• This community needs YOUR help today. We rely 100% on Supporting Memberships to fund our efforts. With the ever increasing fees of everything, we need help. We need more Supporting Members, today. Please invest back into this community. I will ship a few decals too in addition to all the account perks you get.


    Sign up here: https://www.muzzleloadingforum.com/account/upgrades
  • Friends, our 2nd Amendment rights are always under attack and the NRA has been a constant for decades in helping fight that fight.

    We have partnered with the NRA to offer you a discount on membership and Muzzleloading Forum gets a small percentage too of each membership, so you are supporting both the NRA and us.

    Use this link to sign up please; https://membership.nra.org/recruiters/join/XR045103

Turning a Pedersoli Bess into a Dublin Castle Short Land Musket

Muzzleloading Forum

Help Support Muzzleloading Forum:

This site may earn a commission from merchant affiliate links, including eBay, Amazon, and others.
Hi,
There are many original English fowlers with beautiful thumb plates with no engraving on them. It seems odd, particularly if the gun was made on commission but that is the case. Here is an example.
L5canda.jpg

Some are monogrammed. Most colonial guns made in America have no maker or owner marks on them. If marking was the law, Nick, few paid any attention to it.

dave

I’ve seen the same bess like shield thumb piece used on some Virginia long rifles and Fowler’s. Was this style common on civilian arms? In Wallace Gustler’s video, he used on a long rifle.
 
Hi,
More done. I love this stage of the work but I am very slow at it. Brown Besses were not "cookie cutter" guns between individual muskets and patterns. So I spend a lot of time shaping the stock then positioning it in a good way to look at it, and checking with my photos, books, and other resources. I must walk 5 miles every day going back and forth in my shop to the bench where my books are and the bench where the gun is and more, stepping back to look at the gun from a distance. My objective is to "see" the gun not to "look" at it. Everyone can "look" at something but it takes experience and/or training to "see". In the process of "seeing" you are focusing on details but never in the absence of a sense of context. In other words, you never see a detail in a vacuum. It is always a part of a larger more complicated whole. In my opinion, the Brown Bess is the most beautiful military musket ever made and its appeal comes from some details. One is the how the wrist and lock panels areas are shaped. To get this right requires experience with originals or high quality photos of originals. There was variation in individual guns but in general, the stock is widest at the breech, stays that width for about 1/2", begins to taper gently for the rest of the barrel tang, and then narrows to the comb with the top in almost a straight line. On the bottom, the stock has a very slight taper (almost unnoticeable) from the rear ramrod pipe the front of the trigger guard and arcs downward very slightly to the trigger, and more behind the trigger to the butt plate. The smallest height should be where the comb ends. At the breech, the stock should be about 2 1/8" tall. At the comb, the baluster wrist should be 1 9/16" tall. The width will depend on your lock and barrel breech dimension.

Here is where I am. You can see the baluster wrist evolving and the lock and side plate panels.
UgDbmZ8.jpg

QgRZhzw.jpg

Here is a comparison with the Pedersoli stock.
p6r5tU8.jpg

ip8eTfl.jpg

You can see the difference both in height and length on the comb.


dave

Amazing work Dave, if you ever had a workshop or course I’d gladly pay tuition !
 
Hi,
More done. I love this stage of the work but I am very slow at it. Brown Besses were not "cookie cutter" guns between individual muskets and patterns. So I spend a lot of time shaping the stock then positioning it in a good way to look at it, and checking with my photos, books, and other resources. I must walk 5 miles every day going back and forth in my shop to the bench where my books are and the bench where the gun is and more, stepping back to look at the gun from a distance. My objective is to "see" the gun not to "look" at it. Everyone can "look" at something but it takes experience and/or training to "see". In the process of "seeing" you are focusing on details but never in the absence of a sense of context. In other words, you never see a detail in a vacuum. It is always a part of a larger more complicated whole. In my opinion, the Brown Bess is the most beautiful military musket ever made and its appeal comes from some details. One is the how the wrist and lock panels areas are shaped. To get this right requires experience with originals or high quality photos of originals. There was variation in individual guns but in general, the stock is widest at the breech, stays that width for about 1/2", begins to taper gently for the rest of the barrel tang, and then narrows to the comb with the top in almost a straight line. On the bottom, the stock has a very slight taper (almost unnoticeable) from the rear ramrod pipe the front of the trigger guard and arcs downward very slightly to the trigger, and more behind the trigger to the butt plate. The smallest height should be where the comb ends. At the breech, the stock should be about 2 1/8" tall. At the comb, the baluster wrist should be 1 9/16" tall. The width will depend on your lock and barrel breech dimension.

Here is where I am. You can see the baluster wrist evolving and the lock and side plate panels.
UgDbmZ8.jpg

QgRZhzw.jpg

Here is a comparison with the Pedersoli stock.
p6r5tU8.jpg

ip8eTfl.jpg

You can see the difference both in height and length on the comb.


dave


Dave, for your measurements, did you get those from a high quality original in your private collection?
 
There’s a beautiful Bess inside that block of Walnut and you’re doing a damn good job in bringing it out!
One thing many painters/artists do in “looking” at a work in progress is to turn the painting upside down. It allows a completely new perspective on balance, form and design. Often times our brains will process very differently and more objectively when looking at something for a “ first” time.
As to monogramming the thumb piece, it would seem very appropriate to have DP proudly engraved there on.
This is a great journey.
 
Hey Dave can I skip you forward a few steps? I have read most of your posts where a American walnut stock is being finished. I am currently working on a Hawkins American Walnut stock. I am using your method of black aniline dye, scraping, then yellow aniline dye, then a diluted LMF Nut brown dye followed buy Sutherland Wells. Anyways my sample pieces are coming out very murky… am I maybe not scraping deep enough to remove most of the black? Or is my yellow to week? Or both?

2F34A7A1-F179-47B5-B1A7-B95B2A69B367.jpeg
1FEFBAEC-45D5-4E2D-AE2A-9354DACA6D29.jpeg
1D483DC0-37BC-4A67-879C-31D906834B43.jpeg


The first picture shows two murky sample pieces. They have black aniline dye, yellow aniline dye then diluted LMF not brown. Below The two murky pieces are two sample pieces that were just died with yellow aniline dye and then diluted LMF not brown. The middle piece shows two new sample pieces that have been dyed black then scraped back with a murky piece below them. The longer piece to the right is a undyed piece of Walnut. Just trying to show original color of the word next to two pieces that I scraped. The last picture shows the two pieces from the middle picture after yellow dye has been applied.
Any thoughts would be helpful.
Aaron
 
Hi,
Your black dye may be much too concentrated and not fully scraped off. If I use black on walnut, which I do sometimes, I scrape it back until there is no black color on the surface. There is just black dye embedded in the open pores. Then on goes the yellow. However, I only add black to walnut if I am trying to get an old mellow look. Most often, I just apply yellow. Try just using yellow and don't scrape it off. Here is an example with just yellow:
0KdXIRq.jpg

YR7wZHE.jpg

9xZGnLv.jpg

HG7gEvz.jpg

Here is an example with black, scraping, and then yellow:
JimGHuj.jpg

FMbhNhS.jpg

BTx2stD.jpg

K0l5O2G.jpg

bqPMKvL.jpg

sFw1tcs.jpg

In the photo of the rear ramrod pipe, you can see the black dye embedded in the pores of the wood but not contributing to the final color of the surface.
dave
 
Thank you Dave, that is helpful! The picture between the black dyed stock and yellow dyed is super helpful. I would like to create that aged mellow look. Because I have not applied the technique of scraping when woodworking as much as I have sanding with a hard backer. Would it hurt anything if I scraped off the black dye then hit it with some sandpaper? To ensure that I remove enough of the black?
 
Also have you decided what combination your are doing on this particular build?
 
Hi,
Sanding is a good idea. You'll find that scraping off the black entirely on the surface is easier on the stock because of the rounded surfaces. The flat boards are harder to clean up because the scraper just hits the high spots across the flat surface. Until those are scraped down the scraper cannot touch the low spots. I will probably use the black and then yellow. I will test some scraps first to see what looks the best for my objectives. I would like a mellow look.

dave
 
English gunsmiths used and probably still use a mix of bitumen and a spirit of some sort to fill the pores on their super expensive custom made shotguns . They tend to be a bit secretive about the finishes they use .
 
I find this thread and your work very informative . When I was in the gun trade I bought and sold several different Brown Bess Muskets, one found in a hollow tree . When I wanted a musket for competition shooting , I looked at the Pedersoli Bess and decided it was not a good copy so I purchased Pedersoli 1777 Charleville ( Sorry about that) , all it needed was the frizzen hardened and a White Lightning flash hole liner and it was a way . I won a National Championship with that firelock . , I'd still prefer a Bess .
 
Hi Cutfinger,
Thanks for the post. I think the Pedersoli Charleville is a pretty darn good copy and I've enjoyed working on them. Mainly tuning the locks and adding rammer retaining springs so the steel rods don't rattle and fall out. I wish they took the pains with their Bess that they did with their Charlevilles. I wish you were here to handle this Bess. I always thought the latter patterns had stocks too straight to shoot well. I guess my impression was badly distorted by the repros and later India pattern Besses . The tall butt plate, 5 1/4" from toe to top of the heel, allows a lot of vertical adjustment for fitting to the shoulder. This gun shoulders well and fits me as a fowler if I raise the butt plate high on my shoulder. I scaled the stock from photos of Dublin Castle guns and from my notes so the drop at heel and comb height are accurate. It has been a while since I made a short land pattern Bess (most folks seem to want the early patterns) and I am enjoying the project greatly. Please feel free to comment and share your knowledge. I know I appreciate it.

dave
 
Hi,
I cut the apron around the barrel tang and refined the butt stock. It is coming together. One thing I want to mention is note that I am shaping the lock and side plate panels by forming the wrist and top and bottom of the stock at the breech. They evolve naturally. Many inexperienced makers go at the lock panels with chisels and rat tailed files at the point that the wrist is still pretty square and it is a huge mistake. They end up with lock panels that look like picture frames glued to the stock rather than features that follow the flow of the natural contours. On a gun like a Bess, that is critical and doing otherwise will result in a very awkward looking gun. Moreover, while there is variation on originals, the flats around the lock are very thin and often almost nonexistent. If you don't get that right your gun will look like a Pedersoli or worse one of the India-made repros. Here is where I am at and I show the barrel tang apron.
CxPblo9.jpg

TZ3XCVt.jpg

1rxSANz.jpg

2mR9igo.jpg

One feature to note. Draw a straight line along the top of the comb and you will see that the line passes just on top of the flint cock screw and comes close to hitting the pan. That is the right architecture for this gun. That is a critical parameter to get right if you ever build a Bess.

I ordered a trigger guard from TOW (actually, I ordered 2 so I always have some Bess guards on hand). I am really pleased with it. The photo below shows a TRS cast guard for a short land pattern Bess, the TOW guard, and the Miroku guard on the bottom.
PSV3u9Z.jpg

Notice that the boss or lug for the swivel hole is very thin on the Miroku and much thicker on the historically accurate guards. Then notice that the TOW guard is a little thicker and clumsier that the TRS guard. That is exactly what I need for a Dublin Castle Bess.

dave
 
As a guy who's never built a gun and is about to start on his 1st, all I can say is that your work is superb. I really like the effect of the black then yellow dyes.
 
Hi,
I cut the apron around the barrel tang and refined the butt stock. It is coming together. One thing I want to mention is note that I am shaping the lock and side plate panels by forming the wrist and top and bottom of the stock at the breech. They evolve naturally. Many inexperienced makers go at the lock panels with chisels and rat tailed files at the point that the wrist is still pretty square and it is a huge mistake. They end up with lock panels that look like picture frames glued to the stock rather than features that follow the flow of the natural contours. On a gun like a Bess, that is critical and doing otherwise will result in a very awkward looking gun. Moreover, while there is variation on originals, the flats around the lock are very thin and often almost nonexistent. If you don't get that right your gun will look like a Pedersoli or worse one of the India-made repros. Here is where I am at and I show the barrel tang apron.
CxPblo9.jpg

TZ3XCVt.jpg

1rxSANz.jpg

2mR9igo.jpg

One feature to note. Draw a straight line along the top of the comb and you will see that the line passes just on top of the flint cock screw and comes close to hitting the pan. That is the right architecture for this gun. That is a critical parameter to get right if you ever build a Bess.

I ordered a trigger guard from TOW (actually, I ordered 2 so I always have some Bess guards on hand). I am really pleased with it. The photo below shows a TRS cast guard for a short land pattern Bess, the TOW guard, and the Miroku guard on the bottom.
PSV3u9Z.jpg

Notice that the boss or lug for the swivel hole is very thin on the Miroku and much thicker on the historically accurate guards. Then notice that the TOW guard is a little thicker and clumsier that the TRS guard. That is exactly what I need for a Dublin Castle Bess.

dave

Hi Dave, in regards to the trigger guard lugs for pinning them to the stock through the lock mortise, what kind of length would you recommend working with for this shortland musket ? I had to return a few trigger guards to TOW becuase the lug above the sling swivel boss was just too short to work with.
 
Hi,
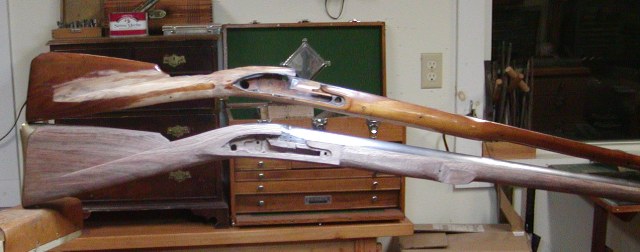
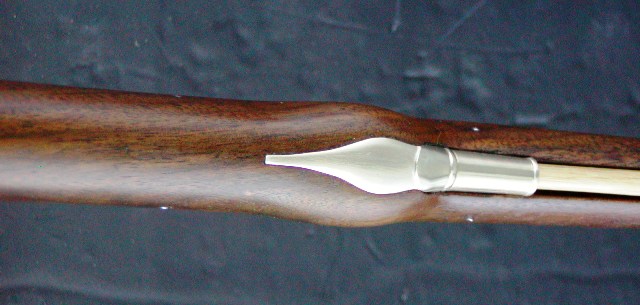
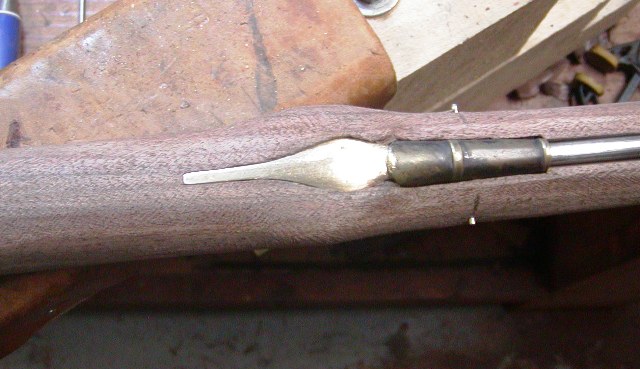
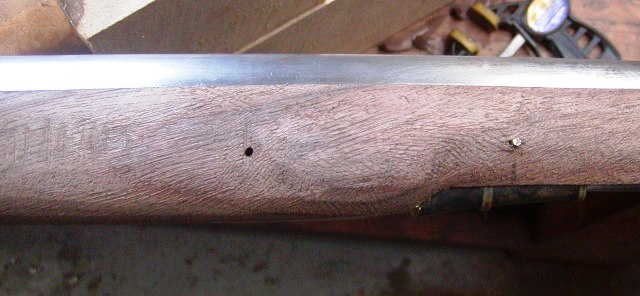
Got a lot done today. My first task was to drill all the pins for the rammer pipes. They all have holes already from the previous stock but they are all well off center of the tab. So I decided to drill new holes, which makes the process simpler. With so much wood removed from the fore stock, it makes locating and drilling the holes very easy. I just the pipe in the mortise but the tab resting on the side of the rod channel and mark the horizontal location I want for the hole on both sides of the stock. Then I use a adjustable square to measure the depth of the mortise and mark that depth on the side I will drill from. I mark the spot with an awl, and drill the hole through the wood with a #42 drill for a 3/32" pin. I clamp the pipe in place and using the hole as a guide, drill the brass. It all came out perfectly.
DhAHBtC.jpg

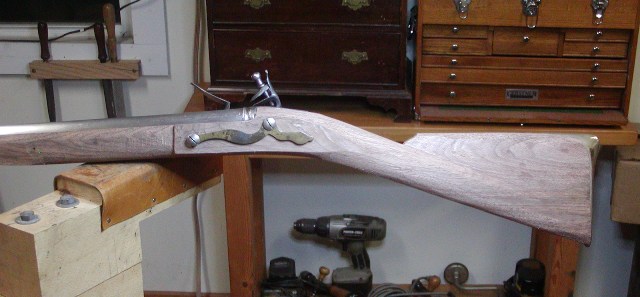
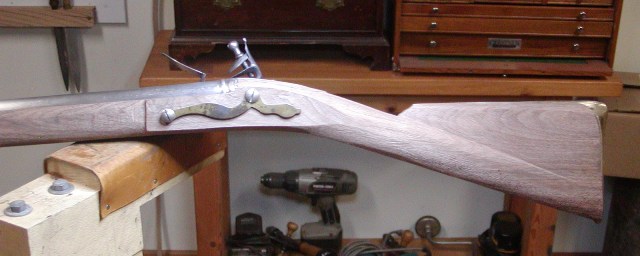
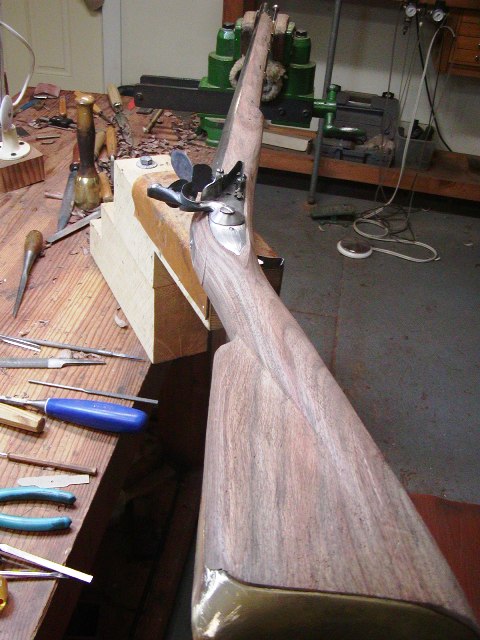
Next was roughing out the swell at the rear pipe. The swell on pattern 1769 and later Besses is not very big. Moreover, it is does not swell downward, just to the sides.
HUvrKcI.jpg

Also the swell is low on the stock and does not influence the upper half of the stock at the rear pipe. The widest point of the swell corresponds to the widest part of the swell in the rear pipe tang.

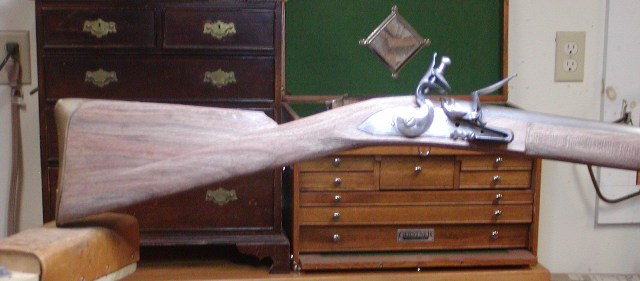
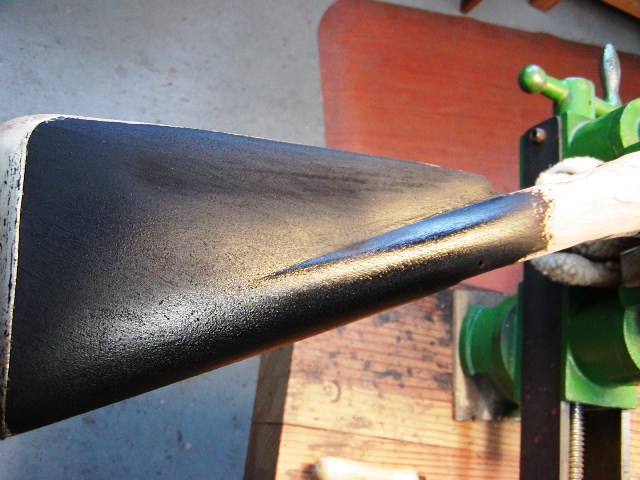
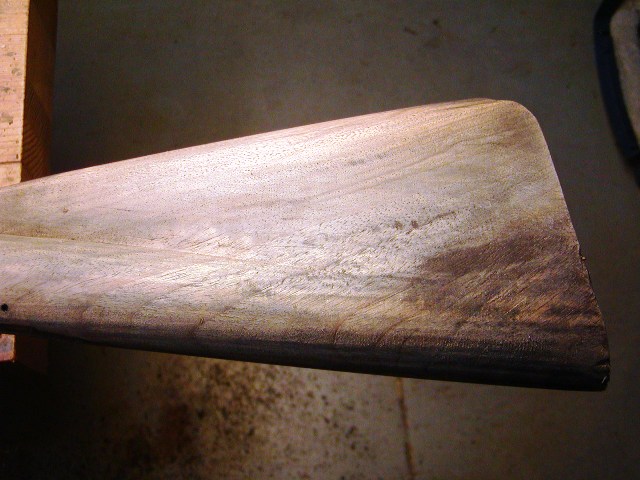
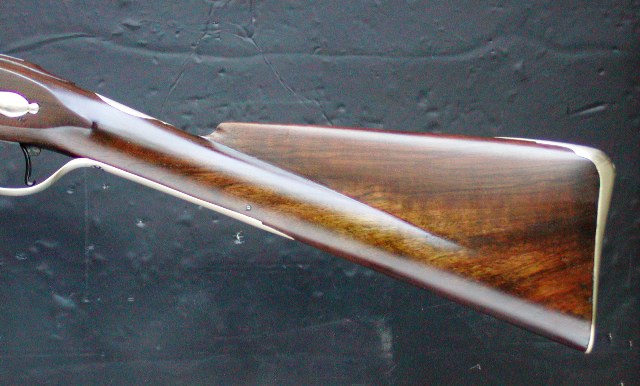
I did more shaping of the butt stock but am leaving the bottom flat until I install the trigger guard. Then everything is rounded.
Gv4DVIa.jpg

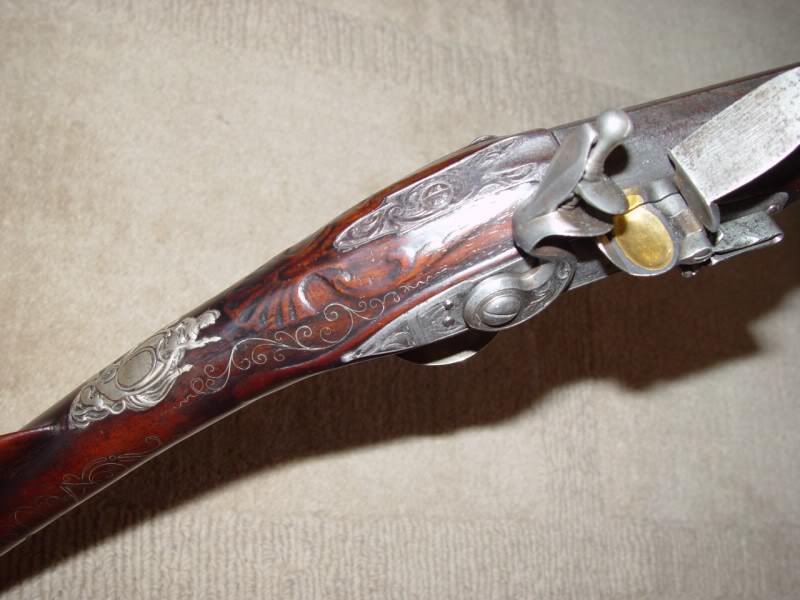
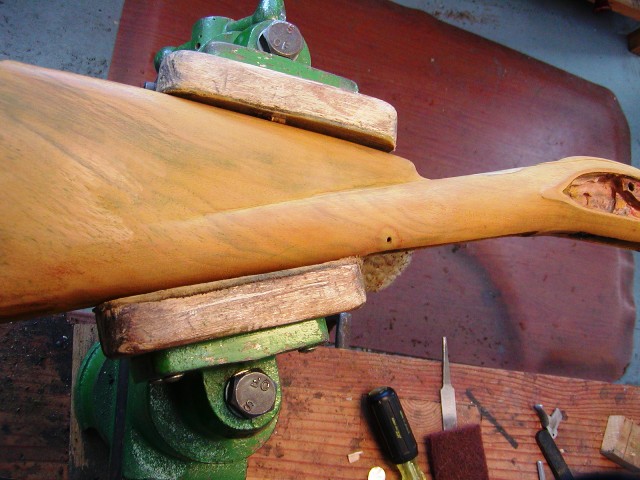
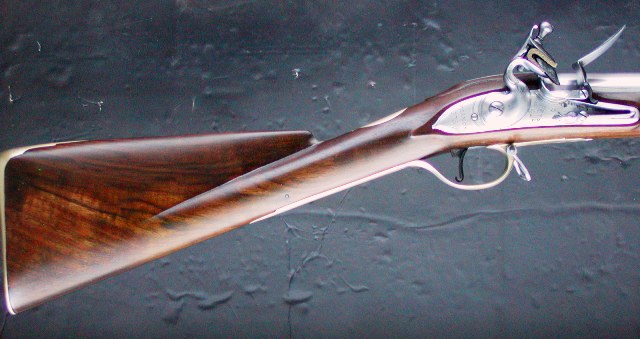
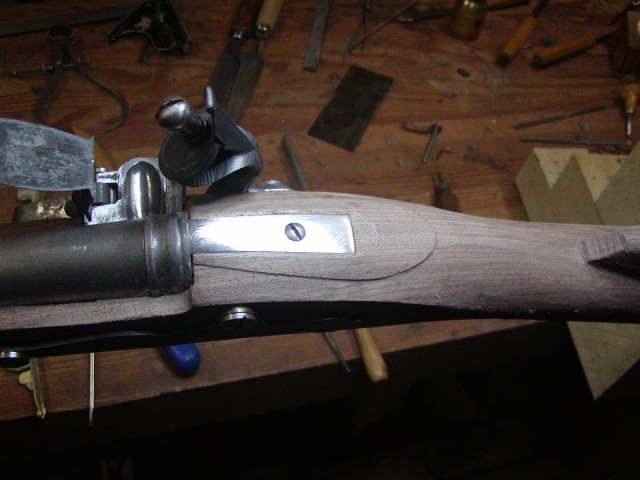
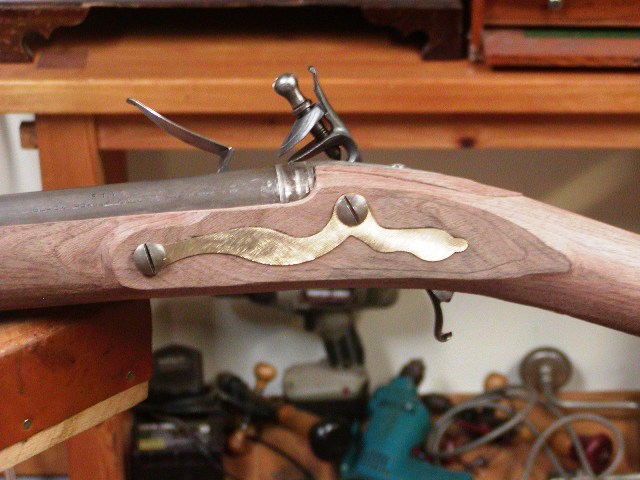
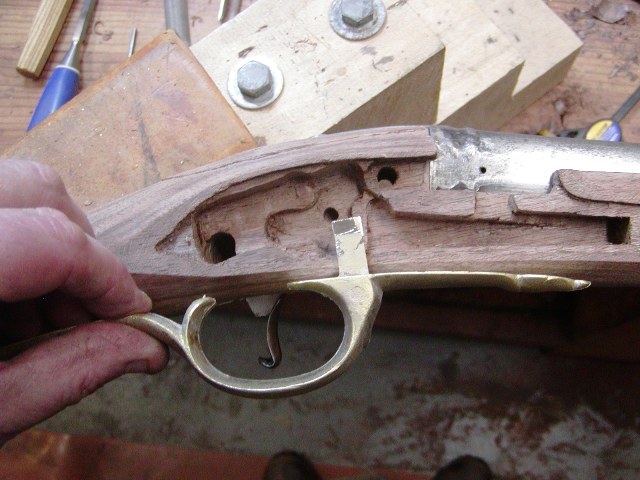
I refined the lock panels more after inletting the side plate. I left a little more stock thickness on the side plate side to compensate for the smaller breech dimensions of the Pedersoli barrel, which is smaller than the originals. That preserves the wrist dimensions. I roughed out the noses of the lock panels using a gouge, round files, and round scrapers. I left it oversize for now. I also inlet the side plate. I left the mortise shallower than the plate's thickness so I could file off the surface and thin it. The brass plate must be stamped rather than cut resulting in the corners of the edge being rounded. That will never look right and I inlet it shallowly and filed off thickness so the rounded edges were gone.
cQepURl.jpg

Then I refined the lock and side plate panels a bit more. I left the tails large for now until I decide how I will shape them. Also, the flats will get narrower as I progress.
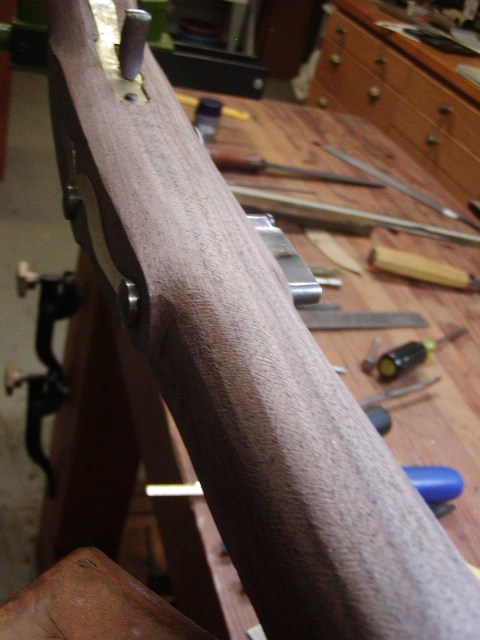
I also curved the bottom of the stock through the lock area and established the proper "knuckles" where it meets the lock panels.
uOXDnbF.jpg


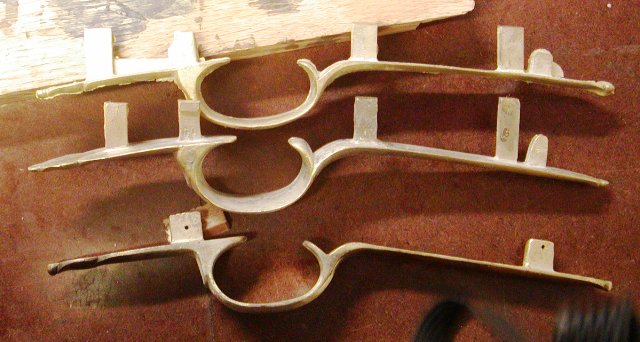
Nick, you don't need to send those guards back. First, the TOW guards have a tall lug that is sufficient to position the cross pin within the lock mortise.
at5IyYs.jpg

The thickness of wood between the surface of the trigger guard mortise and the bottom of the lock mortise should be 3/8"-13/32". So the lug needs to be at least 3/16" higher. If your lug is short then either dovetail and solder an extension on the top of the lug, (not hard to do) or file the lug thinner, cut a piece of 1/6" sheet brass into the lug shape with the proper height, solder it on the side of the existing lug, and drill and install a brass rivet to further anchor them together.

dave
 

Latest posts

Back
Top