- Joined
- Nov 26, 2005
- Messages
- 5,018
- Reaction score
- 9,972
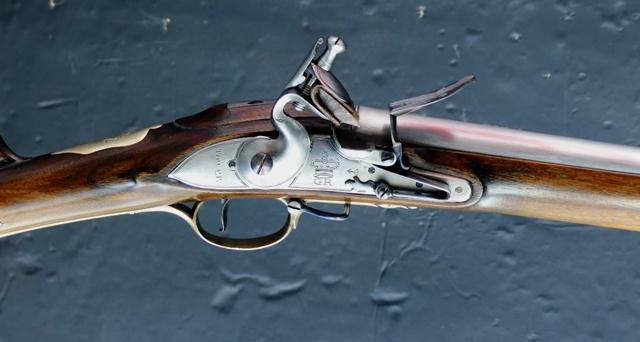
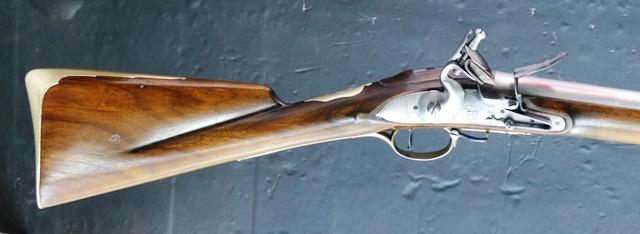
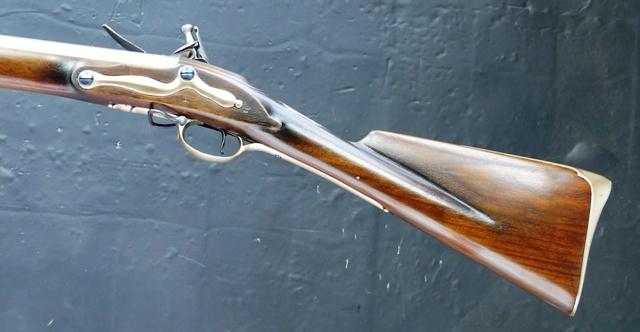
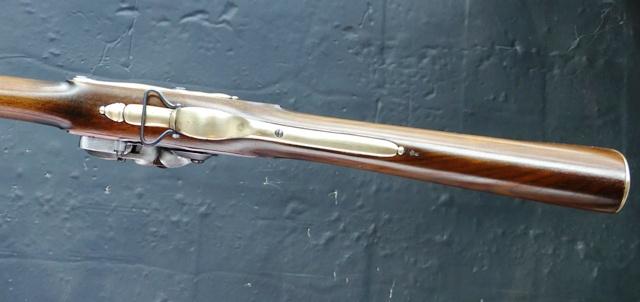
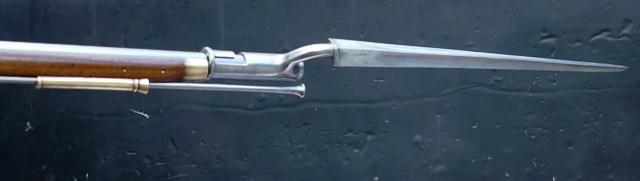
Hi,
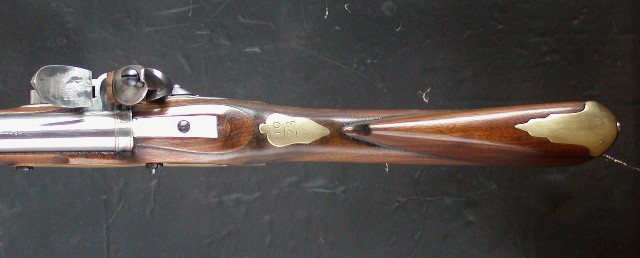
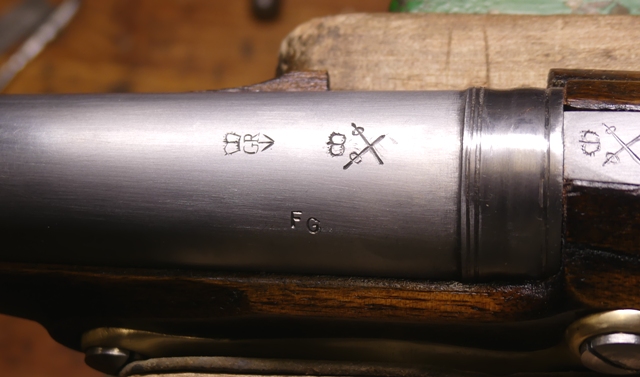
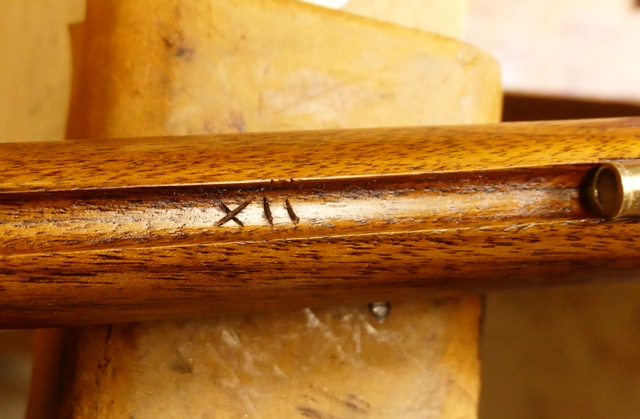
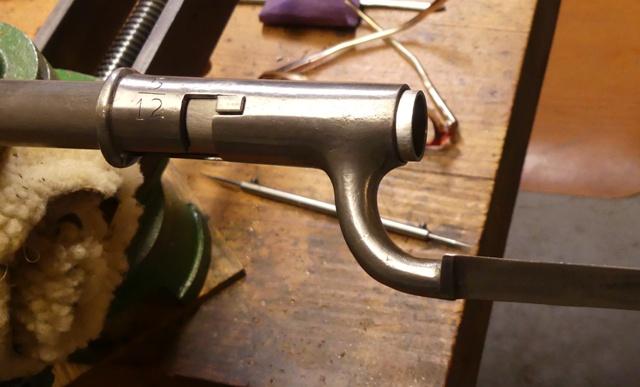
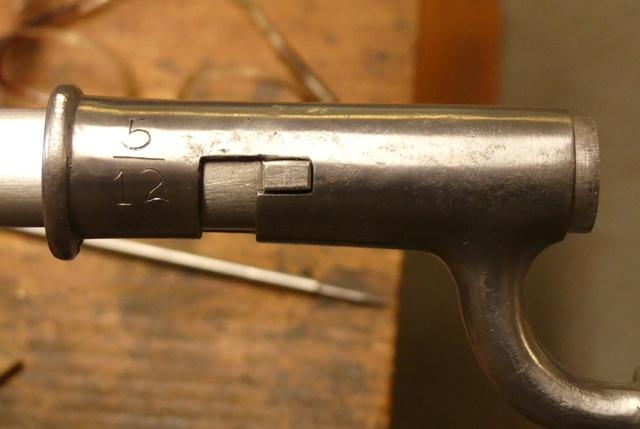
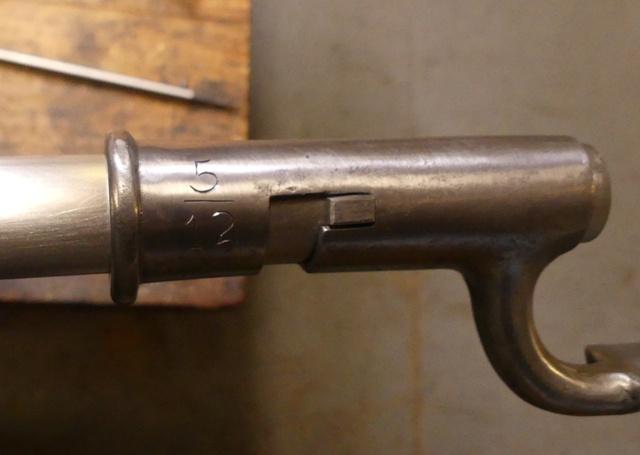
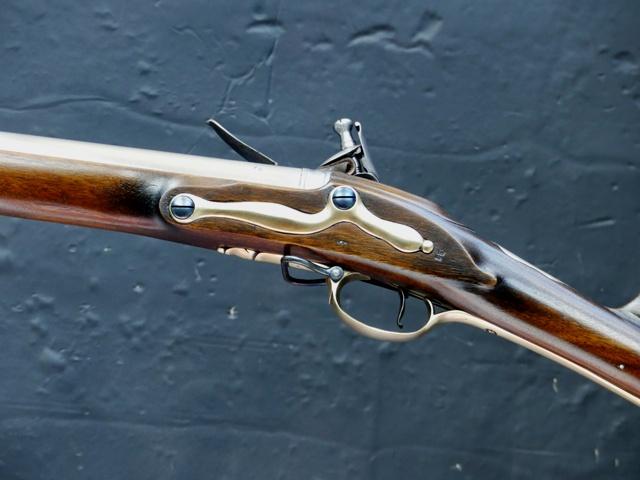
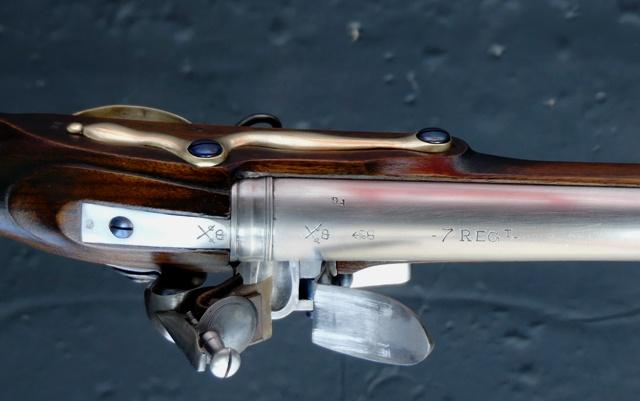
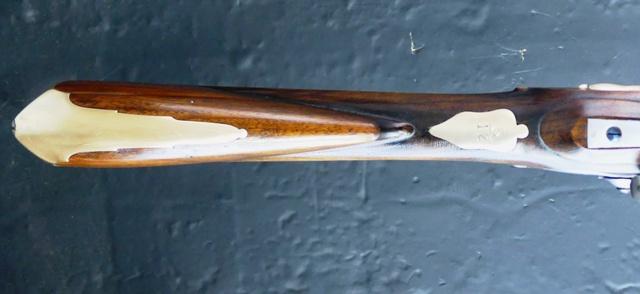
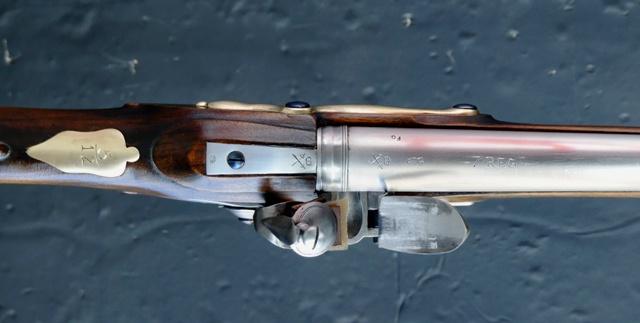
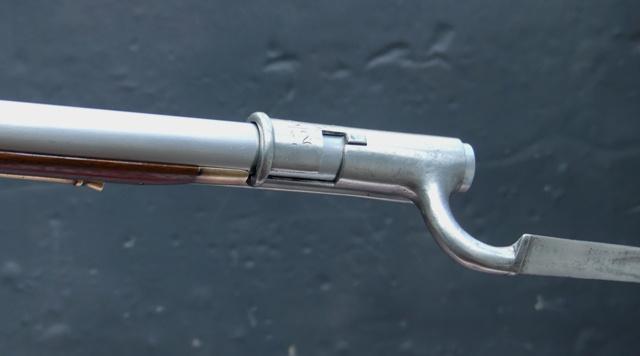
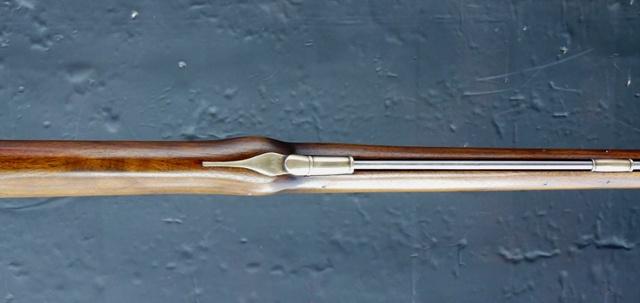
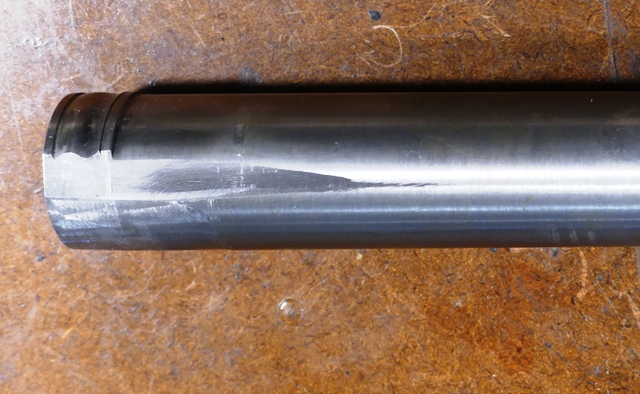
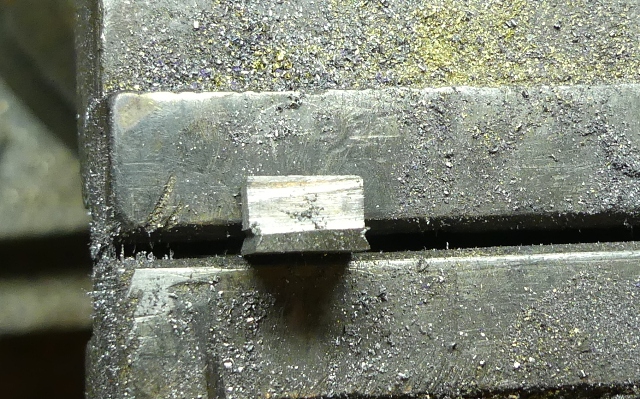
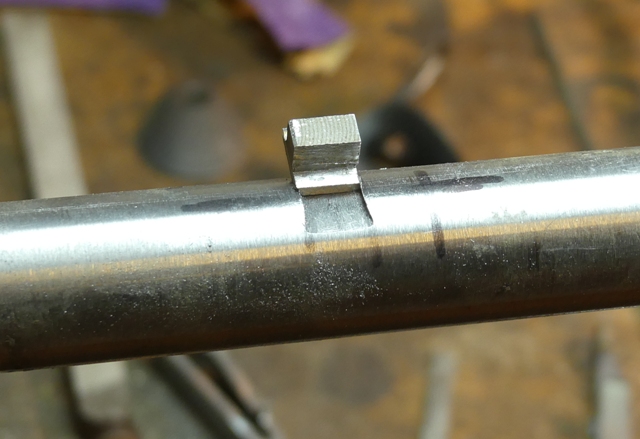
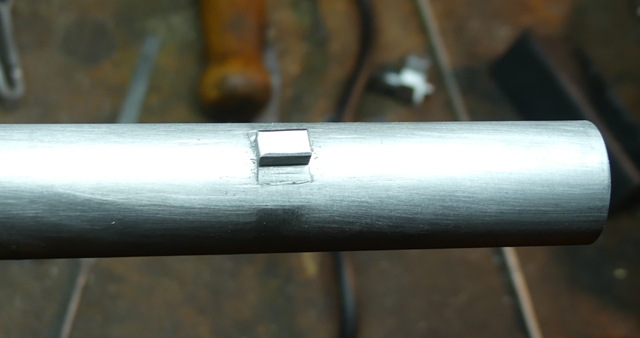
Several folks over the years have asked how to position and mount a lug for a bayonet. I will describe how the British did it on their King's pattern muskets. On British muskets with full sized bayonets meaning the socket is about 4" long and the blade about 17", the lug or front sight (as it was referred to) was 2 1/8" back from the muzzle. TRS provides a little rectangular lug with a curved bottom meant to be soldered or brazed to the barrel. All the commercial repro simply solder a lug to the barrel. Neither of those methods are correct. The lug was shallowly dovetailed into the barrel and then brazed. Here is how it was done except I solder the lug rather than braze it. The lug is about 1/4" wide and 3/8" long with a wider base that has dovetailed ends fore and aft.
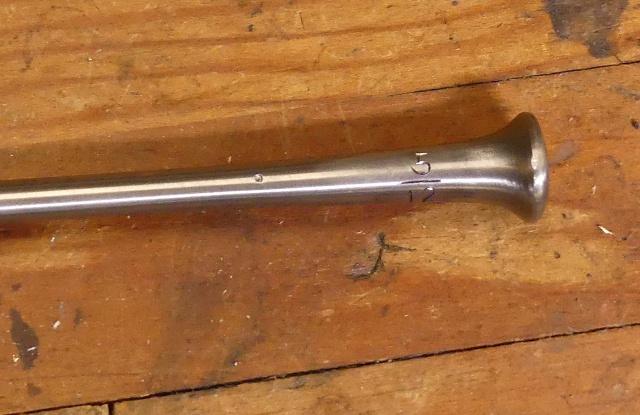
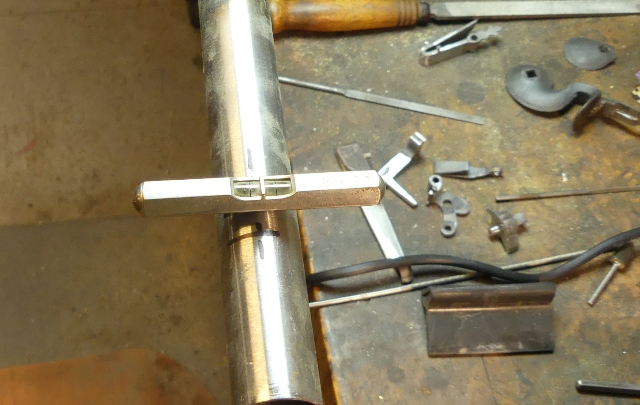
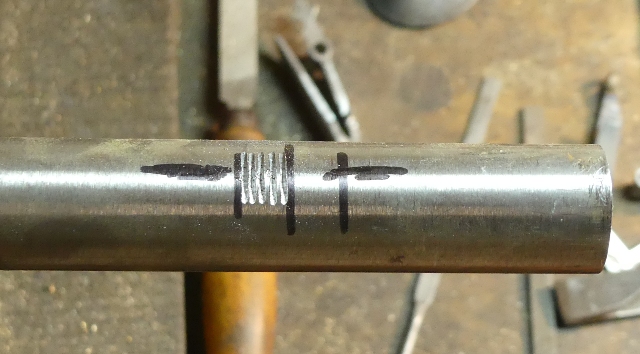
I make the sight from mild steel, cutting away the excess and using a triangular file to make the dovetails. Next I locate the position on the barrel. The front of the lug should be 2 1/8" back from the muzzle. To find the center line of the barrel, I put the barrel in my vise and place a level across the barrel tang at the breech. I level the barrel horizontally in he vise. Then I mark the position of the sight and balance the level at that position. The center of the bubble marks the center of the barrel.
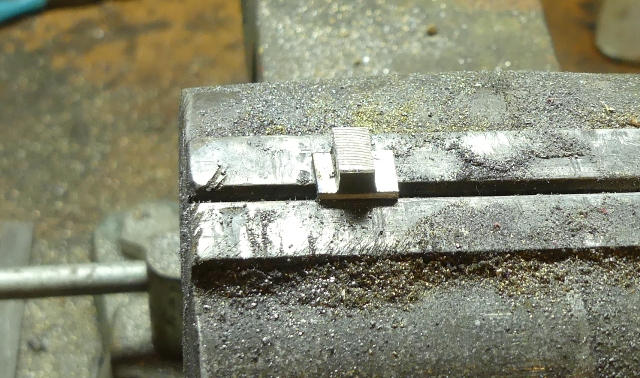
I mark the position and then cut horizontal lines with a hacksaw to begin the dovetailed slot in the barrel. I don't measure the depth, just cut a few strokes for each line.
Then I file the dovetails in the barrel with a small triangular file that has one edge safed.
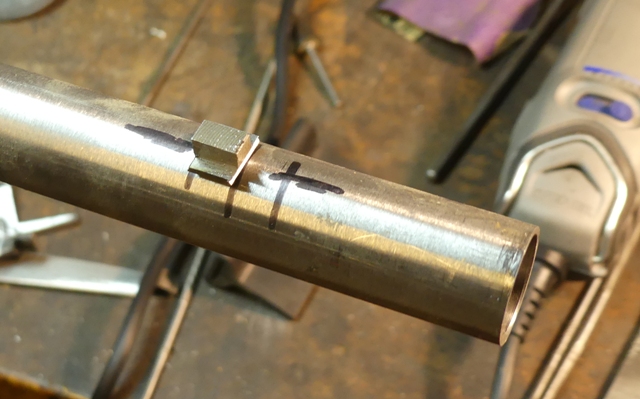
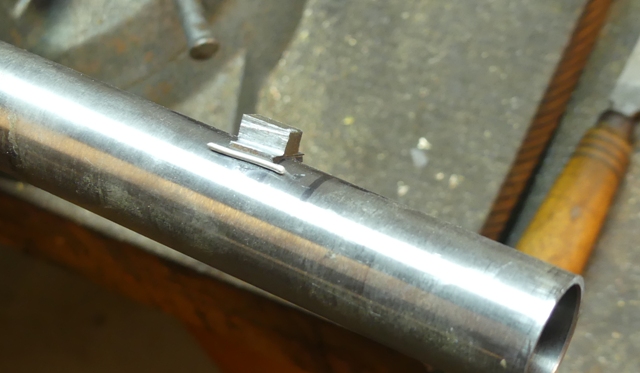
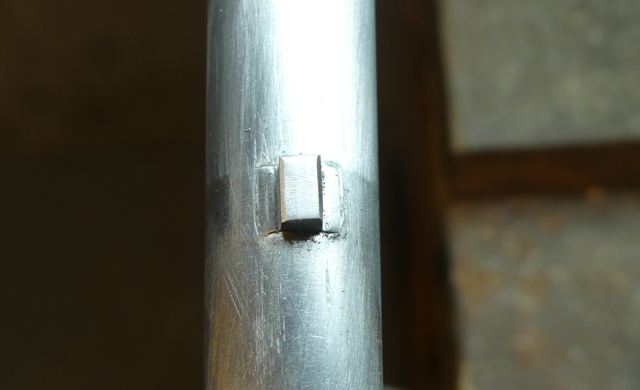
Once the sight fits, I flux the bottom of the sight and the barrel and lay a piece of low temp silver bearing solder on the edge of the sight base after tilting the barrel to one side.
Then I heat from below, drawing the solder under the base to the lower edge.
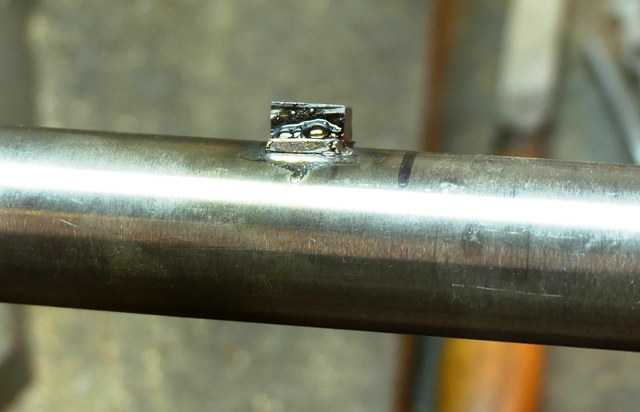
Finally, I file the base flush with the barrel and clean up the solder. The sight will eventually be filed a little thinner and lower. It appears exactly like the originals.
dave
Several folks over the years have asked how to position and mount a lug for a bayonet. I will describe how the British did it on their King's pattern muskets. On British muskets with full sized bayonets meaning the socket is about 4" long and the blade about 17", the lug or front sight (as it was referred to) was 2 1/8" back from the muzzle. TRS provides a little rectangular lug with a curved bottom meant to be soldered or brazed to the barrel. All the commercial repro simply solder a lug to the barrel. Neither of those methods are correct. The lug was shallowly dovetailed into the barrel and then brazed. Here is how it was done except I solder the lug rather than braze it. The lug is about 1/4" wide and 3/8" long with a wider base that has dovetailed ends fore and aft.
I make the sight from mild steel, cutting away the excess and using a triangular file to make the dovetails. Next I locate the position on the barrel. The front of the lug should be 2 1/8" back from the muzzle. To find the center line of the barrel, I put the barrel in my vise and place a level across the barrel tang at the breech. I level the barrel horizontally in he vise. Then I mark the position of the sight and balance the level at that position. The center of the bubble marks the center of the barrel.
I mark the position and then cut horizontal lines with a hacksaw to begin the dovetailed slot in the barrel. I don't measure the depth, just cut a few strokes for each line.
Then I file the dovetails in the barrel with a small triangular file that has one edge safed.
Once the sight fits, I flux the bottom of the sight and the barrel and lay a piece of low temp silver bearing solder on the edge of the sight base after tilting the barrel to one side.
Then I heat from below, drawing the solder under the base to the lower edge.
Finally, I file the base flush with the barrel and clean up the solder. The sight will eventually be filed a little thinner and lower. It appears exactly like the originals.
dave