• This community needs YOUR help today. We rely 100% on Supporting Memberships to fund our efforts. With the ever increasing fees of everything, we need help. We need more Supporting Members, today. Please invest back into this community. I will ship a few decals too in addition to all the account perks you get.


    Sign up here: https://www.muzzleloadingforum.com/account/upgrades
  • Friends, our 2nd Amendment rights are always under attack and the NRA has been a constant for decades in helping fight that fight.

    We have partnered with the NRA to offer you a discount on membership and Muzzleloading Forum gets a small percentage too of each membership, so you are supporting both the NRA and us.

    Use this link to sign up please; https://membership.nra.org/recruiters/join/XR045103

Hawk New England Fowler

Muzzleloading Forum

Help Support Muzzleloading Forum:

This site may earn a commission from merchant affiliate links, including eBay, Amazon, and others.
Just wondering how this fowler handles with a 48" barrel? It is a long weapon. Wouldn't it be cumbersome in dense woods?
Hi,
The original barrel was 57" and this one is 50". The gun weighs less than 7 lbs. They were not used in dense forest. Fowling was done in open marshes, wetlands, heaths, and fields.

dave
 
Hi,
The lock and side plate are engraved. The lock still needs a little tweaking for best performance but is going to be a very fine lock in the end, albeit very different from the lock I bought from TOW. Engraving the lock plate gave me fits. The cast metal just seemed to have variable density and it was very hard to cut clean borders. The metal I welded on to the plate at the rear for the third lock bolt engraved much more smoothly. The flint cock, which is from Chambers engraved so much easier and the frizzen made from a higher carbon alloy did as well. The lock plate was difficult but it worked out fine in the end.


I have no images of the back side of the frizzen on the original gun but I suspect it was engraved in some French fashion. So I went to my French pattern books and adapted a design and cut it. I also finished engraving the side plate. I copied the original but had to make some changes because the dimensions of the plate are a little different owing to differences in the size of the lock. A gun is a system and you cannot change just one thing. Anyway, it came out well and really looks the authentic part.


I still need to finish the barrel and then make the ramrod. The barrel is 50" long and I only have rods 48". So I am going to turn a long steel ferrule. I am not sure the owner of the gun has a cleaning rod long enough so I may have to make that as well. The rod in the gun may have a tow worm and the other a modern threaded ferrule. Those details are why a gun like this takes so much time to produce. I can make 2-3 other guns in the time this one takes because almost everything on this fowler had to be hand made.

More to come.

dave
 
Hi,
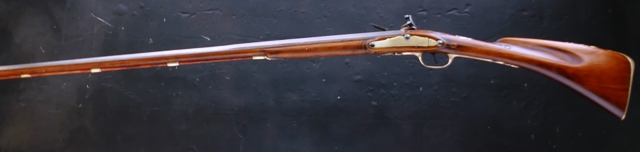
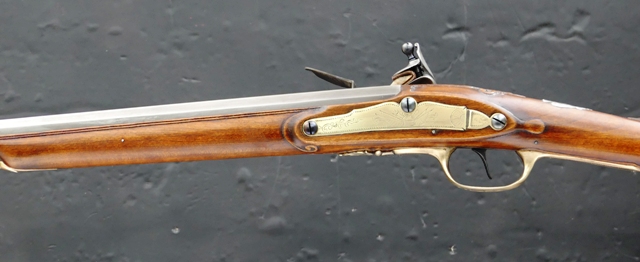
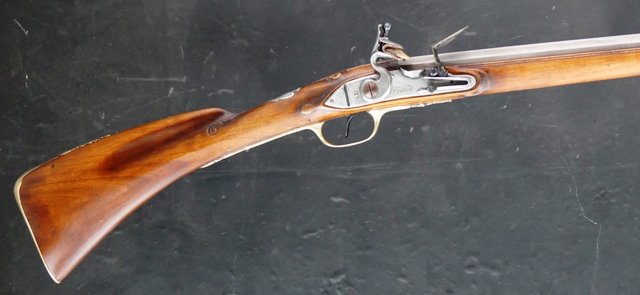
Thanks Rich and Jennison. The fowler is almost done. I should be able to post final photos on Sunday or Monday. The front sight is mortised into the barrel but I also added solder for insurance.


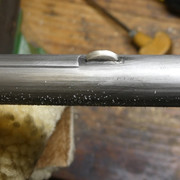
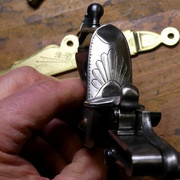
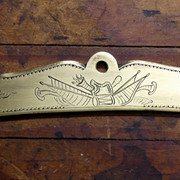
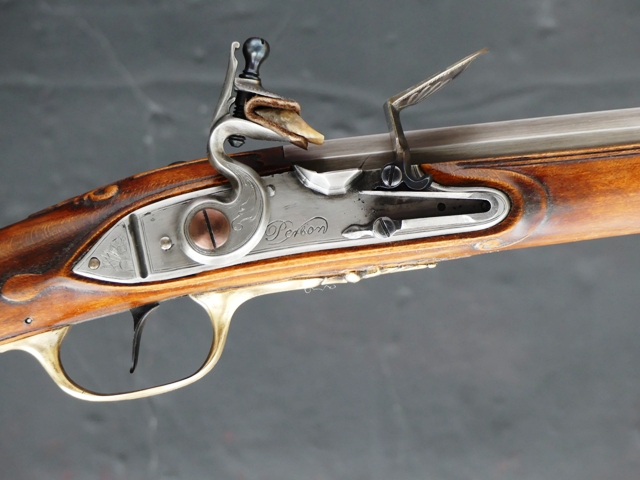
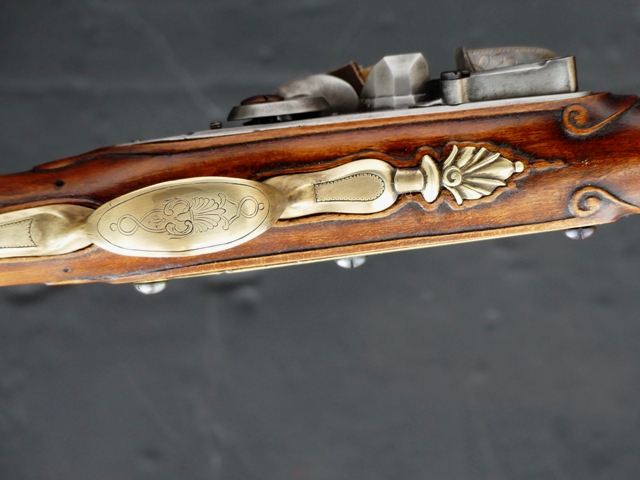
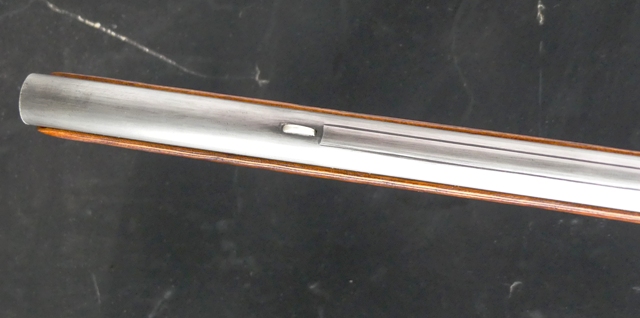
I had a left over silver sprue button so I melted it in a crucible so gravity formed it into a perfect little round button in the bottom of the crucible. Then I hammered and flattened it into a perfect round shape on my little anvil. Next I cut it in half to make the half moon sight. I marked its dimensions on the barrel after finding the center. I mark the center of the barrel by laying it upside down on a flat surface. The flat barrel tang and top flat of the octagon section hold the barrel horizontally level on the bench. I put a thin file under the barrel where the sight is located and draw it out from under the barrel. That makes a perfect center mark on the round part of the barrel near the muzzle. The sight is located almost 5" back from the muzzle where the flat sighting plane ends. I cut the outline of the base into the barrel using a square graver and a series of parallel lines lengthwise in the mortise. Here are photos from a pistol I made.


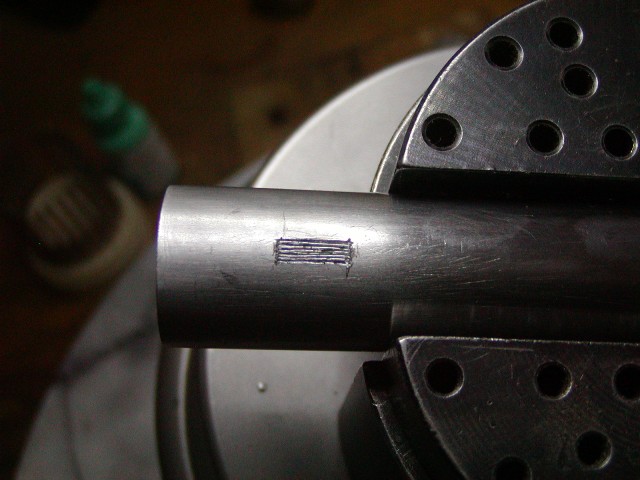
Using a 1/8" wide flat bottomed die sinker's chisel, I cut out the mortise.


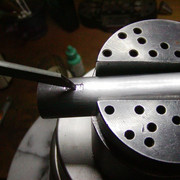
Then I go around the edges with a knife edged chisel that undercuts the edges. I use a tiny triangular file to cut little dovetails in the ends of the sight and connect the tops of them on each side with tiny grooves cut with a jeweler's saw. I flux the mortise and sight, tap it into the mortise, which holds it in position. and then sweat solder from one side of the sight to the other. After soldering, I clean up the excess solder, and then peen the barrel along the ends and sides of the sight with a hammer and punch so the steel barrel locks the sight in place. It should hold fine even without the solder. I don't measure any depth or do any machining. It is all done by eye and it goes very quickly.

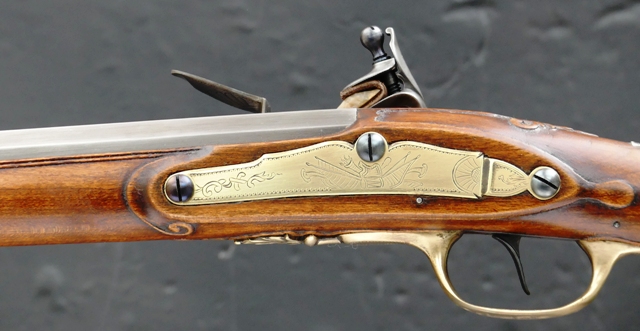
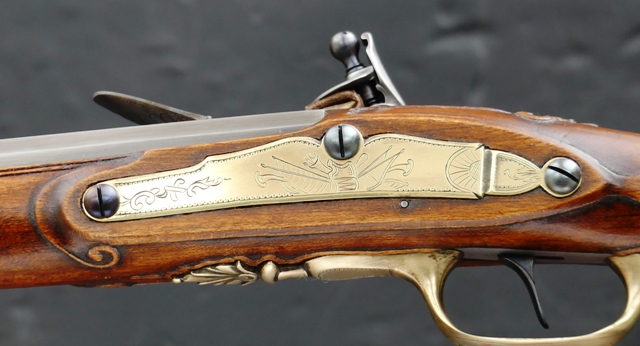
I drilled the 5/64" diameter vent hole. The owner does not want a vent liner, just a hole like the original. Under that circumstance and given the thick barrel walls at the breech, I am no fan of the "sunset" position of the hole relative to the pan on the lock. I want the hole buried a little bit into the pan. As Larry Pletcher showed in his tests, the radiant heat from the pan that ignites the charge peaks after priming powder burns down into the pan a little. With a thick barrel wall and simple touch hole, the peak of radiant heat means more reliable ignition. It does not mean the fastest ignition. There is a trade off. That is why you generally see vent holes lower than "sunset" position on most military guns. Anyway, this gun has a relatively big vent hole positioned just below the top of the pan. It will be very reliable and representative of the guns from the time.

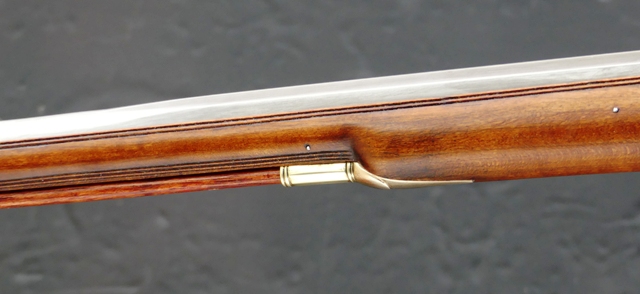
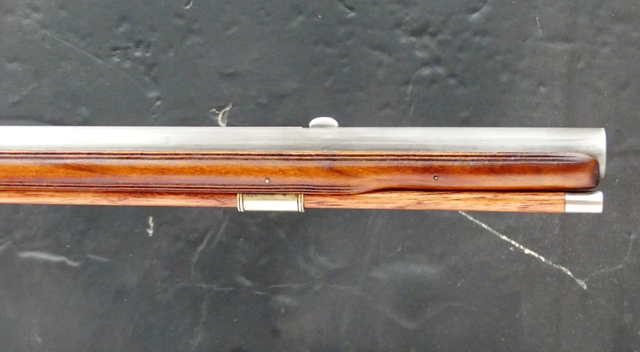
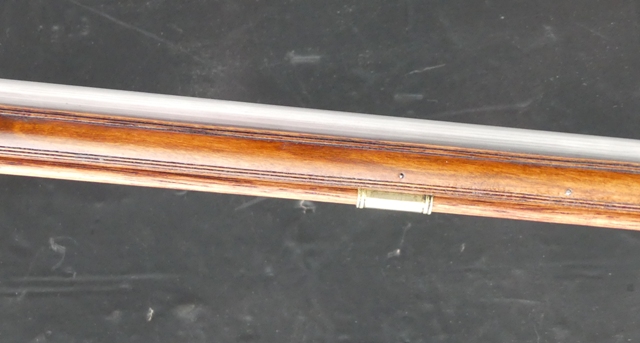
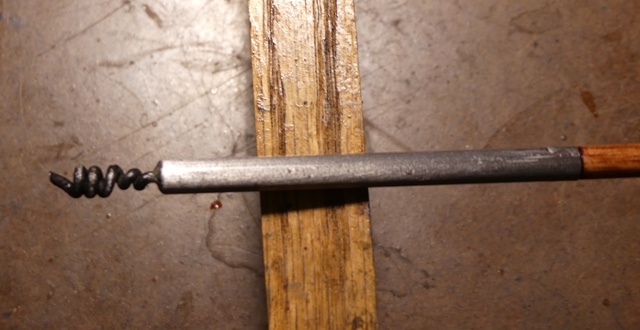
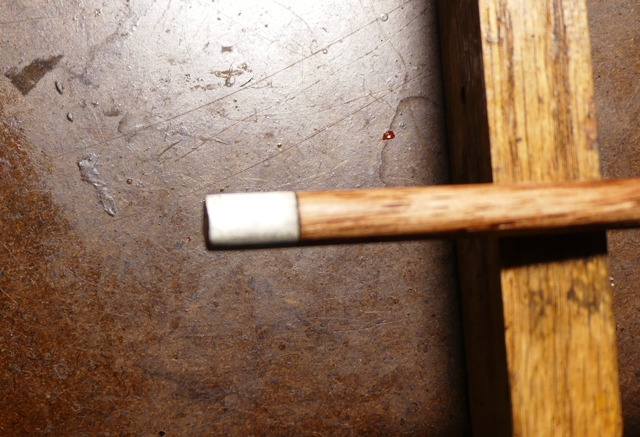
I made the ramrod. On this gun even the ramrod was a challenge. It had to be tapered, which I do on my lathe. I can only get 48" hickory blanks so I had to add 2 inches. I made a long iron ferrule to add that length and made and attached a spring steel tow worm. The worm is tightly hammered into a hole in the ferrule and then soldered.


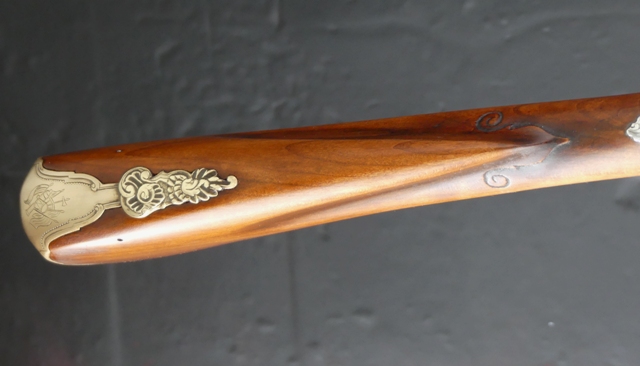
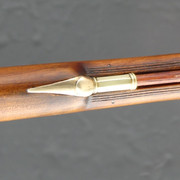
The original gun also has a rod with a silver tip at the muzzle. So I turned the end of the rod to form the internal diameter post for the tip. Then I cut silver sheet the size needed, annealed it, and bent it around a drill the inside diameter of the ferrule. I measured the silver so the butt joint was exactly at the right diameter. Then I low temp silver soldered it together. I fitted the collar to the rod making sure the end of the wood would support the silver end cap. I scribed a circle in silver sheet, cut it out with a jeweler's saw, and tinned it with solder. Then I laid it on top of the silver collar and heated it until it sat down and was soldered in place. Then I ground off the excess, glued the tip and tow worm to the ramrod, pinned the ferrule for the worm, sanded the rod, stained and started coating it with finish.


dave
 
Hi,
It is done, finally. All the fiddly stuff at the end took forever. I need to let the finish cure and then put on a light coat of Renaissance Wax. I also need to test fire it. The owner did not want a vent liner so I just drilled a simple hole. The finish on the cherry stock is Sutherland Welles polymerized tung oil. I added some bone black shading and tarnished the metal a little. You can see how the staining with black during the whiskering process embedded a shadow effect in the wood making the cherry glow. It is 62 caliber with a 50" barrel by FCI that I modified a great deal. In fact, not one component on this gun was used as bought. Everything was hand made or modified extensively from a commercial product. It weighs 7 lbs 10oz compared with the original gun that weighed 7 lbs 6 oz.

Enjoy.

dave


Dave, I'm a big admirer of your work here. I've got a question about inletting some of these more decorative parts. In this picture I noticed some larger gaps between the wood and buttplate.

Polish_20240311_093622067.jpg


Is this just an accepted part of inletting detailed parts in wood? I'm putting together my first kit and opted to put a brass patch box in instead of Kibler's sliding version. It's been a little frustrating getting the wood to cooperate with the full detail. I've got it looking fairly decent, but in some of the smaller details the wood doesn't take well to cutting and scraping and leave a good "point" to fill in fully around the brass. I see this in your picture as well and was wondering if it's simply the nature of the beast.
 
Hi,
It is not a chip. It is an accumulation of bone black glazing and some finish that oozed out of the mortise. I may take a small stiff brush and clean it out if I can. However, that said, this stock has quite a few chips repaired. I really don't like cherry because it tends to chip and not hold crisp edges very well. If you have slight gaps or chips, don't fret over them until after you stain the wood. The stain may swell the wood closing the gaps or you can still glue in stained chips as a repair. If you scroll down page 2 of the thread you can see the butt plate freshly inlet for comparison.

dave
 
Will look forward to your maple stocked rifle with English fowler style stock. Have parts to work on a John Newcomer style rifle but in flintlock instead of percussion and fancy curly maple from Freddie Harrison, 48" long Getz swamped barrel in .60 caliber and iron, not brass fowler furniture. Have R. E. Davis Twigg right hand lock but shoot left handed. The original rifle has brass patch box with delicate wire inlay on either side of the door. I believe Tim Williams has made a copy of it.
 

Latest posts

Back
Top