• This community needs YOUR help today. We rely 100% on Supporting Memberships to fund our efforts. With the ever increasing fees of everything, we need help. We need more Supporting Members, today. Please invest back into this community. I will ship a few decals too in addition to all the account perks you get.


    Sign up here: https://www.muzzleloadingforum.com/account/upgrades
  • Friends, our 2nd Amendment rights are always under attack and the NRA has been a constant for decades in helping fight that fight.

    We have partnered with the NRA to offer you a discount on membership and Muzzleloading Forum gets a small percentage too of each membership, so you are supporting both the NRA and us.

    Use this link to sign up please; https://membership.nra.org/recruiters/join/XR045103

Hawk New England Fowler

Muzzleloading Forum

Help Support Muzzleloading Forum:

This site may earn a commission from merchant affiliate links, including eBay, Amazon, and others.
Joined
Nov 26, 2005
Messages
5,018
Reaction score
9,972
Hi folks,
I've been working on and off on a second Hawk New England fowler for a while. I am just catching up with posting so I put up some photos taken a while ago. The original Connecticut River Valley gun can be seen here:

https://americanlongrifles.org/forum/index.php?topic=49909.msg494966#msg494966
It is one of the finest New England fowlers ever made. I made a version of it several years ago:

https://americanlongrifles.org/forum/index.php?topic=52871.0
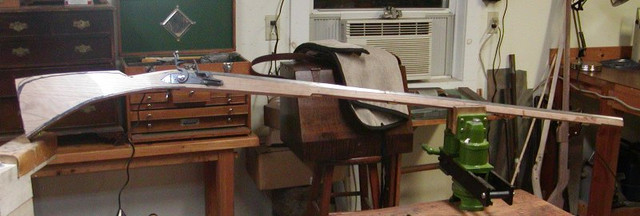
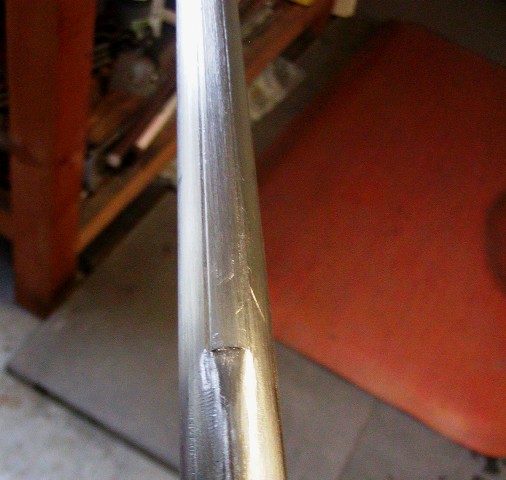
This time, I am making it closer to the original and included a longer barrel. The original has a 57" French barrel that is incredibly thin walled. I could not get that duplicated so I finally settled on a 20 gauge 50" barrel by FCI with the idea of working it over. It took me 2 years to find and get that long a barrel. It was made in the Spanish form and originally had a wedding band transition from octagon to round and a flare at the muzzle.


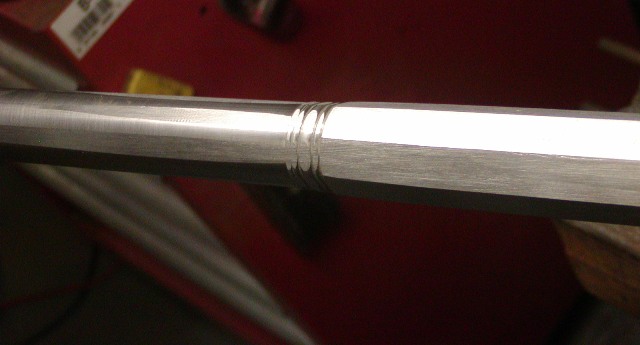
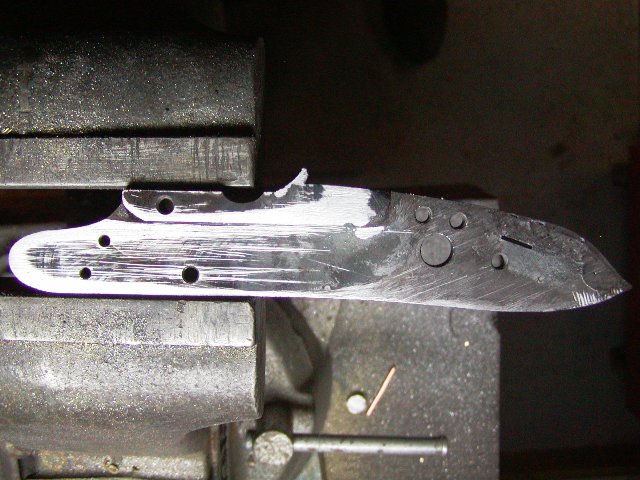
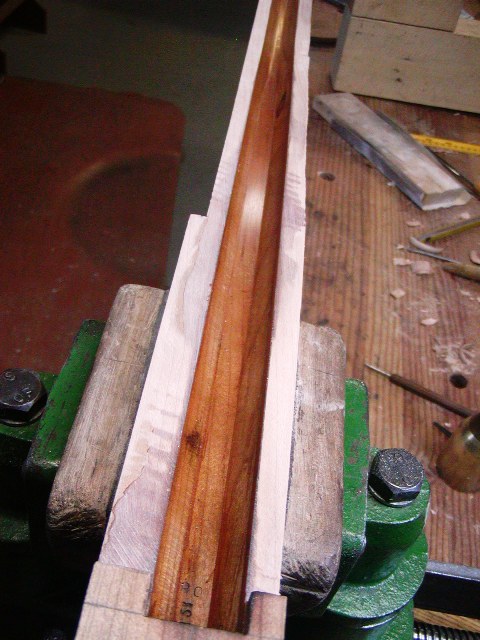
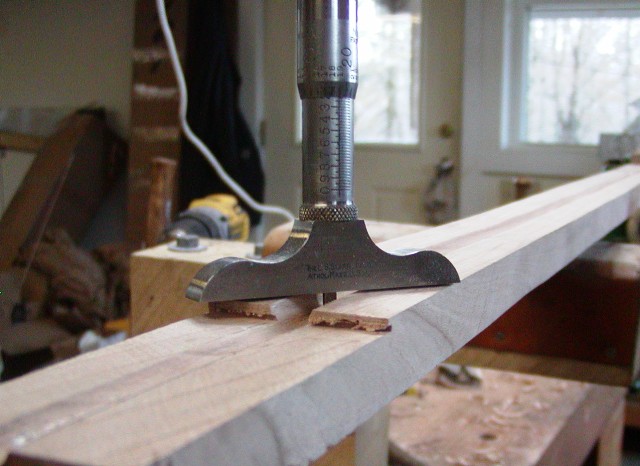
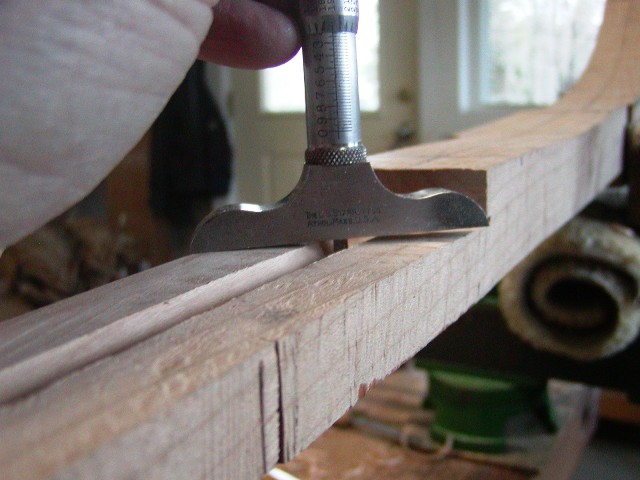
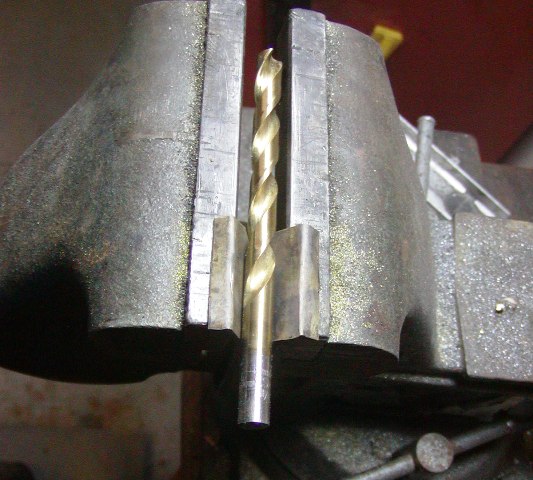
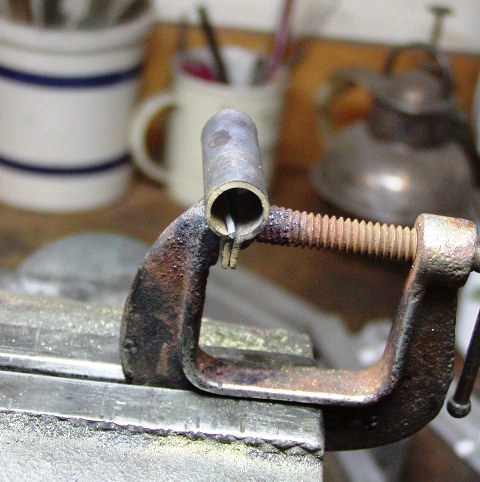
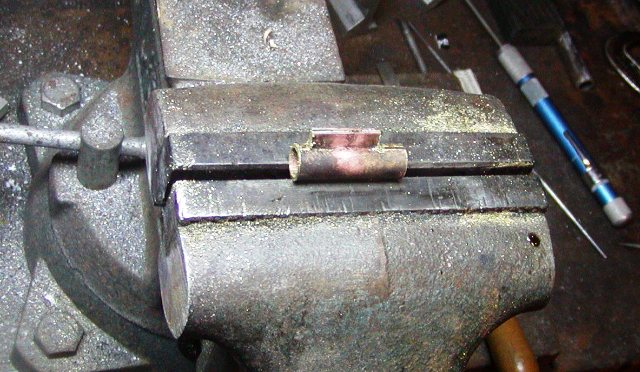
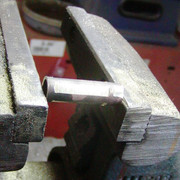
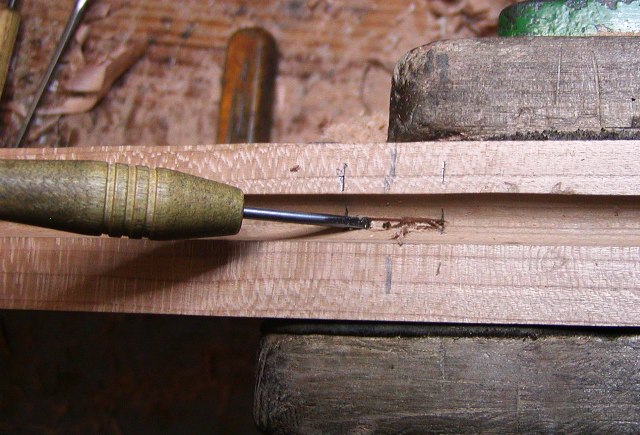
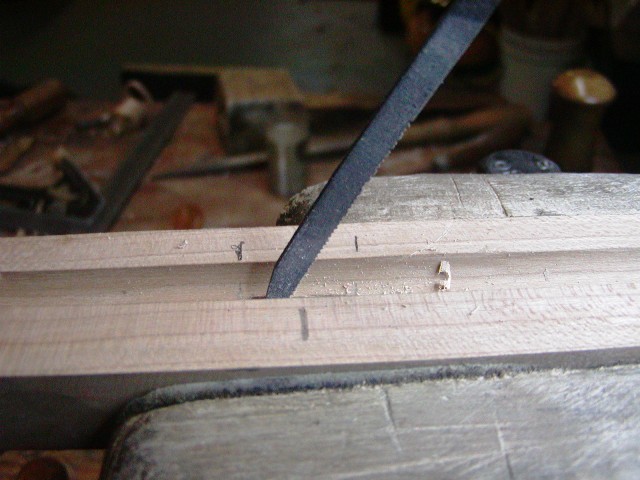
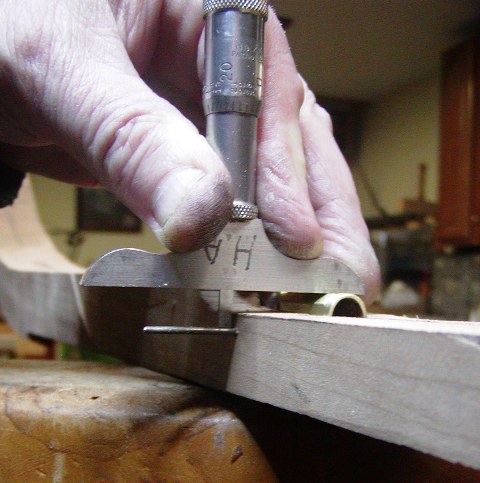
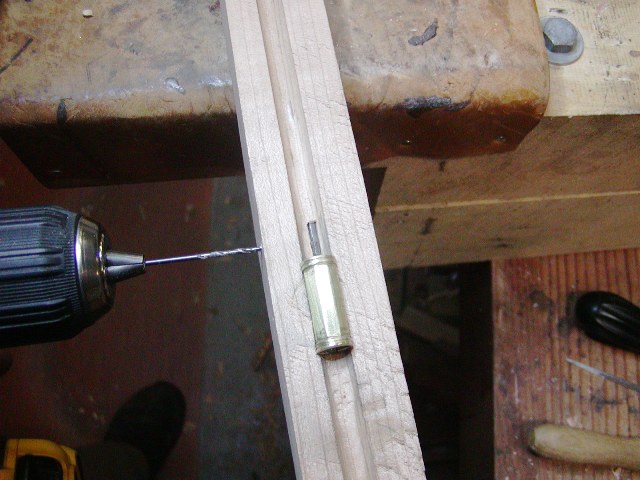
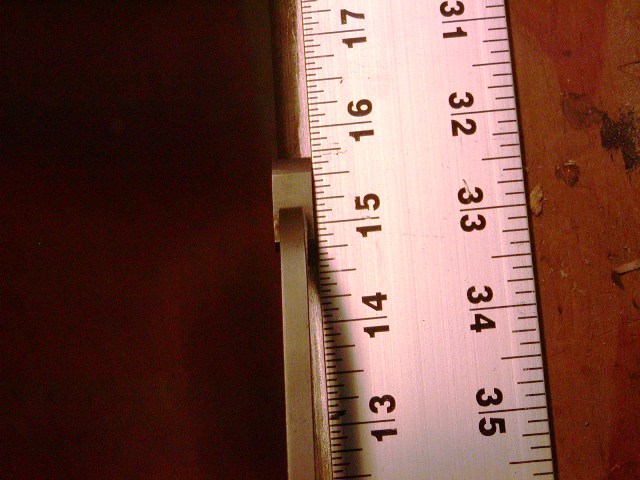
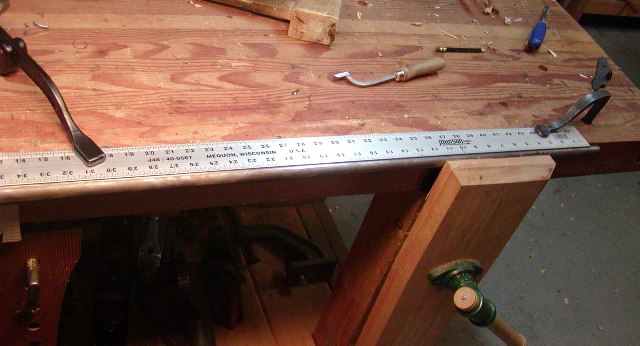
Both features had to go. I wanted a simple unadorned transition from octagon to round and no flare at the muzzle, just a slightly tapered tube all the way. Now some of you would advise taking it to a machine shop but I could do it on my own. My secret weapon is the 12" single cut razor sharp lathe file. In one and a half days of work, I got rid of the wedding band, tapered the octagon section the way I wanted, and got rid of the flare at the muzzle. In the process, the mound of steel wool shavings at my feet grew to 8-10" high. The barrel lost a pound of weight. The transitions machined in the barrel for the swamp and flare were abrupt and blobby. I wiped all of that roughness out. The next step was to cut the sight plane down the full lenght of the barrel.

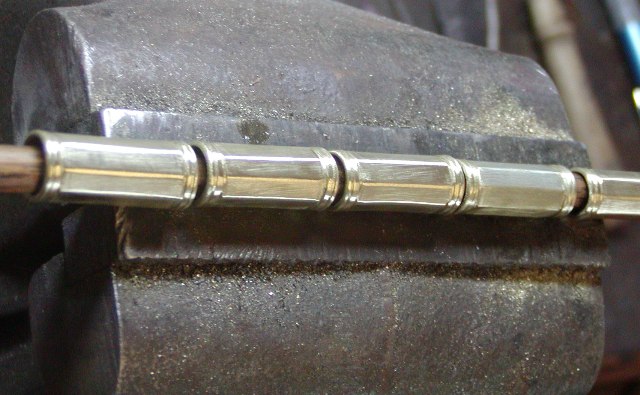
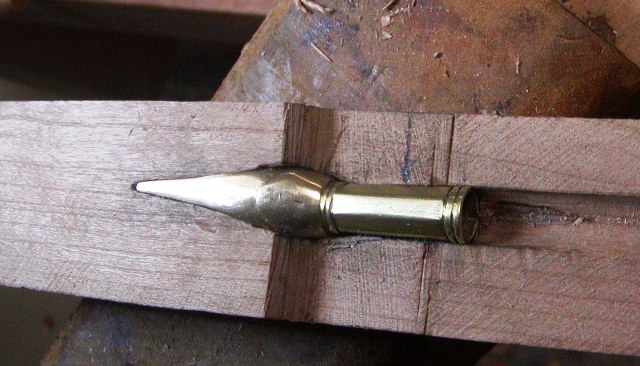
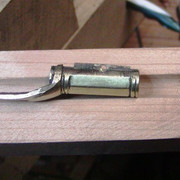
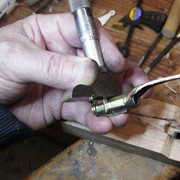
This is how I did it.


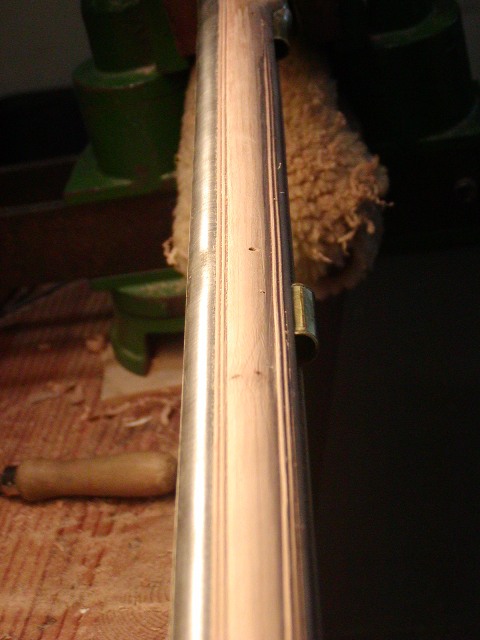
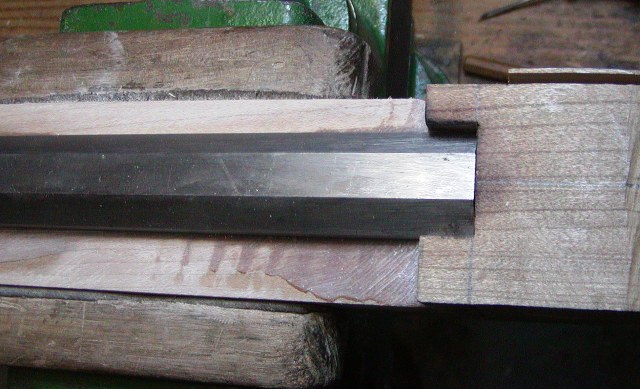
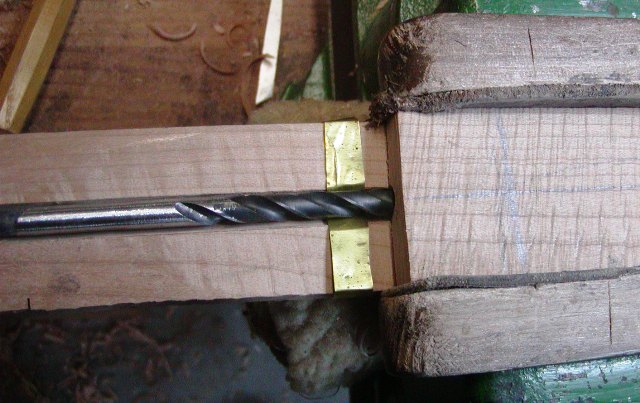
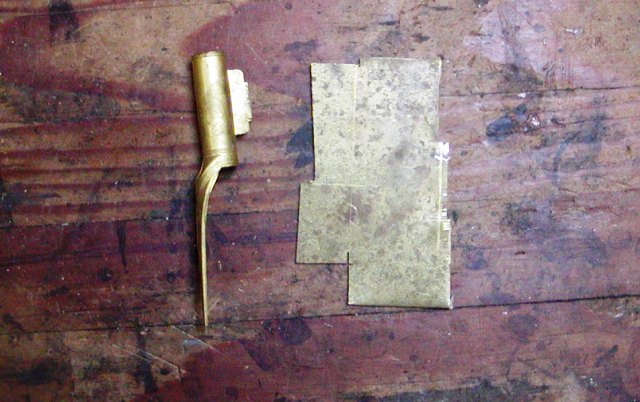
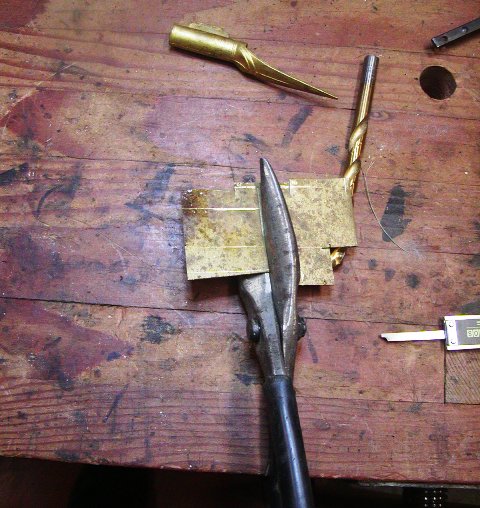
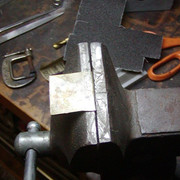
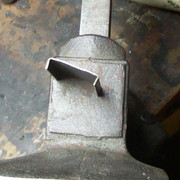
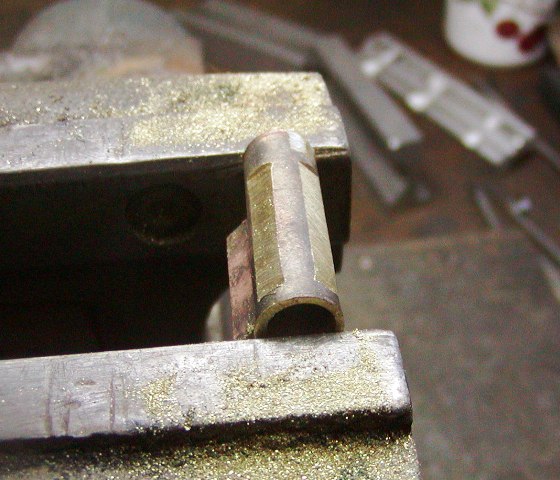
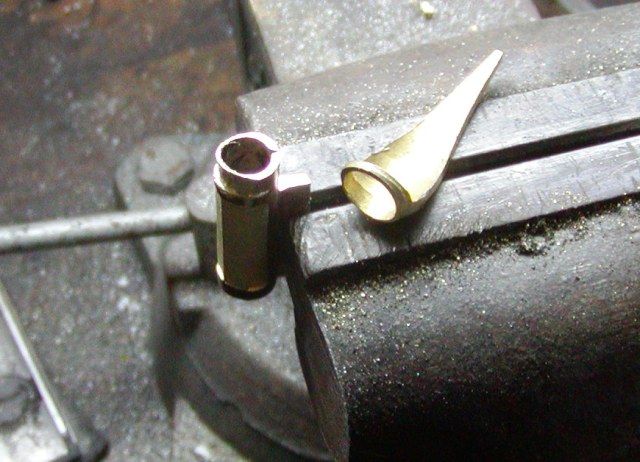
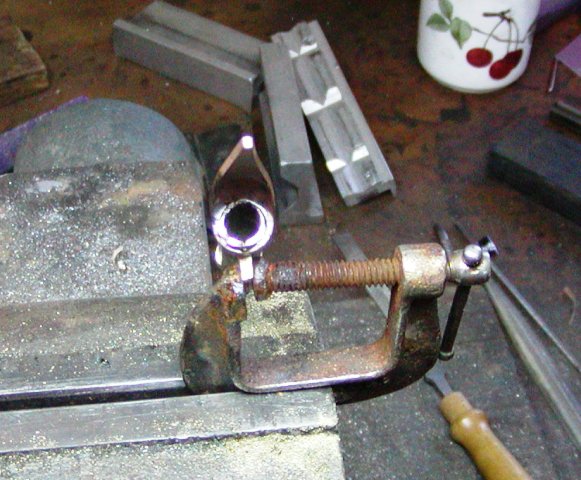
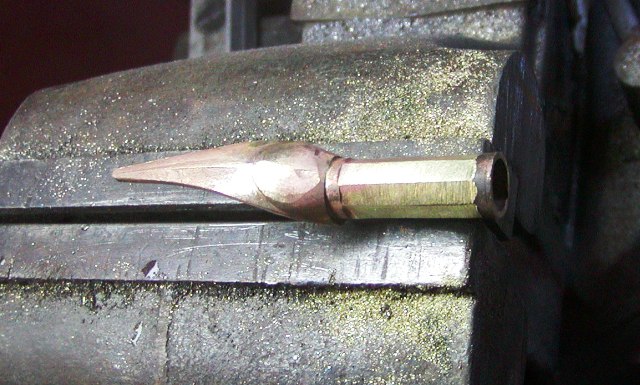
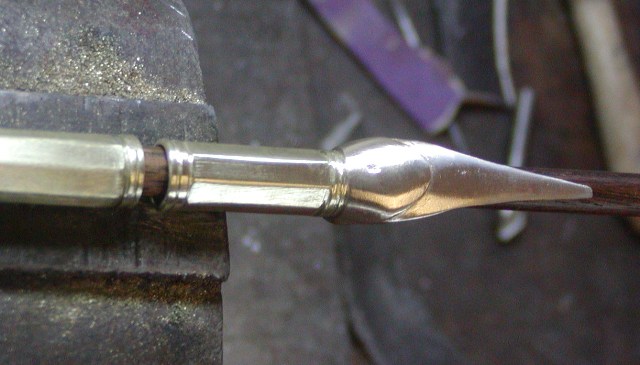
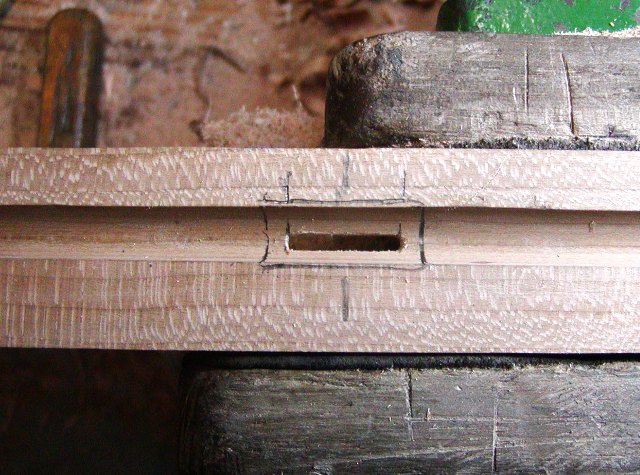
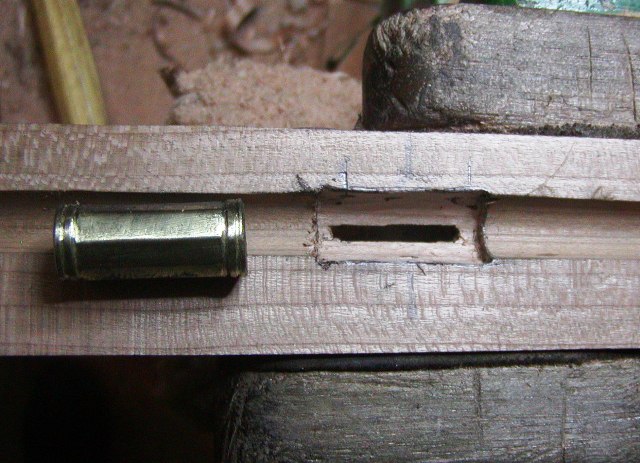
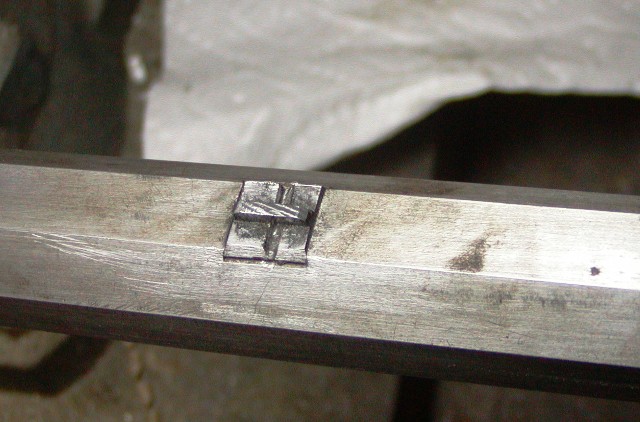
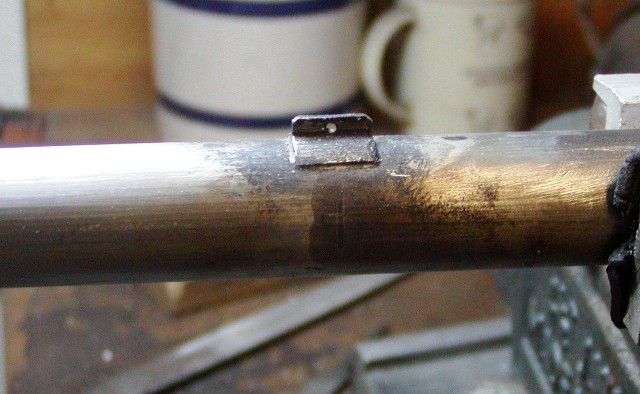
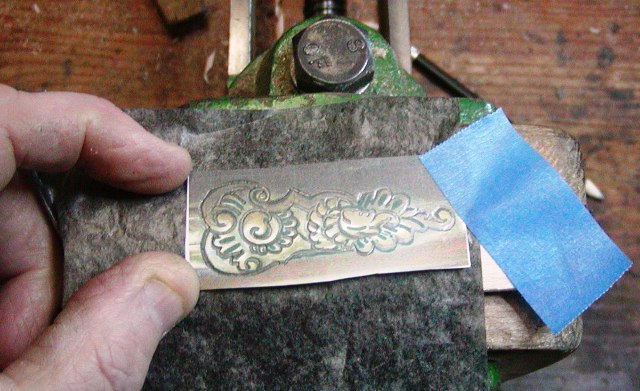
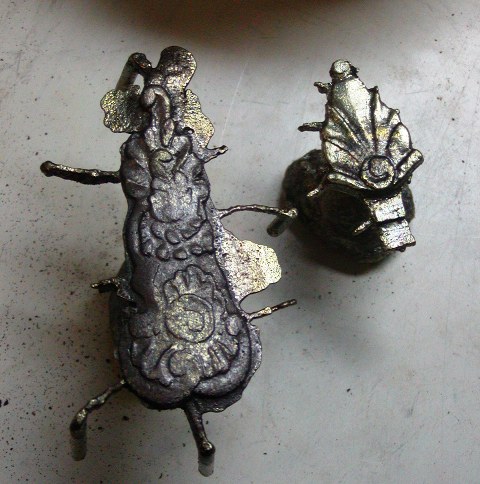
The silver front sight will be mortised into the barrel just in front of the end of the sight plane.

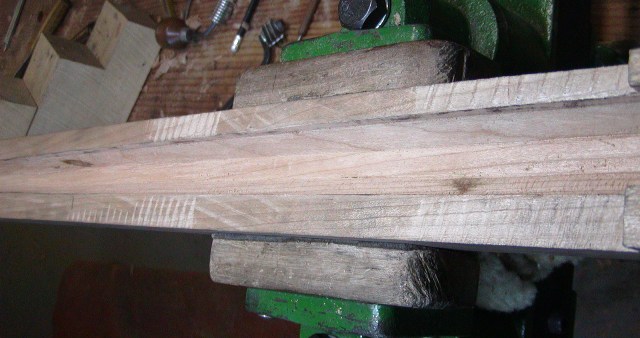
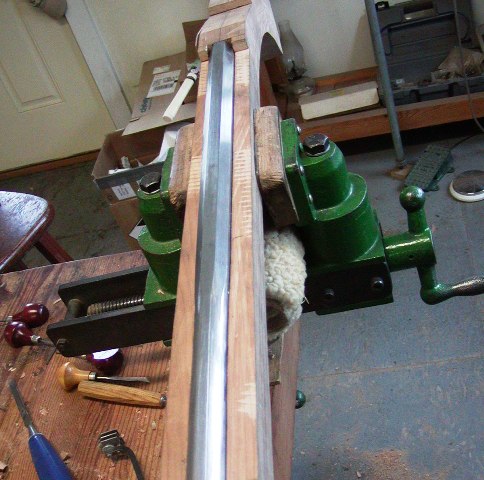
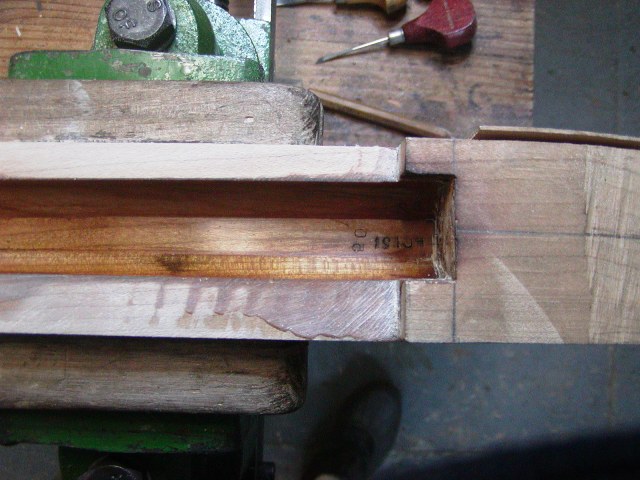
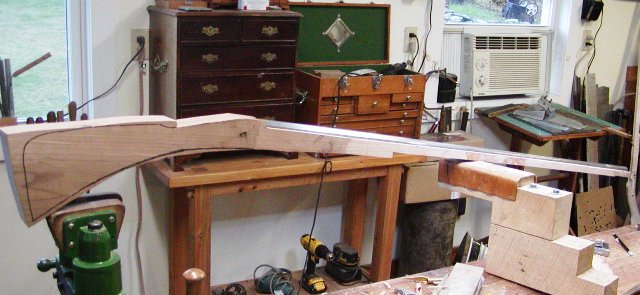
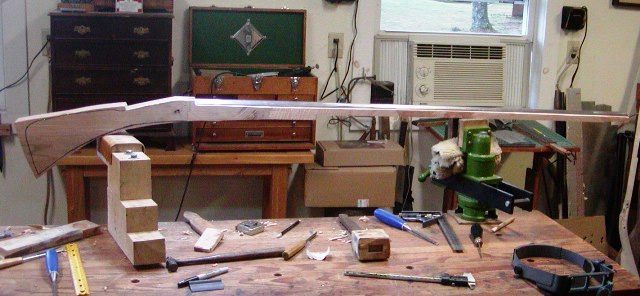
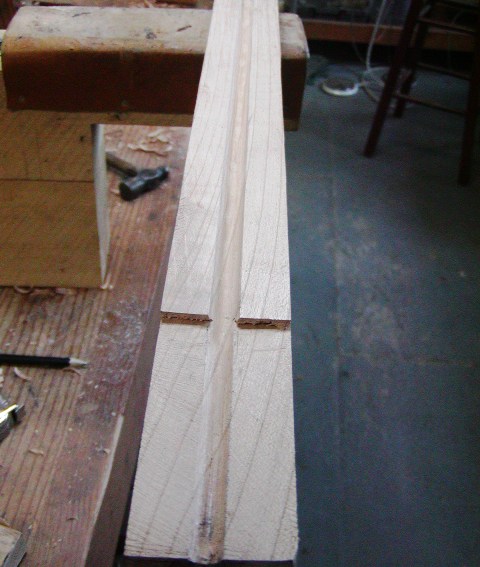
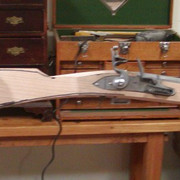
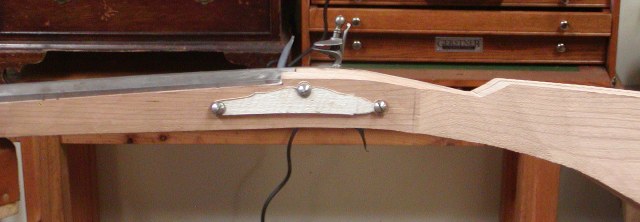
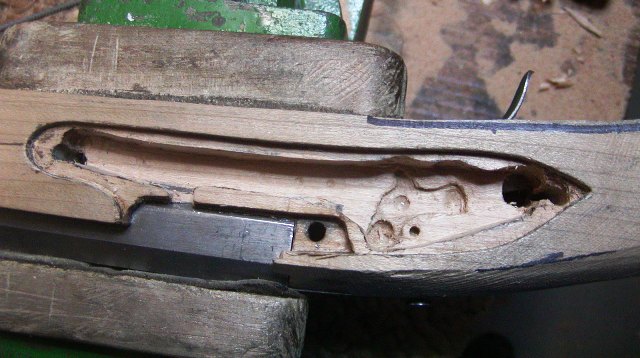
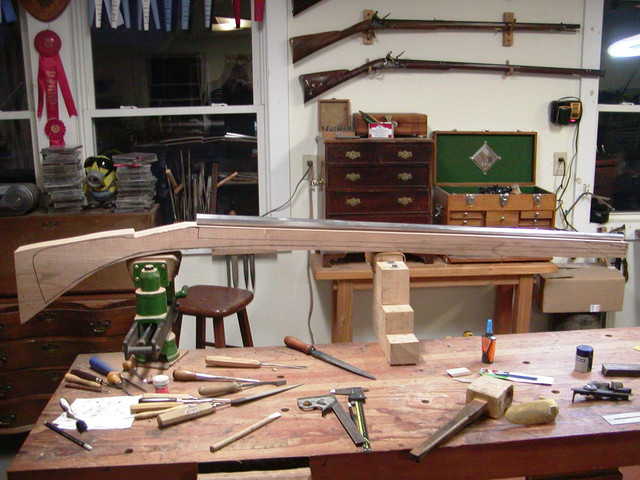
The stock is band sawed out of a dense cherry blank. Notice how tight and straight the grain is running through the wrist.


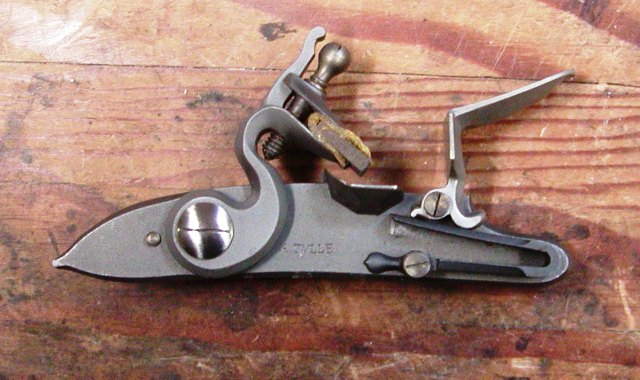
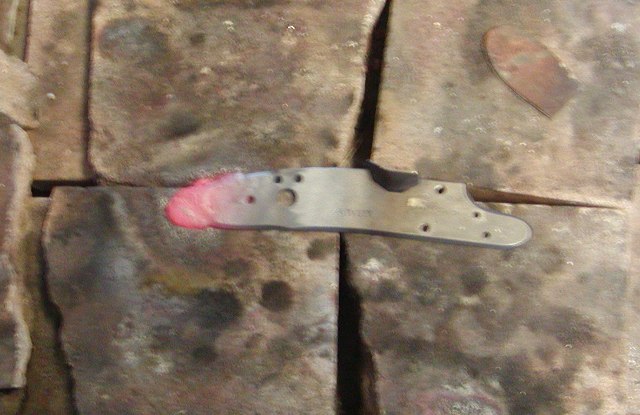
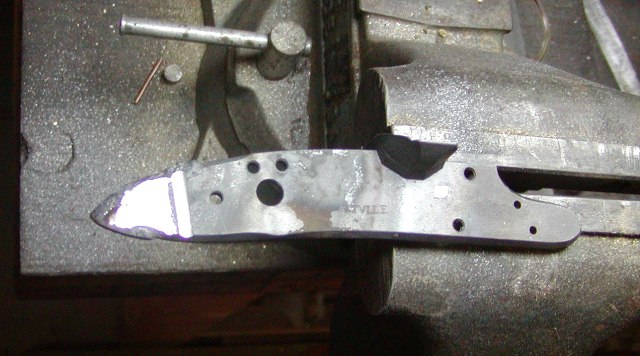
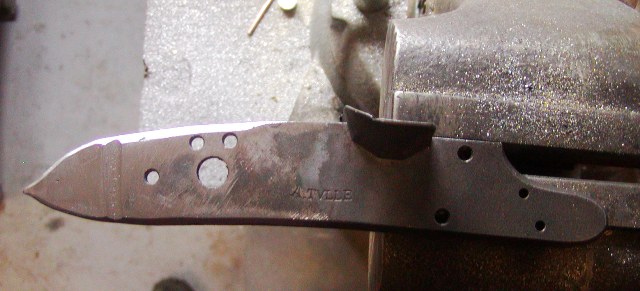
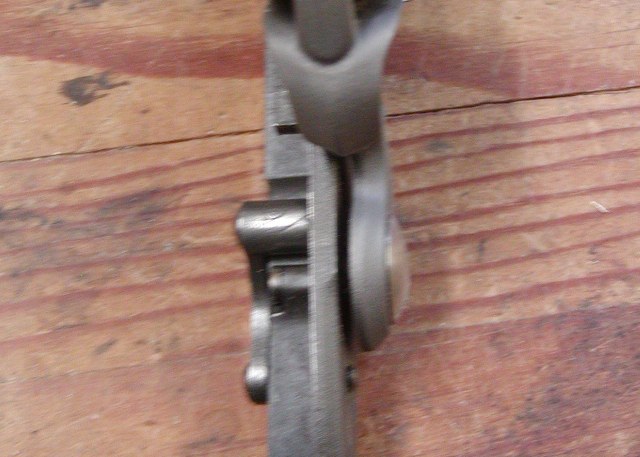
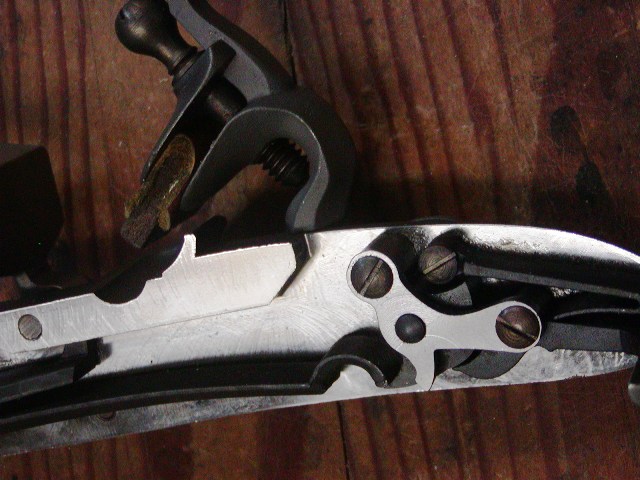
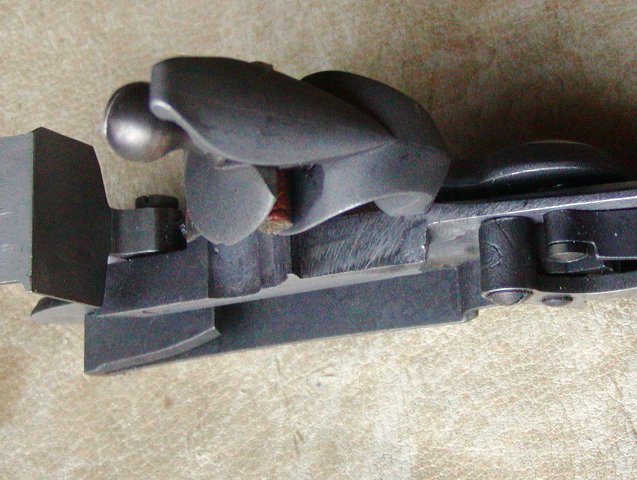
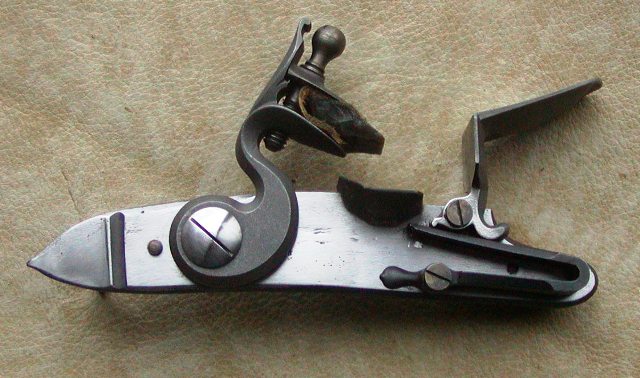
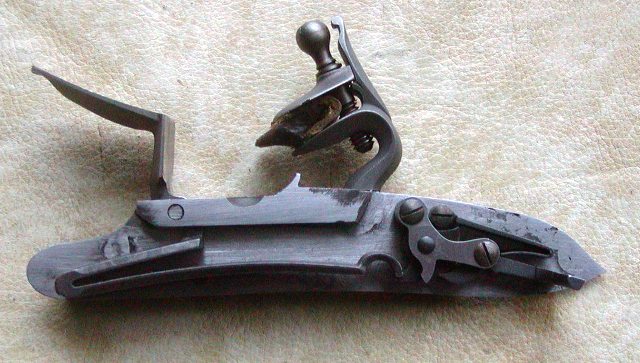
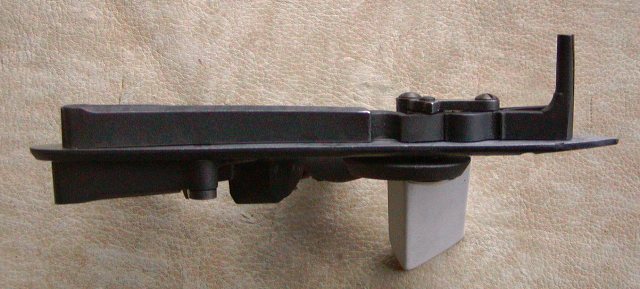
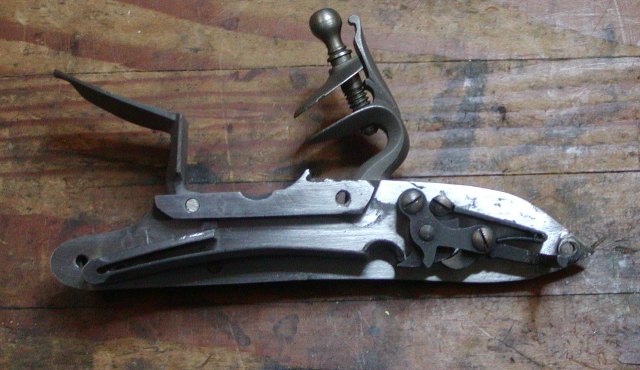
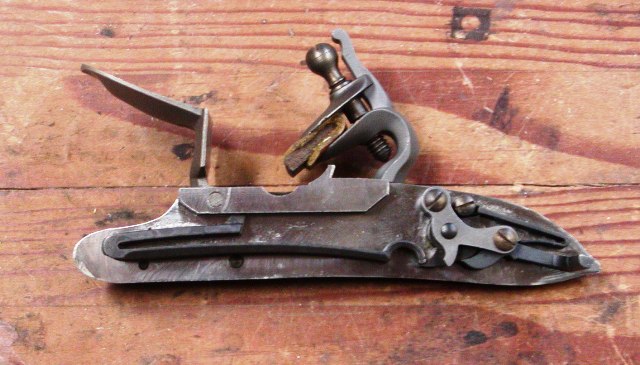
The lock will be a TOW Tulle lock because it has the best fit superficially to the original lock. Beyond that superficial appearance it is a piece of junk despite some saying "it is a good sparker". Let's look at it. Outside, with some welding, it will serve the purpose. Inside, it is a joke. Look at the position of the mainspring. It is so high on the plate that it could never be mated with an historically accurate large breeched barrel without the mainspring breaking into the barrel channel. This is stupid beyond belief. Also note that the hook of the mainspring just barely hits the toe of the tumbler at rest. Most importantly, look at the length of the lock plate bolster and how it does not overlap the shoulder on the flint cock. So the shoulder of the cock rest against the thinner edge of the lock plate just barely. Now imagine inletting that such that the shoulder of the cock clears the stock. It is very close to exposing a gap behind the lock plate. This is so stupid and if the bolster was extended just 1/8" more, the problem would be solved. Well of course that is what I will do as well as many other things.


More to come.

dave
 
Hi Folks,
I was too busy to post more photos of this project and I fell behind with it when I got sick in March. I am going to catch up with old and new photos. This project is difficult because no components readily available can be used without extensive modification and many others need to be fabricated from scratch. The Hawk fowler is one of the most sophisticated and beautiful New England guns ever made. I attributed it to mid-18th century gun makers along the Connecticut River but recent discoveries by historian and gun builder, Richard Colton, may change that. Richard retired from his position as historian for the Springfield Arsenal NPS Historical Park. He is familiar with almost every surviving gun in NE from the 17th and 18th centuries. He is a wealth of knowledge backed up by evidence and documentation and a superb maker of those New England guns. He discovered a gun very similar to the Hawk fowler including the unique butt plate and trigger guard made by Barnabas Mathis of Worcester, MA. Some of you may recall that name relative to RCA #13. Richard believes Mathis may have been a very influential gun maker in the Worcester area promoting use of French fashions and designs. So the Hawk fowler might be from the hot bed of New England gun making surrounding Worcester and Shrewsbury, MA rather than the CT River.

So, I am still building a relatively close copy of the Hawk fowler regardless of its history. The lock is one challenge. The closest modern version is the "Tulle" lock sold by TOW. Close is a relative term. A lot has to be changed as I mentioned in my previous posts. The Hawk gun has 3 bolts holding the lock in place like old Buccaneer guns. So I had to add length to the lock plate and shape it accordingly. Next on the lock is filling the mainspring stud hole so it can be reshaped and mounted such that it doesn't interfere with the barrel channel. The current position is stupid beyond reason. I fixed the other issues with this lock such as the position of the flint cock far away from the lock plate. The rest of the work involved welding.


I inlet the barrel by hand rather than using any machinery. It just was more straight forward that way. I used chisels, scrapers, and Gunline round and octagon barrel floats. The fit was clean and tight but it just seemed to go on forever. These long barrels are a test of discipline and perseverance.


As with most of my barrel inlets, I painted the channel with a varnish tin coat of AcraGlas tinted with LMF Lancaster Maple stain. You can see how thin it is since the wood grain is so visible. It will strengthen the thin barrel walls 3-10 times over the bare wood.


I trimmed wood off the forestock and you can see how slim and elegant this gun will be.


dave
 
Hi Folks,
Thanks for looking and commenting. I spent most of my day working on the fowler but had other jobs to attend to as well. The shooting and reenacting season is upon us and I always get a flurry of emergency work to do at this time of year. The next flurry comes just before muzzleloader hunting season opens. Anyway, I did more work on the lock. I finished all the welding, shaped the affected areas, changed the position of the mainspring, and fitted a different flint cock. Here is the original lock as a refresher.


It is the Tulle fusil lock sold by TOW. I don't know who makes it. I needed to lengthen and widen the lock plate to match the original lock on the Hawk fowler. That lock is held on with 3 lock bolts so there had to be more room behind the sear to fit a bolt. As you can see, the mainspring is very high on the lock plate and it cannot accommodate a large barrel without breaking into the barrel channel or having the upper leaf ground thinner to fit the barrel. Also, the lock plate bolster is ground way to short. Much more than is necessary to clear the mainspring and tumbler bridle. As a result the shoulder of the flint cock barely rests on the thicker bolster with half of it on the thinner edge of the lock plate. It barely makes contact with the plate because it it positioned so far out from the plate. I believe that was done so the shoulder of the flint cock was not deeper than the edge of the lock plate. Imagine trying to inlet a lock in which the inner shoulder of the cock is deeper than the edge of the lock plate. How could you inlet that such that the cock cleared the stock without the inner edge of the lock plate being exposed? The manufacturer's answer was to position the cock way out on the tumbler post such that only the inner edge of the shoulder hits the lock plate. Anyway, the lock gives me the chance to do some of my favorite things, heat, melt, and beat the snot out of stuff made of metal. As I posted earlier, I welded steel to the tail and bolster of the lock. Then I shaped the lock plate and filled the pin hole for the mainspring. To do that, I countersink both sides to the hole, fill it with welding rod, and peen the ends of the rod into the countersinks. Then I heat the mushrooms of peened metal with my welding torch, fusing them in the hole. File flush and the hole is gone. Then I drilled a pin hole lower on the plate so the upper leaf of the mainspring has more clearance for a large barrel. I swapped out the flintcock for one from Chambers early Ketland lock and fitted the top jaw to the new cock.


Now I have to deal with the mainspring. It has a twist to it such that it starts out tight to the plate but at full cock, migrates outward quite a bit.


Speaking to the maker of the lock, how on earth do you allow that kind of sloppy work out of your shop for sale? What do you expect the average buyer to do to deal with that? Do you care? Do you think they should know how to reshape, harden and temper a spring to fix your poor work? Is $230 too little to expect a lock that has a mainspring that actually is made properly?

dave
 
Hi,
I had a great day. I fixed the mainspring on the lock. I had to heat it red hot and bend the lower leaf horizontally so it lined up with the upper leaf. Then I hardened and tempered it. In the process I opened the bend slightly to give the spring more strength. Next up was carving the ramrod groove and drilling the ramrod hole. The ramrod hole is 9/32" in diameter and the ramrod groove is 5/16". I could not disassemble the original gun when I examined it a couple of years ago but my measurements of the ramrod groove and thickness of wood between the barrel and ramrod groove and hole presented a problem. I could not see how the ramrod hole avoided breaking into the barrel channel and allowed clearance for the forward lock bolt. There was not enough downward angle to the ramrod groove or freeboard on the sides of the stock to do that. So, I suspected that the gunsmith deflected the ramrod drill downward after the rear ramrod pipe. So my first job was to cut a ramrod groove that angled down slightly. I normally use my router table for this but in this case, the job had to be done by hand. I cut the groove with a gouge such that it was deeper at the muzzle and shallower at the rear pipe.


Then I did some "by guess and by golly" calculations and decided on a thin brass shim to deflect the ramrod drill away from the barrel.


However, before I could do any drilling, I had to make a >50" ramrod drill. The longest drills I had were 48". So I had to make a new drill just for this gun. I set up the drilling and away I went.


It came out very well. I could have used a little more deflection but the hole will work. The forward lock bolt will break into the barrel channel requiring a groove on the bottom of the barrel but that is no problem. I was so happy with the result that I lifted up my dog Willow and waltzed around the shop to the "Mull of Kintyre".

dave
 
There are no idle hands in your workshop! Your enthusiasm and expertise are quite inspiring, Dave. Looking forward to this build as well .
Ps- do you have an index of links with titles to your many projects and tutorials? I have recently happened upon two that I didn’t know about. I am imagining that there may be other treasures as well.
Cheers!
Bob
 
Hi,
I am finally catching up with this important project. It will be my focus now until it is done. It is a challenging one as you will see. Anyway, I made the ramrod pipes. With the long barrel this gun has 5 pipes. They are all octagon with decorative collars at each end. You cannot buy commercial pipes the right size so I had to make the suite. I used 0.04" thick sheet brass and a cast 3/8" fowler rear pipe I bought from TOW.


The pipes get smaller in diameter toward the rear accommodating a tapered ramrod. So the first pipe is 3/8" inside diameter, the second is 21/64" and so on until the rear pipe is 5/16" inside diameter. Simply multiply the desired diameter by Pi and then add double the height of the vertical tabs to get the long dimension for the sheet brass. The pipes are all 1.0625" in length so that establishes the other dimension. Then I just cut the rectangle out with metal shears.


Once cut out, I square the edges and anneal the brass. Then I bend the tabs.


I anneal the brass again and then sand and clean the inside of the tabs so they can be soldered. Then I press and tap the proper diameter drill into the sheet to form the pipe. When almost closed, I squeeze it in the vice using the drill as a mandrel.


Next, I drip flux between the tabs and lay on a strip of solder and sweat it into the joint.


Pipes don't have to be soldered but it keeps them tightly closed as I work on them. All of the pipes are octagon with decorative round collars at the ends. Some careful filing with flat and triangular files is all that is needed. I don't mark things out or use any jigs. I just file by eye.


The pipe in the photos is the rear pipe and it has a filed extension to the rear to attach the tang. I cut the tang off a 3/8" cast fowler pipe. The pipe itself does not go to waste because I can use it as a forward pipe on another gun on which I want 3/8" diameter round pipes.


The round collar on the tang slips nicely over the rear extension on the 5/16" diameter sheet brass pipe and is soldered in place.


It is a very strong attachment and I clean up the pipe and file the tang to the shape and size I require.


I finish up the pipes with files, stones, and sandpaper and I have a nice suite of 5 pipes for the Hawk fowler that match the original gun pretty closely. They will be polished up a bit more later but for now they are ready for inletting.


This is a challenging project because almost all of the components have to be fabricated from scratch or by greatly modifying commercial products.

dave
 
Hi and thank you all for looking and commenting,

I inlet all the pipes today. I like doing pipes and these were easy with one caveat, which I will get to below. I don't use any router bits or cutters or jigs. Inletting these pipes is so straight forward and simple. The basic method is I mark the extent of the tab on the stock.


Then I mark a center line in the ramrod groove for that tab and drill a series of holes.


Then I cut out the slot using a small flat chisel and a saw I made from a needle file.


At that point the pipe can sit down on the stock and I can trace the outline.


I stab in the ends with a tiny flat chisel and remove wood for the decorative collars at the ends of the pipe with a tiny gouge. Then is is just gouge work to set the pipe in. Sometimes I need inletting black but often I don't.


The rear pipe was straight forward and the tang went in easy as I inlet both the pipe and tang simultaneously.


However, because of a large step in the diameter of the barrel at this point in the stock, the web of wood is very narrow and the tab on the rear pipe is very small. The ramrod groove and hole follow the outside profile of the barrel rather than the bore. As a result, the web of wood is thicker forward of the rear pipe and behind it. However, at that pipe the groove intersects a thin spot caused by the transition in the barrel.


The pin hole has to be drilled with no room for error. In these situations, I drill the hole through the pipe where I want it. Then I measure its location accurately on the stock. When I drill the stock, I want the drill to catch in the hole pre-drilled in the pipe as a guide. It works very well but only if you have removed a lot of excess wood off the stock so you are not drilling a long hole and that you squared the stock so you can measure accurately.


No milling machines, jigs, drilling guides, etc needed, just some basic skills.

dave
 
Hi Guys,
More done. The lock is fully inlet and so is the trigger and trigger plate. I do not immediately pin my triggers after installing them and their plates. I wait until I am sure the lower profile of the stock is what I want. With the trigger loose but in place, I can determine LOP and the position of the butt plate but I am not committed to the final profile of the bottom of the stock. On this gun, that profile is critical so I am in no rush to permanently attach the trigger. Indeed, as I progressed I inlet the trigger plate deeper 4 times. I have the dimensions of the original gun but my components are not a perfect match. In particular, my lock is a little thinner so to get the look right, I have to adjust the bottom profile of the original stock. I leave my options for shaping open until the very last moment. Here is the gun at the moment.


As you can see, it is a complicated style and it is every bit as difficult to produce as any Lehigh Valley rifle. The Hawk fowler is one of the greatest New England made guns that has survived. It is easily the match for any gun by Earle, White, or Pomeroy. There is no margin for error. The lock mortise is a case in point. The lock is attached with 3 bolts much like the French buccaneer guns. In fact, I believe the original lock could have been from a good quality buccaneer. The name "Palan" ,which means "hoist" in French, on the lock is a family name common around the location of the Tulle manufactury. Tulle made its name making buccaneer muskets before it was known for fusil de chasses. Anyway, the 3 bolts do not have much room in the lock mortise.


I do not know the shape of the mainspring on the original lock but I have to work with the modern product and it requires very tight tolerances if I am going to replicate the original side plate, which determines the positions of the lock bolt holes. It will all work out.

The web of wood separating the barrel channel from the ramrod groove and hole is only 0.14" at the muzzle. That means the ramrod groove must follow the profile of the outside of the barrel on the original gun otherwise it would break into the barrel channel near the breech. I assumed that but the tolerances are really tight. There is very little room for the ramrod pipe and barrel pins. I made my pins from 1/16" diameter spring steel rod. Fitting them was a real challenge, particularly for the barrel lugs. I dovetailed the rear lug and soldered the rest and drilled them all for 1/16" pins. On the rear lug, I ground a groove in the base so the pin would be as close to the barrel as possible. There is no extra space to do otherwise.


I also predrilled the other lugs.


The result was very good when I drilled for the pins.


More to come,

dave
 
Hi Folks,
I was down for most of a week after getting my Covid 19 vaccine. It whacked me pretty hard but I am back to normal. The Hawk fowler is one of the hardest guns I've ever made. There are no components you can buy that can simply be used. Everything has to be modified extensively or made from scratch. I think I could make 2-3 other guns from rough blanks or 25 Kibler kits in the time required for this one gun. My next challenge is the butt plate. I bought a wax cast French trade gun butt plate that will provide the base. I peened and stretched it longer and wider. Then I reshaped the heel of the plate and cut off the forward finial to be replaced by one matching the Hawk fowler. To make that finial, I had to cast it. First I scaled a photo of the original finial and traced its outline and details. Then I shaped a piece of hard maple and glued a little handle on the under side. Holding the maple blank and handle in a vise, I traced the return on to the wood using graphite paper.


Then I carved the tang in 3D relief.


I cut off the handle and trimmed away the excess wood so I could use the carving as my model for casting. I used Delft clay to make a 2-piece mold, melted brass in my oven and poured the casting.


I also cast the front finial for the trigger guard, for which I had an existing suitable model from my previous Hawk fowler.


Now I need to trim the castings, glue them to a base, and then chisel the details and polish them. After that, I will show how I construct the parts.

dave
Glad that you are on the rebound with your health.
As always, it is very interesting to see your creativity and skills at work. This will be some Fowler!
 

Latest posts

Back
Top