


An amazing piece of work. A real labour of love. Thank you for sharing it and your knowledge with us.
-
This community needs YOUR help today. We rely 100% on Supporting Memberships to fund our efforts. With the ever increasing fees of everything, we need help. We need more Supporting Members, today. Please invest back into this community. I will ship a few decals too in addition to all the account perks you get.

Sign up here: https://www.muzzleloadingforum.com/account/upgrades -
Friends, our 2nd Amendment rights are always under attack and the NRA has been a constant for decades in helping fight that fight.
We have partnered with the NRA to offer you a discount on membership and Muzzleloading Forum gets a small percentage too of each membership, so you are supporting both the NRA and us.
Use this link to sign up please; https://membership.nra.org/recruiters/join/XR045103
You are using an out of date browser. It may not display this or other websites correctly.
You should upgrade or use an alternative browser.
You should upgrade or use an alternative browser.
Hawk New England Fowler
- Thread starter dave_person
- Start date
Help Support Muzzleloading Forum:
This site may earn a commission from merchant affiliate
links, including eBay, Amazon, and others.
Brokennock
Cannon
Thank you very, very much for this background information. It is greatly appreciated.The original fowler was built for John Hawks (1707-1784) a resident of Deerfield, MA. He was the commanding sergeant at Fort Massachusetts in North Adams, MA when it was besieged by French and indian troops during August 1746. The garrison number 30 (including several women and children) under Hawks and the attackers were close to 1,000. They held out bravely until their ammunition was gone. Then they agreed to terms from the French, surrendered, and were taken as captives to Canada. Half of them died enroute but they were treated well by the French and one woman even gave birth during their trek north. Hawks was well regarded by his captors because of his intelligence, bravery, and care of his soldiers and their families during captivity. The commander of the French and Canadian troops was General de Vaudreuil, who became the royal leader of New France during its last years and the French and Indian War. Based on eyewitness accounts, he was impressed with Hawks and treated him very well. Hawks was exchanged in short time and became a valuable diplomat working to keep communications going between New France and Massachusetts as tensions ramped up again prior to the F&I War. Hawks was a patriot during the Rev War and died in 1784. He was clearly a man who you wanted in command when things were not going well. What has this to do with the Hawks fowler. The quality of the French hardware is beyond anything typical of New England guns. I suspect that Sergeant John Hawks was given a gift by the French of a high quality civilian gun before 1750 and that those components were restocked
by Barnabas Mathis to become the Hawks fowler sometime during or after the F&I war.
This is the stuff I keep coming here for.
I've got good vision and Josh does a better job than me!Hi,
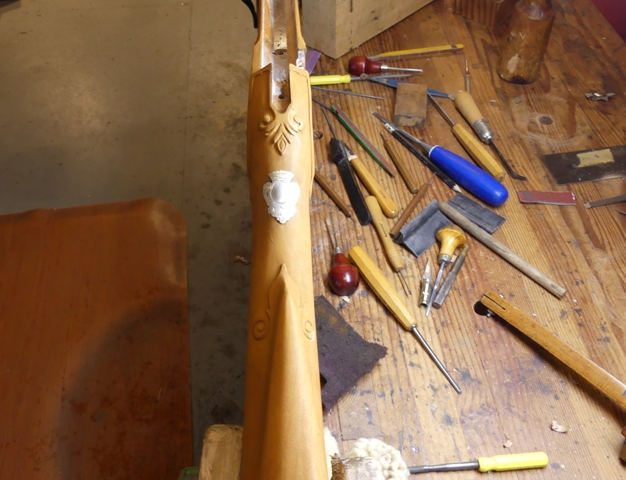
More done today. I had the pleasure of my friend Josh's company today. He filed and sanded lock castings for a long land Brown Bess and an Elliot carbine. For those who don't remember Josh, he is blind and we posted "Building Blind several years ago. I carved the outlines and background for most of the decorative carving and moldings.
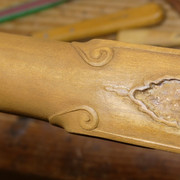
It is all still a bit rough and I will be cleaning up the background and edges later after cutting the raised beads along the barrel channel and ramrod groove. To do those, I use a cutter I made and installed in my old antique marking gauge.
That cuts the initial lines and then I go back and deepen them with a checkering tool. Then I remove background along the bead with a dog leg chisel and bottoming file to give the bead some relief.
Then I go back over the beads with the marking gauge cutter to round over the tops. There will be beaded moldings along the top of the barrel channel and along the ramrod groove.
I did one side and then asked Josh if he would like to try the other side. I set him up and away he went. He did the job perfectly.
dave
- Joined
- Nov 26, 2005
- Messages
- 5,019
- Reaction score
- 9,973
Hi,
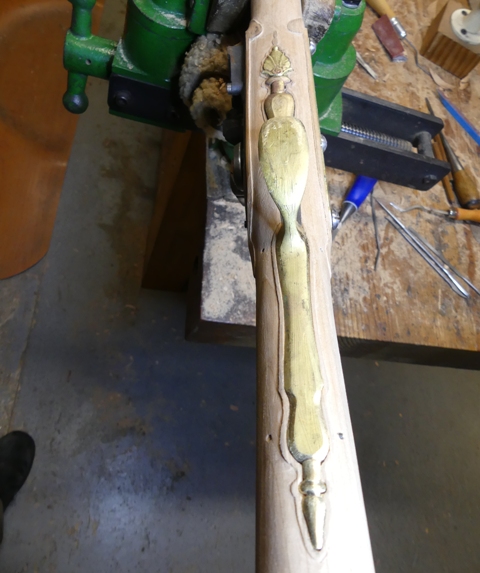
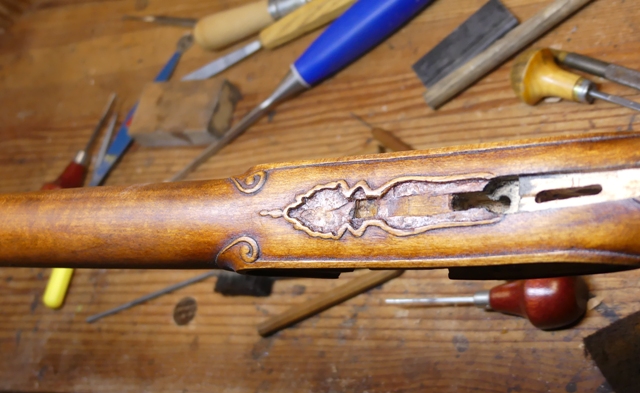
Finished engraving the wrist plate. It is my design but inspired by several French plates. It is all ready for inletting.


dave
Finished engraving the wrist plate. It is my design but inspired by several French plates. It is all ready for inletting.
dave
- Joined
- Nov 26, 2005
- Messages
- 5,019
- Reaction score
- 9,973
Hi,
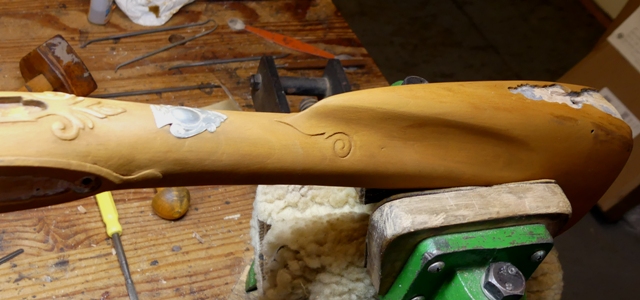
Thanks everyone for looking and commenting! I am getting my inertia back on this project. I have so much competing work at the moment that my focus on it suffered the last month or so. I really do love the gun but it is demanding at every step. There is no point at which I can relax. Even final scraping and sanding requires intense focus because I am always sanding or scraping between carved features like the moldings along the forestock and around the trigger guard and lock panels. The reward is that when done, the Hawks fowler is one of the most beautiful and high quality New England guns ever made. It is definitely in the top 5 of all surviving NE guns made during colonial times of which I have seen.
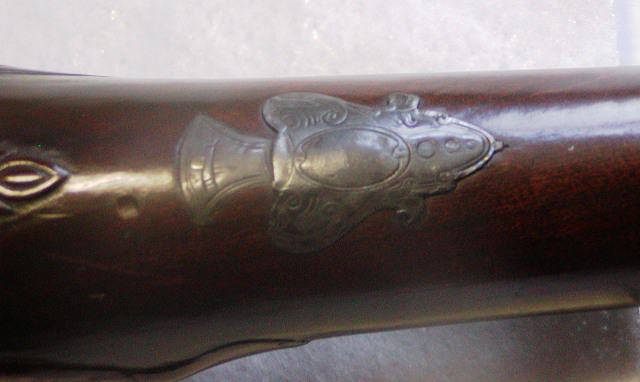
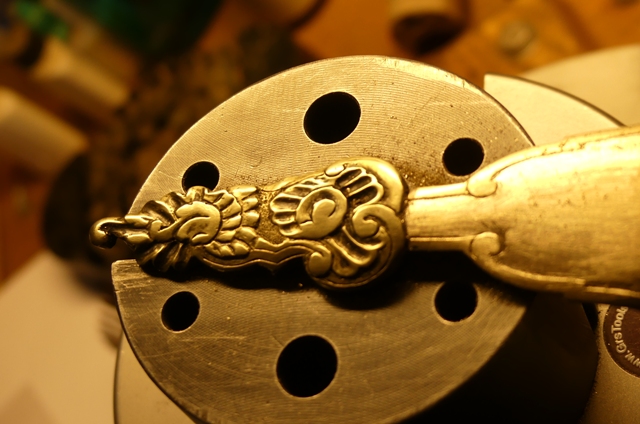
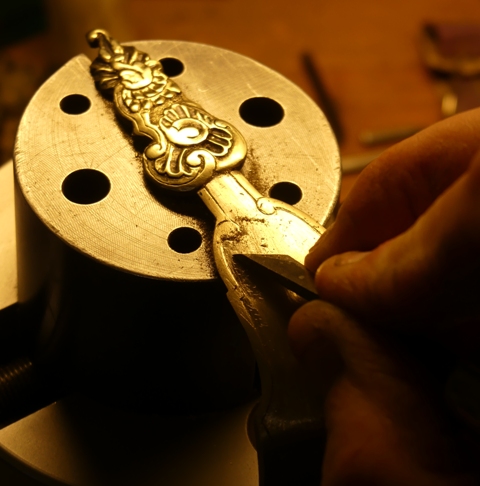
I inlet the thumb plate. Despite the weakness of cherry, it inlet well and I left it slightly proud of the wood surface as was the original.
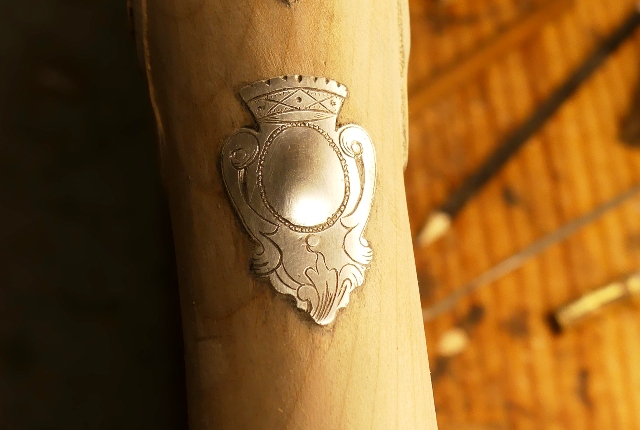
I glued it in place with Acra Glas but also tacked in 3 silver pins. I designed the plate so that the 2 pins iin the upper shoulders of the plate are part of the engraved design. Remember these photos:
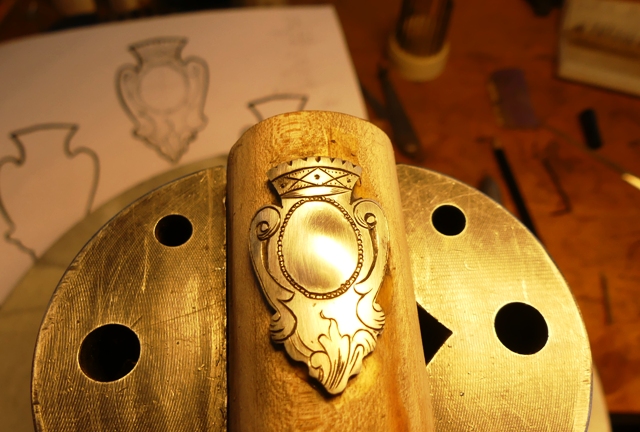
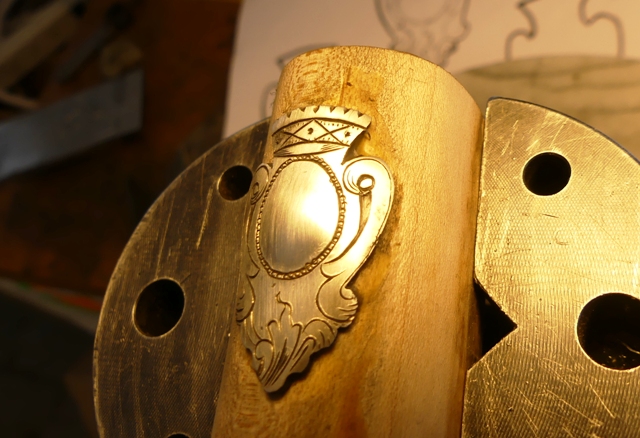
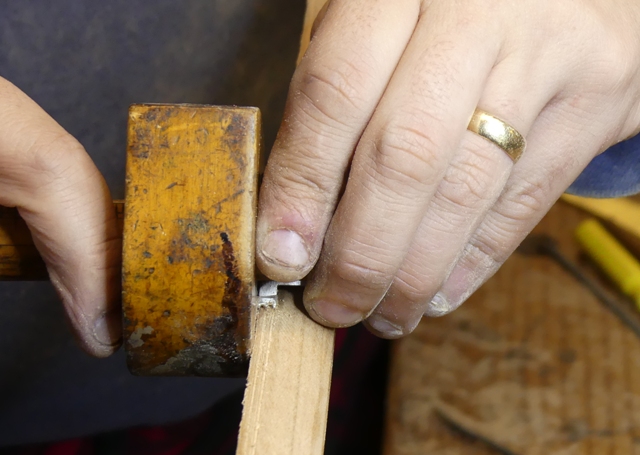
You can see the round circles engraved with the volutes at the shoulders. Those are the locations for the upper 2 pins and then I needed one lower pin below the oval cabuchon. I drill the tiny holes with a #1 drill while the plate is still glued to the wood base used during engraving. Then I pop the inlay off the wood using heat and position it on the stock. I tape it securely in place with Scotch tape. Then I tap tiny brass nails into the holes. I hold the tiny nails with a surgical forceps and tap them in part way. Then I trace around the plate with a very sharp pencil with two sides of the point flattened like a carpenter's pencil. After tracing, I pull the tacks with pliers, remove the plate, and stab in the border of the mortise with tiny chisels. After back cutting the edges of the mortise, I remove the center wood with a shallow gouge sufficient to let the plate set down partially into the mortise. Then I work the edges of the mortise along the sides because as the plate sets down, those edges have to move down the sides of the stock. It is a fiddly dance of blackening the plate and removing the wood.
When the plate is in, I redrill the holes for the tacking nails a little deeper and slightly counter sink the holes. Then I make silver nails to replace them. I use tiny silver wire and straighten a section, then thread it with a 0-72 die. The threads will capture the wood and glue in their holes. I clip a section as long as I need with jeweler's clippers, which automatically gives the pin a point. I line the mortise with Acra Glas tinted close to what the color of the finished wood, install the plate and tap it into place hard with a wooden mallet, and then tap in the silver nails. I clip the extra nail off about 1/8" above the plate and peen the excess down carefully into the counter sinks. I want these nails to show so I did not file them completely flush with the silver plate.
More to come.
dave
Thanks everyone for looking and commenting! I am getting my inertia back on this project. I have so much competing work at the moment that my focus on it suffered the last month or so. I really do love the gun but it is demanding at every step. There is no point at which I can relax. Even final scraping and sanding requires intense focus because I am always sanding or scraping between carved features like the moldings along the forestock and around the trigger guard and lock panels. The reward is that when done, the Hawks fowler is one of the most beautiful and high quality New England guns ever made. It is definitely in the top 5 of all surviving NE guns made during colonial times of which I have seen.
I inlet the thumb plate. Despite the weakness of cherry, it inlet well and I left it slightly proud of the wood surface as was the original.
I glued it in place with Acra Glas but also tacked in 3 silver pins. I designed the plate so that the 2 pins iin the upper shoulders of the plate are part of the engraved design. Remember these photos:
You can see the round circles engraved with the volutes at the shoulders. Those are the locations for the upper 2 pins and then I needed one lower pin below the oval cabuchon. I drill the tiny holes with a #1 drill while the plate is still glued to the wood base used during engraving. Then I pop the inlay off the wood using heat and position it on the stock. I tape it securely in place with Scotch tape. Then I tap tiny brass nails into the holes. I hold the tiny nails with a surgical forceps and tap them in part way. Then I trace around the plate with a very sharp pencil with two sides of the point flattened like a carpenter's pencil. After tracing, I pull the tacks with pliers, remove the plate, and stab in the border of the mortise with tiny chisels. After back cutting the edges of the mortise, I remove the center wood with a shallow gouge sufficient to let the plate set down partially into the mortise. Then I work the edges of the mortise along the sides because as the plate sets down, those edges have to move down the sides of the stock. It is a fiddly dance of blackening the plate and removing the wood.
When the plate is in, I redrill the holes for the tacking nails a little deeper and slightly counter sink the holes. Then I make silver nails to replace them. I use tiny silver wire and straighten a section, then thread it with a 0-72 die. The threads will capture the wood and glue in their holes. I clip a section as long as I need with jeweler's clippers, which automatically gives the pin a point. I line the mortise with Acra Glas tinted close to what the color of the finished wood, install the plate and tap it into place hard with a wooden mallet, and then tap in the silver nails. I clip the extra nail off about 1/8" above the plate and peen the excess down carefully into the counter sinks. I want these nails to show so I did not file them completely flush with the silver plate.
More to come.
dave
CuNosecap
40 Cal
Thank you for these detailed postings. I find them very helpful.
Rick
Rick
Brokennock
Cannon
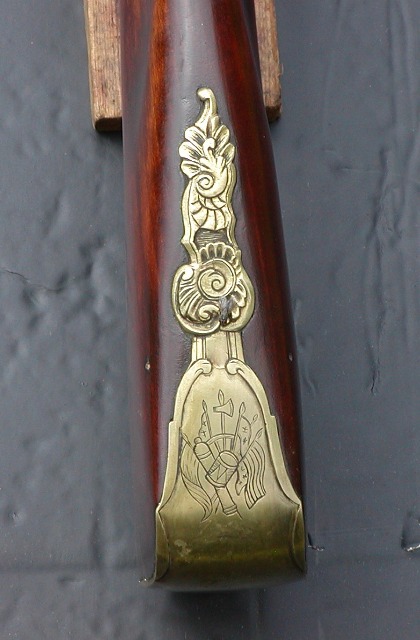
Mr. Person, I am curious,
How can one tell the difference when looking at an original?
Do you think the thumb piece was left proud when the original gun was new or was it flush and is now proud due to wood shrinkage?I left it slightly proud of the wood surface as was the original.
How can one tell the difference when looking at an original?
- Joined
- Nov 26, 2005
- Messages
- 5,019
- Reaction score
- 9,973
Hi,Mr. Person, I am curious,
Do you think the thumb piece was left proud when the original gun was new or was it flush and is now proud due to wood shrinkage?
How can one tell the difference when looking at an original?
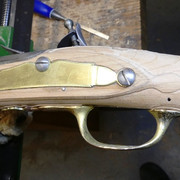
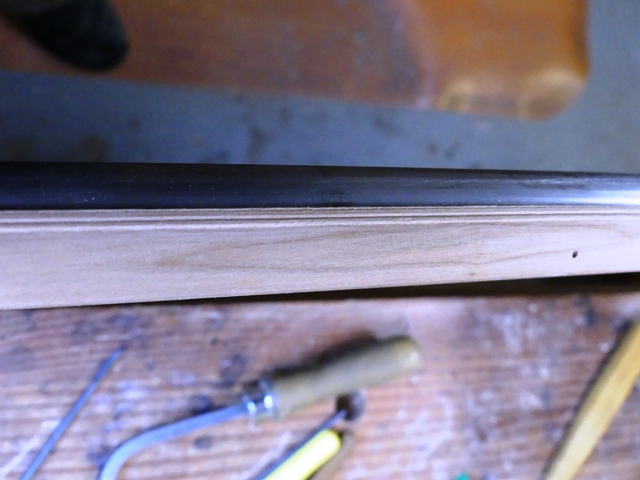
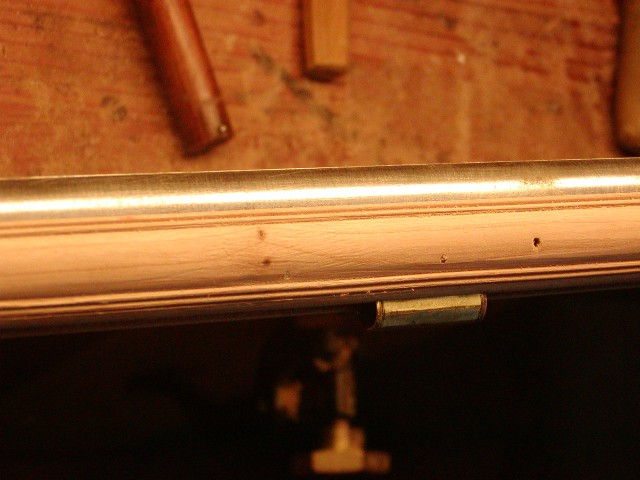
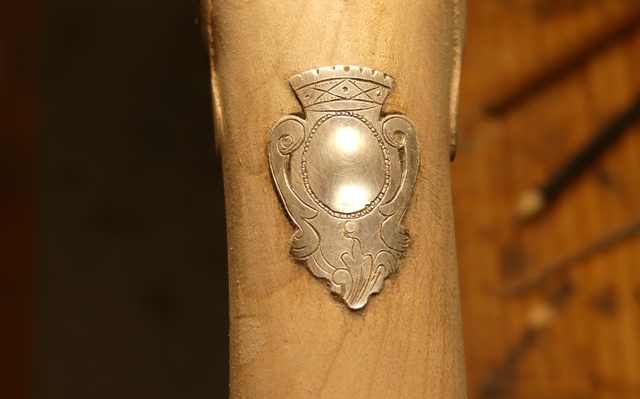
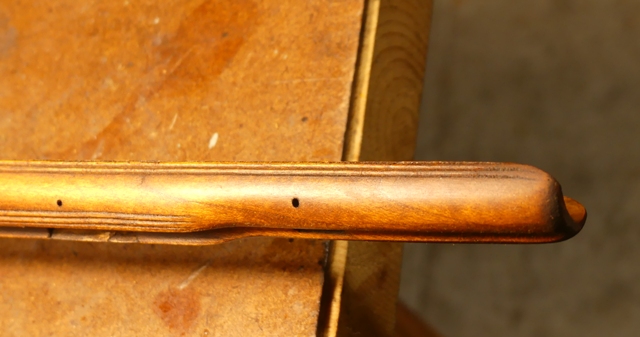
You can easily tell it was mounted that way because the edges are slightly rounded over and there are no gaps surrounding it. Here is a photo.
You can also see that it was probably made from thin silver that has dimpled during installation or during use.
dave
Brokennock
Cannon
Excellent, thank you.Hi,
You can easily tell it was mounted that way because the edges are slightly rounded over and there are no gaps surrounding it. Here is a photo.
You can also see that it was probably made from thin silver that has dimpled during installation or during use.
dave
- Joined
- Nov 26, 2005
- Messages
- 5,019
- Reaction score
- 9,973
Hi,
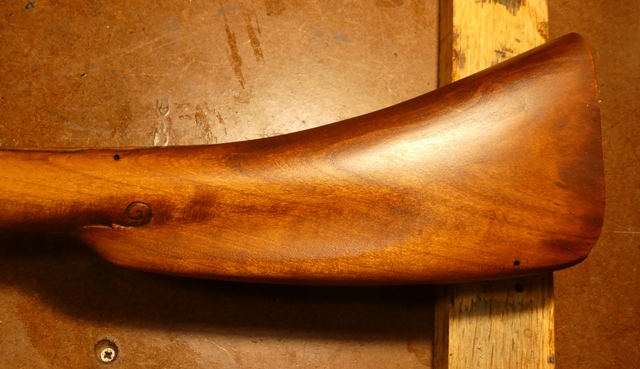
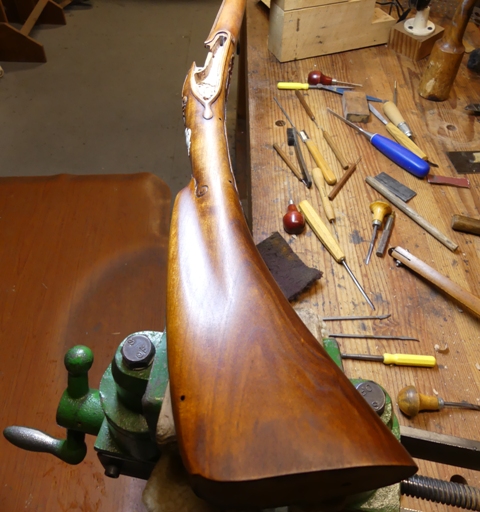
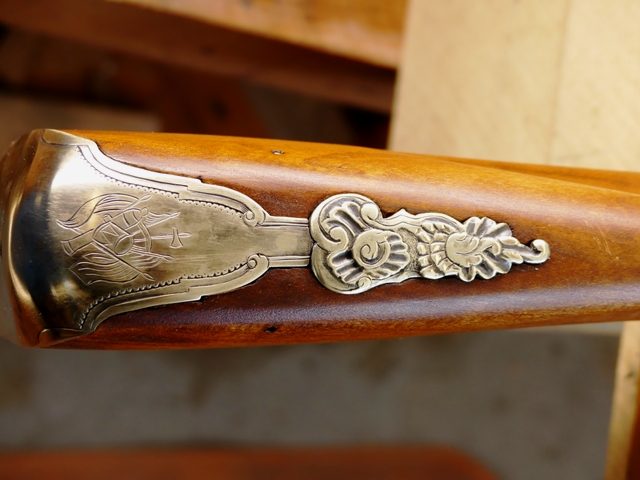
Staining and the first coat of finish are always milestone events for me. I cleaned up the stock and the carving. On light colored wood like cherry, you really need to see the stock under low angle light to see the rough spots. Then I stained the wood. I don't care for lye as a stain for cherry because it is usually a gamble. Often the color is too dark and cherry will darken naturally with age. I prefer aniline dyes for cherry and mix my own colors. In this case, after testing on scrap wood, I created a water-based stain that mixed 10 parts Brownells resorcin brown with 1 part Brownells black. It was perfect for the wood.
After drying, I rubbed it back with a gray Scotch Bright pad, cleaned it with a vacuum, and then applied finish. The finish is Sutherland Welles polymerized tung oil low-medium sheen. I applied the finish with a gray Scotch Bright pad and will add more coats over the next few days. You can start to see the mellow "shadow" effects of the previous black stain. Better lighting will reveal more as I go.
dave
I like how that finish is coming out. As beautiful as a piece of very fine furniture. Applying the finish with a gray Scotchbright pad is a new one for me- I am guessing the varnish combines with wood ‘dust’ and it fills the pores? (My experience with a final dry “sanding” with Scotchbrite pads is that they open the wood pores more than sandpaper, which I am not keen on.)
Last edited:
- Joined
- Nov 26, 2005
- Messages
- 5,019
- Reaction score
- 9,973
Hi Bob,I like how that finish is coming out. As beautiful as a piece of very fine furniture. Applying the finish with a gray Scotchbright pad is a new one for me- I am guessing the varnish combines with wood ‘dust’ and it fills the pores? (My experience with a final dry “sanding” with Scotchbrite pads is that they open the wood pores more than sandpaper, which I am not keen on.)
No the application using the Scotch Bright pad is not to create any sawdust filler. The very fine gray pad applies the finish nice and evenly and somewhat sparingly. Plus, by rubbing the finish on some of the very sharp edges are slightly rounded giving the details an older authentic look. After applying the finish, I let it sit for 10 minutes and then wipe off all excess finish with a rag. I let it dry for 24 hours and repeat the cycles until I have the sheen I want.
dave
Thanks Dave.Hi Bob,
No the application using the Scotch Bright pad is not to create any sawdust filler. The very fine gray pad applies the finish nice and evenly and somewhat sparingly. Plus, by rubbing the finish on some of the very sharp edges are slightly rounded giving the details an older authentic look. After applying the finish, I let it sit for 10 minutes and then wipe off all excess finish with a rag. I let it dry for 24 hours and repeat the cycles until I have the sheen I want.
dave
I had completely missed this thread, Dave!
A wonderful job ad a great tutorial.
The way that lock started out with the mainspring hanging off the tumbler was scary!
A wonderful job ad a great tutorial.
The way that lock started out with the mainspring hanging off the tumbler was scary!
- Joined
- Nov 26, 2005
- Messages
- 5,019
- Reaction score
- 9,973
Hi Lads,
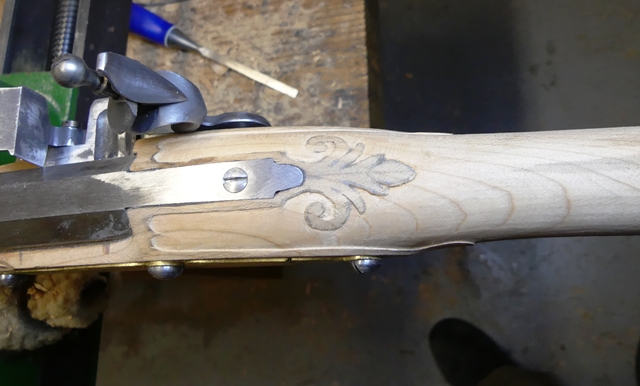
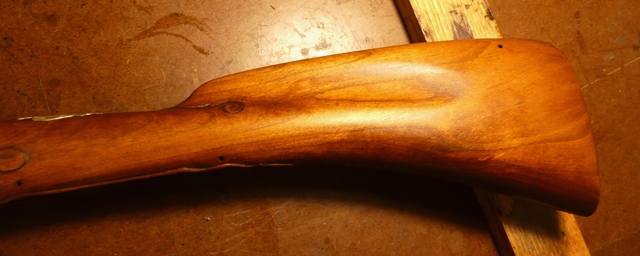
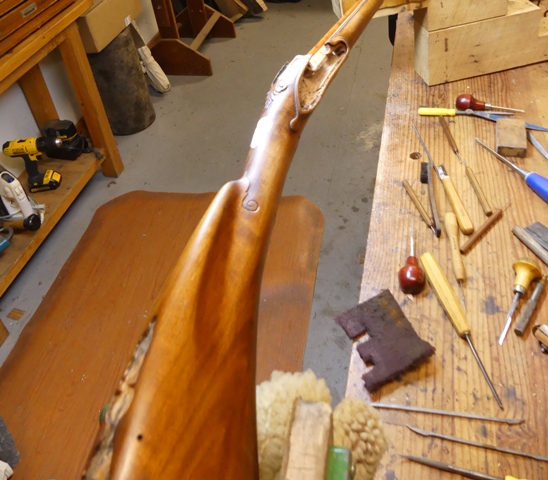
The stock is coming out great. The color shimmers and the shadow black pigment really electrifies the cherry.
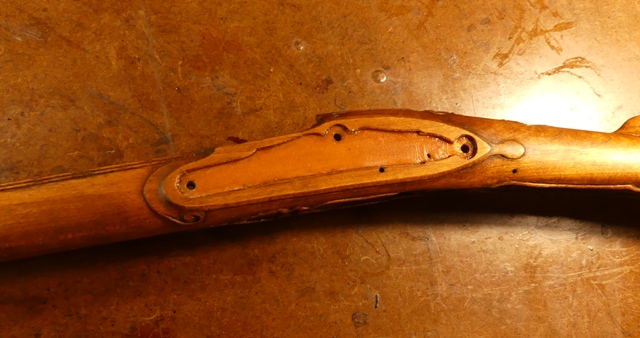
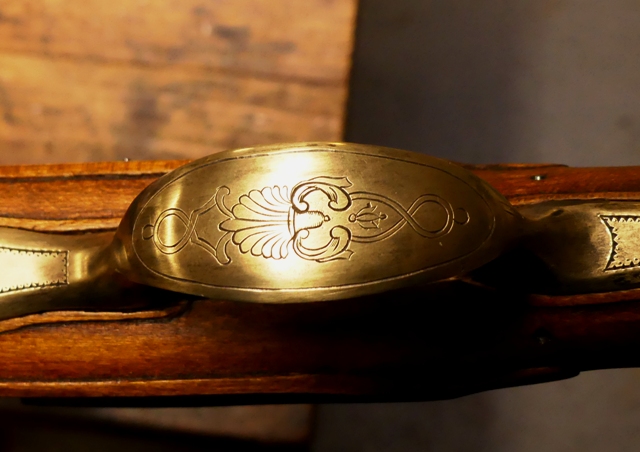
I cleaned up the butt plate finial and polished it. It just requires a few engraved accent lines.
My tools of choice are my Lindsay Airgraver with a 90 degree cutter, a small and larger round bottomed die sinker's chisels, and a couple of small round diamond stones, one in my Dremel, and the other in a needle file handle. Finally, a couple of small needle files are also handy. For polishing, I use little bits of sand paper but mostly pencil pointed sticks dipped in paraffin oil and then rotten stone. The base of the butt plate has raised borders on either side extending from the finial back around the heel. I have to carve those borders. I first cut the edges with my square graver then go back and raise that edge by laying the square graver over 90 degrees so one side carves away brass removing background. Then I go at it with a flat die sinker's chisel to remove more metal. Finally, I scrape the brass with old cheap skew wood chisels. I learned this years ago from Tom Curran (Acer Saccharum on this forum). I miss him terribly. I just gently scrape the surface of the brass and the chisel peels away the scratches and excess metal in tight corners.
Making this gun is not for the faint of heart. You have to dive in and develop a comprehensive set of skills because so many parts have to be fabricated and none are crude or rustic.

The rest of the butt plate decoration is complex. I have to clean up the raised borders and engrave some accents. Then there is a very fine nick and dot border inside and parallel to the raised border. Within that is an engraved panoply of arms. Unfortunately, the original engraving is so worn that I cannot see the design. So I have to recreate an appropriate one. I did this for a previous version of this gun I built and will copy that.
dave
The stock is coming out great. The color shimmers and the shadow black pigment really electrifies the cherry.
I cleaned up the butt plate finial and polished it. It just requires a few engraved accent lines.
My tools of choice are my Lindsay Airgraver with a 90 degree cutter, a small and larger round bottomed die sinker's chisels, and a couple of small round diamond stones, one in my Dremel, and the other in a needle file handle. Finally, a couple of small needle files are also handy. For polishing, I use little bits of sand paper but mostly pencil pointed sticks dipped in paraffin oil and then rotten stone. The base of the butt plate has raised borders on either side extending from the finial back around the heel. I have to carve those borders. I first cut the edges with my square graver then go back and raise that edge by laying the square graver over 90 degrees so one side carves away brass removing background. Then I go at it with a flat die sinker's chisel to remove more metal. Finally, I scrape the brass with old cheap skew wood chisels. I learned this years ago from Tom Curran (Acer Saccharum on this forum). I miss him terribly. I just gently scrape the surface of the brass and the chisel peels away the scratches and excess metal in tight corners.
Making this gun is not for the faint of heart. You have to dive in and develop a comprehensive set of skills because so many parts have to be fabricated and none are crude or rustic.
The rest of the butt plate decoration is complex. I have to clean up the raised borders and engrave some accents. Then there is a very fine nick and dot border inside and parallel to the raised border. Within that is an engraved panoply of arms. Unfortunately, the original engraving is so worn that I cannot see the design. So I have to recreate an appropriate one. I did this for a previous version of this gun I built and will copy that.
dave
Brokennock
Cannon
If only I had a 1st born to sell to get such a piece 
- Joined
- Nov 26, 2005
- Messages
- 5,019
- Reaction score
- 9,973
Hi,
Butt plate engraving is done. Now time for the side plate and trigger guard.
dave
Butt plate engraving is done. Now time for the side plate and trigger guard.
dave
- Joined
- Nov 26, 2005
- Messages
- 5,019
- Reaction score
- 9,973
Hi,
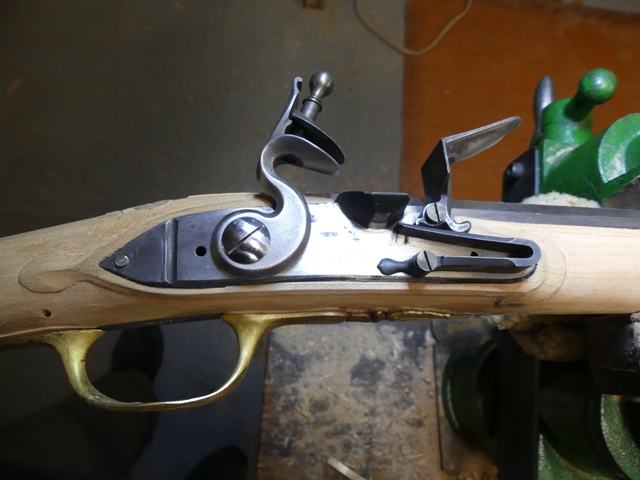
Trigger guard is engraved. Now I just need to engrave the side plate and finish the lock and barrel.

dave
Trigger guard is engraved. Now I just need to engrave the side plate and finish the lock and barrel.
dave
Fowling must have been a very stately affair. And the Hawk Fowler must have made its owner proud.Hi,
Trigger guard is engraved. Now I just need to engrave the side plate and finish the lock and barrel.
dave
So this one will too.
- Joined
- Aug 14, 2019
- Messages
- 137
- Reaction score
- 161
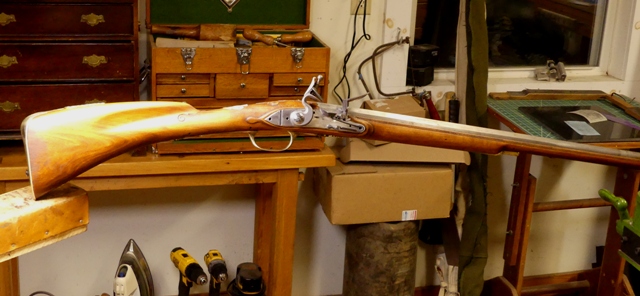
Just wondering how this fowler handles with a 48" barrel? It is a long weapon. Wouldn't it be cumbersome in dense woods?
Similar threads
- Replies
- 112
- Views
- 6K
- Replies
- 18
- Views
- 1K
- Replies
- 10
- Views
- 1K
