• This community needs YOUR help today. We rely 100% on Supporting Memberships to fund our efforts. With the ever increasing fees of everything, we need help. We need more Supporting Members, today. Please invest back into this community. I will ship a few decals too in addition to all the account perks you get.


    Sign up here: https://www.muzzleloadingforum.com/account/upgrades
  • Friends, our 2nd Amendment rights are always under attack and the NRA has been a constant for decades in helping fight that fight.

    We have partnered with the NRA to offer you a discount on membership and Muzzleloading Forum gets a small percentage too of each membership, so you are supporting both the NRA and us.

    Use this link to sign up please; https://membership.nra.org/recruiters/join/XR045103

New rifle cont'd

Muzzleloading Forum

Help Support Muzzleloading Forum:

This site may earn a commission from merchant affiliate links, including eBay, Amazon, and others.

Mountainman56

50 Cal.
Joined
Oct 8, 2007
Messages
1,031
Reaction score
0
Been inletting on the lock for 3 evenings now but only 5 hours work. I don't care much for inletting so as soon as I get frustrated I quit so I don't mess anything up. Shaping the stock is the part I enjoy but that's down the road many evenings yet. Pretty much got the lock where I want it...it lacks about 1/16ths of an inch of being all the way in but I'm going to start on the barrel tonight and hopefully let everything come together at once. Also I'm going to do a little filing on the tang at work today to get it shaped.

I am very impressed with the Jim Chamber's deluxe siler as well as the stock I purchased from TOTW. The lock inletting is more of a guideline and they leave a lot of meat for you to take off yourself so getting things to fit right is nobody's problem but your own. The lock is obviously done well and the matte finish (bead blasted?) is very even with no sticky-outy things that need filing and I'm sure, if a person was so inclined, would look fine with no other finish than what is has.


101_0276.jpg
 
looks good. :thumbsup:

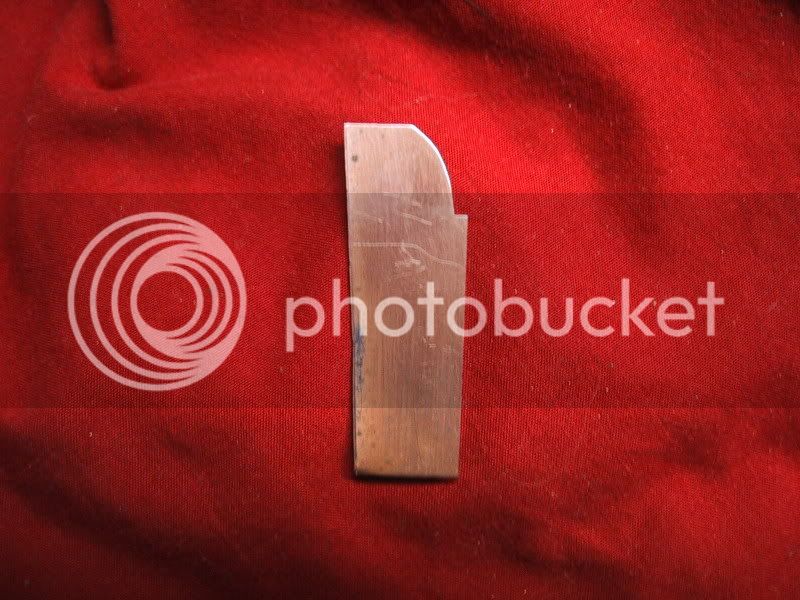
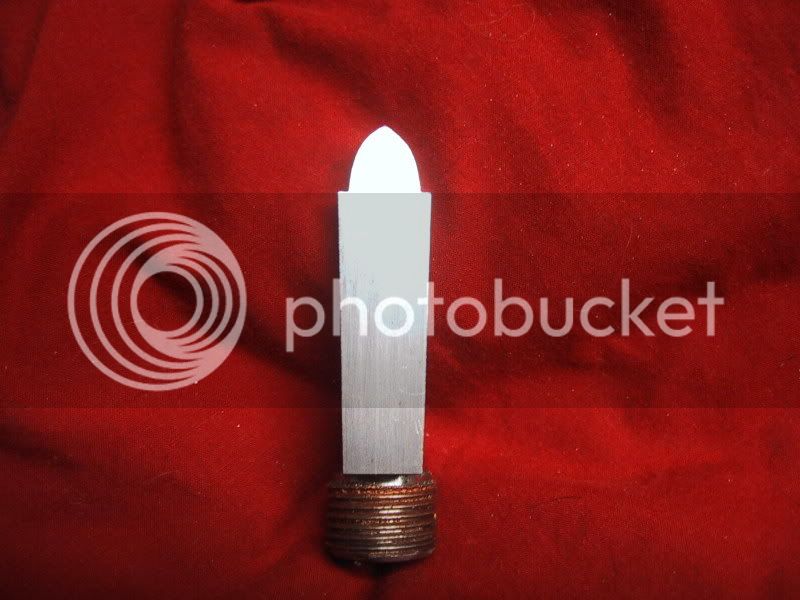
To shape the tang I like to make a simple one sided template out of thin metal. I use several different patterns this is the new one...

IMG_2730.jpg


IMG_2729.jpg


I use a marker and color the top of the tang and use a sharp pointy thing and scratch the outline on one side then flip the template over.
 
Well, mountainman, that's the way to do it. NEVER work on a gun when you're mad or frustrated. Just walk away from it. Come back tomorrow. You can mess up more stuff when you're ill...which just makes you more mad, which makes you mess up, which makes you more mad...
 
I like the template Roy, I'm getting ready to file tang very similar to yours and I was concerned that it would not be symmetrical. The template will insure symmetry.

I don't know why I didn't think of that earlier. I have used templates in the past, but my old brain just didn't make the transition. Dhuuuuh.

Mountainman,
Stophel is right on.
Walking away when frustrated is the thing to do. Things go south real quick when frustration overwhelms reason.

Thanks, J.D.
 
Thanks for the input Roy. That's a great idea. :bow: I wish I would have read my post again before I went out and started shaping the tang. I made a paper template, cut it out and marked what was stickin out with permanent marker flipped it over and did the same on the other side. Then I filed off the black...however it would have been much more exact your way with a metal template and a sharp pointy thing. So as a result I have to finish mine up using the TLAR method (that looks about right)

Thanks again for your help.
 
Thanks :thumbsup: keep it in mind for next time...

Now I've used the TLAR method alot. :haha: If you want to change an area on the tang you can always heat it up red and smack it with a hammer to spread it out a bit and file away again. :haha: Guess how I learned that one :redface:
 
Old40Rod said:
Inletting the lock first, and then the tang and barrel?
On a regular build you can determine where to put the lock after the barrel is inlet to get the touch hole placement correct. On a pre-carve the lock has to go where they have the mortise and you may have to move the barrel back a bit farther to get the touch hole in front of the breech plug.
 
On a pre-carve the lock has to go where they have the mortise and you may have to move the barrel back a bit

Roy... I can see this if the lock is pre-inlet. Does this apply on a pre-carve if the lock is not pre-inlet (i.e. you just have the lock panels generally located and shaped)? If the lock is not pre-inlet, you have a bit of room on the panel to move the lock forward and rearward, so it seems like you would want to do the tang and barrel first... dunno, just asking because I'm about ready to start my first flinter from a PR Tn Mt. precarve.
 
Hey Roy........here's my TLAR tang. If anyone notices where it ain't symetrical I ain't gonna let em shoot my rifle. :wink:

101_0277.jpg
 
Old40Rod said:
On a pre-carve the lock has to go where they have the mortise and you may have to move the barrel back a bit

Roy... I can see this if the lock is pre-inlet. Does this apply on a pre-carve if the lock is not pre-inlet (i.e. you just have the lock panels generally located and shaped)? If the lock is not pre-inlet, you have a bit of room on the panel to move the lock forward and rearward, so it seems like you would want to do the tang and barrel first... dunno, just asking because I'm about ready to start my first flinter from a PR Tn Mt. precarve.
this is what he started with...

101_0272.jpg


I guess I should have said "kit" sorry :redface:
 
Roy said:
Looks good :thumbsup: Ready to pin the barrel yet?

Am I ready to pin the barrel yet? :haha: good one! Only worked about an hour on it last night before it was annoying me. I get tomorrow off (that's the second day off since Christmas), hopefully I'll get the barrel and tang in, finish inletting the lock, solder on the underlugs, file in the sight dovetails.....hmmm, I'd better get more scotch.

On the other hand it's entirely possible I will just sit on my butt in front of the fire sipping scotch and watching the boob tube and :snore:
 
Thats always a good plan too... Remember to think of where your ramrod pipes are going and plan your barrel lugs around them. As for the sights you can put the front one on, but I'd leave the back one untill after you have the whole gun put together. With everything inletted it will give you the balance point. Don't want your sight on the balance point... Guess how I learned that... :haha:
To be honest the last things I do, unless I am going to age or brown the barrel, is to put the rear sight on and sign my name. :v
 
Curious what kind of tools you are using to inlet the side plate trigger etc etc....

I have a chambers new england 10ga fowler kit x2 that I'm ready to start working on. Been looking over tool posts. Being you're doing it you'd be a great help, or anyone else who has been there done that.

Thanks
Dan
 
Here is some pics of what I use for tools. So far I've done most all my inletting with a 1/4" straight chisel and the set of exacto knives. I have made use of the dremel but only in internal areas where a slip won't make you suicidal. Yesday I southern engineered some half round chisels as there is no chance of buying anything like that where I live.

My wife jokes that since I moved here from Canada I should have changed my nickname from "Mountainman" to "Middle of nowhere man".

To make the chisels I took some roll pins, which are spring steel and brazed them onto some 1/4" x 4" bolts which I had ground the threads down on until they would slide snugly into the pin. Then I ground a notch on the slotted side. Now I have to use a tapered stone in my dremel to grind an internal bevel to make my edge, then I will re-temper them and finish sharpening them with a stone. I hope they work as I have a lot of company time invested in them. :grin: Oh yeah and I ground the heads round so they don't look like they're made out of bolts. :wink:

101_0280.jpg


Southern Engineering

101_0281.jpg


Roy...thanks again for the rear sight tip. I can nearly guarantee I could have managed to get it in exactly the wrong place.
 
Back
Top