


Maria will discover , that she will learn far more actually doing the work , than just reading about it. I didn't scratch build my first m/l rifle, until I was 25 yrs. old . I had knowledge of gunworking tools from my machinist Dad , who also taught me how to think , and engineer a project , while I was a kid. Maria is fortunate to have a mentor of your caliber , Dave. Part of your legacy , will be carried forward by Maria.. I'm very excited for Maria ,as this is experience no university can ,or will teach. .............oldwood
-
This community needs YOUR help today. We rely 100% on Supporting Memberships to fund our efforts. With the ever increasing fees of everything, we need help. We need more Supporting Members, today. Please invest back into this community. I will ship a few decals too in addition to all the account perks you get.

Sign up here: https://www.muzzleloadingforum.com/account/upgrades -
Friends, our 2nd Amendment rights are always under attack and the NRA has been a constant for decades in helping fight that fight.
We have partnered with the NRA to offer you a discount on membership and Muzzleloading Forum gets a small percentage too of each membership, so you are supporting both the NRA and us.
Use this link to sign up please; https://membership.nra.org/recruiters/join/XR045103
You are using an out of date browser. It may not display this or other websites correctly.
You should upgrade or use an alternative browser.
You should upgrade or use an alternative browser.
My Apprentice and Her English Fowler
- Thread starter dave_person
- Start date
Help Support Muzzleloading Forum:
This site may earn a commission from merchant affiliate
links, including eBay, Amazon, and others.
- Joined
- May 6, 2014
- Messages
- 16,892
- Reaction score
- 15,309
Maria is one fortunate girl as a High School Senior, getting what amounts to Postgraduate muzzleloading gunsmithing training from a modern master.
I read Dave's info on checking the quality of locks a second time before I understood completely what he meant.
Gus
I read Dave's info on checking the quality of locks a second time before I understood completely what he meant.
Gus
- Joined
- Nov 26, 2005
- Messages
- 5,018
- Reaction score
- 9,969
Hi folks and thanks again for your support and interest in this project,
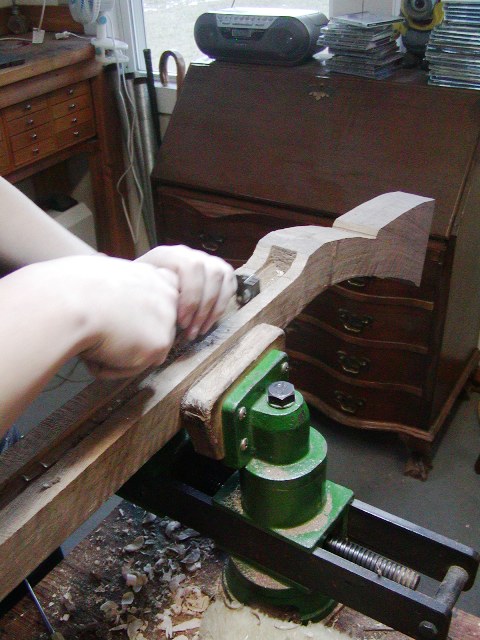
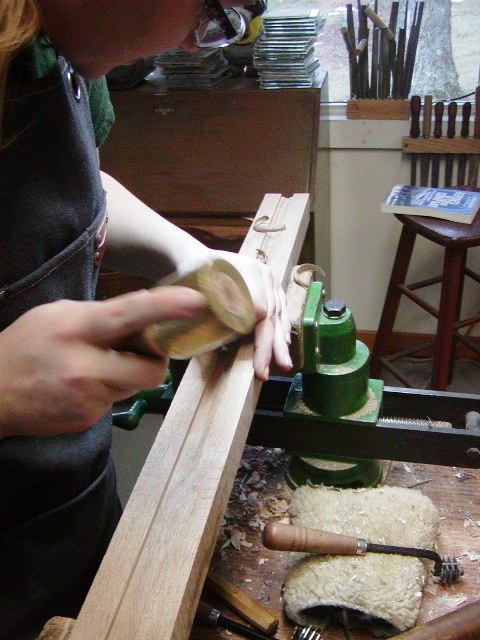
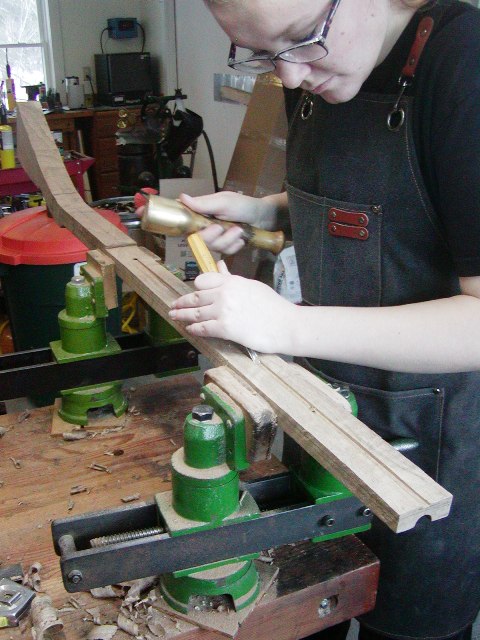
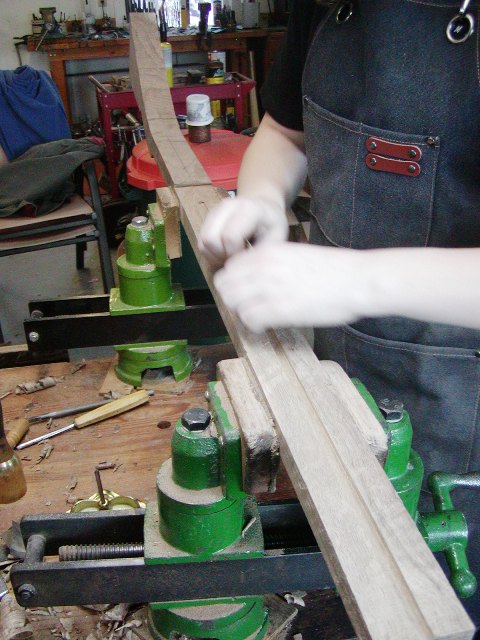
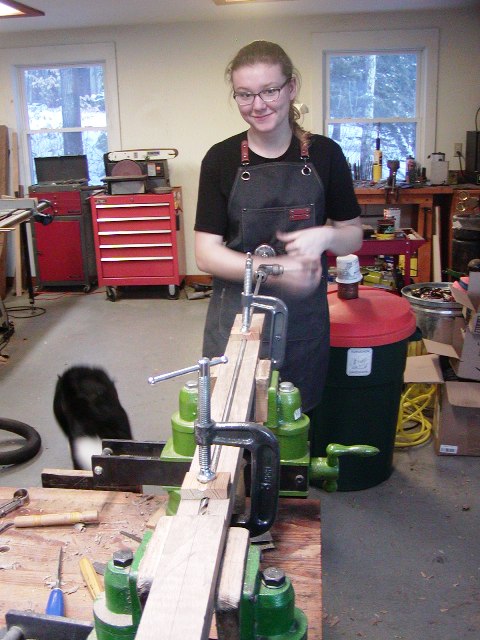
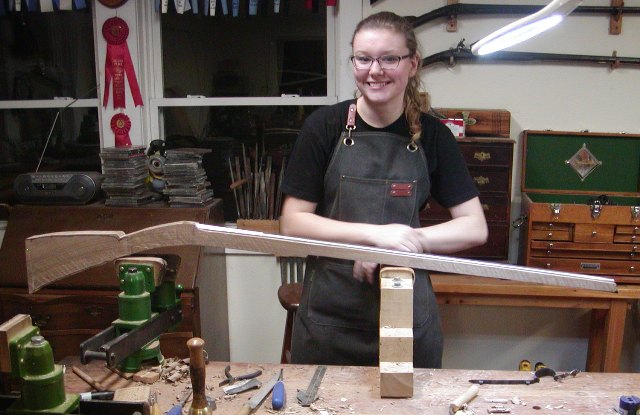
Maria turned 18 today and her grandparents, mother, and brother came over to the shop to see her progress. It was a very nice time and everyone in her family is behind her. After her family left, Maria and I got busy preparing the stock for barrel inletting. First, it needed to be squared up so sides were even and perpendicular. So I got out my jack plane and taught Maria how to sharpen the blade. To sharpen, I use 3-M micro abrasive sheets placed on a flat polished granite tile from Home Depot. Final polish is achieved by stroking the tool on a leather strop coated with jeweler's rouge. My dad made me that strop almost 40 years ago. Anyway, Maria trued up the stock blank.
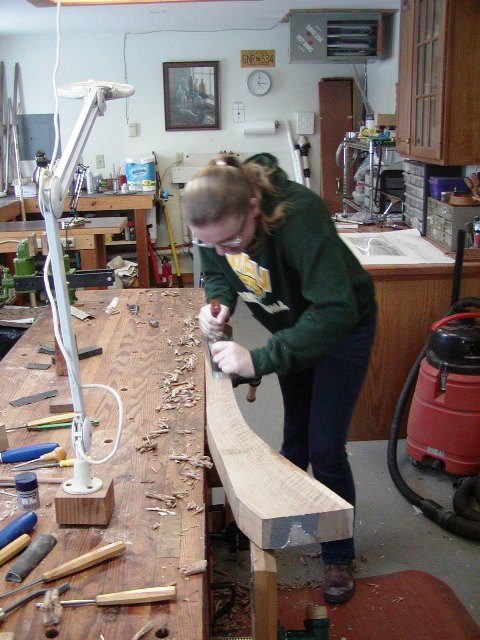
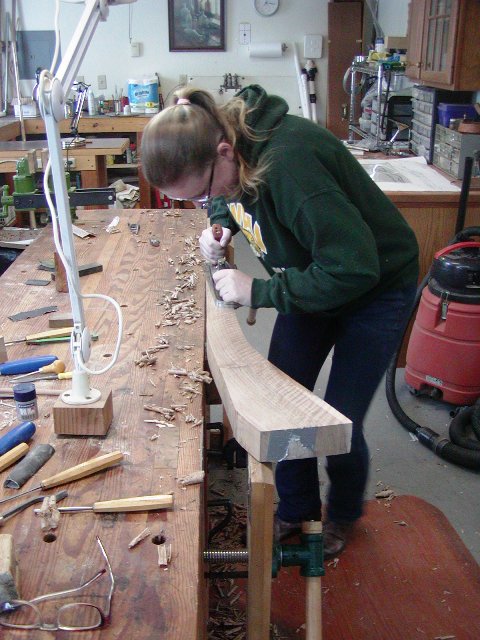
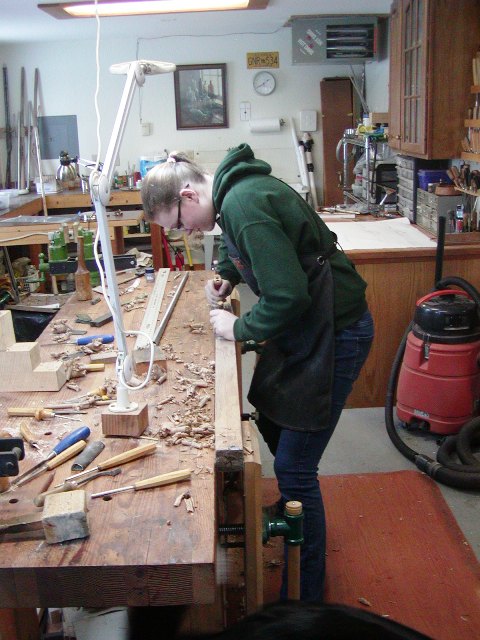
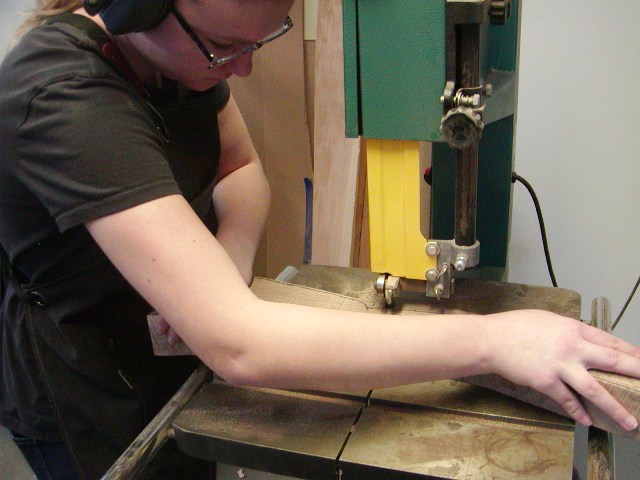
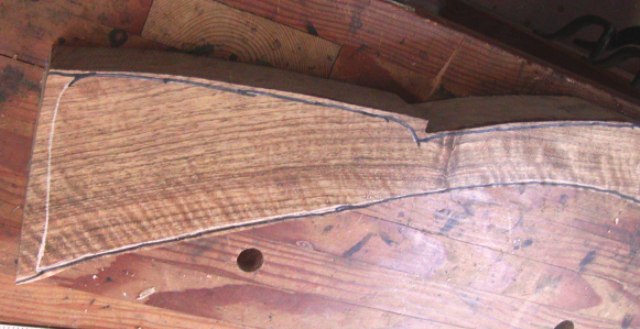
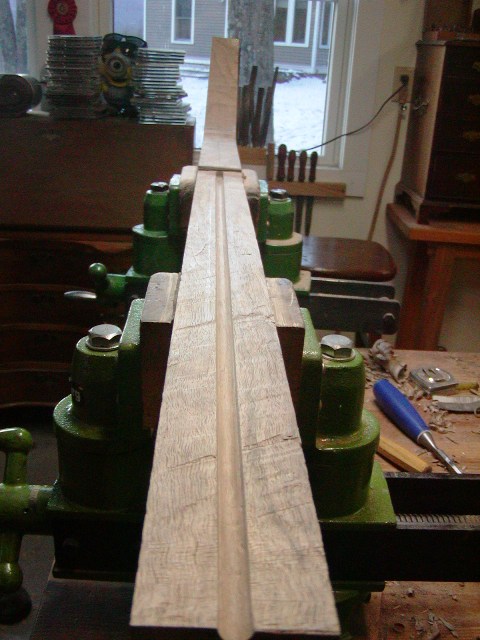
The photos demonstrate the value of a good wood working bench. The wooden leg vices hold the stock securely and the height is just right to be able to get your weight over the work so the work of planing is transferred to your upper body and legs, and not your arms. A sharp plane and the right bench make this a physically active but pleasant task even with dense wood like English walnut. Next we trimmed out the stock to our outline. To transfer the outline to the wood, I trace the drawing on clear transparency sheet using a Magic Marker Sharpie, then place it on the stock blank. The clear sheet allows us to see the wood grain relative to the outline of the gun. We adjust accordingly. Then we tape the transparency sheet to the stock and slip graphite paper underneath. We then trace the lines and the graphite paper copies them to the wood. We then darken those lines with a Sharpie and cut out the stock on the bandsaw.
Here is the result showing perfect grain flow in the stock and some really nice figure.
Next we mount a dado blade on my table saw that will cut the minimum width of the barrel and cut a groove in the stock blank about 2/3s the depth of the barrel.
Then we inlet the breech of the barrel until it sets down into the stock enough to accurately trace its outline.


Once we have a good outline of the barrel on the stock, we will fully inlet it with chisels, gouges, and barrel floats.
dave
Maria turned 18 today and her grandparents, mother, and brother came over to the shop to see her progress. It was a very nice time and everyone in her family is behind her. After her family left, Maria and I got busy preparing the stock for barrel inletting. First, it needed to be squared up so sides were even and perpendicular. So I got out my jack plane and taught Maria how to sharpen the blade. To sharpen, I use 3-M micro abrasive sheets placed on a flat polished granite tile from Home Depot. Final polish is achieved by stroking the tool on a leather strop coated with jeweler's rouge. My dad made me that strop almost 40 years ago. Anyway, Maria trued up the stock blank.
The photos demonstrate the value of a good wood working bench. The wooden leg vices hold the stock securely and the height is just right to be able to get your weight over the work so the work of planing is transferred to your upper body and legs, and not your arms. A sharp plane and the right bench make this a physically active but pleasant task even with dense wood like English walnut. Next we trimmed out the stock to our outline. To transfer the outline to the wood, I trace the drawing on clear transparency sheet using a Magic Marker Sharpie, then place it on the stock blank. The clear sheet allows us to see the wood grain relative to the outline of the gun. We adjust accordingly. Then we tape the transparency sheet to the stock and slip graphite paper underneath. We then trace the lines and the graphite paper copies them to the wood. We then darken those lines with a Sharpie and cut out the stock on the bandsaw.
Here is the result showing perfect grain flow in the stock and some really nice figure.
Next we mount a dado blade on my table saw that will cut the minimum width of the barrel and cut a groove in the stock blank about 2/3s the depth of the barrel.
Then we inlet the breech of the barrel until it sets down into the stock enough to accurately trace its outline.
Once we have a good outline of the barrel on the stock, we will fully inlet it with chisels, gouges, and barrel floats.
dave
It looks so quick and easy in the pictures but I know how hard these taks can be! Maria is lucky to have someone so talented to mentor her - you are a good role model for everyone Dave.
Gary
Gary

Quicksilver
-Gone Exploring-
Good things happening all around in this thread!!
- Joined
- Nov 26, 2005
- Messages
- 5,018
- Reaction score
- 9,969
Hi,
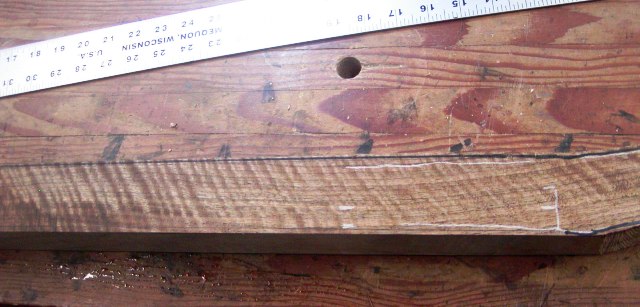
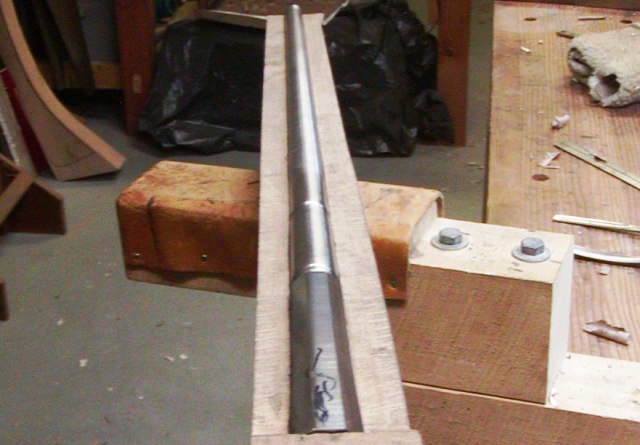
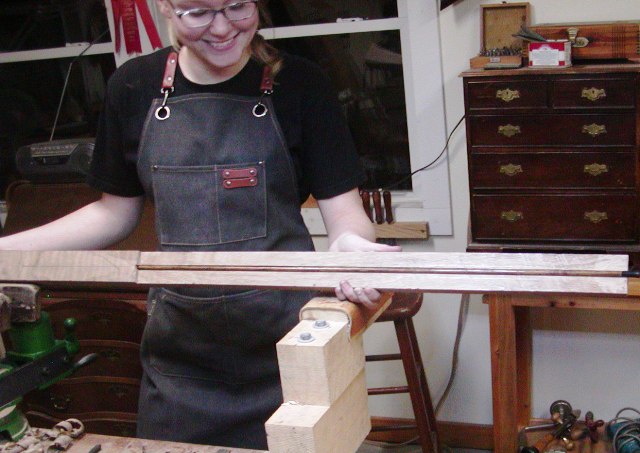
Maria wanted to work on New Year's Day so we got going at about 1:30 PM. This is where we started.
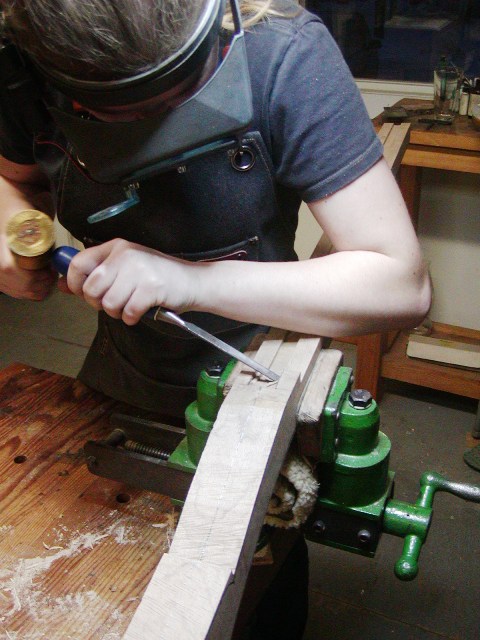
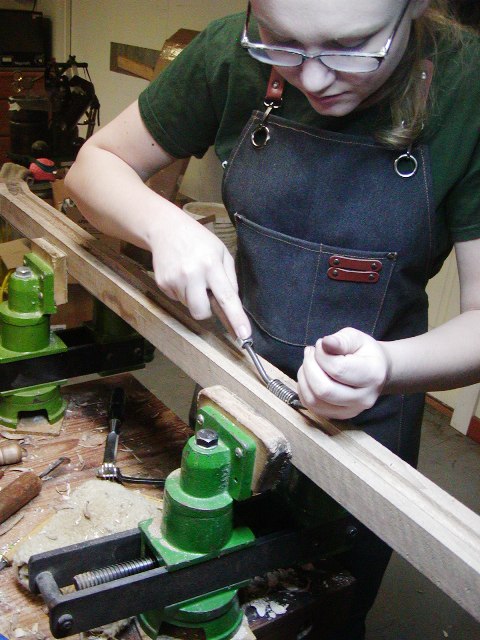
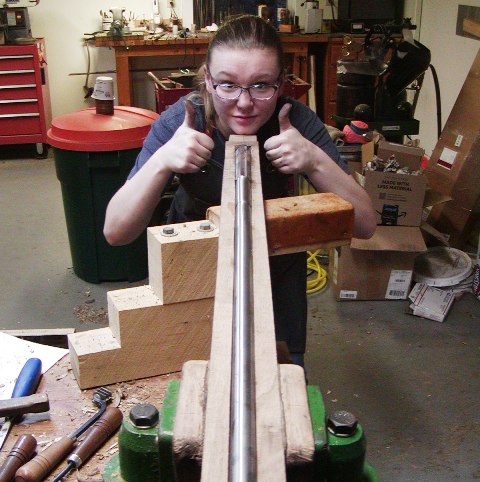
The octagonal breech section is the only place where serious tapering occurs so we focused ther to get the barrel down in the stock sufficient to trace and accurate outline. Maria checked depth of the bottom flat at various locations and then chiseled out enough wood to set the breech down in the stock quite a ways. She also liked the way the visor enlarged her eyes kind of the way Soupy Sales and Ernie Kovacs did it.
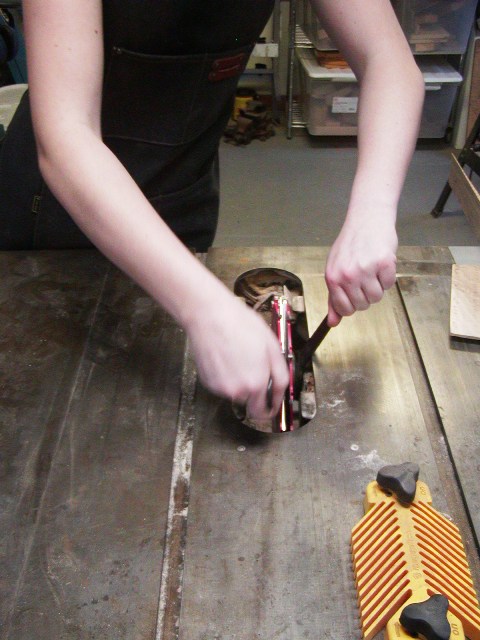
Here she used an octagonal barrel float to shape the breech area.
Next, she cut the bottom of the groove made with the dado cutter to the muzzle with a gouge to begin forming it round to the right depth. That also allowed the barrel to sit down in the stock for accurate tracing.
After tracing the barrel, she continued to curve the barrel channel for the round section with a gouge and smooth it with a round barrel float.
Then it came time to let inletting black guide her. I apply a thin coat of black with a tooth brush and then we set it in the stock. Maria cut and scraped the marks until the barrel began to set down to final fit.

A little tedious work and we ended the afternoon with this. Just a little more to do and the result is a nice precise barrel channel inlet with a few tiny gaps that will eventually disappear when finish is applied.

dave
Maria wanted to work on New Year's Day so we got going at about 1:30 PM. This is where we started.
The octagonal breech section is the only place where serious tapering occurs so we focused ther to get the barrel down in the stock sufficient to trace and accurate outline. Maria checked depth of the bottom flat at various locations and then chiseled out enough wood to set the breech down in the stock quite a ways. She also liked the way the visor enlarged her eyes kind of the way Soupy Sales and Ernie Kovacs did it.
Here she used an octagonal barrel float to shape the breech area.
Next, she cut the bottom of the groove made with the dado cutter to the muzzle with a gouge to begin forming it round to the right depth. That also allowed the barrel to sit down in the stock for accurate tracing.
After tracing the barrel, she continued to curve the barrel channel for the round section with a gouge and smooth it with a round barrel float.
Then it came time to let inletting black guide her. I apply a thin coat of black with a tooth brush and then we set it in the stock. Maria cut and scraped the marks until the barrel began to set down to final fit.
A little tedious work and we ended the afternoon with this. Just a little more to do and the result is a nice precise barrel channel inlet with a few tiny gaps that will eventually disappear when finish is applied.
dave
- Joined
- Nov 26, 2005
- Messages
- 5,018
- Reaction score
- 9,969
Hi,
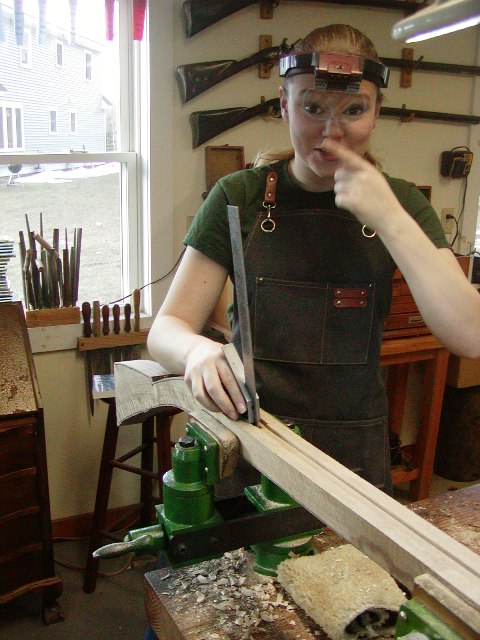
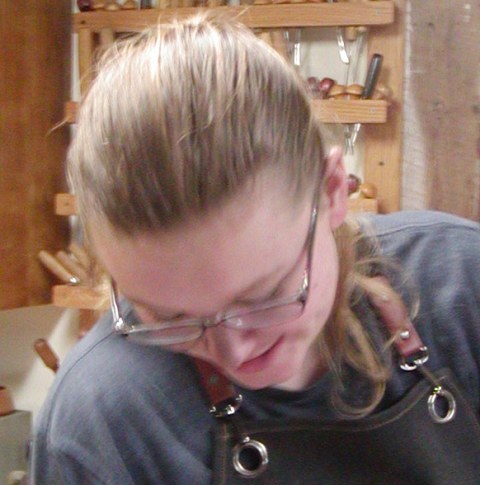
Yesterday, Maria finished inletting the barrel. It came out very well with a few minor spots where the channel could be tighter. The figure in the wood made the job a bit harder but Maria has learned to sharpen tools scary sharp. She is good at it.

In this image note the inletting black on her nose and face. That's what happens when your glasses slide down your nose and you have to push them back up.
Finally, we coated the barrel channel with a thin coat of AcraGlas tinted accordingly, to strengthen the channel. When we are done, her stock will be eggshell thin around the barrel and the AcraGlas really strengthens the wood. Hopefully, it will help preserve the gun during the rough and tumble of reenactments.
Yesterday, Maria finished inletting the barrel. It came out very well with a few minor spots where the channel could be tighter. The figure in the wood made the job a bit harder but Maria has learned to sharpen tools scary sharp. She is good at it.
In this image note the inletting black on her nose and face. That's what happens when your glasses slide down your nose and you have to push them back up.
Finally, we coated the barrel channel with a thin coat of AcraGlas tinted accordingly, to strengthen the channel. When we are done, her stock will be eggshell thin around the barrel and the AcraGlas really strengthens the wood. Hopefully, it will help preserve the gun during the rough and tumble of reenactments.
The personal director for a a local frack water tanker truck manufacturing factory ,(For the Marcellis Gas drilling industry) , said he would rather hire female welders , right out of the welding tech school , because a welder working on sensitive products , needs the right touch , which female welders possess , with no learning curve. $60 , 000 salary , right out of the gate.
I would think that threading that tab would be redundant when you peened and welded it. If you had her do it for the learning experience then maybe it's a good thing to do but not necessary.Hi, and thanks for the votes of confidence and support.
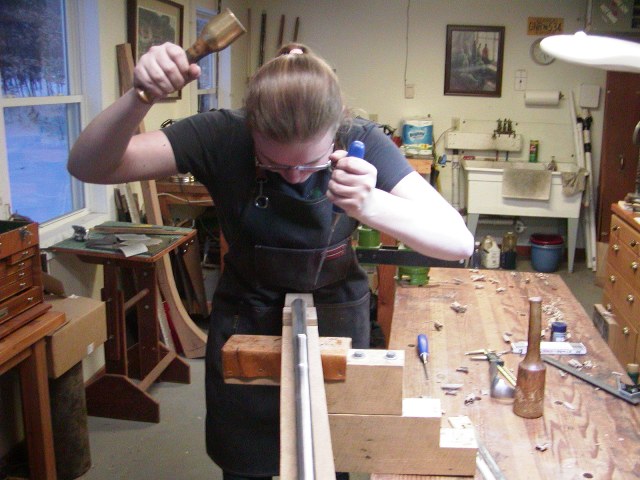
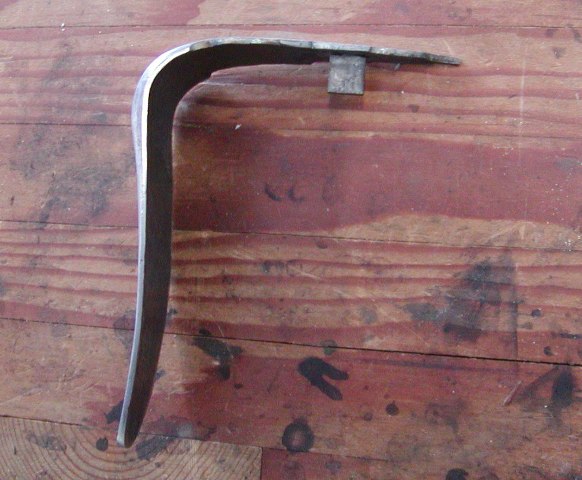
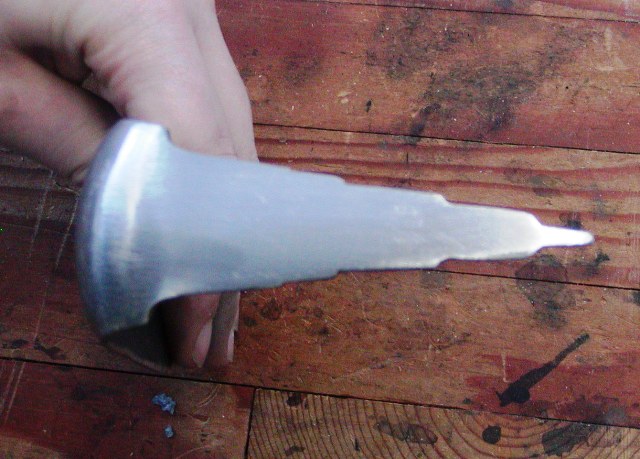
We are on a roll now because the barrel came from Rice. It is 20 gauge, 41" long, and it 1 1/32" wide at the breech. It weighs just over 2lbs and the barrel wall thickness at the muzzle is 1/16". I believe it is made from 4140 steel. So next week we start inletting the barrel and parts. Today, Maria finished her butt plate by attaching a lug under the return for a cross pin. She did this by cutting and filing a rectangular lug from 1/8" thick steel and filed one end into a round peg. She then cut 8-32 threads into the peg. Then the butt plate is drilled and tapped for an 8-32 thread. The top of that hole is countersunk slightly.
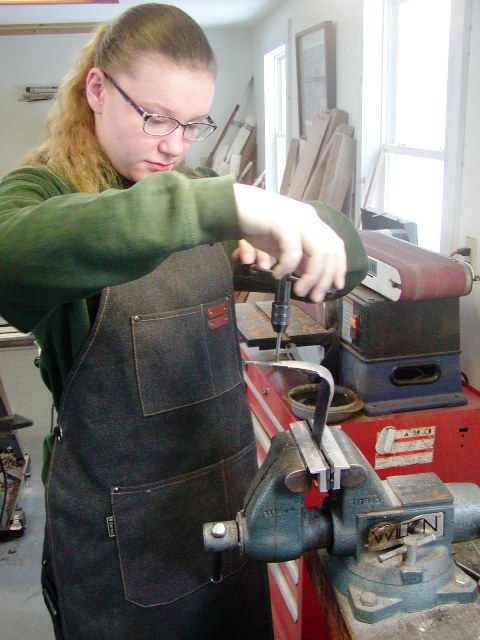
The lug is theaded into the butt plate and adjusted so it tightens down when lined up properly.
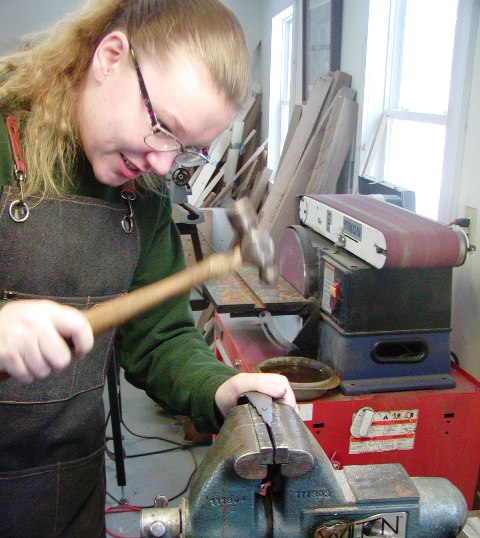
Next she peened the excess peg down into the counter sink. We love bashing stuff.
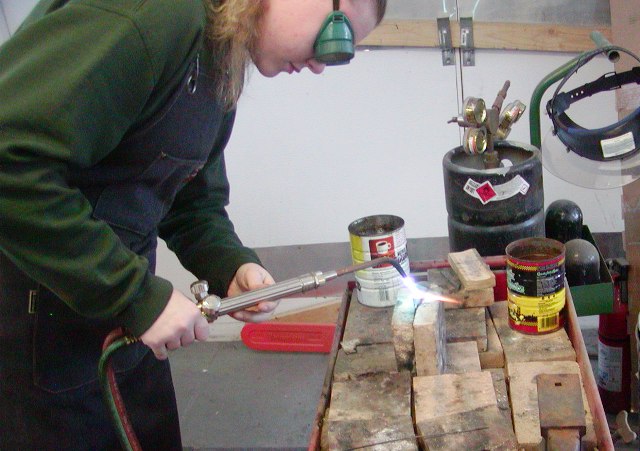
Then the peened mound of excess metal is heated and welded to the butt plate locking it all together. We love burning and melting stuff.
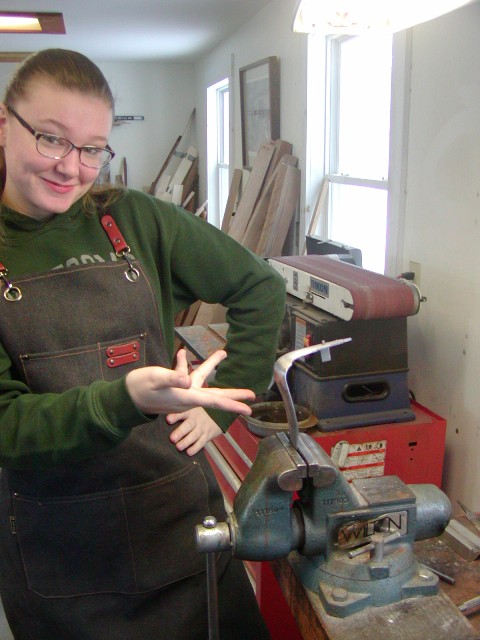
Grind, file, and sand the return smooth and clean and we are done.
dave
The Appalachian
Feral American
- Joined
- Jan 26, 2022
- Messages
- 860
- Reaction score
- 1,612
Redundant, poor choice of wording.
Overkill maybe sorta, but since when is overkill a horrible thing? Built to last forever is what I say.
Overkill maybe sorta, but since when is overkill a horrible thing? Built to last forever is what I say.
Brokennock
Cannon
I love people who would tell Dale Earnhardt, Sébastien Loeb, or Mario Andretti how to drive. 
- Joined
- Jun 17, 2019
- Messages
- 6,833
- Reaction score
- 7,751
There are still some fine young people existing today! Nice posting, good to know and read.
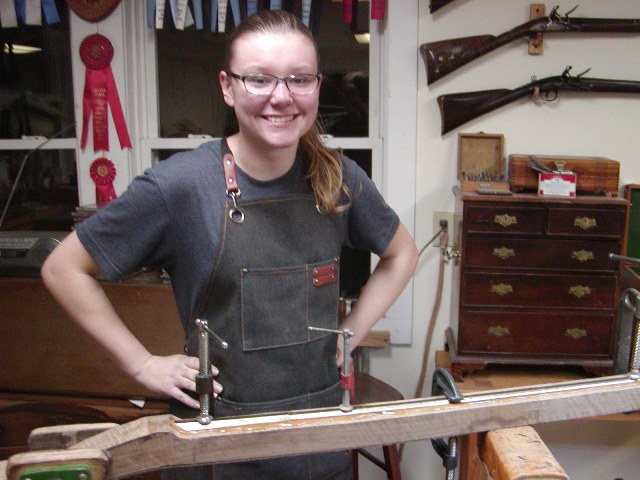
Looking very proud of her accomplishment and rightly so. Well done Maria and Dave!
- Joined
- Nov 26, 2005
- Messages
- 5,018
- Reaction score
- 9,969
Hi,I would think that threading that tab would be redundant when you peened and welded it. If you had her do it for the learning experience then maybe it's a good thing to do but not necessary.
By threading it, the lug stays tightly in the proper orientation making it incredibly easier to peen and then weld it without it moving. Not overkill, just smart workmanship.
dave
Teaching her to sharpen chisels scary sharp may be the single most valuable gift you have given her Dave, I have some chisels that need addressing, will pay bus fare.
All the best,
Robby
All the best,
Robby
Maybe yes - maybe no - - I still think it is redundant. As you peed you check the position of the tab and if correct you peed it more then weld it. Same results and also good workmanship.Hi,
By threading it, the lug stays tightly in the proper orientation making it incredibly easier to peen and then weld it without it moving. Not overkill, just smart workmanship.
dave
Brokennock
Cannon
Some folks would try to tell Michaelangelo how to paint 
- Joined
- Nov 26, 2005
- Messages
- 5,018
- Reaction score
- 9,969
Hi,
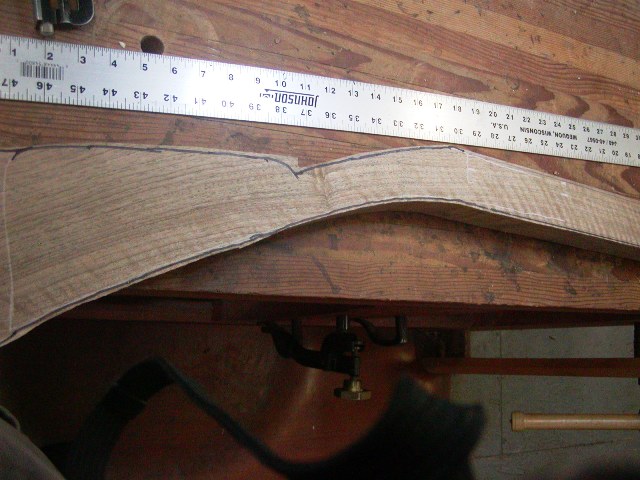
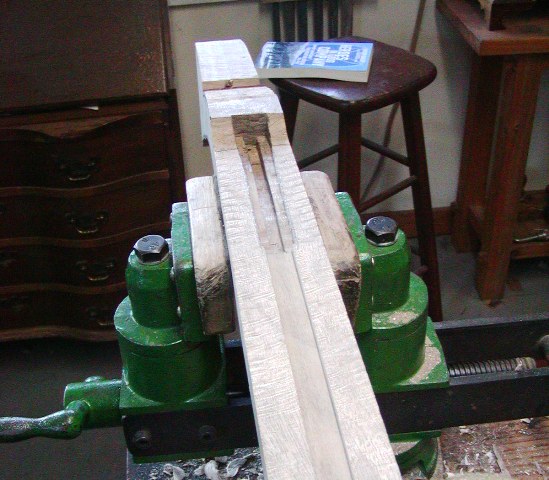
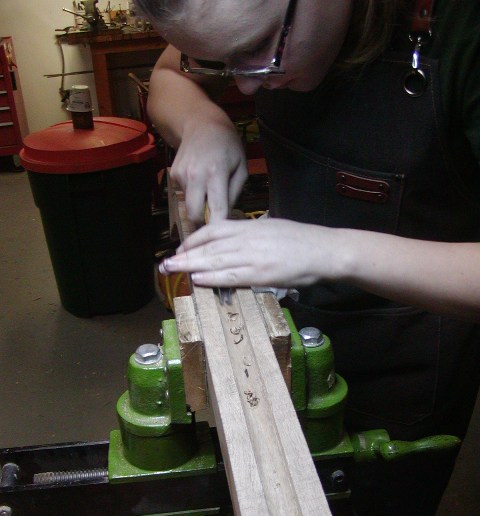
We had a good day making the ramrod groove and drilling the ramrod hole. The Rice Dolep barrel has a very steep taper over the first 2 inches from the breech. Very steep. Based on our plans, we wanted the web of wood between the barrel channel and ramrod to be about 1/8" under the barrel at the breech and 3/16" under the barrel at the muzzle. That means the ramrod is not parallel with the bore but closer to parallel with the bottom of the barrel. This provides for a very slim gun, particularly for the fore stock but also good clearance for the forward lock bolt. This is in keeping with the original English fowlers that I own. So we marked a straight line on the sides of the stock that was 1/8" below the barrel at the breech and 3/16" below at the muzzle. The ramrod groove and hole would be parallel to that line. To achieve that, Maria had to plane the bottom of the stock blank to a line that was exactly parallel with our line for the bottom of the barrel. That surface then sat down on my router table and guided the depth of the routed groove in the stock blank. The ramrod groove and hole is to be 5/16" wide but my round 5/16" bit is a mess so we used a flat bottomed 5/16" bit and then a gouge to round the bottom of the groove.
Maria smoothed the groove with a 5/16" rasp with a bent handle and coarse sandpaper wrapped around a round form.
The result was a nice clean groove. Then we used a 5/16" ramrod drill to make the hole.

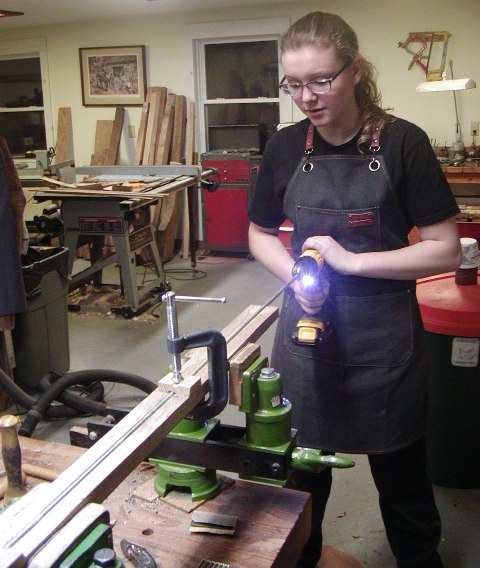
We started the hole but realized quickly we needed a course correction. The groove cut by gouges at the beginning of the step by the rear ramrod pipe had a bump pushing the drill down. We discovered this quickly and because that section of the hole would be replaced by the rear ramrod pipe, we simply cut it away, adjusted the groove at entry and started again. This illustrates measures that I routinely make to prevent problems. I start my ramrod holes where the front of the rear pipe will be. I then drill in 1/2" at a time until I am sure everything is lined up correctly. That gives me 2 increments of drilling that can be cut away and realigned if needed because they will be replaced by the rear pipe and provides a check that all is going to plan. After we realigned the groove, we started the hole again and it was on track. I had Maria start the hole using the drill and hand powered brace-and-bit.
That was to allow a slow start but also to give her experience with period tools. Then once the hole was well established, I had her power the drill with an electric drill so she learned how to use that tool for this purpose.
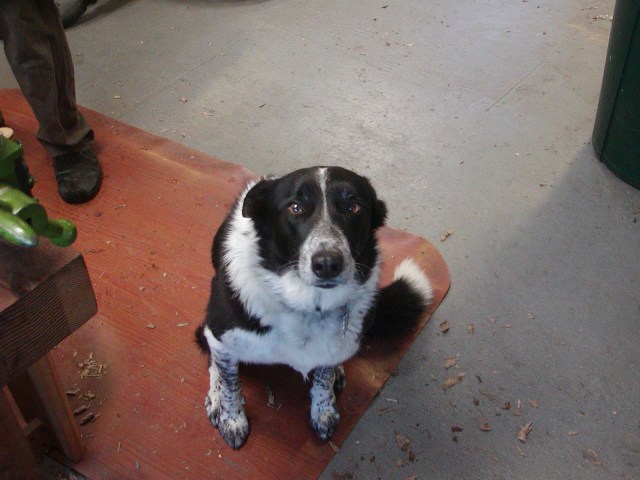
All this time we were assisted by my other helper.
In the end, the hole was drilled successfully but it ended up about 1/32"-1/16" lower in the stock at the breech than we planned likely because the figured walnut had some really tough parts to drill through, deflecting the drill downward. It was a great experience for Maria and the end result was just great.
Next up is trimming the stock and inletting the lock.
dave
We had a good day making the ramrod groove and drilling the ramrod hole. The Rice Dolep barrel has a very steep taper over the first 2 inches from the breech. Very steep. Based on our plans, we wanted the web of wood between the barrel channel and ramrod to be about 1/8" under the barrel at the breech and 3/16" under the barrel at the muzzle. That means the ramrod is not parallel with the bore but closer to parallel with the bottom of the barrel. This provides for a very slim gun, particularly for the fore stock but also good clearance for the forward lock bolt. This is in keeping with the original English fowlers that I own. So we marked a straight line on the sides of the stock that was 1/8" below the barrel at the breech and 3/16" below at the muzzle. The ramrod groove and hole would be parallel to that line. To achieve that, Maria had to plane the bottom of the stock blank to a line that was exactly parallel with our line for the bottom of the barrel. That surface then sat down on my router table and guided the depth of the routed groove in the stock blank. The ramrod groove and hole is to be 5/16" wide but my round 5/16" bit is a mess so we used a flat bottomed 5/16" bit and then a gouge to round the bottom of the groove.
Maria smoothed the groove with a 5/16" rasp with a bent handle and coarse sandpaper wrapped around a round form.
The result was a nice clean groove. Then we used a 5/16" ramrod drill to make the hole.
We started the hole but realized quickly we needed a course correction. The groove cut by gouges at the beginning of the step by the rear ramrod pipe had a bump pushing the drill down. We discovered this quickly and because that section of the hole would be replaced by the rear ramrod pipe, we simply cut it away, adjusted the groove at entry and started again. This illustrates measures that I routinely make to prevent problems. I start my ramrod holes where the front of the rear pipe will be. I then drill in 1/2" at a time until I am sure everything is lined up correctly. That gives me 2 increments of drilling that can be cut away and realigned if needed because they will be replaced by the rear pipe and provides a check that all is going to plan. After we realigned the groove, we started the hole again and it was on track. I had Maria start the hole using the drill and hand powered brace-and-bit.
That was to allow a slow start but also to give her experience with period tools. Then once the hole was well established, I had her power the drill with an electric drill so she learned how to use that tool for this purpose.
All this time we were assisted by my other helper.
In the end, the hole was drilled successfully but it ended up about 1/32"-1/16" lower in the stock at the breech than we planned likely because the figured walnut had some really tough parts to drill through, deflecting the drill downward. It was a great experience for Maria and the end result was just great.
Next up is trimming the stock and inletting the lock.
dave
Similar threads
- Replies
- 15
- Views
- 1K
