• This community needs YOUR help today. We rely 100% on Supporting Memberships to fund our efforts. With the ever increasing fees of everything, we need help. We need more Supporting Members, today. Please invest back into this community. I will ship a few decals too in addition to all the account perks you get.


    Sign up here: https://www.muzzleloadingforum.com/account/upgrades
  • Friends, our 2nd Amendment rights are always under attack and the NRA has been a constant for decades in helping fight that fight.

    We have partnered with the NRA to offer you a discount on membership and Muzzleloading Forum gets a small percentage too of each membership, so you are supporting both the NRA and us.

    Use this link to sign up please; https://membership.nra.org/recruiters/join/XR045103

First time flintlock build

Muzzleloading Forum

Help Support Muzzleloading Forum:

This site may earn a commission from merchant affiliate links, including eBay, Amazon, and others.
The wood is always left oversize to allow the builder to shape it for a good fit with the metal parts.

I'm not sure which chamber your wood chip broke off in but I'm sure it is not worth worrying about.

If the chip is in an area that will be seen, you can always glue it back in place with a good wood glue like Elmers.

A word about shaping the wood to match the metal:

One of the biggest errors a builder makes is to just file or sand the wood within 1/2 to 1 inch of the metal part.
This always leaves a steep taper from the rest of the stock shape and quite frankly, looks like hell.

When shaping the wood, run the smaller surface at least 2 inches away from the metal part before blending it into the existing wood.
Better yet, reduce the size of the entire area to mate with the metal part.

A fine gunstock will always be one big continuous blend of shape and size between its various features. In other words, it should not be possible to tell where one area of the surface is reshaped to match another area of the stock.

I know this is difficult to imagine but if you look at other finely made rifles you will notice it.
 
I would buy The Gunsmith of Grenville County, or Recreating the American Longrifle. Either of these are available from Track of the Wolf.

money well spent, IMHO.

good luck with your build!
 
A good reference and a good eye... also patience. Your going to need allot more than just sandpaper as the wood removal is minimal compared to using a good rasp or sureform. You seriously need to purchase a good reference before attempting to fix or start the build. I also wouldn't worry about trying to contact the maker, this again is were YOU learn to fix the manufacturer defects I mentioned earlier. It's not a pre built rifle your going to buy at the local gun store, it's a kit and just that, parts that require your work to finish. There is also going to be wood to metal fit issues that you just can't get perfect... Unfortunately that's one of the downsides to a pre-carved stock and the cheap wood traditions has chosen to use. However, all you can do is give it your best, ask questions, read that book and have a blast! Good luck! :hatsoff:
 
Well, truth be told, I could just assemble this and it would work, but it wouldn't look so nice.

I started dremeling the wood as I started to hand sand paper....would've taken too long. On the downside of the dremel, it did touch the brass and so there are marks on the brass. Im going to youtube some videos and check out my library to see if they have those books you guys mentioned.

For the future, I'm going to buy a higher end one someone has assembled. I know myself enough, to know that I bounce around from project to project too much to know that I'd stay with an 80 hour project. Beautiful guns. Definitely not worth my touch.
 
Haha, I figured that would be blasphemous in this world. Hey, I'm relatively young and do not want to spend all day sanding this down via hand.

I want it, and I want it now!
 
I watched a video. My biggest problem is not having a table vice. I have no good way to sand my stock with no table vice. might be time to invest in one.
 
do not want to spend all day sanding this down via hand.

I want it, and I want it now!

And you want to actually build a more complex kit? Not trying to sound rude in any way, but I'm going to be blunt and say that kind of thinking will never help you truly understand and enjoy what goes into this type of hobby or produce a quality rifle. From first hand experience, the art and craftsmanship of building a rifle involves patience, something I'm not good at! However, to yield quality results and respect for the craft it's learned like everything else. By no means do I call myself a "true builder" or experienced for that matter... Yet, I do feel with that rushing nature you'll find in the long run it would be very beneficial to slow down, and have patience for your build! It'll save you many headaches and frustrated nights. Again... get yourself a book and read it! :thumbsup:
 
You don't need a vise to hold your stock when your reshaping it. For years, I just used my lap and it worked just fine.

There is also nothing really wrong with a Dremel tool except, as you found, it can get you into trouble faster than you can blink.
This will cause what could have been a simple job to become more difficult and time consuming.

As for sanding being slow, yes it is but if removing wood is the task just use a very course paper like 60, 70 or 80 grit and sand across the grain of the wood.

Sanding across the grain cuts the wood fibers and removes the wood rather fast. It also leaves large scratches in the wood.

The idea here is to remove wood so don't worry about the scratches until you have the surface just about where you want it.

Then, change the direction of your sanding so it is running parallel with the grain of the wood.
Sanding parallel with the grain is much slower but it will leave the surface smooth and scratch free.

When the scratches are gone, switch to a finer grain of sandpaper and continue to sand parallel with the grain of the wood.

When 120 grit paper leaves a unform looking surface, switch to 180 or 220 grit paper.

That is as fine as you will ever need to finish sand a piece of wood.
Using grits finer than 220 is a total waste of time so don't bother with it.

Also, don't try to save a few bucks by buying the cheap flint or aluminum oxide sandpaper.
Spend a few more cents per sheet and buy the reddish color "Garnet" paper.
It cuts faster and lasts longer.

As for wanting it "Right Now" just remember the words of an old engineer I worked with.

He had a sign hanging above his desk. It said:

"YOU CAN HAVE IT RIGHT
OR YOU CAN HAVE IT NOW
BUT YOU CAN'T HAVE IT RIGHT NOW"

:)
 
Hehe. I was just kidding about the i want it now part. I was referring to that commercial.

Anyways ive got a bit more sanding to do, the only problem now is fitting the trigger. Looking at the ditections but its not exactly clear :/
 
I agree 101% about picking up a copy of 'The Gunsmith of Grenville County", it's an excellent book and every time I open it I find something new and interesting.
The trouble here in the UK is obtaining the parts to make your own long rifle, particularly the stock. Barrels are also out of the question unless you have our equivalent of an FFL. Some years ago I bought a half dozen original octagonal barrels in auction, no idea where they were made or 'how'! Mostly rubbish but I have salvaged one decent rifle barrel (approx 35" cleaned up) and one that was cut up for 3 10" pistol barrels. I made a pistol that I was quite pleased with but never fired it. I traded it with a good friend for a "Kentucky Rifle Kit' from CVA. Yes, the one with the 2 piece stock and bridle-less lock! It's still in the box and will probably stay that way, but the barrel? Now that's a different question...
 
Hmm. So I'm almost to the point of being satisfied with the fit of the wood. I did a dry fit last night, I got most everything together. The only thing I can't figure out are the parts that go into the gun.

As in, I have the lock inlaid, but the pieces which go inside (2 washers and screws) I have no idea how they go in. I 've been youtubing and looking at the instruction manual, but I haven't found anything on how to place those pieces into the gun.
 
Washers and screws,,,,? The only "washers" I can think of are on the left hand side of the rifle and the screws that hold the lock plate on... can you post a picture?
 
With the rifle laying on its right side and the lock installed place a washer on the lock screw.

Insert the screw into the hole in the left hand flat and screw it into the lock.

Be careful starting the screw into the lock.
The hole(s) for the lock screws don't always line up exactly with the threaded hole(s) in the lock and you don't want to "cross-thread" the screw and then force it to screw in. That could damage the threads in the lockplate.

If the screw(s) won't screw in easily, use a drill bit to enlarge the holes in the wood a little.

Fancier guns often have a plate instead of washers.

 
Being that everyone knows how I am totally against third world production guns, the kits are not any better.

Buy the best parts you can. Chamber's and Muzzle loader supply both have real good American made parts. The parts I bought took me 5 months to build. I had never built one before, and shall never build one again.
Is it perfect, heck no, is it pretty, not really.
Was it made by me, and has it worked perfectly for a decade now. You betcha.

I did not use one modern tool, nothing that plugs in (cept the light in the rust box). All by hand.
Went to swap meets and bought years old hand tools that still work like new.
 
Is there anyway to actually upload images? Or do i need to use a file hosting website like flickr? Or photobucket?
Id much rather upload but im not seeing that option.

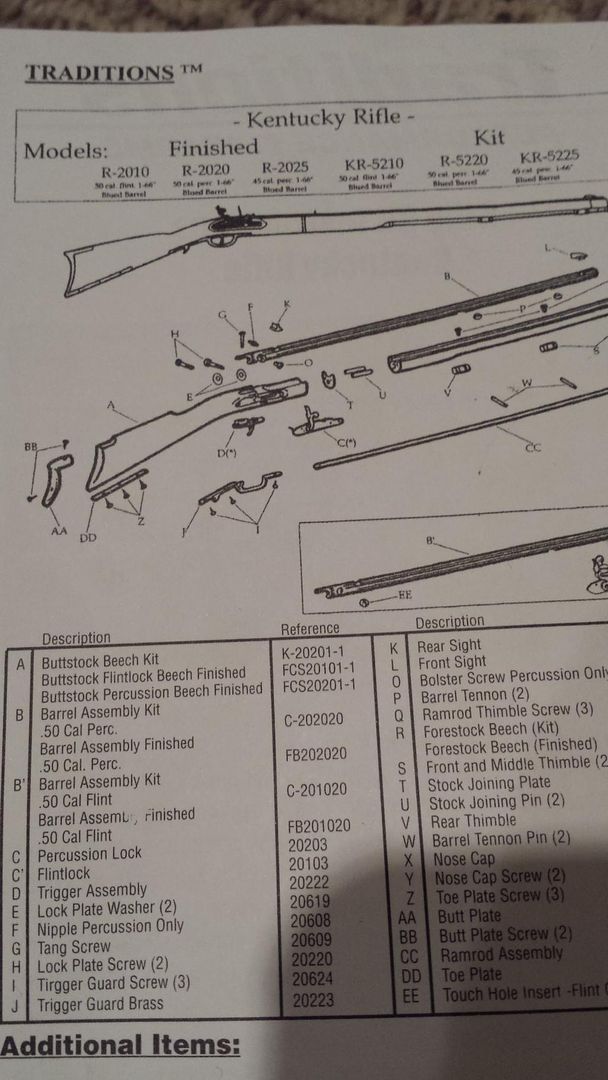
Its called lockplate washer and lockplate screw. Items H and E. Id upload the schematics but i have no idea how to do that either. Id tell you guys to google "traditions kentucky rifle" then go to specifications on that website, but thats aaking for way too much as you all have been way more than helpful and kind.

And to answer why i didnt go with top of the line. I pick up and drop projects often. I didnt want to invest $800 and then let it sit. Also perfection and art are NOT my forte. I wanted to screw up on cheap stuff before i jumped to the expensive stuff. This project hasnt taken me too long nor has it been too frustrating, but it has provided me insight to my shortcomings and wants. With the artistry i want out of this, i am definitely going to buy them...right after i assemble the traditions pirate flintlocks! That should be easier
 
Did you read the post I made up above?

Your lockplate washer and screw are meant to hold the lock into its mortise.

They do this by passing thru the stock from the side opposite the lock with the threaded end screwing into the lockplate on the far side.
 
Claycow said:
Is there anyway to actually upload images? Or do i need to use a file hosting website like flickr? Or photobucket?
Id much rather upload but im not seeing that option.

"Its called lockplate washer and lockplate screw. Items H and E. Id upload the schematics but i have no idea how to do that either. Id tell you guys to google "traditions kentucky rifle" then go to specifications on that website, but thats aaking for way too much as you all have been way more than helpful and kind."

Yes sir, you have to have something like photobucket. What you are looking at are the lock screws and the washers for those screws. The slide in the left side of the rifle across from the lock plate. As Zonie wrote, becareful pushing them thru the wholes and starting them into the lock plate, you can easily cross thread them.
Ypu should have two holes drilled thru the lock area and side plate to slide the screws thru after running the washers over them. Coned side out towards the left.

And to answer why i didnt go with top of the line. I pick up and drop projects often. I didnt want to invest $800 and then let it sit. Also perfection and art are NOT my forte. I wanted to screw up on cheap stuff before i jumped to the expensive stuff. This project hasnt taken me too long nor has it been too frustrating, but it has provided me insight to my shortcomings and wants. With the artistry i want out of this, i am definitely going to buy them...right after i assemble the traditions pirate flintlocks! That should be easier

You build what you want, you're the one doing the project, you paid your money for it, have fun with it, take your time and build it right. :thumbsup:

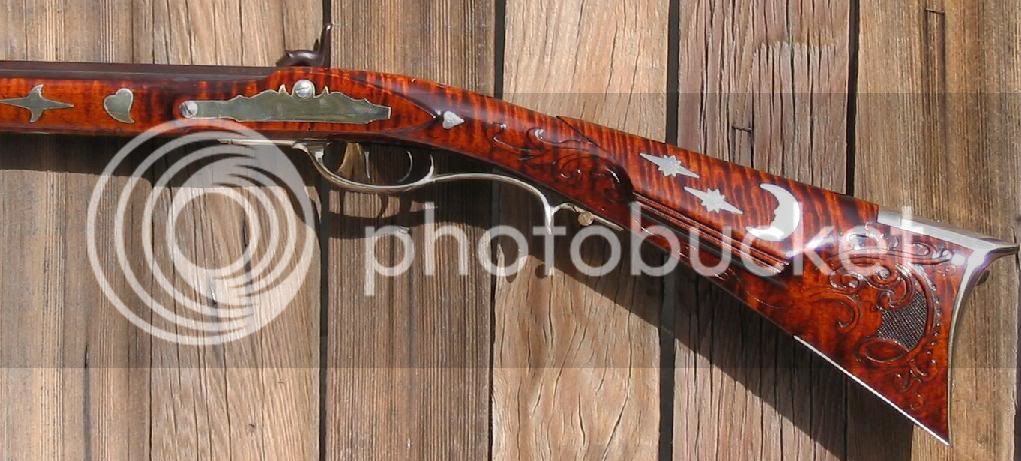
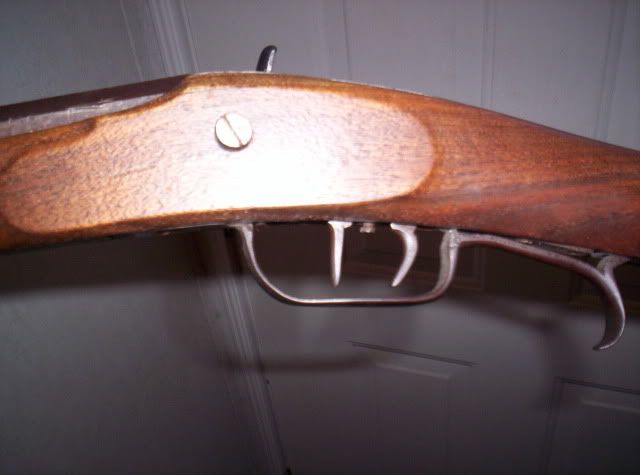
This rifle only has one and no washer, but this is how they work.
easier to see maybeso than Zonies because of the brass?
 
Thanks for the pm to the guy who sent it.

Ok so you see the golden washers. There are also 2 screws, not totally sure those are the correct ones but i think they are. Anyone have ideas? Below that is the schematics, i believe those two pieces are E and H


20150201_232731_zpsynigyuw3.jpg
[/URL][/img]

 
Back
Top