• This community needs YOUR help today. We rely 100% on Supporting Memberships to fund our efforts. With the ever increasing fees of everything, we need help. We need more Supporting Members, today. Please invest back into this community. I will ship a few decals too in addition to all the account perks you get.


    Sign up here: https://www.muzzleloadingforum.com/account/upgrades
  • Friends, our 2nd Amendment rights are always under attack and the NRA has been a constant for decades in helping fight that fight.

    We have partnered with the NRA to offer you a discount on membership and Muzzleloading Forum gets a small percentage too of each membership, so you are supporting both the NRA and us.

    Use this link to sign up please; https://membership.nra.org/recruiters/join/XR045103

Fowler build pics

Muzzleloading Forum

Help Support Muzzleloading Forum:

This site may earn a commission from merchant affiliate links, including eBay, Amazon, and others.
if you don't own a plane, I'd start with the basics, i.e. a standard block plane - doesn't need to be low angle.
There are hundreds of 'em on eBay - choose a good name (Stanley, Lie Nielsen) and be sure the iron hasn't been abused and remains close to square, if you go used.
And keep it sharp. Same care as your chisels.
 
What size is a good overall one to get that can be used most of the time though? Or should I go with a spokeshave?
 
When working from precarves there just isn't that much wood to remove to have to worry about planes most of the time.

There is nothing you can do with a plane that you can't do with other tools but they can be a time saver and save wear on your rasps, files and other tools.

As MM indicated you will probably get the most mileage out of a 6 or 7" block plane (as opposed to a bench plane). I, however, prefer a good low angle as I find it reduces tear out with problem grains when milling down the fore end top and sides.

A convex radius spokeshave can be handy for hollowing out the cheekpiece. A concave for convex areas of the stock. Again grain can be a problem and there are other tools that work too.

There is a learning curve with planes and spokeshaves and you will have to find what works for you. Some folks avoid them for the risk of tear out. As with anything, they take some practice to tune and use effectively.

One of the best sources for these tools is Lee Valley: http://www.leevalley.com/US/Wood/page.aspx?cat=1&p=41182

Enjoy, J.D.
 
Last edited by a moderator:
perrybucsdad said:
What size is a good overall one to get that can be used most of the time though? Or should I go with a spokeshave?

My personal favorite is the standard block plane. However, I use it more for basic woodworking than I have in gun building. But, I haven't carved out a stock yet.

Also, if you can find a decent plane with a not-so-great iron, Lee Valley sells good quality replacement irons. Or, you can buy a Hock blade and make yourself one of whatever size and shape you like. Or, just buy some O1 tool steel and make on or more up.

Anyway... Back to the fowler.
 
Carried the wrist line into the buttstock on the lock side.
To explain my process a little more:
First I brought the wrist part itself down to grade, and tapered it out into the butt.
I did this first because it seems easier to just follow the existing wrist line down and out thru the butt.
I can keep things in line and proportioned using the existing fore-wrist - no guessing on where things need to end up.
Once I have that roughed in, (my theory anyway!) is I can attack the comb pretty aggressively, because now I know where all four sides are going to end up.
No guessing where the endpoints should be and overdoing the wood removal.
There's probably a better way to do all this... but this was my logic so far..
So I chiseled in the wrist line, then gouged out the comb pretty fast.

IMG_2024_zpsa02f882f.jpg


IMG_2026_zps91f2559c.jpg


IMG_2027_zps881d4a2e.jpg


IMG_2028_zps809a4be9.jpg


Once I got the comb thickness pared down to the junction with the wrist, it's gets a little more demanding with the chisel work.
I cut the joint line deeper a little at a time, with a small vee-gouge and a file and then start lowering the comb below (or above, actually) the wrist baluster.
The comb-baluster joint line looks messy while doing this, but I clean that up later.
This was kind of fussy back-and-forth work - comb - baluster - comb, to work the joint lines and proportions where I wanted them.

IMG_2029_zpsd643193e.jpg


Some sanding and scraping to remove the chisel flats, and this side look sorta like the other side now.
I'm leaving that mid-line crest (the shadow line down the wrist) in for awhile, as a landmark.
I think most of it will get rounded off in the final shaping.

I would say that what I have now is roughly equivalent to a pre-carve, from the lock panel back.
Which means the exacting wood removal to final shape and character is still in front of me.

IMG_2031_zpsadb39f0c.jpg


Roughing in the lower forearm next.
I've been waiting almost 4 months for my entry pipe from TOW.
rant.gif

/mike
 
Nicely done Mike...and well documented. I try to leave that "line" down the wrist as long as possible as a guide too. Same with other points of definition. I feel it really helps my "eye".

Most guys I've seen define the comb by drawing in their top lines and then working "down" with the gouge to the defined wrist during rough in.

Working "along" the lines to the wrist the way your doing it makes sence. Again, just one of those examples of how many different ways there are to do the same thing with the same result.

Keep up the good work and Enjoy, J.D.
 
Made a little progress in the last week, but not much.
Life, wife, and kids took precedence.
Wanted to rough out the lower forearm before inletting entry pipe, so as not to have to go through too much extra wood.
Turns out I barely had enough wood as it was.
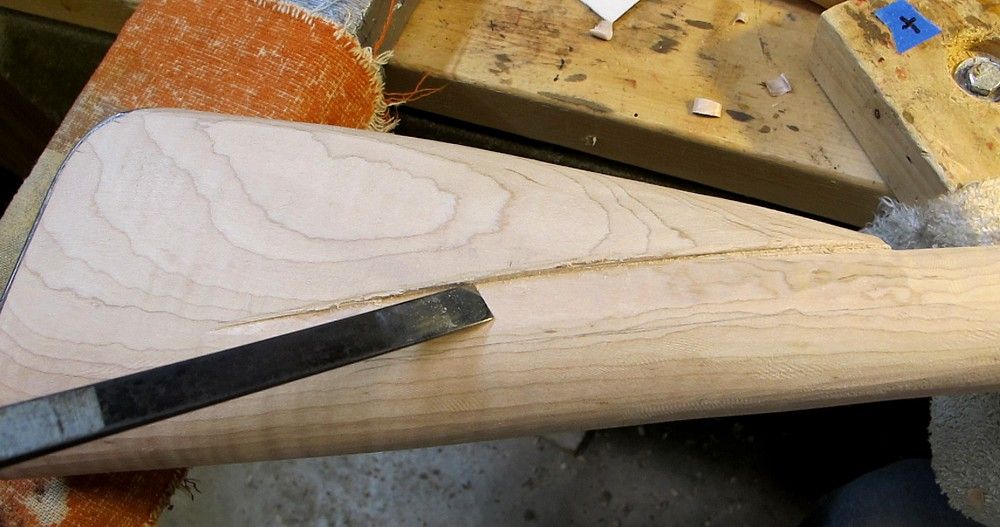
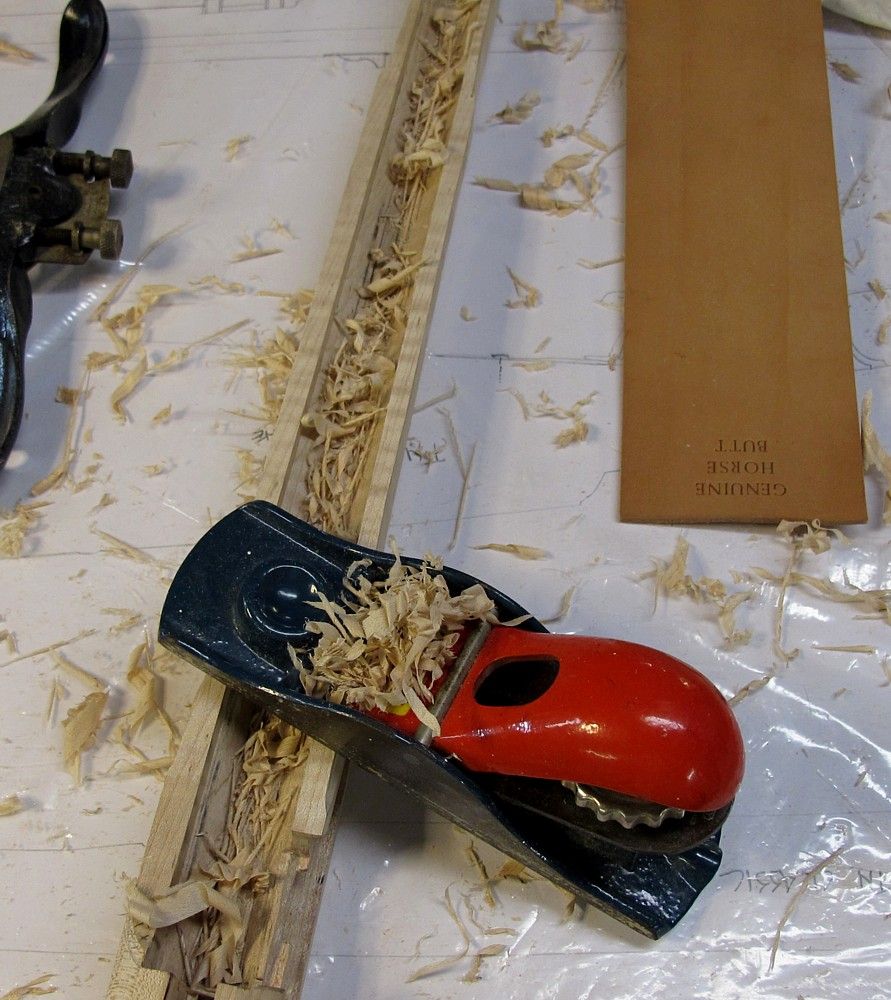
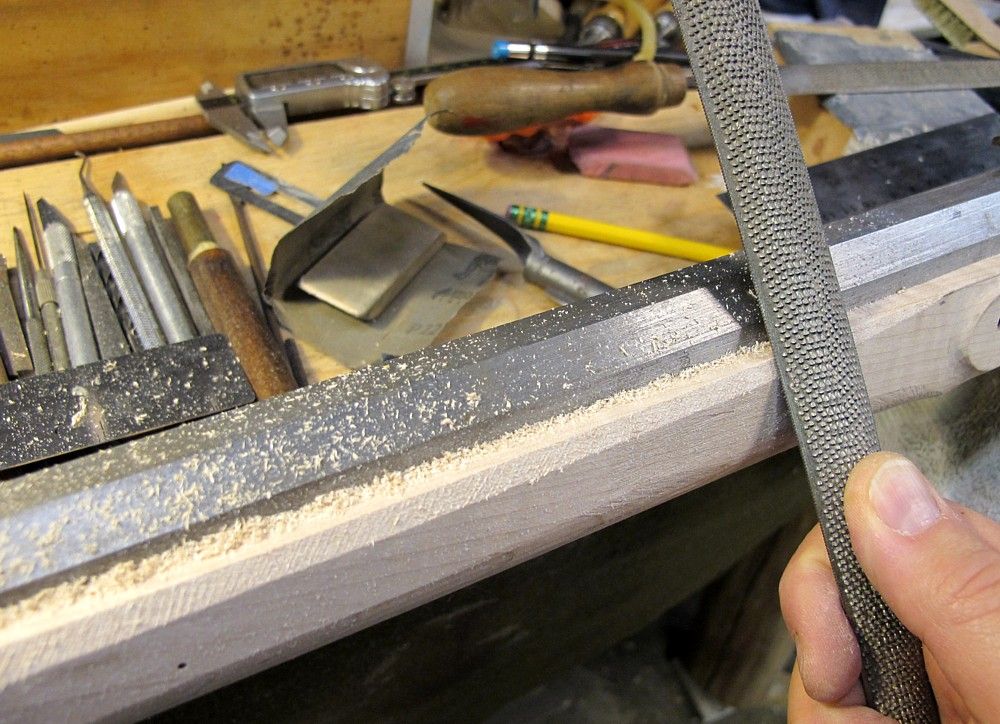
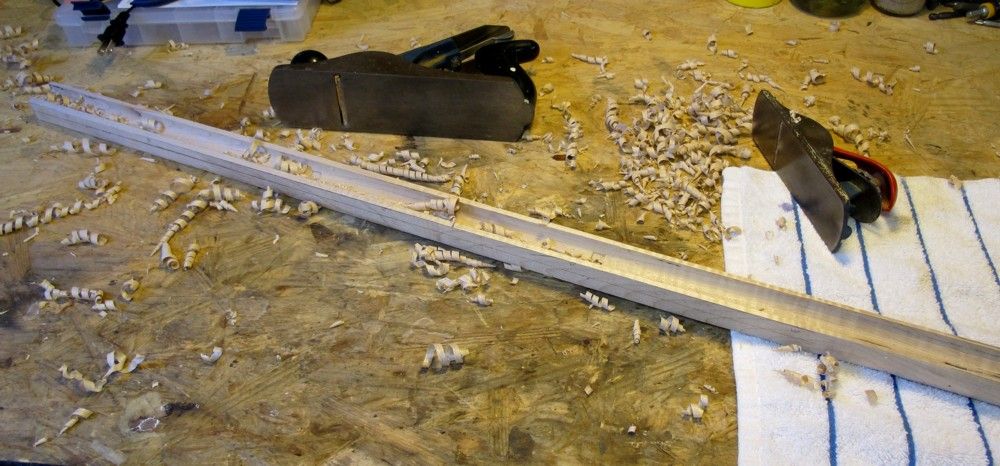
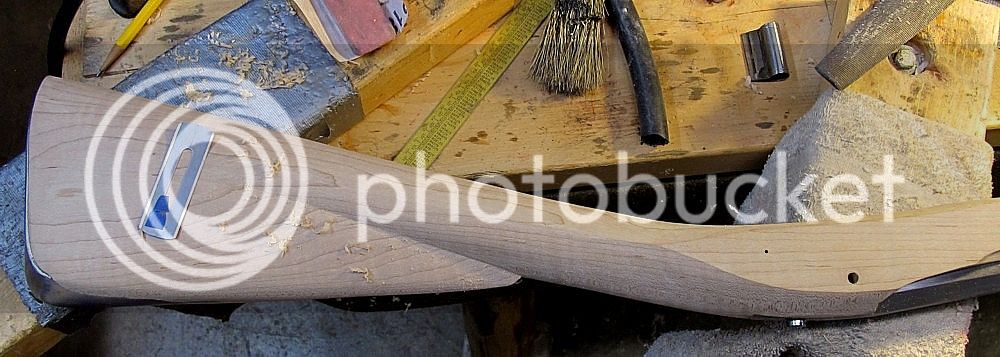
On the forearm, I took the top line down to near final level (half the barrel exposed) with block plane.
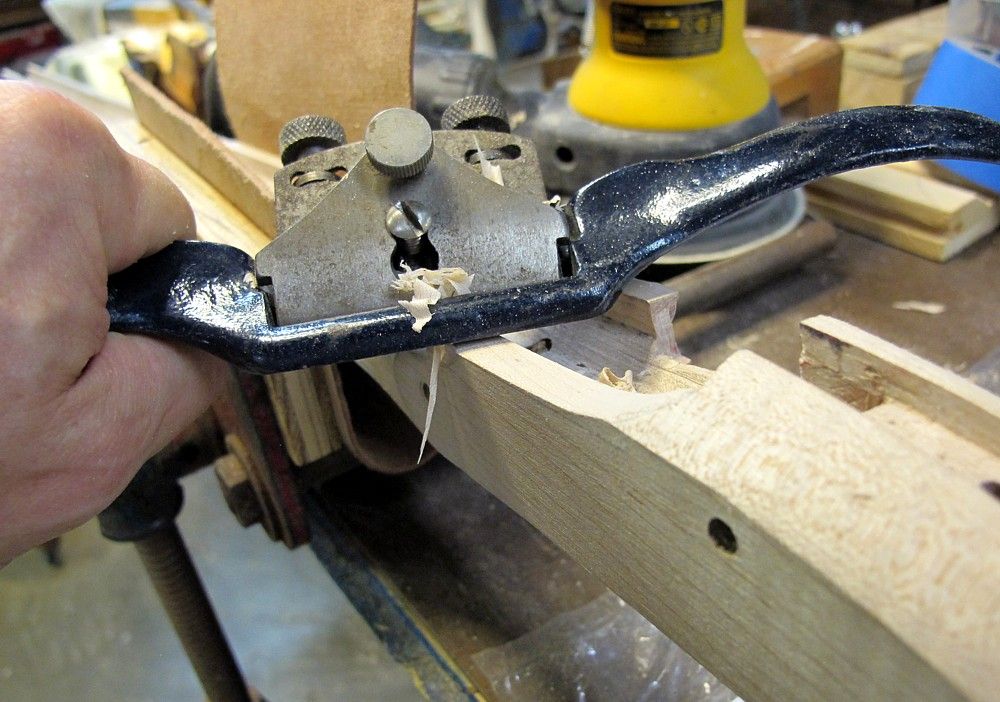
Near the breech, where it curves up, I used spokeshave and scraper.
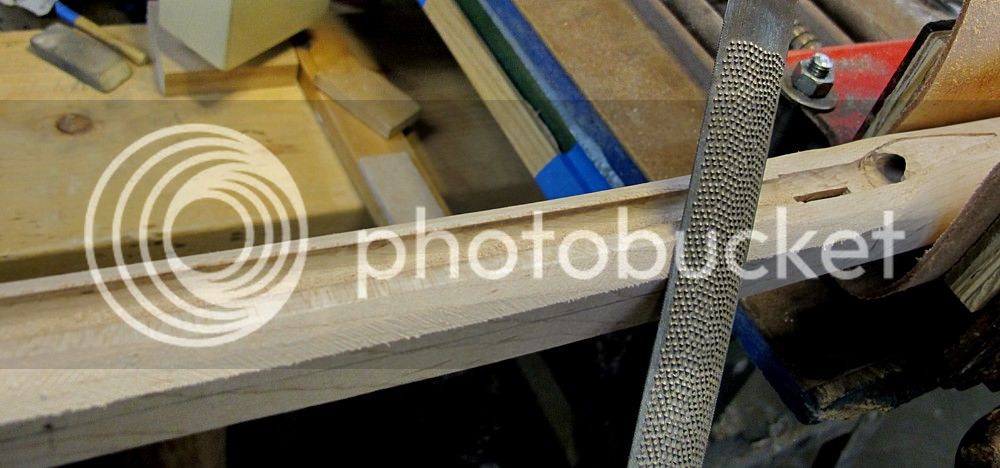
Then worked down the forearm from the sides in, using the faceted approach described in Mike Brooks’ tutorial.

(Note: Santa brought me a horse butt strop! Everybody oughta have one of those. I have yet to give it a work out, but i will soon.)

IMG_2033_zps2084b687.jpg


IMG_2035_zpsf3195d0a.jpg


IMG_2036_zps6b8bdb5b.jpg


IMG_2038_zps4ad2568b.jpg


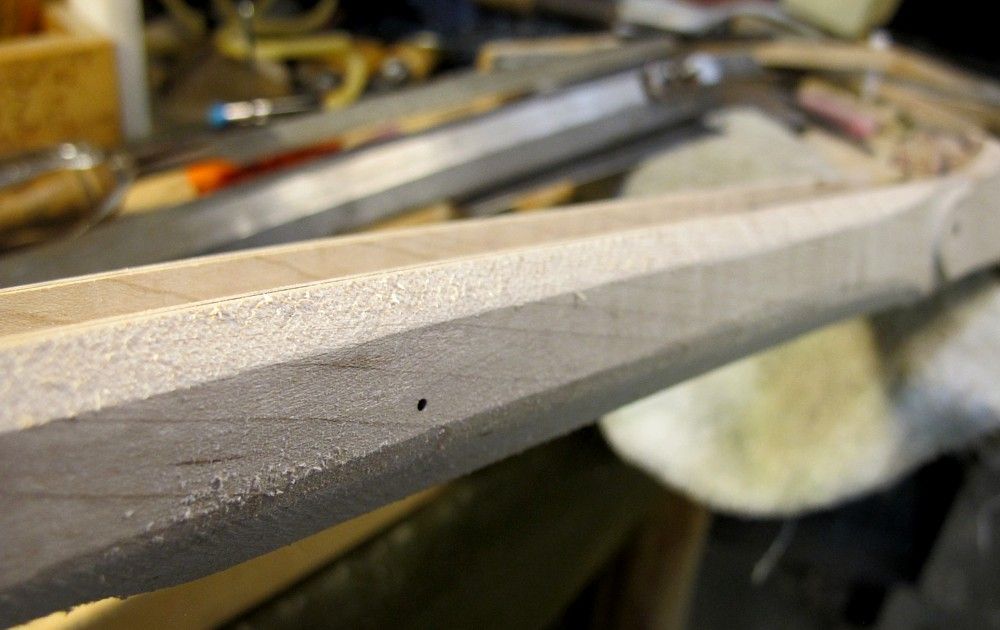
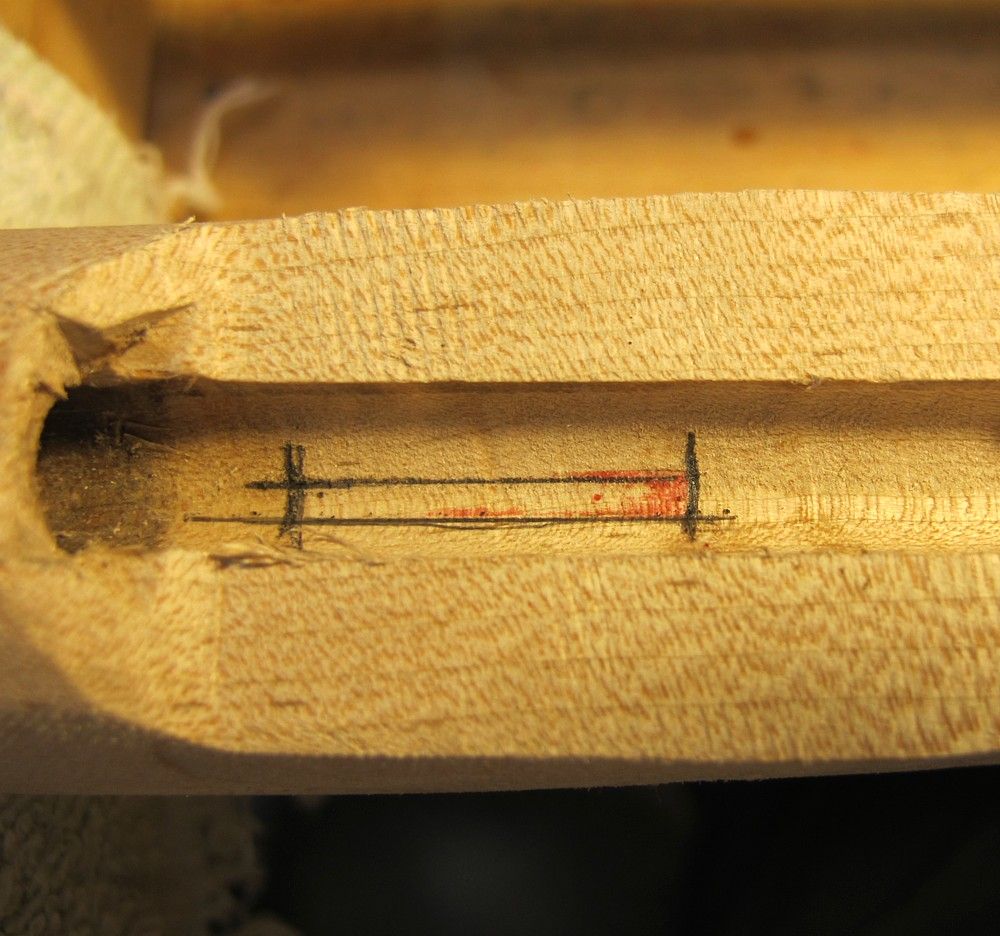
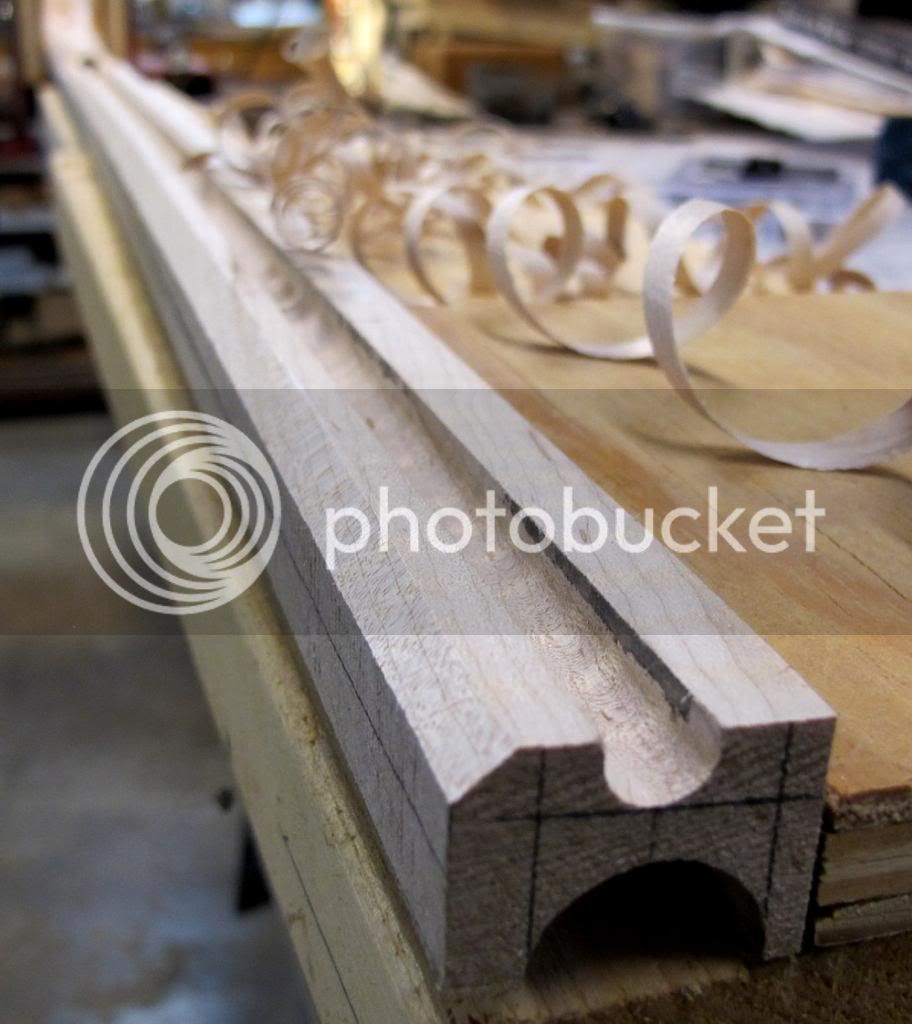
To make a lay-out line for how much wood to leave on the top of the lower forearm I just laid a piece of 1/16” music wire along the barrel and traced along side it.

IMG_2037_zps4f906ac1.jpg


Then on to the entry pipe. Despite my early whining, turns out I DID have the entry pipe from TOW, it’s the forward pipes I've been waiting on.
(And I appreciate the gracious offers I received from some forum members here help me out of that predicament ”“ thanks fellas.)
Simple forward pipes I can make, and so I did.
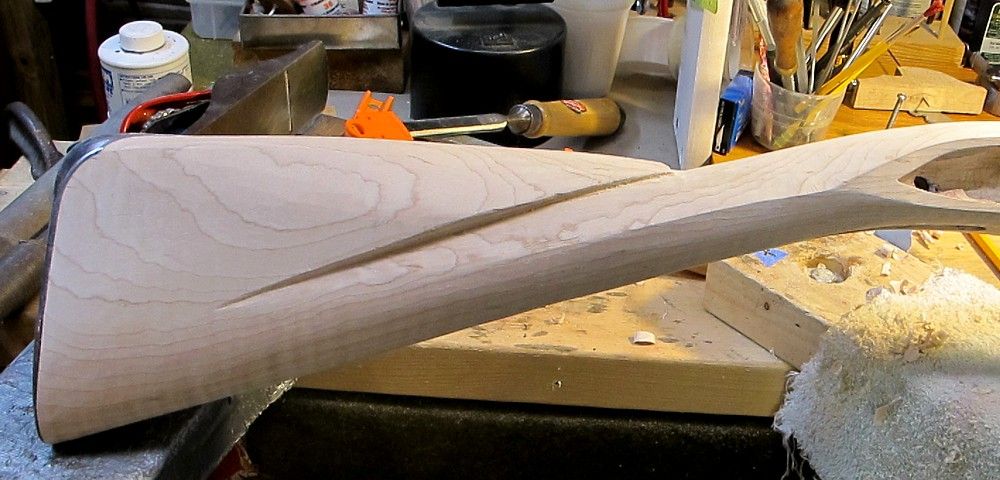
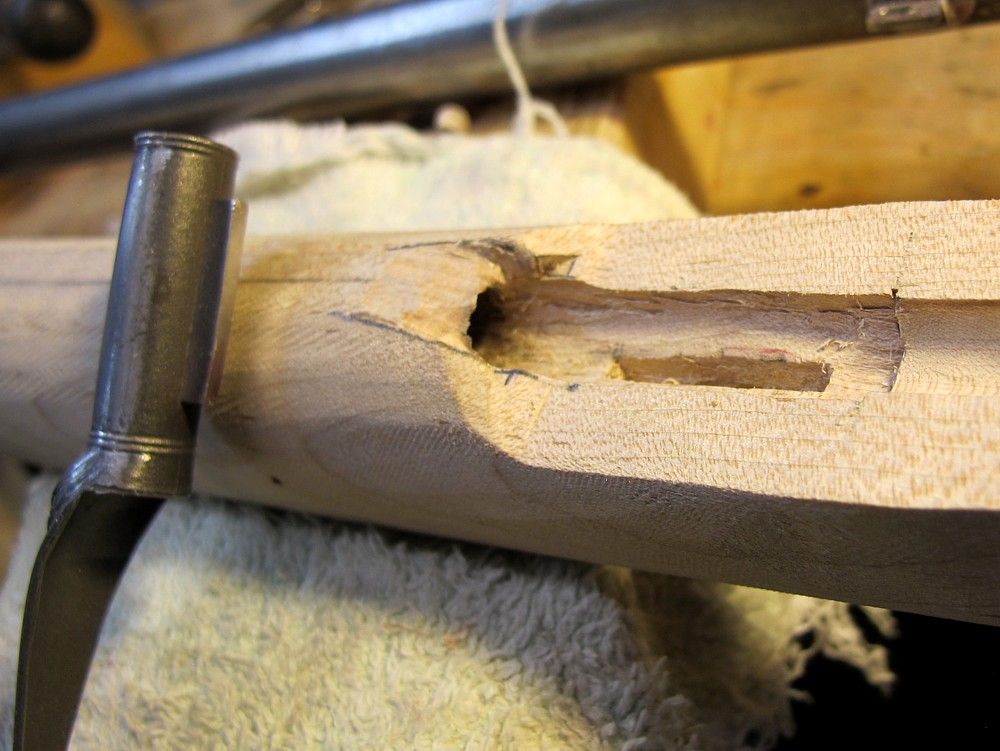
For the entry pipe, I took off a small patch of excess wood from the bottom side, again, so I’m only inletting through the minimum ”“ I left the rest to keep some rigidity to the upper forearm.
I did leave excess around the shoulder, or transition from upper to lower forearm ”“ I’ll trim that up once the pipe is home.

IMG_2039_zps45a63eb1.jpg


IMG_2041_zpsd5c46fac.jpg


IMG_2042_zps9334dc79.jpg


IMG_2043_zps22cb8b8e.jpg


IMG_2044_zpsa5dd60e6.jpg


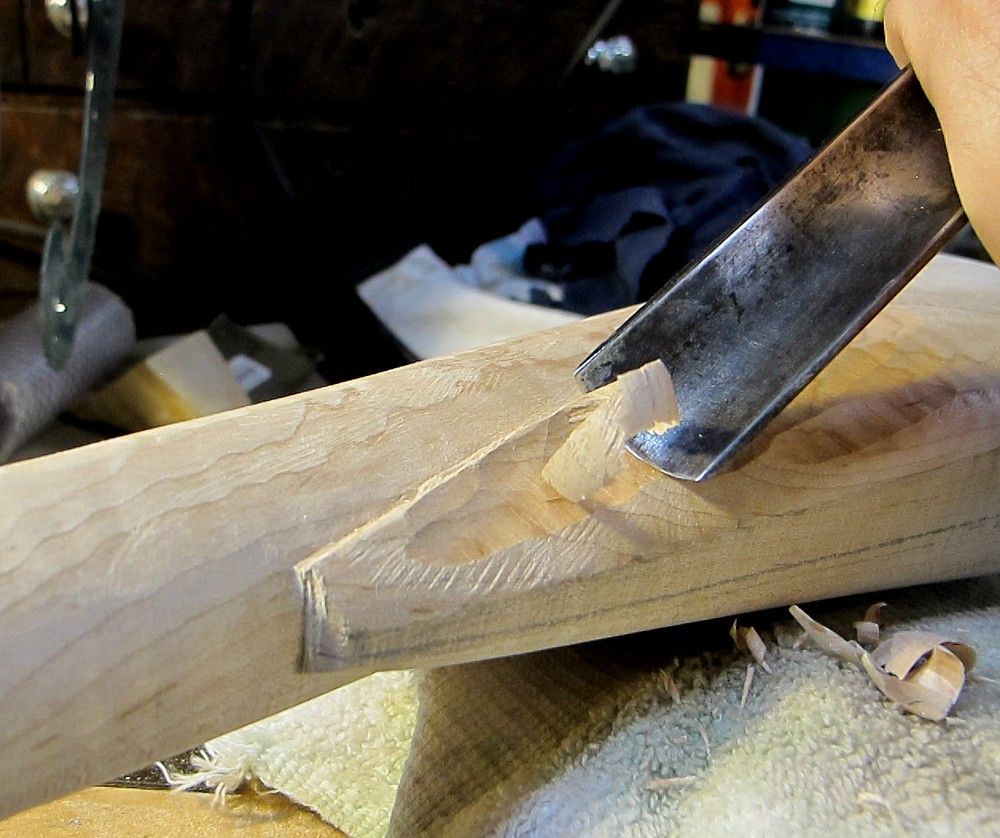
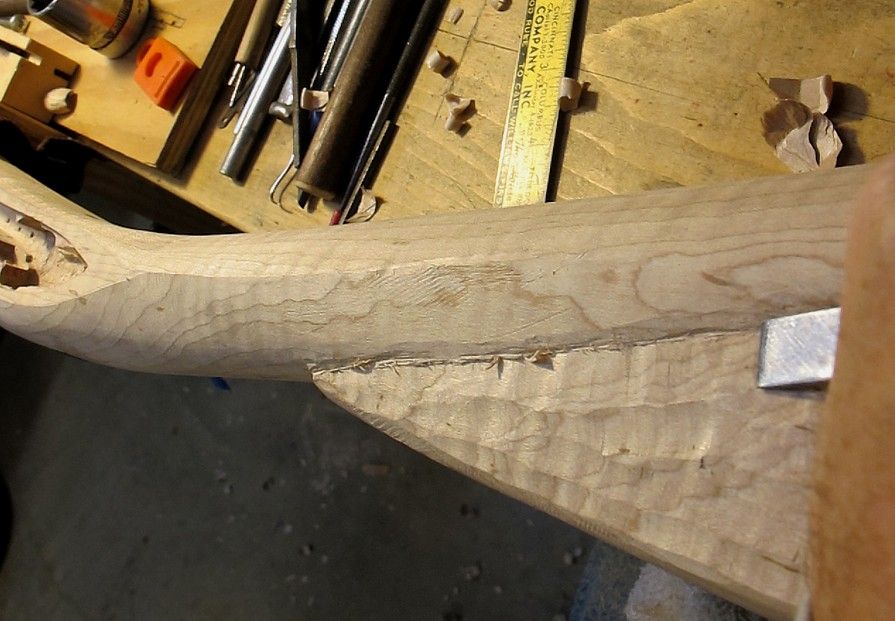
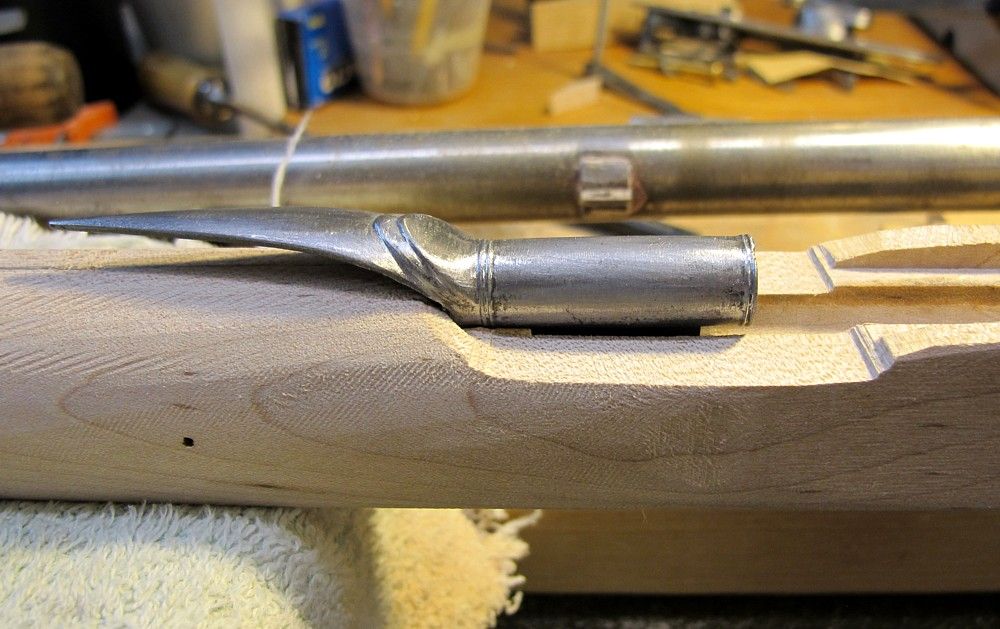
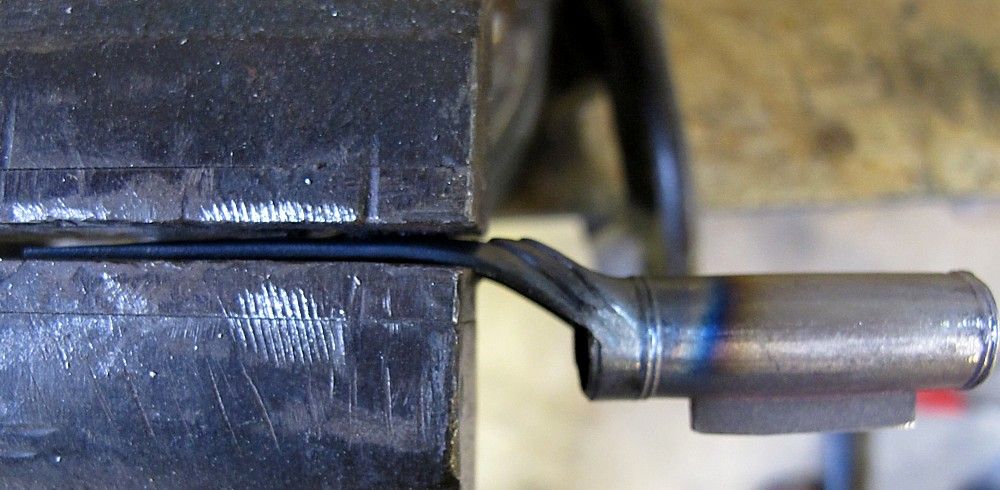
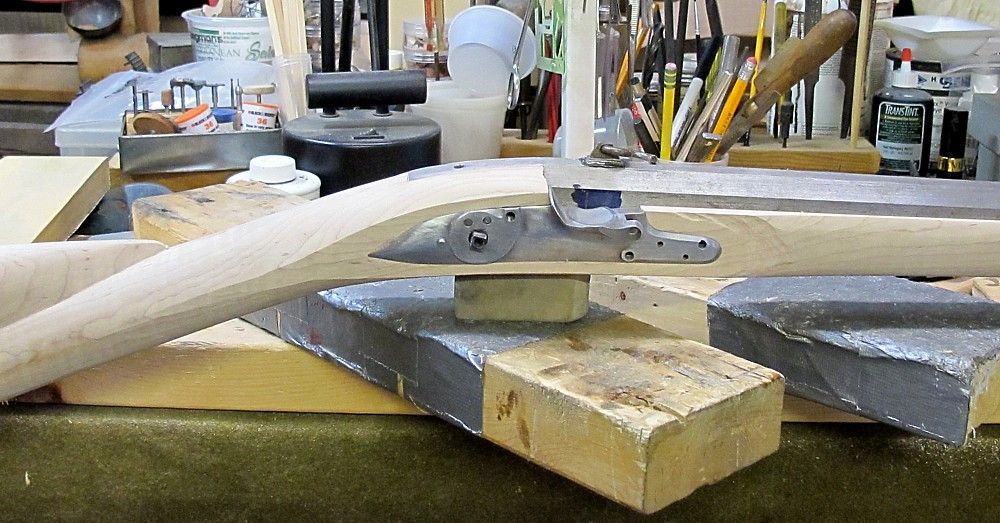
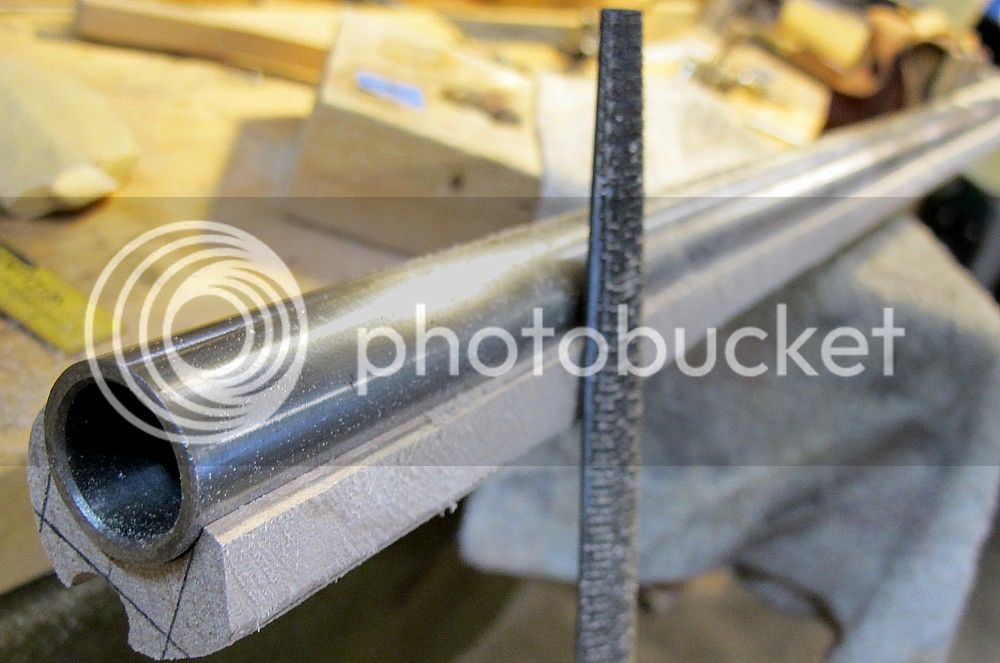
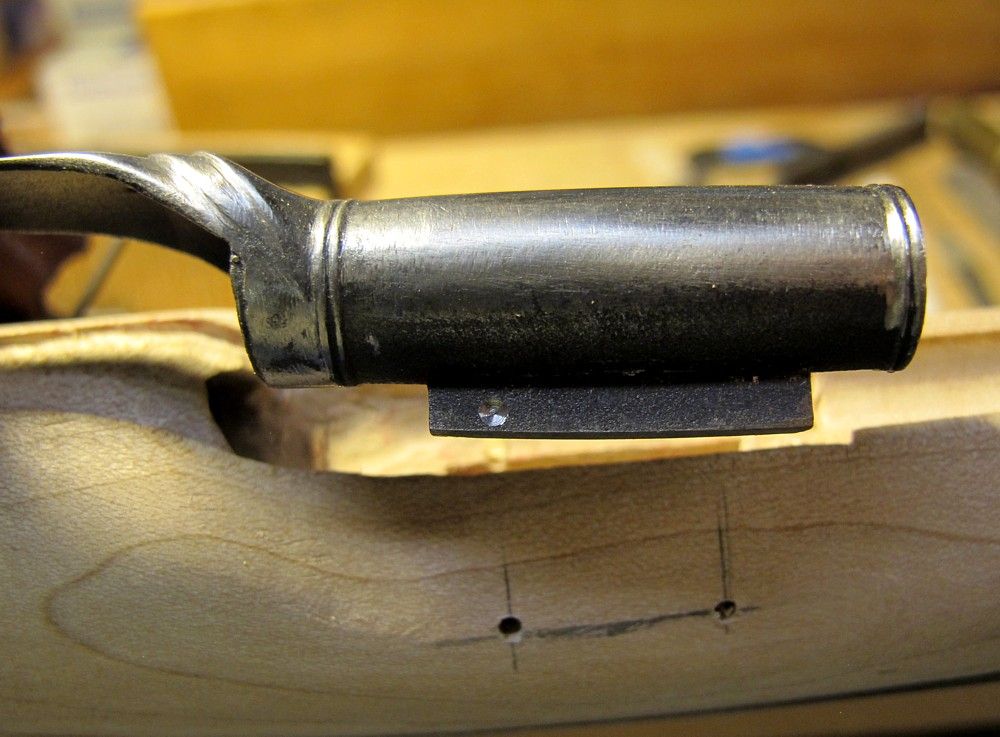
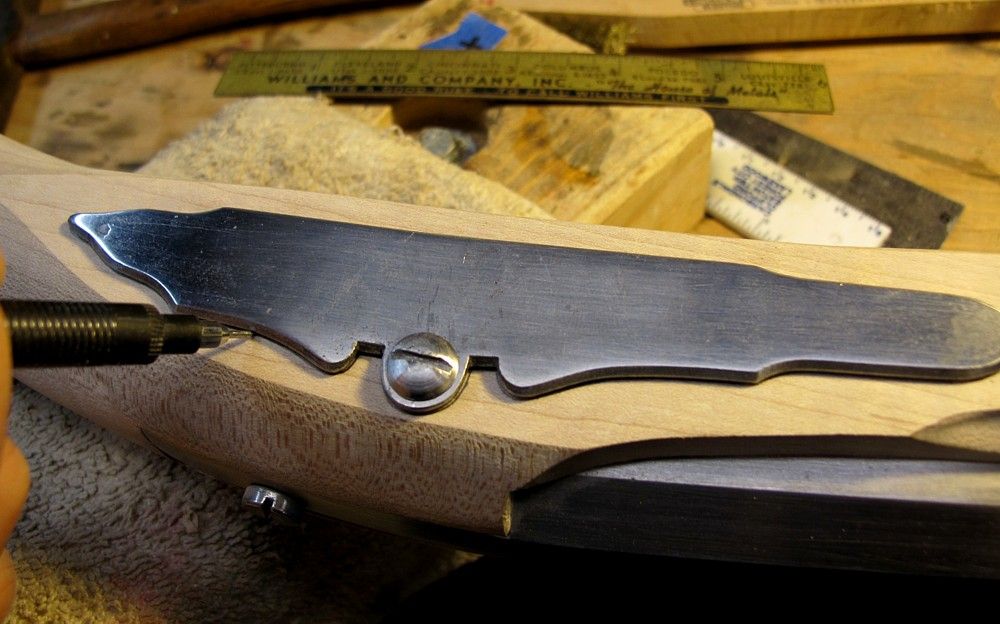
So in the photo above ”“ I had a small problem.
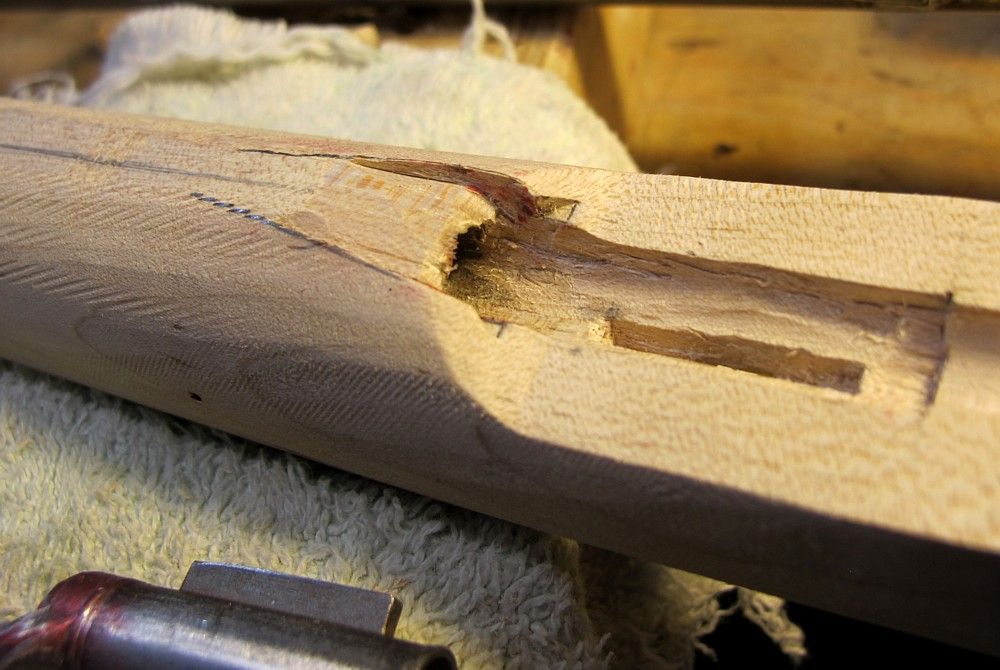
I was down as deep I needed to be for ramrod travel, but the pipe skirt was still not all the way in the wood.
skep.gif


Too much hump and curvature, so I propaned it red hot and squeezed it in vise to flatten it out a bit.
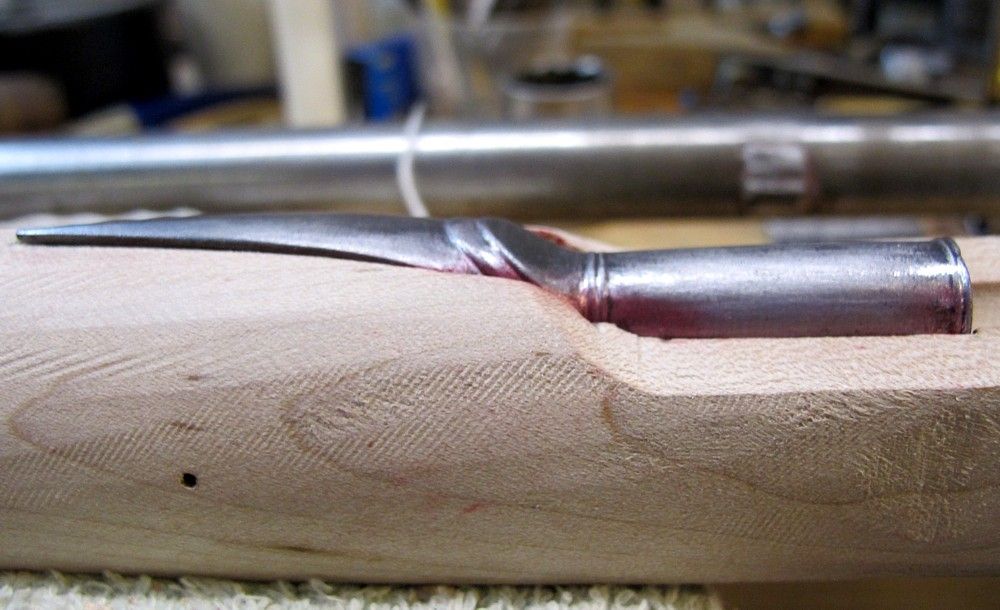
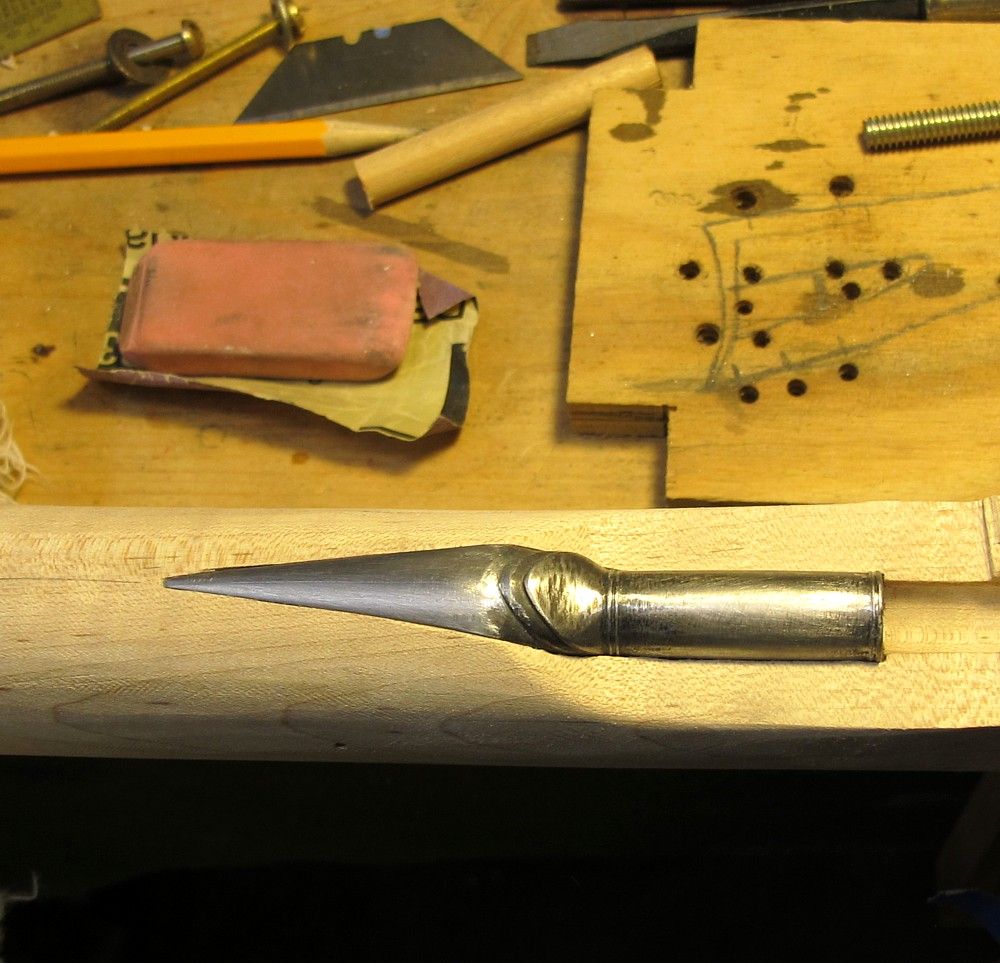
Worked the stock transition back a little with a small half-round file, a little more inletting, and the pipe was about how I wanted it.
Some fine tuning of the stock and pipe clean-up will occur later.

IMG_2045_zps1c61cf16.jpg


IMG_2057_zps67c3df36.jpg


IMG_2059_zpsaed554b0.jpg


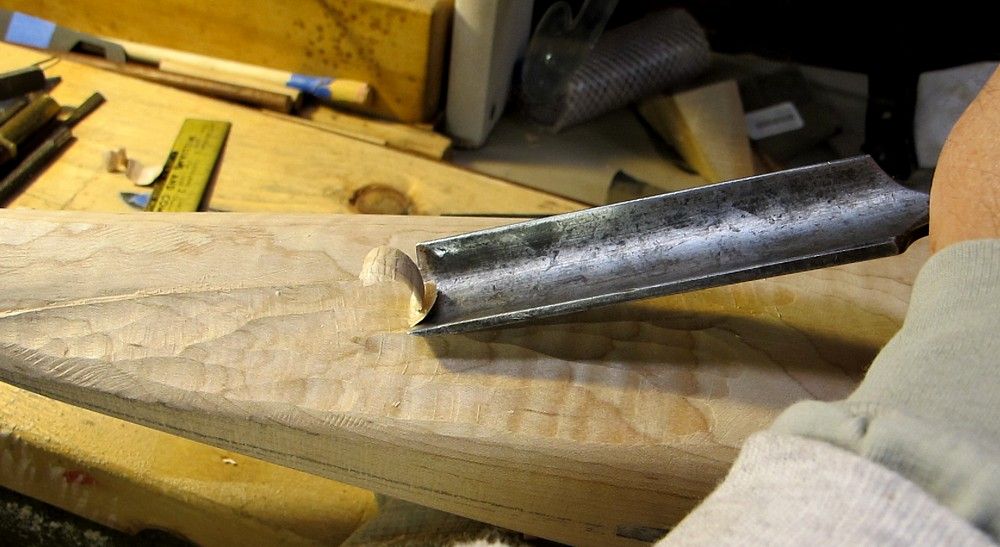
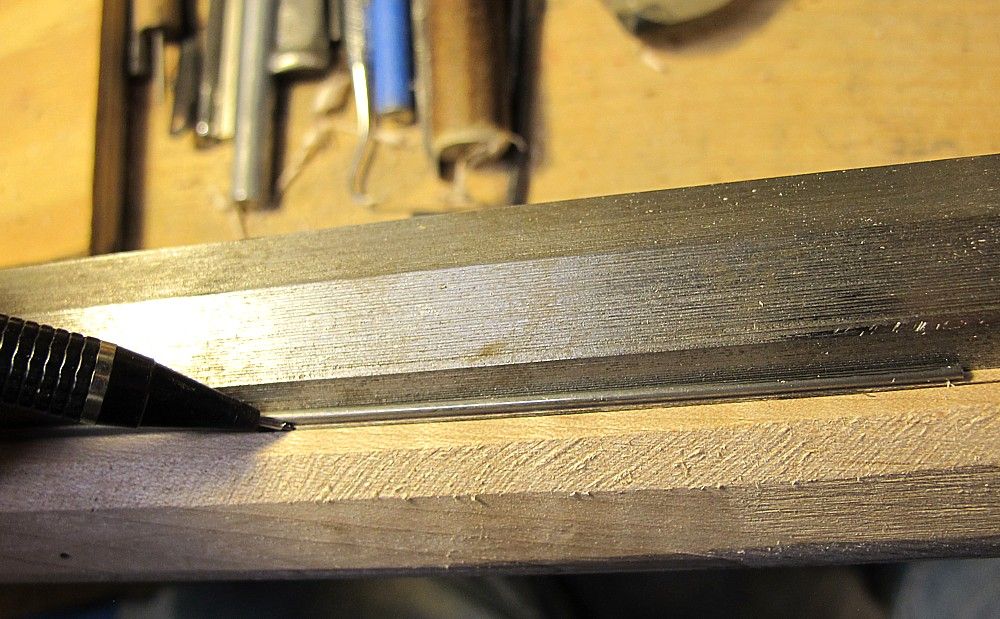
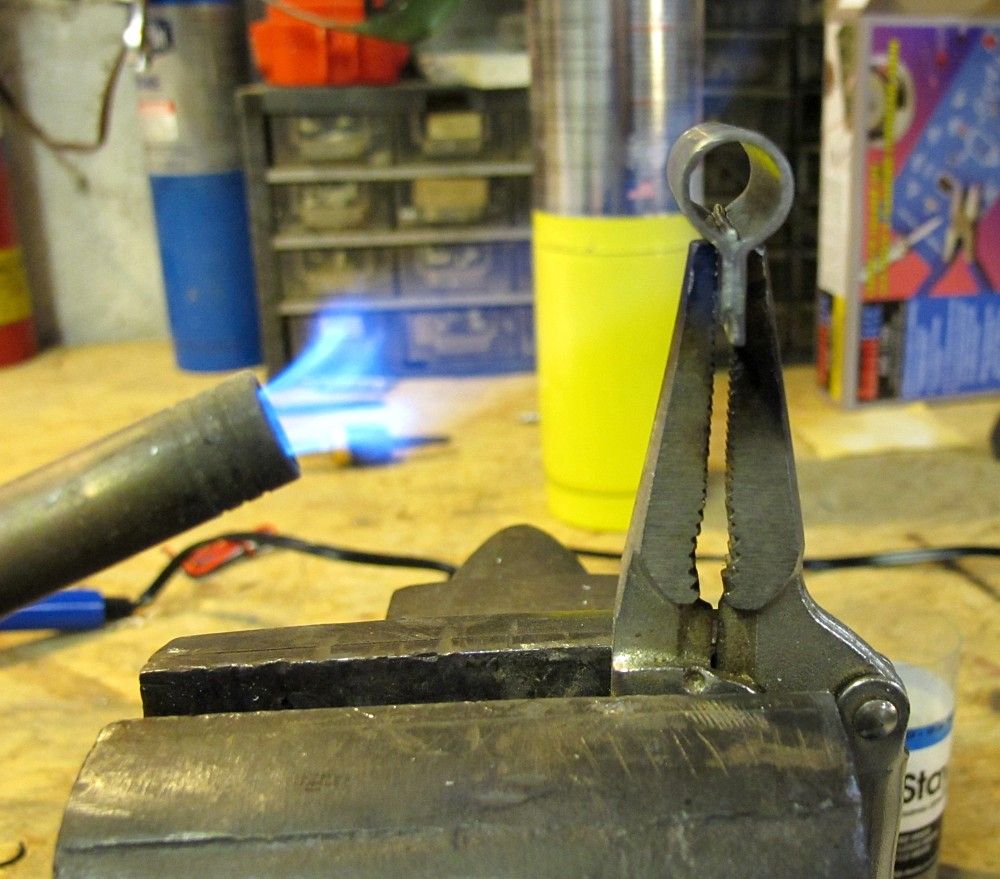
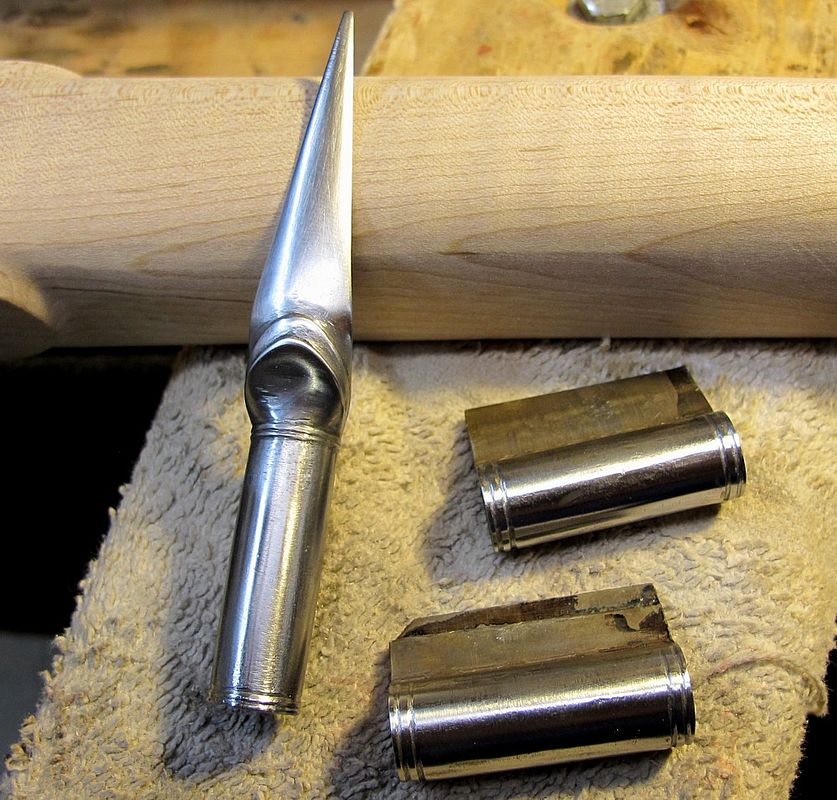
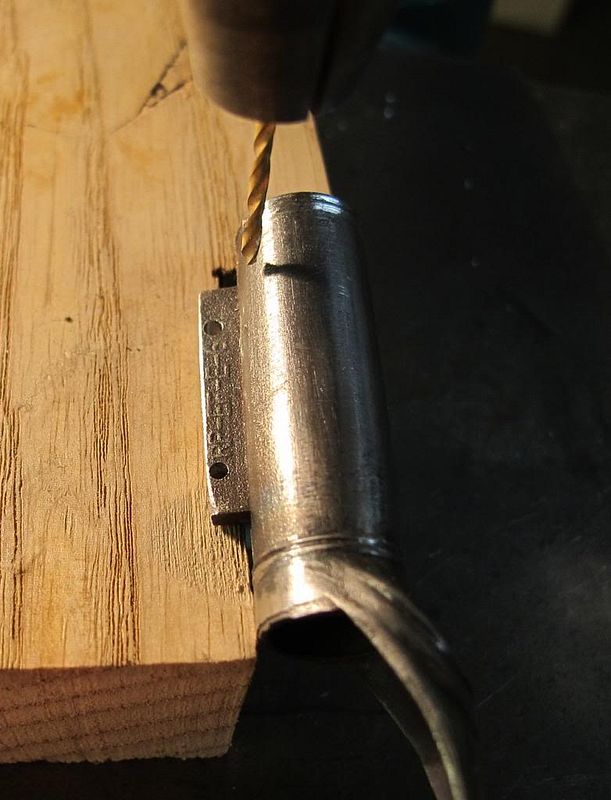
Formed the forward pipes around some 3/8” round bar, and soldered together the tabs.
Pic (below) is off StayBrite solder wire laying inside the pipe, on the seam (which was cleaned & fluxed).
Some gentle heat until it melts down into the tabs. Easy as it gets.
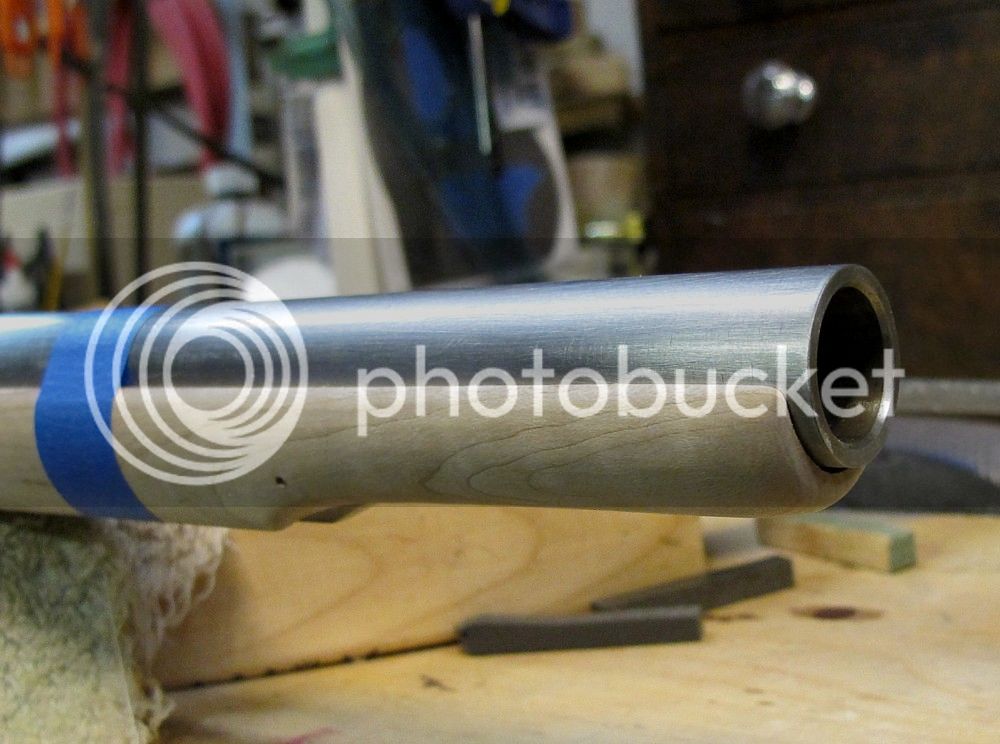
Will file the ring detail into the pipe ends later.

IMG_2056_zps2f0515d2.jpg


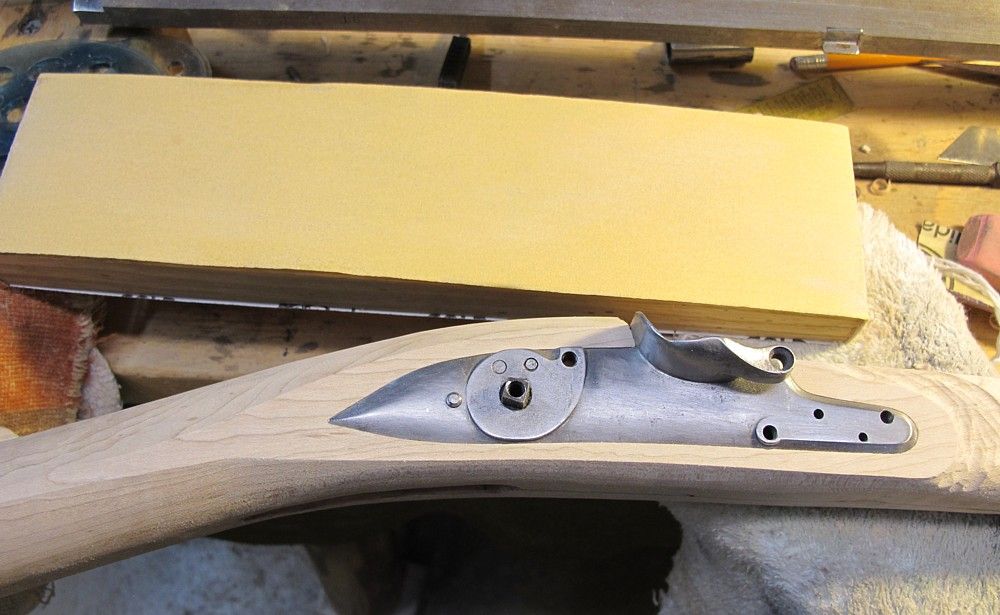
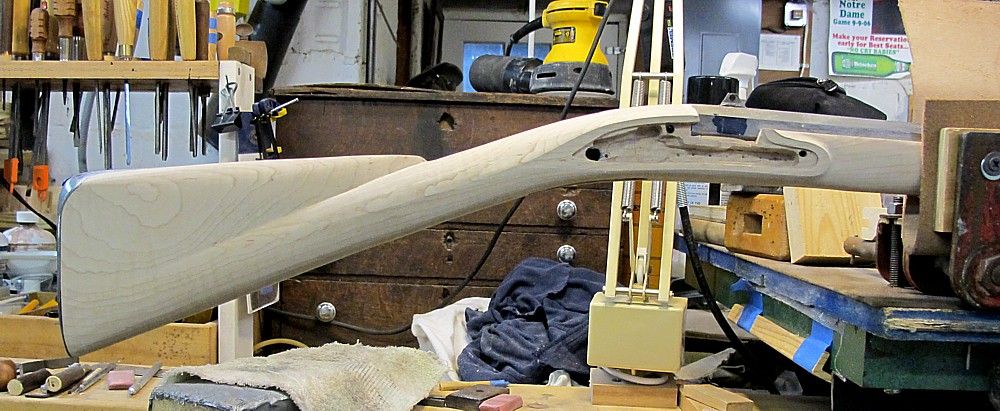
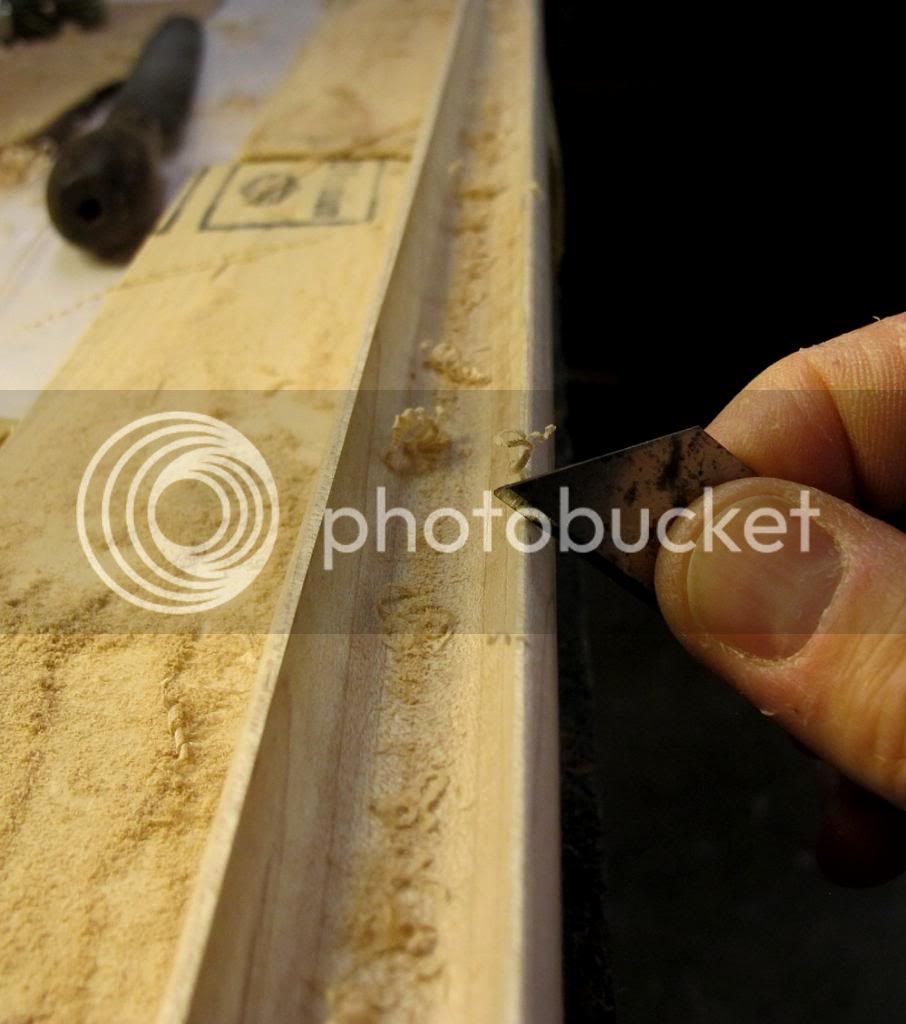
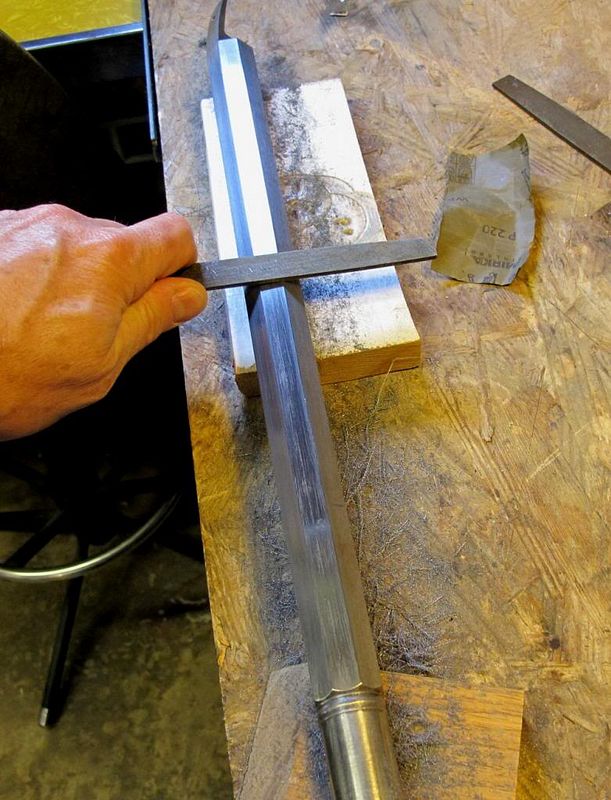
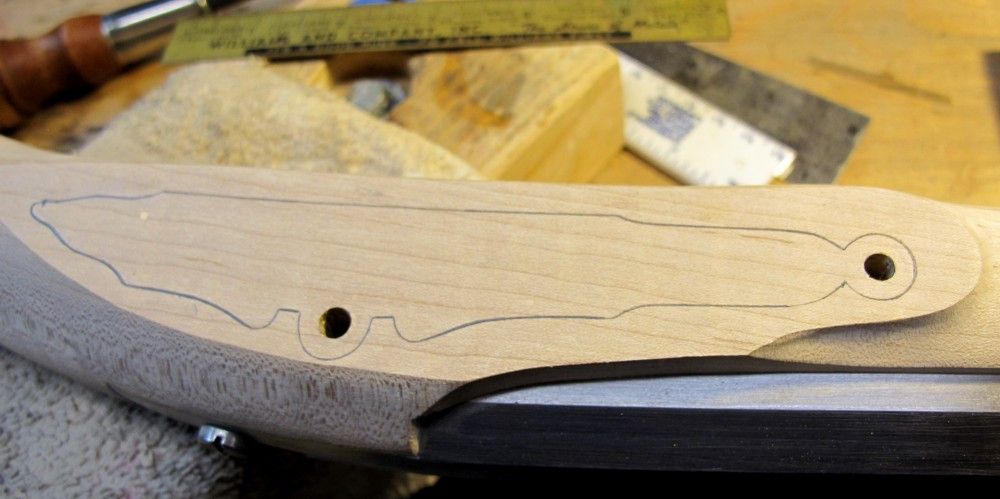
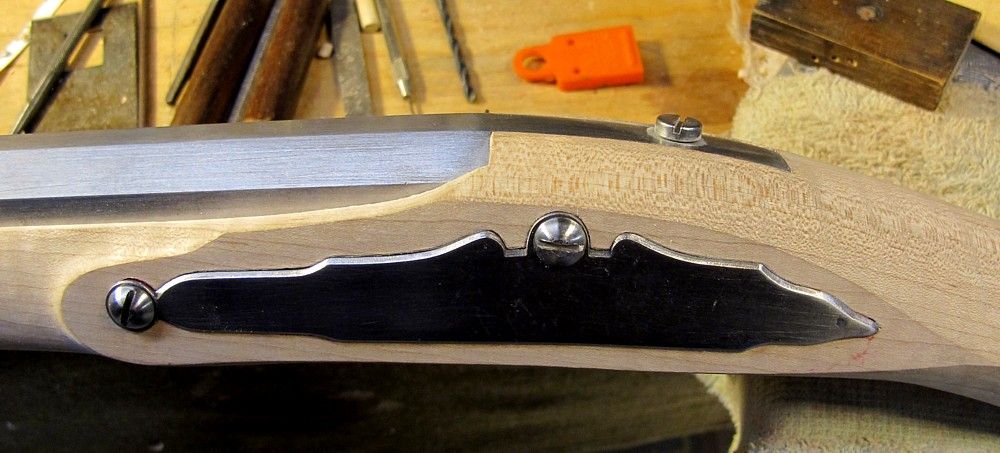
Next I took down the lock panel to final grade. I used a homemade 8” sanding block for this, you can see in the pic. 100 grit on one side, 220 on the other. Kept everything level.
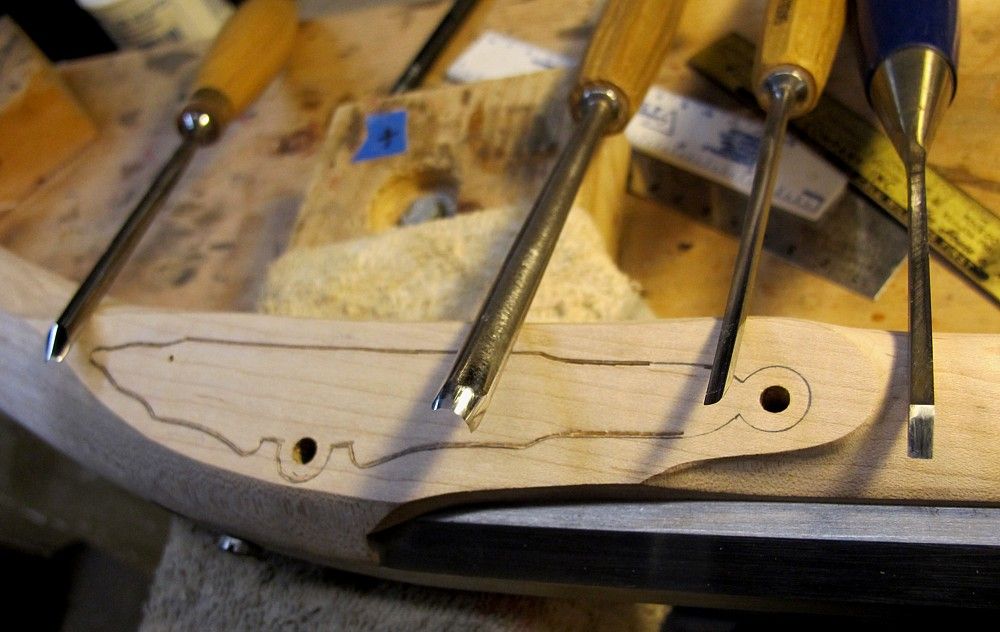
Of course, lowering the panel distorted my lock panel outline (pic below) ”“ made everything bigger and the flats extended forward and backward ”“ so later I had to essentially re-do the entire lock panel shape. Kinda inefficient.

IMG_2060_zps476d38b5.jpg


IMG_2061_zps4f19ea65.jpg


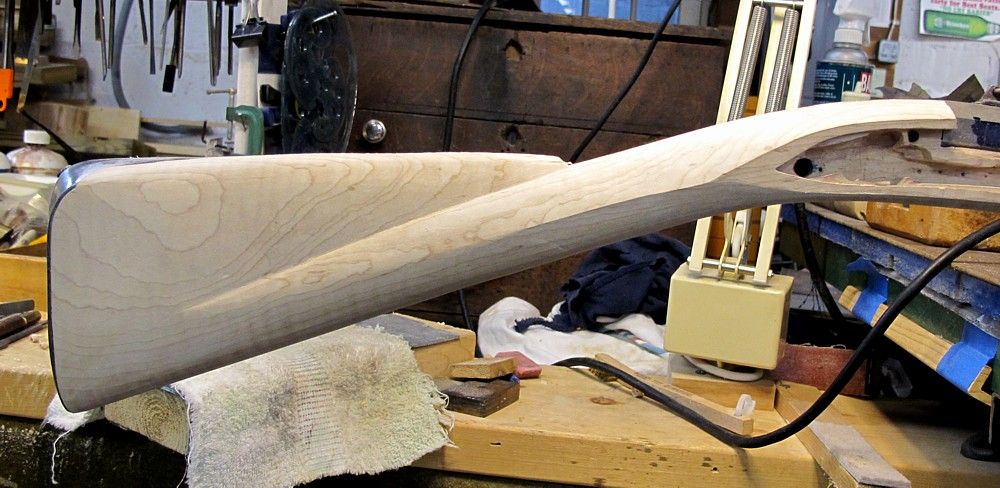
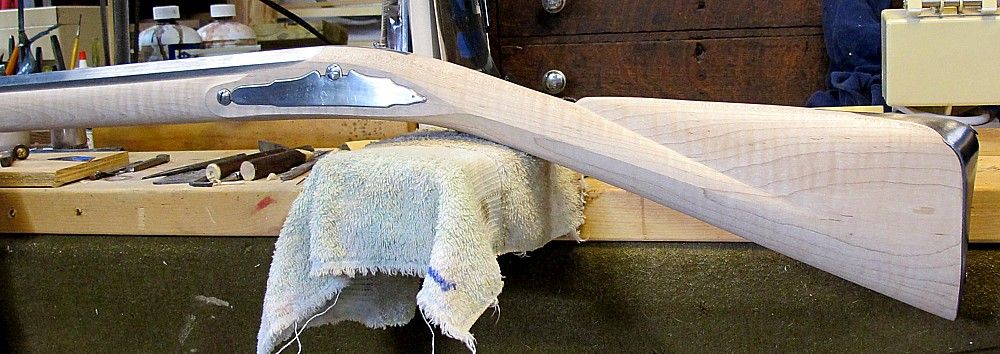
So after reworking the lock panel, and more wood removal around all sides of the lock, I’m getting closer to the final shape in that area. But surely more tweaking and slimming before it’s over.
Wrist needs significant weight loss as well as the bottom of forearm, once the TG goes in.

IMG_2064_zps296414b5.jpg


See where they discovered that a Revolutionary War cannon in NYC’s Central Park Conservancy was still loaded with powder and ball ? There’s a safety lesson there somewhere.
/MM
 
Great Job Meteorman!! Love the detail! Love the pictures!

I am doing much the same thing...only I am doing it with a video camera (very amateur). I'm also taking a few photographs along the way. This is my first attempt at building my own ML. I'm going with a .54 cal rifle....AND....a 16 gauge shotgun. The gunmaker I am working with was hesitant at first to take on an interchangable barrel gun, but now we have got both barrels inlet, triggers inlet, side plate and lock inlet...and everything bolted together, he is very pleased.

Didn't mean to hijack your post. I just thought it was awesome to find someone starting a similar gun....AND...documenting each step.

GREAT WORK!!
 
Been puttering along, few steps forward a step or two back.
Shaped the upper forearm with planes, rasp, files, and scrapers.
Took the top down to final level for barrel exposure and then exposed just over half the ramrod.
Then faceted down the sides of upper forearm.

IMG_2065_zpsfa487368.jpg


IMG_2068_zpsad5d3200.jpg


IMG_2069_zps16207406.jpg


IMG_2070_zpsb9854107.jpg


IMG_2075_zpsccfc6db9.jpg


IMG_2076_zpsa76e57db.jpg


As mentioned earlier, I made the forward pipes out of scrap steel sheet and filed in some detail.
Then layed out the entry pipe pins and drilled them in the wood by hand and eyeball.
Just enough to mark the tab, and then drilled the tab separately.
A toothpick came into play here”¦.. :(

IMG_2067_zps687a0ec4.jpg


IMG_2079_zps748a4453.jpg


IMG_2080_zps7d49cc7d.jpg


Last few days have been kinda treading water, doing some odds and ends.
Draw filed the flats on the barrel.
Shaped the nose area.
Seem to spend a lot of time sitting there staring at it, scraping off a little wood here and there.
I’m taking a break, basically, until I can hopefully get some feedback from some folks at the Lewisburg show this Friday.

IMG_2082_zps23c43f06.jpg


IMG_2086_zpsaf5739aa.jpg


After seeking some feedback from the pros at Lewisburg, I’ll move on to inletting triggerguard and forward pipes.

/mike
 
Not a whole lot of progress this weekend as far as removing actual wood, but great progress as far as learning the way forward.
I attended the Lewisburg show and took my piece with me, and sought some advice from some very skilled builders (and tremendous gentlemen too , by the way).
Many thanks to Mark Wheland, Mitch Yates, Matt Harshbarger, and Ron Luckenbill for taking the time to give me some constructive feedback and valuable pointers on the way forward. :hatsoff: :hatsoff: :hatsoff: :hatsoff:
The Lewisburg show was great, as usual.
Got pretty crowded Friday mid-day, so I bailed kinda early.

So I came back and immediately starting reducing the buttstock and both lower and upper forearms.
IMG_2088_zps1ca74d8c.jpg
.

Inletted the sideplate today. Pretty standard stuff. Trace, stab in outline, backcut, and remove field.
I took a picture that showed the chisels I used to stab in the outline.
Yeah it’d be nice to have almost every size of every sweep of Pfeil, but.. is it necessary ? ”“ no.
The 4/3 and 8/7 and a straight 1/8” will get most curves if I’m careful.
I also get a lot of use from a Sorby 1/8th radius 3mm gouge (on far left).

IMG_2089_zpsc7029530.jpg


IMG_2090_zps60326ac5.jpg


IMG_2091_zpsd903b0c0.jpg


IMG_2092_zps0f023441.jpg


IMG_2094_zps462714d0.jpg


IMG_2095_zps95bffae6.jpg


So, now I have a plan of attack for slimming the wrist and lower butt.
It was of course very helpful to see and handle some real pieces in Lewisburg instead of working from pictures.
And hands-on advice from the pros is always a good thing.
/mike
 
When you have her finished ya need to come east to Union County Muzzleloaders range and join us shooting the first Sunday of each month. BJH
 

Latest posts

Back
Top