Col. Batguano
75 Cal.
- Joined
- Feb 10, 2011
- Messages
- 5,034
- Reaction score
- 1,407
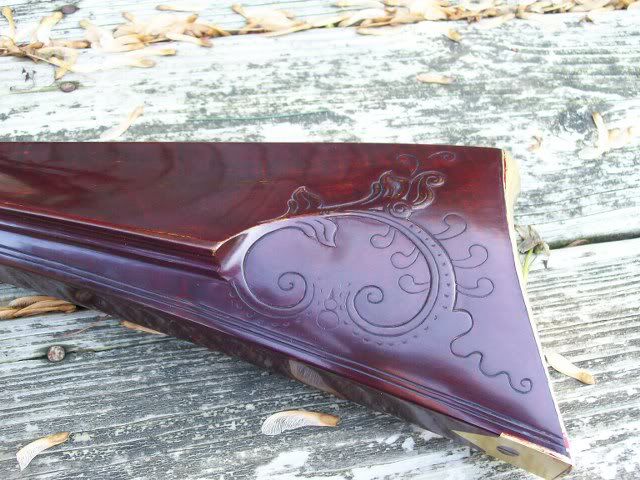
After about a year of work, I'm closing in on the fun part of a Lehigh build. The fun, and nerve wracking part. Carving. I created a jig last night to ride in the RR groove for the incise lines on the forestock. A chunk of 3/8" round steel rod, with a plate brazed to it, and holes drilled 1/10" apart (in progrressing distance from the rod) to put a sharpened #8 machine bolt through the brazed-on plate as a cutting tool. A small adaptation to how the book said to do it.
Since they are parallel to the groove, it's not much of a problem But, now what's the best way to do them on the butt? The butt has a gentle swooping curve to it, and I want the incise line to start about 1/4" high, and taper inwards, not following the curvature. I want to stay away from freehanding it too much, but am thinking that maybe a hand held Sawzall blade dragged over the stock with some kind if guide would be a good ticket.
The reason I think of that, is because those Pfeil gouges like a 12/1 with a 1mm tip are too wide at the top if you go deep. And they are a V-groove. The deeper you go in the carving, the wider they get. That makes it very difficult to keep everything just right over a longer distance like this. I'm thinking that these sorts of incise lines are better if they are a square-bottomed groove. If you are a little deeper in one place, and shallower in another, at least the groove width will be a consistent width.
Thoughts?
With the relief carving, right now I have my design about 1/32" proud to the base. How high do you guys get it before you start your contour carving? The book says 1/16", but that seems really high to me.