• Friends, our 2nd Amendment rights are always under attack and the NRA has been a constant for decades in helping fight that fight.

    We have partnered with the NRA to offer you a discount on membership and Muzzleloading Forum gets a small percentage too of each membership, so you are supporting both the NRA and us.

    Use this link to sign up please; https://membership.nra.org/recruiters/join/XR045103

Bending horn

Muzzleloading Forum

Help Support Muzzleloading Forum:

This site may earn a commission from merchant affiliate links, including eBay, Amazon, and others.
Joined
Nov 30, 2015
Messages
1,854
Reaction score
140
Location
Georgia
I've looked but can't find anything on this. What I'm wanting to do is make a priming horn, small and flat sided. I am unable to find a tutorial on how to bend the horn flat. I think they used to boil the horn; I tried that but wound up with a horn as unbendable as ever. Maybe I didn't boil it long enough.

I admire those flat-sided small horns and want one. I'd prefer to build it myself.

Thanks in advance.
 
I posted instructions on how to flatten horn on here, but forgot which thread it was posted to, so here we go again.

Before you start heating your horn, you have to make a inter-wood form to put inside the horn when you press it flat or the sides will collapse inward and deform the horn. This inter-form can be made of any soft or hard wood and cut in the general shape of your horn and slightly smaller to fit inside the corn.

Wear heavy leather gloves and satety eye glasses, as you are working with very hot oil!!

Water boils at 212 degrees and is not hot enough to soften horn for flattening. I and many other Horner makers use lard or cooking oil, that is heated to around 325 degrees and carefully lower the horn in the hot oil for only about ten seconds at a time and pull horn out and after a few seconds put the horn back in the hot oil and keep repeating this until the horn starts to soften. You have to be very careful that you don't scorch and burn the horn doing the above.

When you think that the horn is pliable enough to flatten. Quickly put in your form and start clamping the horn between to boards in a medium to heavy bench vise slowly until the horn is flattened. If you have some resistance while clamping down on the horn. STOP and re-heat the horn a little again. Leave horn in vise to cool overnight.

Rick
 
Rick is the expert on all things horn (IMO) and I would follow his advice. One time, I didn't - thinking that if I heated the horn in boiling water, it would be pliable. All I ended up with was a smelly kitchen and a very clean horn. Then (as he recommends) I bough a 'fry daddy' deep fat fryer and some veggie oil at the local supermarket (I only use this oil to do horns - if you deep fat fry anything, I'd have one rig for the kitchen and one for the workshop.)

I have heard descriptions of folks using dry heat (heat gun or oven) but I've never tried it because I see it as a way to over heat the horn and ruin the project. With hot oil, I feel as though I have a good bit more control over what's going on, and I can get the horn out of the heat before it starts to delaminate. Short version: don't use the oven.

Rick recommends about 325 degrees, but I've had better luck going hotter - about 350 to 375 BUT you have to be super careful that you don't leave the horn in too long or it will start to delaminate, and this will ruin your project.

Other thoughts: be sure you use thick leather gloves, lose enough that you can snatch them off your hands in a big hurry if things start to go wrong. Pretty much the same protocol as you would use for pouring lead when you're running ball: long pants, long sleeves, no dangling neclaces, jewelry etc., good gloves, closed toed shoes, tie your hair back if necessary. You want to avoid allowing any water (as in, even a drop of sweat) to fall into the hot oil. While this will not be as bad as a similar drop of sweat into molten lead, it can still be quite dramatic, and not in a good way.

If you see bubbles start to come off your horn when it's in the oil, pull it out and see if it's become pliable. (Same thing if you see a sort of milky stuff coming out). Once you clamp it, give things plenty of time to set (I try to keep the horn in the former overnight). If you don't, the horn will try to return to its original shape. It's OK to do this in stages.

One more thought: be sure that you have the hole drilled before you put the horn in the oil ... an air bubble coming to the top could cause a splash- and- burn pretty quickly. I usually try pouring some powder (the same granulation as I i'll use in the horn) to make sure that there won't be any bridging, and the powder will flow nicely.

Horns are a boatload of fun to do ... you will make a horn for each of your rifles before you're done.

Good luck with your project, and remember, we love pictures!
 
If you can find yourself a small electric deep fryer, they work great for this operation. The temperature is controllable, and since the fryer is portable, you can do it outside or in the garage so you don't stink up your house (heated horn is a bit smelly).
 
MSW said:
Other thoughts: be sure you use thick leather gloves, lose enough that you can snatch them off your hands in a big hurry if things start to go wrong. Pretty much the same protocol as you would use for pouring lead when you're running ball: .... closed toed shoes,

I appreciate the information you mentioned and especially the safety tips from Rick and you.

I sheepishly admit that one time I did not follow the advice when doing Hot Tank Bluing at a Friend's shop and the unfortunate results would have been similar had I been around hot oil. I worked at my friend's shop a couple/three nights a week, but did not realize my friend wanted to run the bluing tanks that night. I was wearing pretty good running shoes that night and MUCH regretted it afterwards. Had I realized he was going "to blue," then I would have worn old cowboy or engineer boots with no lacing on top of the boot. I don't remember exactly how it happened, but some of the hot/caustic bluing salt solution came up over the tanks and landed directly down on top of my running shoe and quickly soaked through to my skin. It burnt a rounded depression in my foot that took weeks to heal.

I wonder would if it would be a good idea to use a fairly inexpensive face shield, like the one linked below, when working with the hot oil? http://www.homedepot.com/p/3M-Clear-Professional-Face-Shield-90028-80025/202195394

Gus
 
Last edited by a moderator:
Thanks, everyone. Looks like I'm stuck with buying one, probably one of those brass flasks; I don't have the real estate resources to oil-cook a horn to bend it. I'm just not equipped to do it. I don't have a deep fryer or have access to one, and wouldn't buy one simply for making a single horn.

As much as I like making my own equipment, this one eludes me.

You guys do some remarkable work.
 
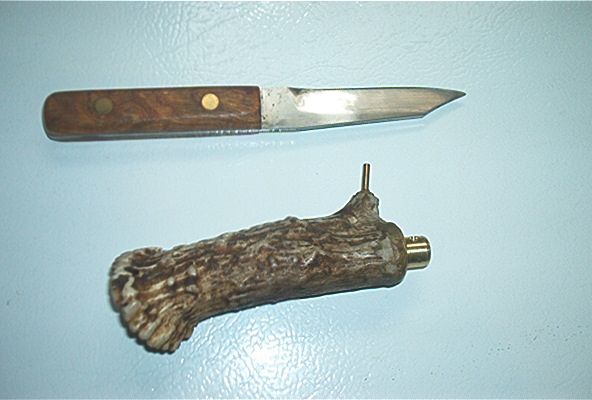
For primimg "flasks" I like to use a section of antler. You can hollow it out with a drill and fine chisels or bent rod and "burn " it out. Just do it outside!
Well I tried to post a pictue but as usual photobucket and I aren't on the same page!
 
As has been stated, you can use a Fry Daddy, a heat gun or even a barbecue grill to heat horns for reshaping. Always work where the smell will not get you into trouble and spills will not injure you or damage anything important.

Yes, the face shield (at the very least - eye protection) is suggested.

The control dial of the Fry Daddy is only fair, but you can improve it with a kitchen thermometer. Yes, learning the tap sound method of the horn as it becomes more plastic is good for some people and the foam/bubbles also help for knowing how hot the horn is. But the price of learning is a few toasted horns. Yes, I have done it when learning to round horns for lathe turned horns or rounding and turning decorative bands.

Having an interior support form is important for horn work. Most of my experience has been with rounding mandrels, but Horner's description of the multi-part internal forms for flat horns does work.

Good luck!
CS
 
Gus, those are pretty good shields. We use something very similar (might be the same thing - can't tell from the photo) at the mill where I work. Whenever we shut down that paper machine for more than a few days, we do a "boil out" which involves spraying a very caustic foam all over the machine (which is about twenty five feet wide and about three hundred feet long) ... you have to put on a rainsuit and muck boots, duct tape the cuffs, and put on full face shield, 'cause you will be splashed with the caustic spray, no matter how careful the operator is. The face shield has yet to fail me.

Sorry to hear about your shoes. I find it harder and harder (as I grow older and older) to find decent footwear. I guess this means that I'm being more fussy about it, or that my feet have started to go south, or that the quality of shoes has fallen off... probably a combination of all three...
 
We used those shields when grinding metal or for polishing metal on buffing wheels. (I have one in my shop for such uses as well.) I was always adamant that my apprentices use these shields when doing such work. One time when an Apprentice was grinding the side of a steel lug on the 12" disc sander and he slipped and let go of it, the shield saved his face and probably his eyes from a nasty wound. It cracked the shield, but no harm to his face or eyes.

We used more expensive models when doing hot tank chemical bluing/blacking.

Gus
 
Gene L said:
Thanks, everyone. Looks like I'm stuck with buying one, probably one of those brass flasks;

Gene, if you are going buy a brass flask I will give you a little tip....
Wherever it has threads, rub them with beeswax to prevent galling and gumming up.
Makes disassembly, cleaning, refilling etc... a breeze..
 
Thanks, Clyde. I broke down and traded for a small horn for priming. I hope it won't be too big; haven't seen it yet.

I do have a brass flask I've had for a long time and haven't used it in a while. I'll remove the spout and wax it well.
 
Back
Top