


For those who have never tried rust bluing, here is a simple, inexpensive set up that I use with good results. All that is required is some PVC pipe, distilled water, and the bluing solution. I use Mark Lee Rust Bluing obtainable from Brownell's. Most instructions for rust bluing call for boiling the part for several minutes. This is not a problem with small parts, but few people have a trough long enough to boil a barrel. I have found that boiling per se is not necessary to obtain a smooth, even blue. Here is how I do it.
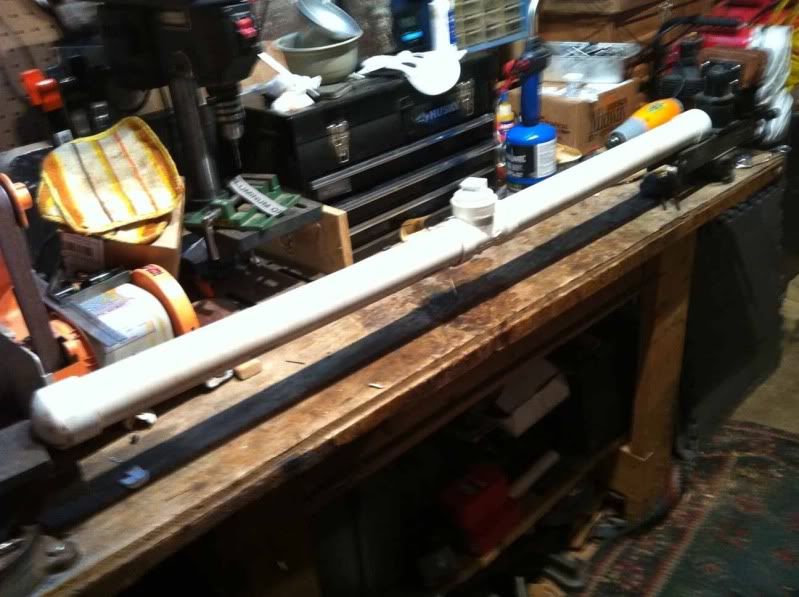
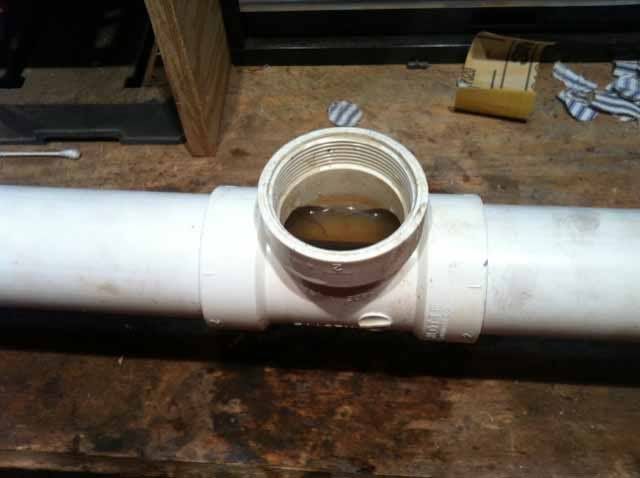
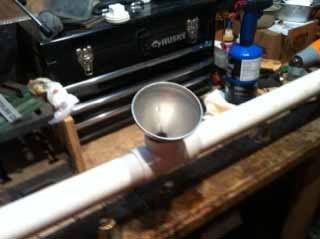
The tank is made from two 24" sections of PVC pipe joined in the middle with a T-section that has a threaded access hole for a cap.
Both ends are capped but only one end is glued on. The other is not glued so that it can be removed for insertion of the barrel. The cap will not come off during normal use. In fact, the heat from the hot water expands the pipe, making for a tight fit with the cap.
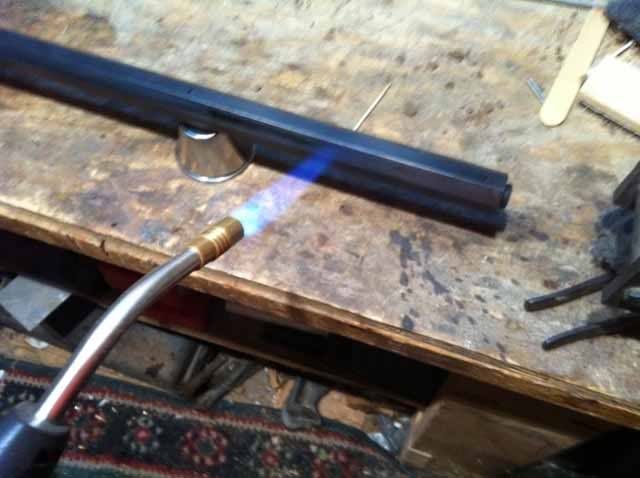
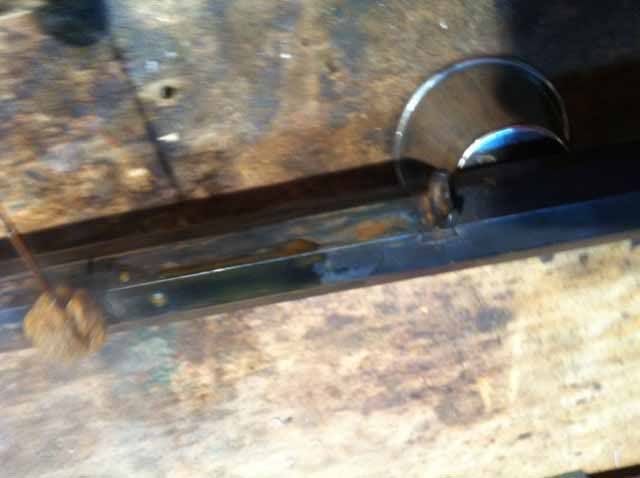
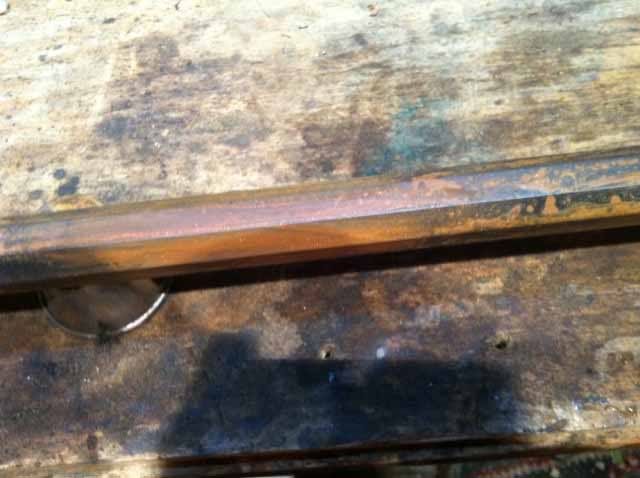
You should use distilled water to avoid problems that may be caused by any minerals in your local water. One gallon is more than enough to blue a barrel and other small parts. The barrel should be polished to the desired final smoothness and thoroughly degreased prior to bluing. Plug both ends of the barrel with the proper size rubber stopper to keep water out of your bore. Begin by heating the barrel with a propane torch to the point where the bluing solution bubbles a bit when applied (this stage is essentially the same as if your were browning the barrel with Birchwood Casey's Plum Brown).
The instructions call for two coats to be applied prior to "boiling" the part. I apply the solution with a new wool swab available from any hobby/craft store. Try to apply the solution as evenly as possible. Once the entire barrel has been coated, if will be covered with red rust. You are now ready to "boil" the part to turn the red to blue/black.
I start heating the pot of distilled water while I'm working on the barrel. Heat it to a rolling boil.
Slide the barrel into the PVC tube and tightly cap the end. I support the tube at either end with the t-access upward. Remember the tube is round so be careful that it does not roll! Sandbags work well for this.
With the barrel in the tube and the end capped, I use a funnel in the T-access to pour in the boiling water. Be sure to fill the tube completely so that the entire barrel is submerged.
Put the pot with the remaining water back on the stove.
You can observe the process through the T; the barrel will turn black almost immediately. The instructions say to boil the part for five minutes. Because with my technique the part is not actually at boiling temperature for this time period, I let it set for three or four minutes, then rotate the tube to pour most of the water into a bucket, then refill with fresh boiling water. I don't know that this is actually necessary, but it sure doesn't hurt.
Once the proper time has elapsed, I again rotate the tube to pour out most of the water into a bucket. Then I pick up the tube, uncap the end and pour out the remaining water. Recycle the used water into your boiling pot. Reusing the water causes no problems and significantly reduces the amount of distilled water needed.
Remove the barrel from the tube. It will be black and covered with a fine black powder.
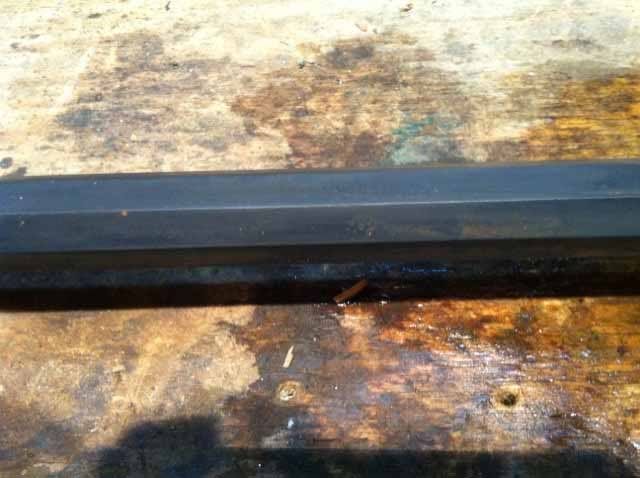
Thoroughly degrease some very fine steel wool with acetone to remove the oil applied during manufacturing. Rub the barrel with the steel wool to remove the fine powder. This step is known as carding. Don't be afraid to rub..the finish is durable. After carding, I wipe the barrel down with distilled water, and repeat the heating/bluing application/boiling process. I did five applications for the barrel shown in this post.
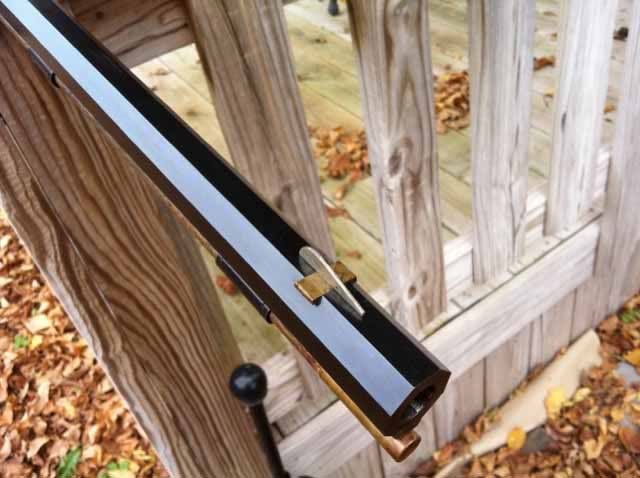
After the final carding, you should have a smooth blue/black surface.

Once you are satisfied with the depth and eveness of the bluing you are ready to neutralize the blueing agent. This is done by simply soaking the barrel in a gallon of water (tap water is ok here) to which a box of baking soda has been added. The instructions say to soak for half an hour.
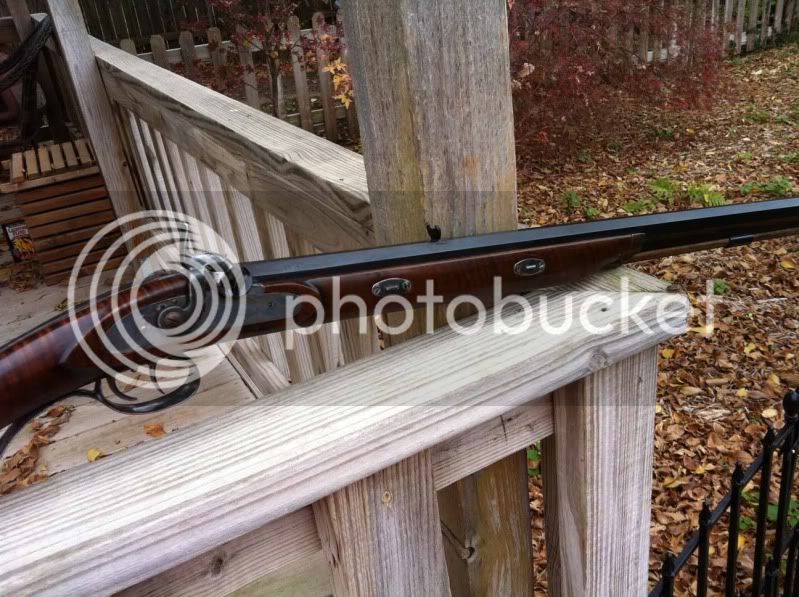
After neutralizing, I use an air compressor to blow out all remaining moisture. Be sure to include the inside of the barrel as well. I then use a good quality gun oil in some fine steel wool to go over the entire barrel to remove any remaining powder and completely kill any rust. The last pics show the final result. This rifle was an old Uberti Sante Fe Hawken kit that someone had started but never finished, that I picked up cheap.
If you can rust brown, or use Plum Brown, you can easily rust blue a barrel or any other part.
The tank is made from two 24" sections of PVC pipe joined in the middle with a T-section that has a threaded access hole for a cap.
Both ends are capped but only one end is glued on. The other is not glued so that it can be removed for insertion of the barrel. The cap will not come off during normal use. In fact, the heat from the hot water expands the pipe, making for a tight fit with the cap.
You should use distilled water to avoid problems that may be caused by any minerals in your local water. One gallon is more than enough to blue a barrel and other small parts. The barrel should be polished to the desired final smoothness and thoroughly degreased prior to bluing. Plug both ends of the barrel with the proper size rubber stopper to keep water out of your bore. Begin by heating the barrel with a propane torch to the point where the bluing solution bubbles a bit when applied (this stage is essentially the same as if your were browning the barrel with Birchwood Casey's Plum Brown).
The instructions call for two coats to be applied prior to "boiling" the part. I apply the solution with a new wool swab available from any hobby/craft store. Try to apply the solution as evenly as possible. Once the entire barrel has been coated, if will be covered with red rust. You are now ready to "boil" the part to turn the red to blue/black.
I start heating the pot of distilled water while I'm working on the barrel. Heat it to a rolling boil.
Slide the barrel into the PVC tube and tightly cap the end. I support the tube at either end with the t-access upward. Remember the tube is round so be careful that it does not roll! Sandbags work well for this.
With the barrel in the tube and the end capped, I use a funnel in the T-access to pour in the boiling water. Be sure to fill the tube completely so that the entire barrel is submerged.
Put the pot with the remaining water back on the stove.
You can observe the process through the T; the barrel will turn black almost immediately. The instructions say to boil the part for five minutes. Because with my technique the part is not actually at boiling temperature for this time period, I let it set for three or four minutes, then rotate the tube to pour most of the water into a bucket, then refill with fresh boiling water. I don't know that this is actually necessary, but it sure doesn't hurt.
Once the proper time has elapsed, I again rotate the tube to pour out most of the water into a bucket. Then I pick up the tube, uncap the end and pour out the remaining water. Recycle the used water into your boiling pot. Reusing the water causes no problems and significantly reduces the amount of distilled water needed.
Remove the barrel from the tube. It will be black and covered with a fine black powder.
Thoroughly degrease some very fine steel wool with acetone to remove the oil applied during manufacturing. Rub the barrel with the steel wool to remove the fine powder. This step is known as carding. Don't be afraid to rub..the finish is durable. After carding, I wipe the barrel down with distilled water, and repeat the heating/bluing application/boiling process. I did five applications for the barrel shown in this post.
After the final carding, you should have a smooth blue/black surface.
Once you are satisfied with the depth and eveness of the bluing you are ready to neutralize the blueing agent. This is done by simply soaking the barrel in a gallon of water (tap water is ok here) to which a box of baking soda has been added. The instructions say to soak for half an hour.
After neutralizing, I use an air compressor to blow out all remaining moisture. Be sure to include the inside of the barrel as well. I then use a good quality gun oil in some fine steel wool to go over the entire barrel to remove any remaining powder and completely kill any rust. The last pics show the final result. This rifle was an old Uberti Sante Fe Hawken kit that someone had started but never finished, that I picked up cheap.
If you can rust brown, or use Plum Brown, you can easily rust blue a barrel or any other part.
