• This community needs YOUR help today. We rely 100% on Supporting Memberships to fund our efforts. With the ever increasing fees of everything, we need help. We need more Supporting Members, today. Please invest back into this community. I will ship a few decals too in addition to all the account perks you get.


    Sign up here: https://www.muzzleloadingforum.com/account/upgrades
  • Friends, our 2nd Amendment rights are always under attack and the NRA has been a constant for decades in helping fight that fight.

    We have partnered with the NRA to offer you a discount on membership and Muzzleloading Forum gets a small percentage too of each membership, so you are supporting both the NRA and us.

    Use this link to sign up please; https://membership.nra.org/recruiters/join/XR045103

Relief carving and sandpaper question

Muzzleloading Forum

Help Support Muzzleloading Forum:

This site may earn a commission from merchant affiliate links, including eBay, Amazon, and others.

mikemeteor

45 Cal.
Joined
Nov 16, 2008
Messages
660
Reaction score
3
Question based on what I read in another thread:

Stophel said:
Keep your tools sharp (do as I say, not as I do), and keep your carving clean and crisp, and even simple carving can look very good compared to complex carving done poorly with rounded or fuzzy edges. Avoid sandpaper around carving at all costs. It is tempting to use tiny bits of the stuff to flatten off the background in the nooks and crannies, but it invariably will end up rounding over the carving, making it look crummy.

I was very interested in that advice from Stophel, about avoiding sandpaper, and gotta admit I was little surprised and intrigued by it.
With a grand total of one build under my belt, I'm interested in improving my carving skills.
I was working under the impression that sandpaper and/or sanding sticks were common practice in relief carving.
For flattening backgrounds and lightly easing 90-degree relief corners.
Maybe lightly easing those edges is exactly what i DON'T want to do :shocked2: !
So, in order to help us newbies better understand the approach to relief carving, I was kinda wondering what the general forum of veteran builders have to say about sandpaper, or, alternatively, beginning and ending all your carvings with only edge tools ?

In asking, I realize there's probably lots of ways to skin that cat.
 
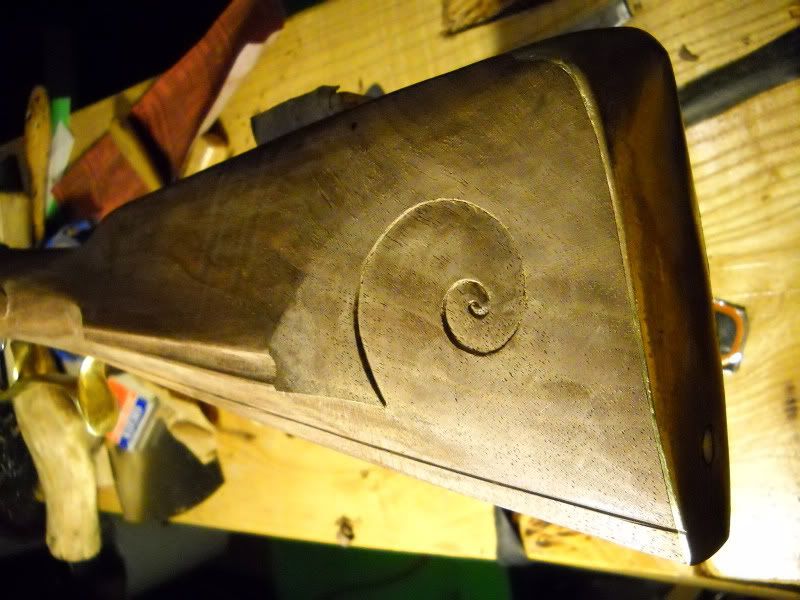
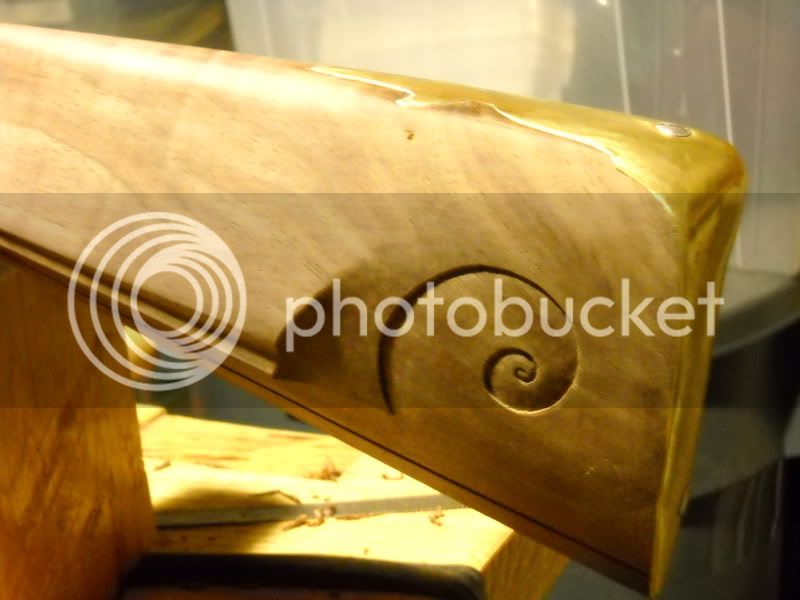
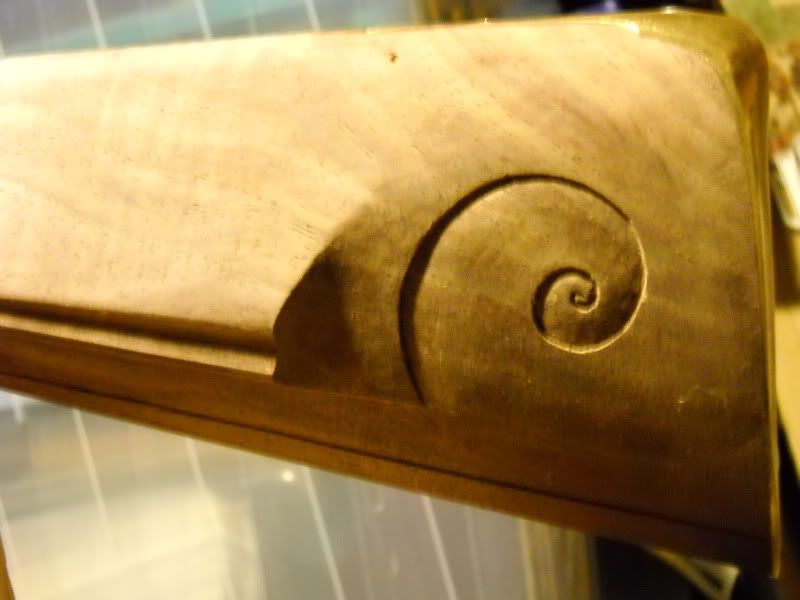
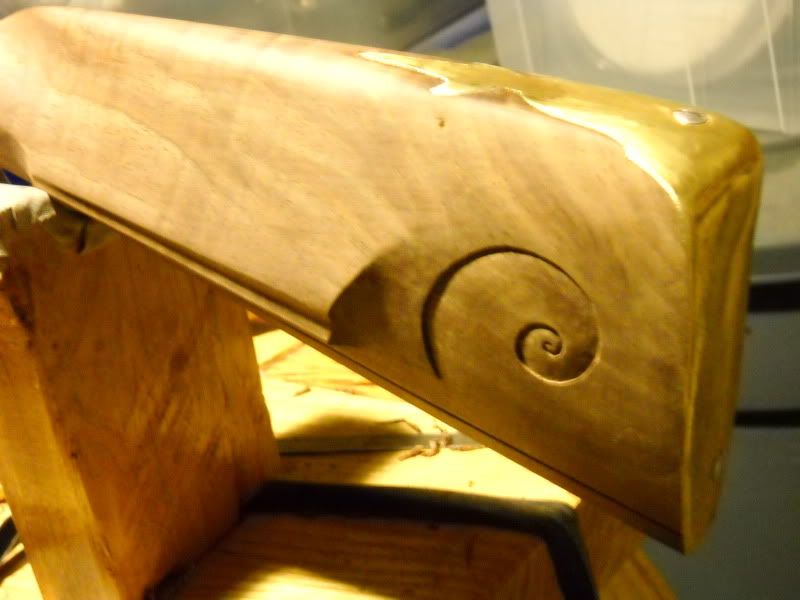
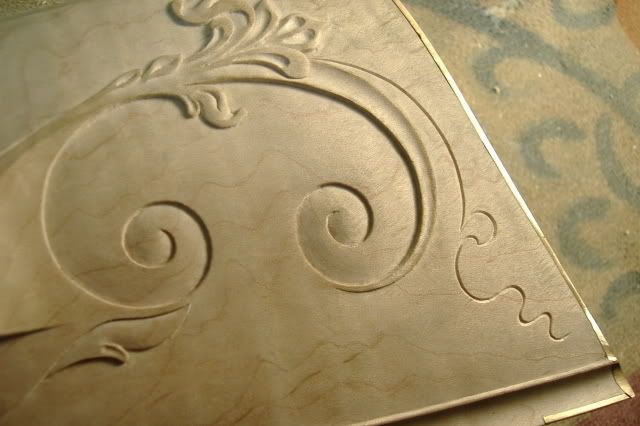
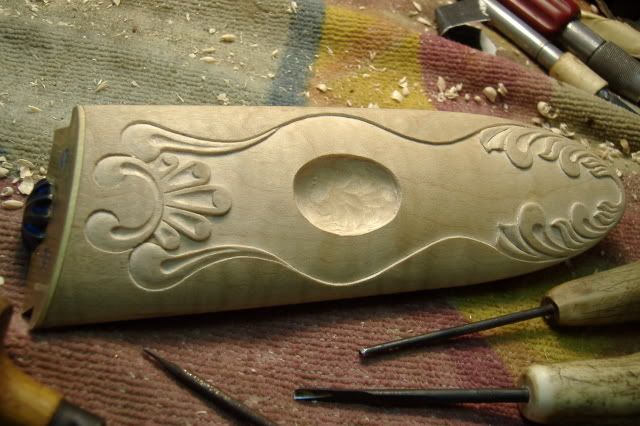
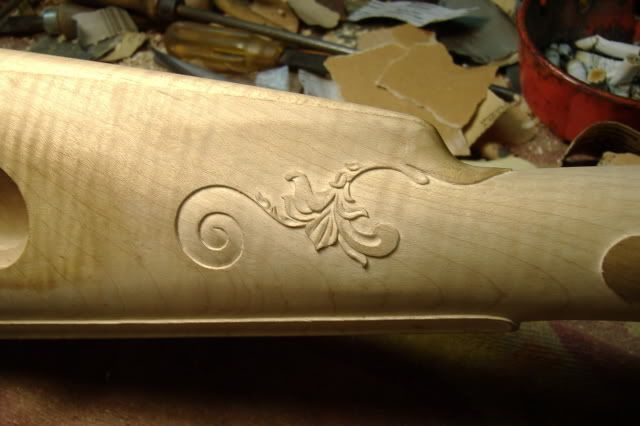
Well, now there's a lot of different ways to carve and to finish carving. There's relief, incised, and negative relief carving, done with the stabbing or the V-tool method or with a knife. I am working on a simple volute, or C-scroll, on an early rifle right now. I stabbed in the outline straight down using home-made thin chisels. Then I relieved the background "some" with flat chisels, then scraped it. Finally I did some sanding of the background keeping entirely away from edges. I have found that sanding up to edges is going to cause problems.

Here are some pix of the carving and cheekpiece.

After stabbing and lowering the background and scraping
RCA19008.jpg


Here are a couple shadowed shots to give a sense of shape. It's really not that deep- the shadows lie! I've still got a little cleaning up to do, improving roundness especially in the inner spiral. Having fun.


RCA19009.jpg

RCA19011.jpg

RCA19010.jpg


Practice until you get good with a few tools then trust them. That approach has always worked best with me in all aspects of rifle building.
 
I outline the relief carving w/ an Exacto knife and use a shallow gouge to reduce the back ground, followed by straight chisels, files and rifflers. Then chisels and scrapers are used to shape and smooth the actual carving followed w/ sandpaper rolls. The problem w/ sandpaper rolls used on the base level, is that next to the relief carving, the outlines become indefinite...that's where the scrapers sharpen up the raised outlines. The "tops" of the relief carving are smoothed w/ sandpaper rolls and during whiskering, I rub green Scotchbrite very lightly all over the carving and base level. I've never taken a carving course, so what I do might not be the way that the better carvers do things, but it works for me....Fred
 
Rich....wish I could expertly install a buttplate like that...WOW!...no gaps and nicely done.....Fred
 
Fred, regarding the buttplate- I've learned some tricks and also love thin soft brass buttplates that can be peened a little to close gaps.

I do a lot of work on the flat part of the inlet with a spokeshave, working the end grain. I am working hard to try to learn where I can work fast and remove a lot of material, and where I need to go slowly.
 
rich pierce said:
I am working hard to try to learn where I can work fast and remove a lot of material, and where I need to go slowly.

You are learning well, Grasshopper. :v :thumbsup:

God bless
 
As others have said, scrape. You can use purpose made scrapers, or just the chisel to scrape with. Angle your scraper different ways to knock off the high spots and level the area out. If the scraper is clean, with no nicks, you can scrape it lightly and get it quite smooth.

For smoothing off the edges where you might be a bit bumpy, I will use files or cut it down with chisels, knives, V-tools, whatever as necessary. One tool that I find very useful is the DemBart checkering cutter. I have several different tips for different uses, but the standard tip is really good for smoothing out some areas.

Again, carving from 200+ years ago generally does NOT have ultra smooth backgrounds, so don't worry about getting it glass slick. :wink:
 
I use sticks and paper folded or sometimes rolled. I think much depends on how smooth you may want things. Original guns are most often not as smooth as some today, and there is certainly nothing wrong with reproducing original type work. It's just a matter of choice.
pennyknife094_640x480.jpg

pennyknife087_640x480.jpg

pennyknife059_640x480.jpg
 
Scraper: a thing you scrape with.

For overall stock scraping, I use a steel scraper. I actually bought mine at either Lowe's or Home Depot some years ago. There's usually a set of three. One plain rectangle, one "gooseneck", which I rarely use, and one that is straight, but with one convex rounded end, and one concave rounded end (I NEVER use the concave end). Now, I don't bother with the rolled, burnished edge that you are "supposed" to do with it (which makes a hooked edge which you draw against the wood). I just file the edge quickly to a slight bevel and that's it. Cuts very nicely, I can use it both directions as necessary, and I don't have to worry about dinging a delicate little turned edge. When I want to sharpen it, I just run a file across the edge a few times and that's it.

The one with the rounded end is good for concave surfaces, like the nose of the comb.

For fine scraping, I use glass microscope slides. Each has 8 usable edges, and a stock can be scraped pretty smooth with them. These have to be used lightly, of course, or you'll break them. These last quite a long time, actually, if you're careful with them. They will probably never get dull, but they will get nicks, which leave scratches in the wood.

For scraping around carving where I can't get a glass slide to fit, I just use appropriately sized chisels. Yes, it will dull the chisel a bit quicker than normal use, but so what.

Some folks use razor blades to scrape with. You can easily make any shape scraper you want out of a piece of steel and sharpen the edge.

Scraping cuts the wood off cleanly. Sanding "feathers" the grain, and mashes it down into the pores...which is why you hear people talk so much about "whiskering" the stock. When wet, these feathers raise back up, and have to be cut off...again. Scraping will almost totally eliminate this. Almost. But it's easy to go back over with the fine scraper and knock off what whiskers you do get (I do it with the stain. I don't bother with a separate "whiskering" process).

Once you start using scrapers, you probably will love them, and wonder why anyone would ever sand wood anyway! :grin:

OK, I do "cheat" sometimes and use sandpaper on wood. Usually in the rough shaping phase...
 
Last edited by a moderator:
Check the suppliers on the LINKS section here, ( see the index page, towards the top under member resources) to get a LInk to Woodcrafters. Then look for "cabinet scrapers". They come in many shapes, but french curves are often preferred to deal with carvings, as they allow you to get into areas where you have curves. In a pinch, a skilled worker can do this work with a dull jackknife blade. :thumbsup:
 
Some decades ago, I had an elderly neighbor who was a world class violin maker. Most of his family had died in the camps and he was trying to find an apprentice to carry on. He made two violins a year which sold for $62,500 each. He was eager to teach others his techniques. His work was awsome and he considered using sandpaper an abortion. For all his work, he only used scapers made from broken Coke bottles. He would break them and sort what was usable. Glass is harder than steel.
 
Now that that's answered ;
did the trade guns ( octagon to round ) with flat butt plates have any engraving or carving on the stocks ? Any engraving anywhere ?
I've been looking thru Shumway's books; and just wondered about any patterns .
These are like the sitting fox smoothbores .
I know I've seen some with tacks ; but did they " fancy em up " ?
Winter well--

Thom
 
Some of them may have "teardrops" behind the lockplates and the tang (someone else can answer that better than I), and the serpent sideplates were engraved...well, they may have used a graver to clean up the cast-in designs.
 

Latest posts

Back
Top