• This community needs YOUR help today. We rely 100% on Supporting Memberships to fund our efforts. With the ever increasing fees of everything, we need help. We need more Supporting Members, today. Please invest back into this community. I will ship a few decals too in addition to all the account perks you get.


    Sign up here: https://www.muzzleloadingforum.com/account/upgrades
  • Friends, our 2nd Amendment rights are always under attack and the NRA has been a constant for decades in helping fight that fight.

    We have partnered with the NRA to offer you a discount on membership and Muzzleloading Forum gets a small percentage too of each membership, so you are supporting both the NRA and us.

    Use this link to sign up please; https://membership.nra.org/recruiters/join/XR045103

Rebuilding a Mendi Wheellock

Muzzleloading Forum

Help Support Muzzleloading Forum:

This site may earn a commission from merchant affiliate links, including eBay, Amazon, and others.
I know the pain, Mike!

Have one to make at present.
I found if I temper them in molten lead, I get an even heat, but they must be in the lead just long enough that it does not stick to them, otherwise too soft.
A pal in the UK made a spring or 2 for his original Brown Bess, and it works V well, (tempered in lead) He took gold with it in an international shoot!

Wishing you the Best of luck next time!

Pukka.
 
RJDH said:
I know the pain, Mike!

Have one to make at present.
I found if I temper them in molten lead, I get an even heat, but they must be in the lead just long enough that it does not stick to them, otherwise too soft.
A pal in the UK made a spring or 2 for his original Brown Bess, and it works V well, (tempered in lead) He took gold with it in an international shoot!

Wishing you the Best of luck next time!

Pukka.

I think making a good spring takes a lot of effort and skill and there is certainly an art to doing it right.

But, I'm still using crayons! :rotf:

Mike
 
As has been mentioned, using molten lead at 700°-750°F to temper the spring should be about right but the soak time wasn't brought up.

With a spring that is going to see some hard use like the one for your wheel lock it is a good idea to let the spring soak at the 700°+ temperature for at least 10 minutes. 15 minutes is even better.

You want to end up with a spring that has fully tempered without any small areas which are only partially tempered and may still be too hard.

Good luck. :thumbsup:
 
Thanks Zonie, that tempering info is much appreciated. I assume you have to hold the spring submerged in the pot with a pair of pliers.

I'm still working on shaping the tip hooks for the chain and other clean up work on the spring.

Tomorrow is suppose to be at least 113°F, so I'll only have to heat the lead to 600°F - ha!

thanks again, Mike
 
The steel will float on the lead so yes, you need to find something to keep it submerged.
You can use pliers but you also might try making up a piece of bent cloths hanger that snugly grasps the spring with one end and the other end is bent to form a triangular shaped foot that can be held down on the workbench with something heavy.

With a bit of bending, the wire can be made to keep the spring at a height that will be submerged under the lead.

Using something like this will make it unnecessary for you to need to sit there holding the pliers by hand.
 
Zonie,

It may depend on the steel used for the spring, as to how long it should soak.
I have hardened and re-tempered weak (original)springs and only seconds were required.

Mark, who made the springs for his original 'Bess also found a few minutes too long, and his springs were soft.
Lead composition may also alter things, as pure lead melts at a higher temp then say wheelweights.

All the best,
Richard.
 
Took some days off from this project - seemed more like work than a hobby, besides it was too hot!

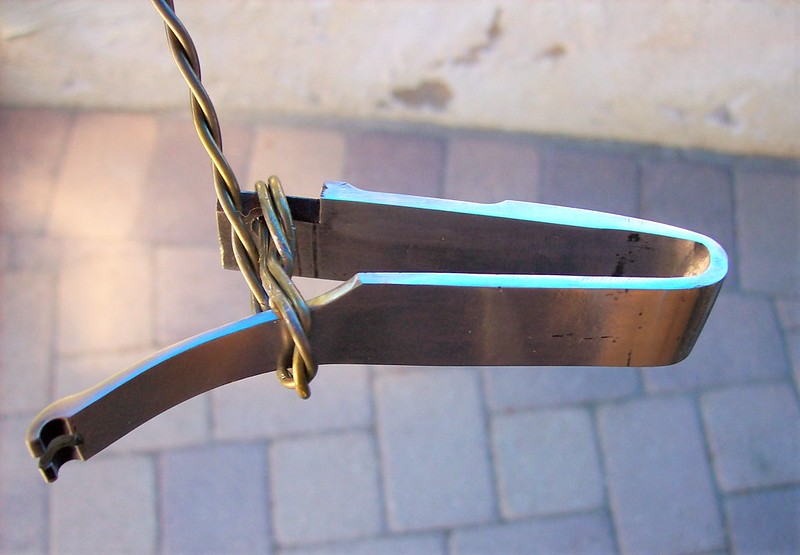
I polished the mainspring and prepared to dunk it into my 20 lb. Lee lead pot:
https://flic.kr/p/29qCDnc

The lead got a little over heated and the spring is a little on the soft side I think, but I decided to work on finishing other parts and leave the mainspring alone for now.

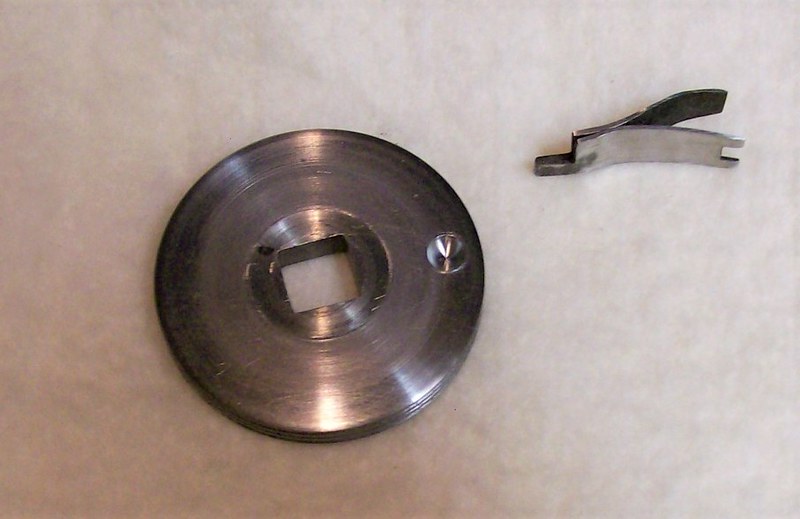
I marked and drilled a divot in the back of the wheel for a 1/4" ball bearing that keeps the wheel in the cocked position and have been trying to lighten (unsuccessfully)the sear spring:
https://flic.kr/p/29qCDqD

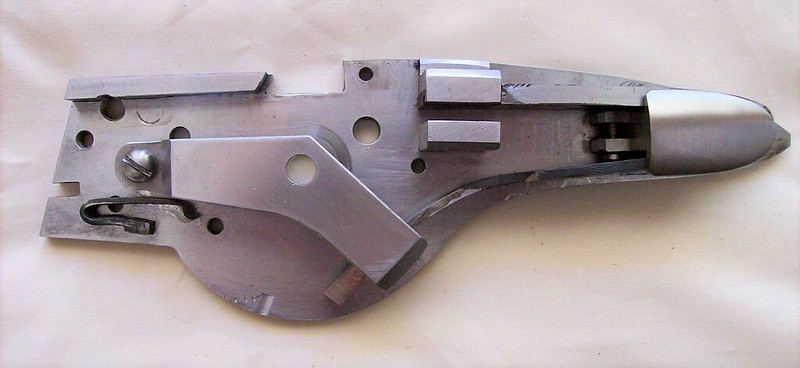
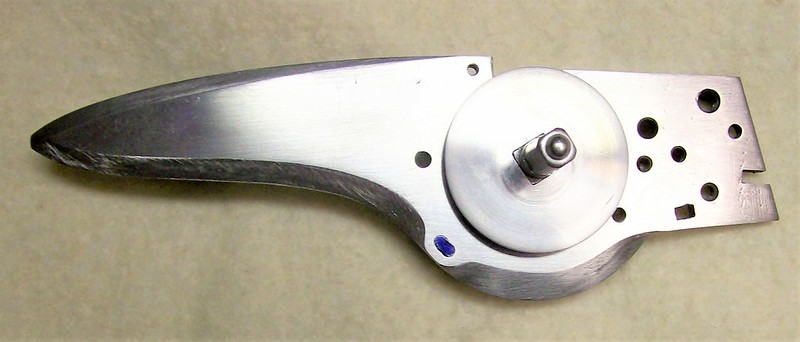
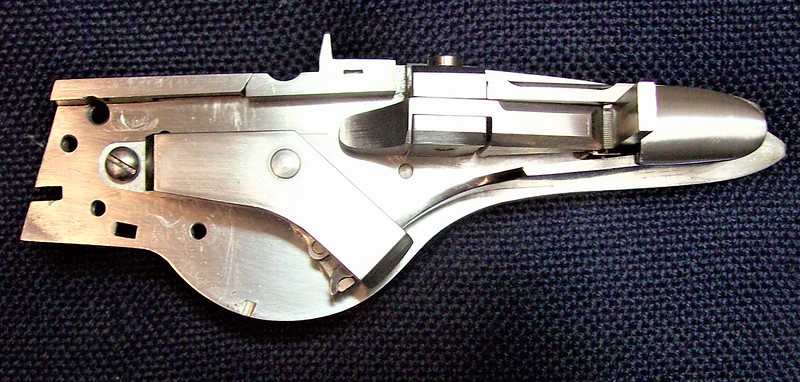
I am trimming the lower portion of the lockplate. It is partially filed to the scribe line in this photo:
https://flic.kr/p/29qCDpB
The spindle & chain is hooked to the mainspring in the photo. There is about .040" clearance from the edge of the lockplate to the lower portion of the bridle - the plate is tilted & it looks like the bridle goes right to the edge of the plate - it doesn't.

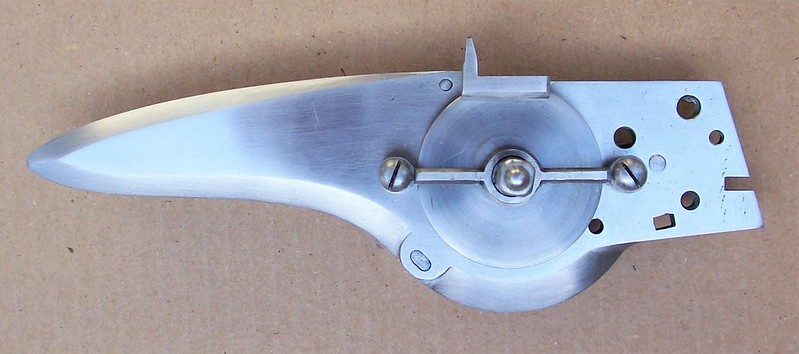
It's no wonder that the snaphance then the flintlock superceded the wheellock - there are 12 holes in the lockplate! 7 threaded holes, a spindle hole, a sear nose hole, pan cover release hole & 2 filed rectangular holes. But then again, nobody was holding a gun to my head to do this project, right?.

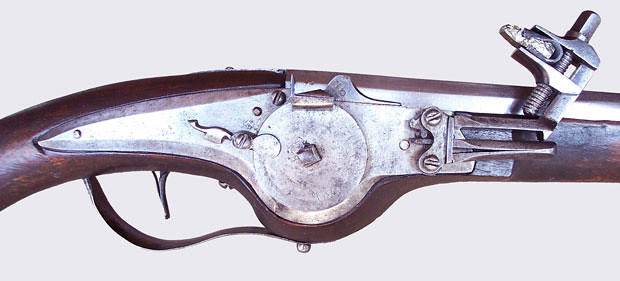
I think I will contour the front of the lockplate similar to this Nurnberg antique, but we'll see:
https://flic.kr/p/28kfZTs

later, Mike
 
Well the heat continues and along with fixing toilets in the house my progress has really slowed down. Today I started shaping the front of the lockplate similar to last photo I posted of the Nurnberg wheellock:
https://flic.kr/p/KTMu66
There is still a lot more metal to remove but it is starting to look better. Believe it or not that photo represents about 4 hours of filing.
 
Very nice job Mike.
Nice filing. Very tidy work!

Yes re. the snaphaunce and flintlock, And even the matchlock where simple and easy is concerned.
I bet all the old wheellock makers could swear!

Hope the tempering goes well.
 
I'm sure the wheellock makers felt like I imagine Hans Hof felt when the small hand held pocket calculator came out.

Hans Hof was the author of a book of Trigonetry tables listing the Sine, Cosine and Tangent of every angle between zero and 90° out to 10 place decimals.
The listings were in degrees, minutes and seconds.
That makes 3600 entries for every degree which totals 324,000, 10 place decimal entries.

The jet engine company I worked for had a copy of the book in the engineering and tool design departments and it was the only quick source if I wanted to know one of these values for my calculations.

Then, in 1972, Hewlett Packard came out with the HP-35, a pocket sized calculator that could calculate the Trigonometric values for any angle in less than a second.

Hans's book suddenly became rather useless.
 
July 30th was my the last post and I've worked on & off trying out different sear springs - hardening & softening them but I could not get the sears to work correctly. I even welded material to the small sear but I could never get it to work correctly, it would not reset after firing. So I made new sears:
https://flic.kr/p/Ld641H
You'll have to scroll back to May 23rd to see what the old sears look like.

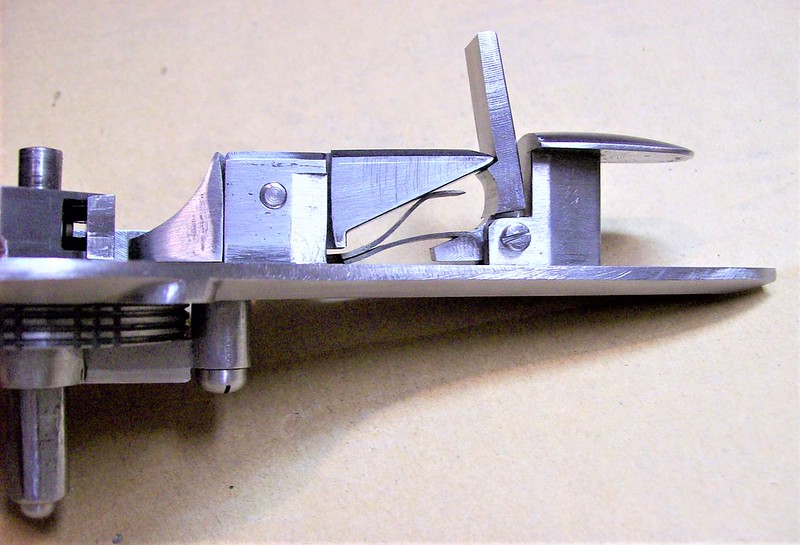
Here's a photo of the new sears in place on the lock:

Now I have to finish shaping & filing and polishing. I have thinned out some interior parts already but many parts still look clunky. The bridle needs a weight reduction, it's very thick and the assembled lock is heavy.

I have to make a steel container for case hardening, I have the parts on hand. It is so bloody hot outside that I could hardened the steel by dumping charcoal on the parts & leave them in the sun for a week.

Until the next installment, Mike
 
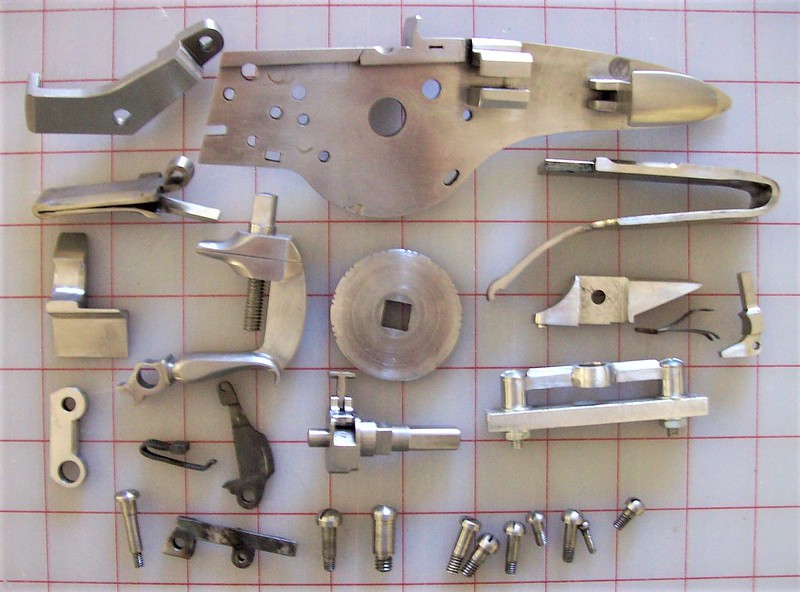
Pile of Parts photo - most filed & polished to 240 grit:
https://flic.kr/p/MWy2pJ

I'll have to take a photo of all the other parts I made but didn't work out - it's about as much as the finished parts.

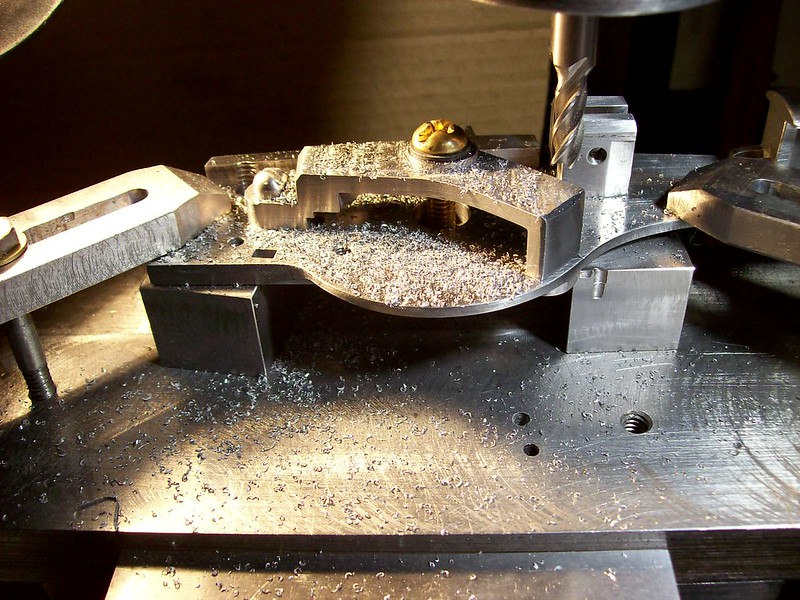
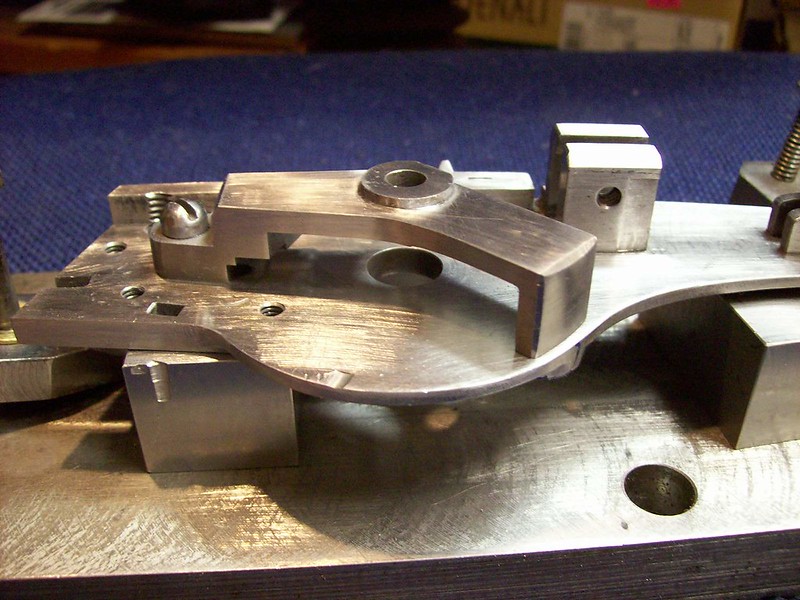
The wheel brace is mounted on an aluminum bar for filing & polishing (lower right). I still need to thin the bridle (upper left) and polish the exterior parts to another grit or 2.
 
Finished polishing the metal (enough for me anyway). Found on another forum that said 400 grit is the minimum polish for hardening. 400 grit is min. to show case hardening colors well, but these parts will have any colors (if any) polished off. I will use wood charcoal & activated charcoal to harden and will probably not get much color, mostly grays.
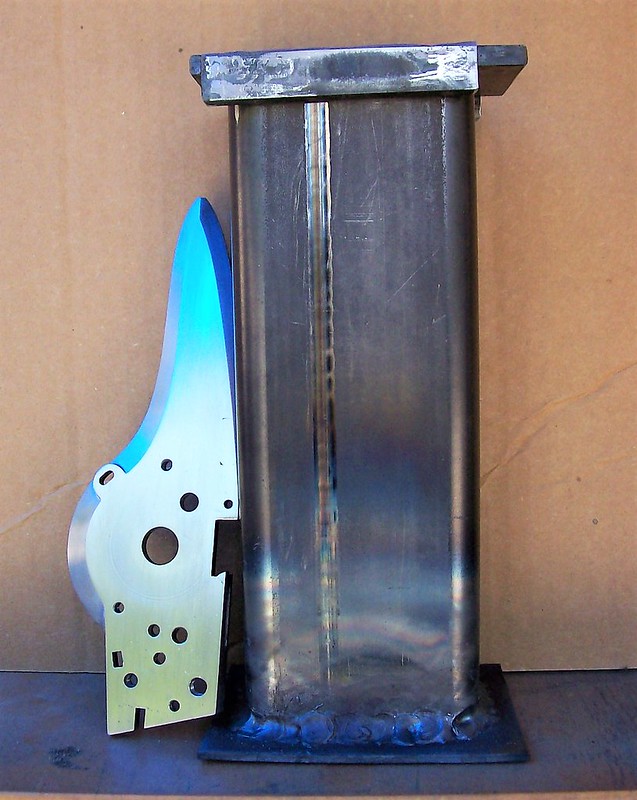
Here's a photo of my container:
https://flic.kr/p/2aksQkh

The container is 1/8" thick steel x 2" x 3" x 8-1/8" tall. The top is 1/4" steel with 1/4" steel tabs on the sides. The tabs are offset from each other.

The container is a lot tighter inside than I thought it would be. It is okay for a percussion lock or flintlock but a little small for a wheellock. I'm going to mount the spindle brace and wheel brace on the plate to stabilize it against warping.

update later next week after the conflagration, Mike
 
Finally did the case hardening this morning (9:30 -1:00). I used Royal Oak charcoal from Home Depot, smashed up to a fine granule and activated charcoal also smashed up (finally used a clay brick as the weapon of choice to pulverize both charcoals - I kept sifting & pulverizing).

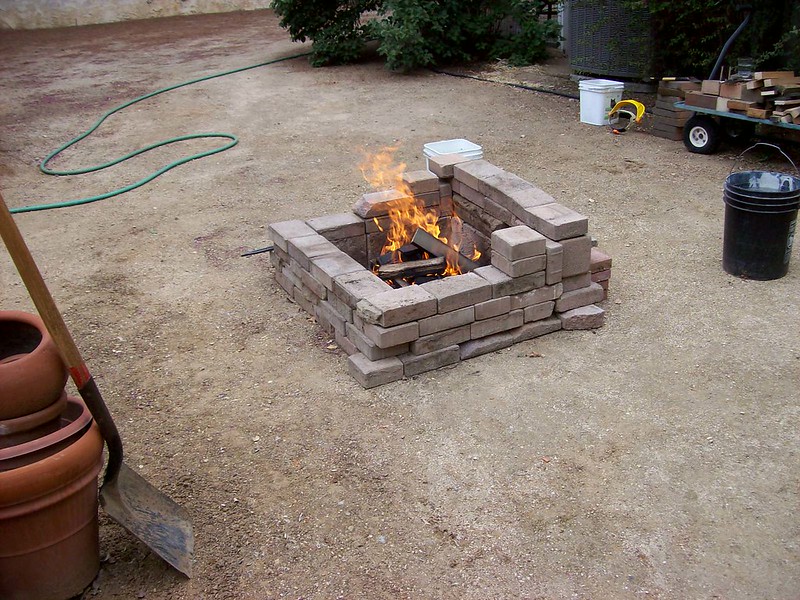
Here's a photo of the elaborate fire pit:
https://flic.kr/p/2aC2Kcu
I added more concrete bricks to the sides of the pit during the burn. I had 5 buckets of water,4 buckets of sand, a garden hose, a shovel and various other hand tools.

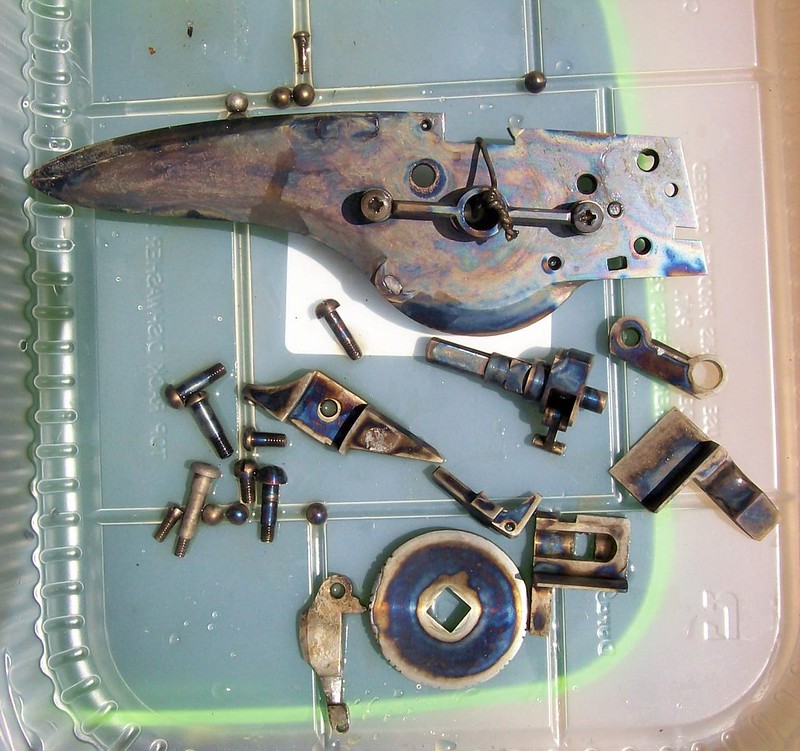
After cooking for about 2-1/2 hours, I let the fire die down for another 1/2 hour, removed the container from the pit, took off the steel cover and dumped the contents into a 5 gallon plastic bucket that I had filled the day before. When I quenched I used a face shield, hat, leather gloves & an old leather jacket. Here are the results straight out of the quench bucket:
https://flic.kr/p/2aC2KGC

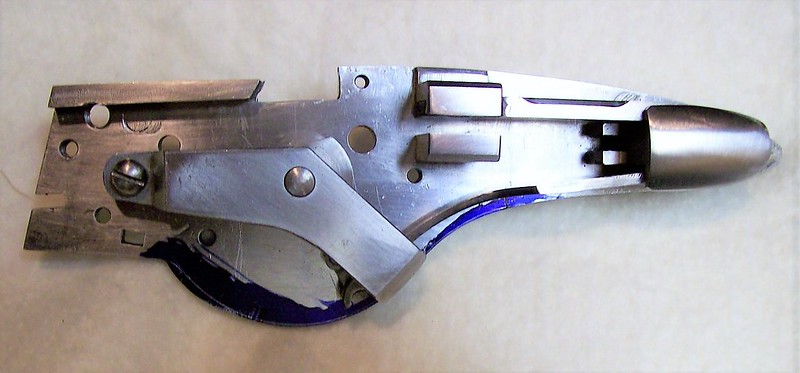
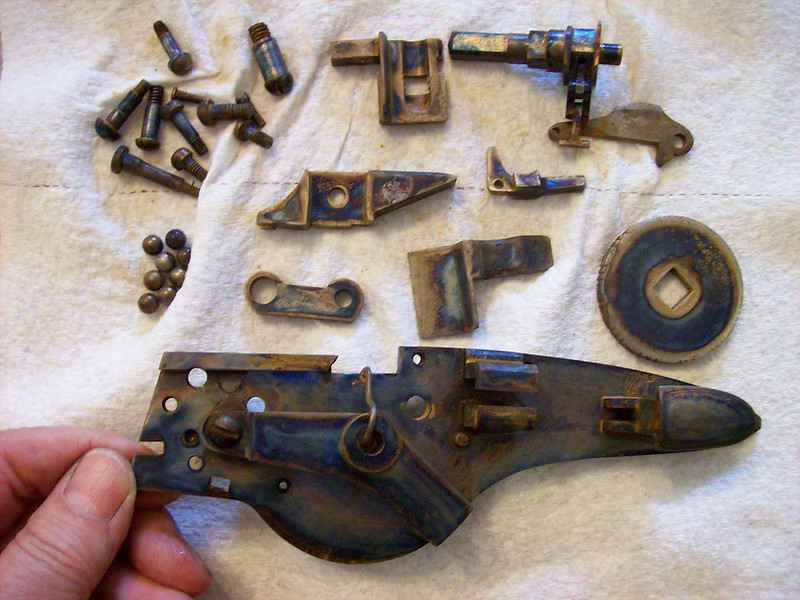
I didn't have room in the container for the dog (pyrite holder), so it will have to wait for another day. The parts have set out for about a 1/2 hour now & are starting to rust, but here's one more shot of the back of the lock plate:
https://flic.kr/p/LWqZyk

I had never done hardening before today and the results were much better than I expected.
Mike
 
Back
Top