


coehornboy
40 Cal.
- Joined
- Mar 24, 2005
- Messages
- 218
- Reaction score
- 1
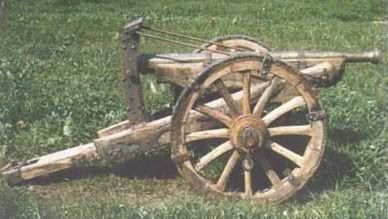
Here's the latest project. I wanted to make an early cannon, and decided on a burgundian design that I saw on the internet (here's a photo of the original):
MY CANNON IS APPROXIMATELY 1/2 SCALE
The barrel is made from oil well tubing..this stuff is has a hard outer layer and also has cooling fins that somewhat replicate the old "stacked rings of iron" look of the original. I had a friend turn a stainless breech plug which is pinned with a 1/4 stainless pin AND TIG welded into place..the bore is approx, 1 1/8, and I use a 4oz fishing sinker and 300 grains of ffg.
The carriage required some imagination...remember, I'm thrifty (cheap), so I scrounged up some lumber, including an old spreader bar from a hammock (the stick with the holes in it). The thick slab wood was from old '70's pine shelving that was 1.5" thick.
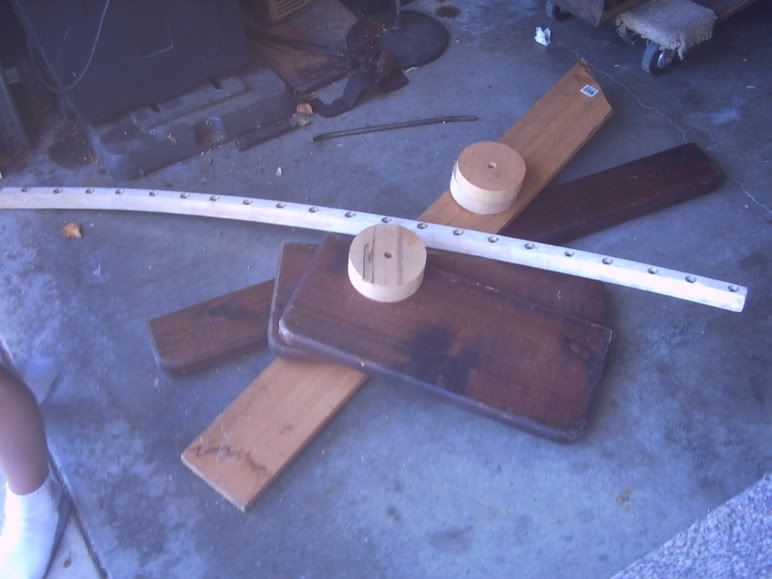
Next, I made a full size template on butcher paper, and cut the wood. I sandwiched the thick pine between scraps of maple and whatever hardwood I could find, and used Gorilla Glue and lots of old bolts and washers to hold everything together. The next photo shows the first version of the carriage, sans wheels. Compare this to the final photo:
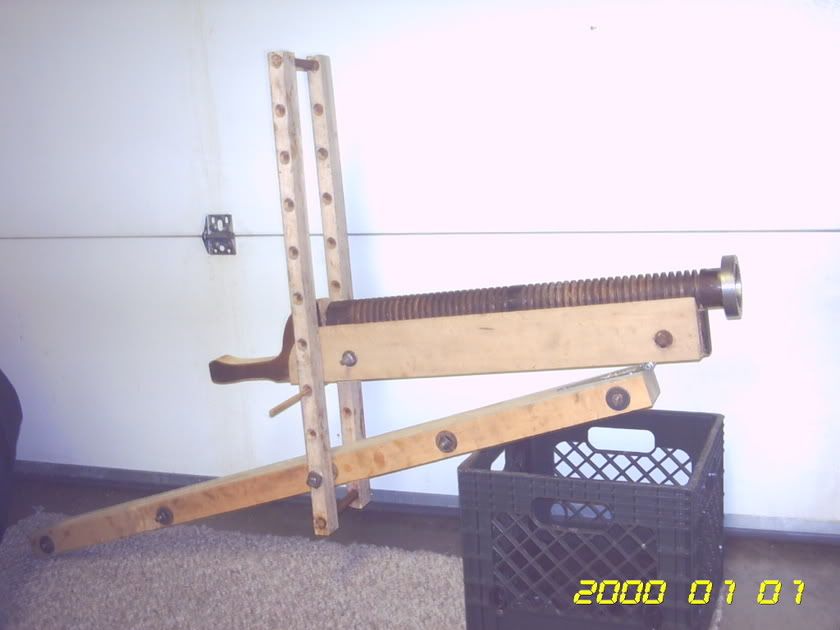
(ignore the wrong date on the photo...cursed technology!!)
Next, I neeeded wheels. Remember, I'm thrifty (cheap), and unwilling to shell out $$$ for custom spoked wheels. So, I modified the design to a sort of "garrison carriage", with smaller, solid wheels, cut from pine slabs. I attached smaller oak wheels inside and outside w/ glue and screws to reinforce the big wheels and act as bearings. I also attached rings on all sides to anchor the gun when firing. An old bronze oar lock was installed in the trail, and I can put a spike through it to help add "drag" when firing.
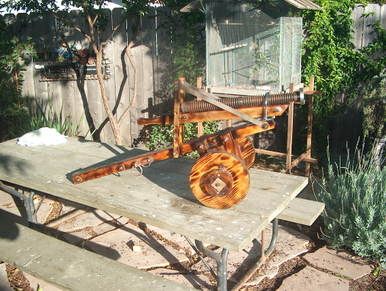
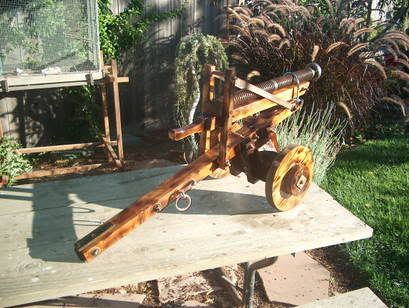
Next, I'll make some sights and add some sort of fine adjustment for elevation. Overall cost was about $20.00 for hardware and spar varnish (not including the cigars and spirits that I bribed the lathe operator/ TIG welder with).
Again, I encourage those of you that are unsure of trying a project like this venture out and take the first step...research and read...talk to people that have been successful with their projects and that can help you make sure that what you are making is safe and correctly designed. And lastly, find the person whom is willing to help you with the parts of the project that require expertise beyond your current skills (for me, it was lathe work).
MY CANNON IS APPROXIMATELY 1/2 SCALE
The barrel is made from oil well tubing..this stuff is has a hard outer layer and also has cooling fins that somewhat replicate the old "stacked rings of iron" look of the original. I had a friend turn a stainless breech plug which is pinned with a 1/4 stainless pin AND TIG welded into place..the bore is approx, 1 1/8, and I use a 4oz fishing sinker and 300 grains of ffg.
The carriage required some imagination...remember, I'm thrifty (cheap), so I scrounged up some lumber, including an old spreader bar from a hammock (the stick with the holes in it). The thick slab wood was from old '70's pine shelving that was 1.5" thick.
Next, I made a full size template on butcher paper, and cut the wood. I sandwiched the thick pine between scraps of maple and whatever hardwood I could find, and used Gorilla Glue and lots of old bolts and washers to hold everything together. The next photo shows the first version of the carriage, sans wheels. Compare this to the final photo:
(ignore the wrong date on the photo...cursed technology!!)
Next, I neeeded wheels. Remember, I'm thrifty (cheap), and unwilling to shell out $$$ for custom spoked wheels. So, I modified the design to a sort of "garrison carriage", with smaller, solid wheels, cut from pine slabs. I attached smaller oak wheels inside and outside w/ glue and screws to reinforce the big wheels and act as bearings. I also attached rings on all sides to anchor the gun when firing. An old bronze oar lock was installed in the trail, and I can put a spike through it to help add "drag" when firing.
Next, I'll make some sights and add some sort of fine adjustment for elevation. Overall cost was about $20.00 for hardware and spar varnish (not including the cigars and spirits that I bribed the lathe operator/ TIG welder with).
Again, I encourage those of you that are unsure of trying a project like this venture out and take the first step...research and read...talk to people that have been successful with their projects and that can help you make sure that what you are making is safe and correctly designed. And lastly, find the person whom is willing to help you with the parts of the project that require expertise beyond your current skills (for me, it was lathe work).
