• This community needs YOUR help today. We rely 100% on Supporting Memberships to fund our efforts. With the ever increasing fees of everything, we need help. We need more Supporting Members, today. Please invest back into this community. I will ship a few decals too in addition to all the account perks you get.


    Sign up here: https://www.muzzleloadingforum.com/account/upgrades
  • Friends, our 2nd Amendment rights are always under attack and the NRA has been a constant for decades in helping fight that fight.

    We have partnered with the NRA to offer you a discount on membership and Muzzleloading Forum gets a small percentage too of each membership, so you are supporting both the NRA and us.

    Use this link to sign up please; https://membership.nra.org/recruiters/join/XR045103

Off & crawling on my first build

Muzzleloading Forum

Help Support Muzzleloading Forum:

This site may earn a commission from merchant affiliate links, including eBay, Amazon, and others.
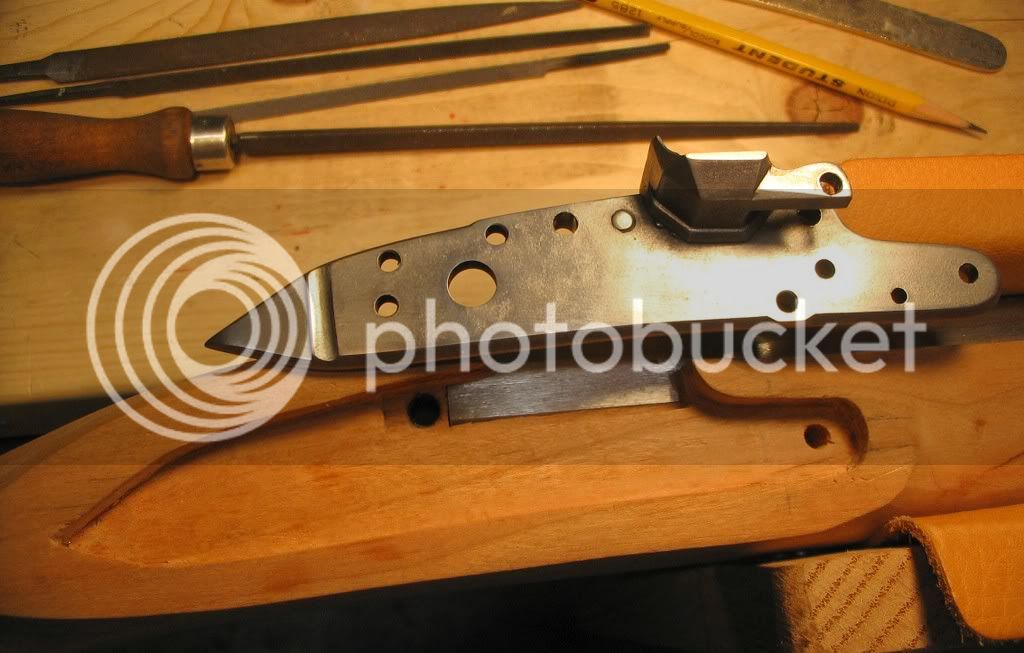
The top screw should be as far back as possible without interfering with the bridle. I would go with a 10/32.which is a #21 drill bit.
You can buy a tap and drill set at any hardware store.
The front one is touchy...
I would try to put it as far forward and as high as you can go..while still getting solid threads..
anyone else is free to jump in..
Go with an 8/32..which is a #29 drill.
Square everything up in your press.. Mark the location on the lock side. Drill with the numbered bits, through the lock side.
Once you have the holes done.. You need to drill clearance holes a 13/36 for the rear and a 11/64 for the front. Just the stock..NOT THE LOCK
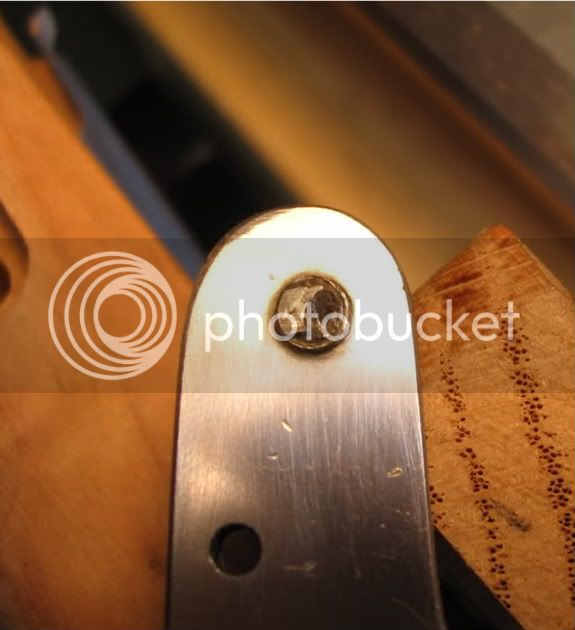
Tap the lock.. You should be good. Nice and square
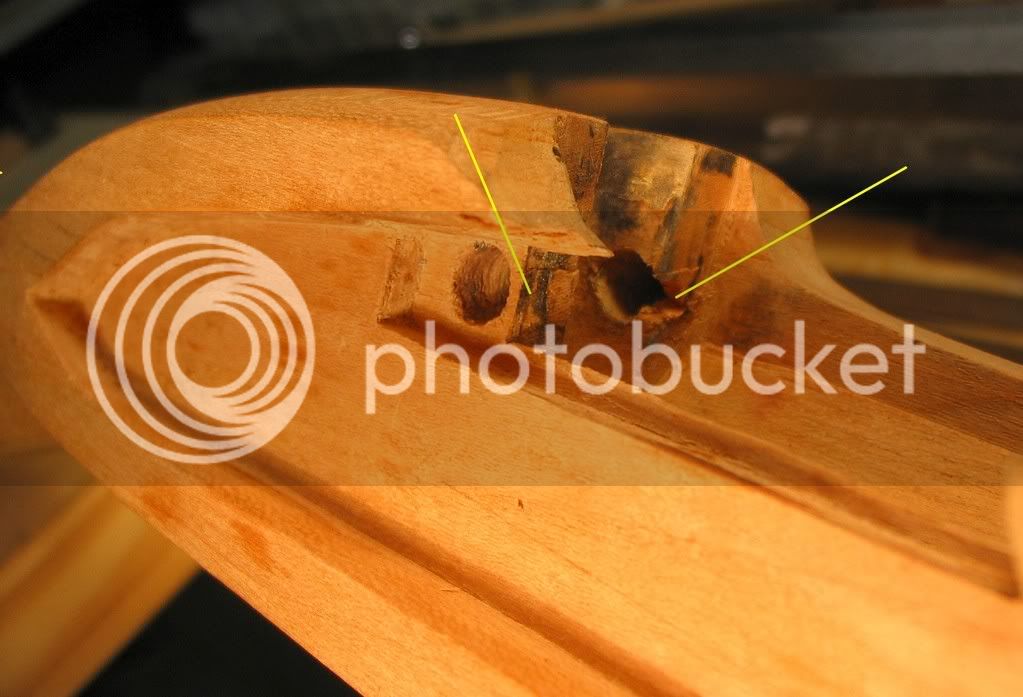
The side plate.
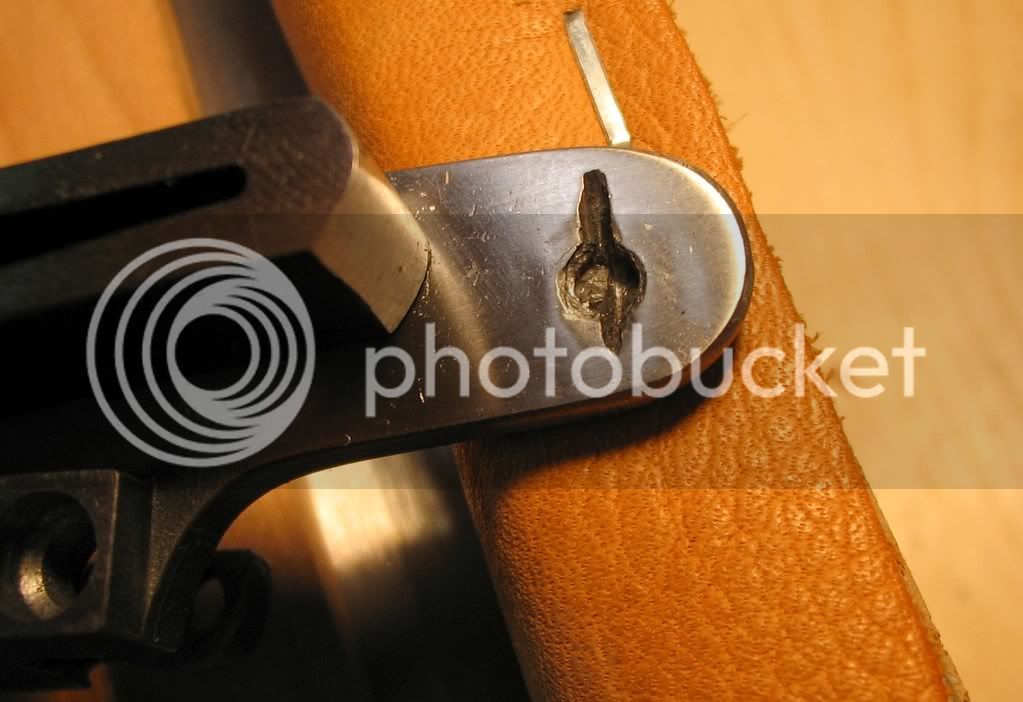
Center the rear hole on the side plate..drill with the clearance bit.
Once you have the side plate screwed down.
Mark the center,the top and bottom of the front lock plate hole with a pencil so you can see it when you twist the front of the side plate over the hole.
That's where you want to drill..
Works every time.
I wish I could show you pics.
Do you have a book that you are working with??.
I have a copy of dixion's book you are welcome to use.
It was given to me from a friend and I already have a "well used one"
Regards
Mike
 
You can mark and drill the top rear hole on the side plate separately.
It is much easier to do that on your drill press.
Just center the hole, leaving enough brass.. I assume its a brass side plate,for the screw head.
Once you have the side palate firmly screwed down, then you can pin point the location of the front hole. per the last post :thumbsup:
 
oldarmy said:
The top screw should be as far back as possible without interfering with the bridle. -Oldarmy

ain't that the truth.

think I may have performed my first MAJOR goof up.
finished seating my lock plate all the way down, then cogitated on the lock bolt hole placement, and drilled them in.
They looked like this, and most of you will immediately know where this is going.
LockPlateInlet2-20-0014.jpg


Apparently I cogitated too much on the front bolt and not enough on the rear. :cursing:

Altho I didn't have much room to play with on the rear bolt, I shoulda used every bit of slack I had.
Here's the back of the bolster with bridle -thought I'd leave me about 3/16" spare. Bad idea:
RearLockBoltHole.jpg


Soooo.., upon removing my barrel to see what I had done, and feeling like=>:barf:, here's the damage:

RearLockBoltBadSpots.jpg


Basically, there's no wood at the 3-o'clock and 9-o'clock position at the barrel breech. :redface:
I suspect the little wood that's there will be gone before the build is done, or at least after shot #1.

Somebody please tell me that this isn't fatal. :(
 
Someone else that KNOWS will certainly come along but can't you just glass bed that area (bolt, tang, and all) and be fine?
 
IMO that is not a major screw up. (The kind where you have to burn your stock and start over.) :grin:
The rear of the barrel will still be supported by the wood above and below the break out and the hole is behind the rear of the barrel.

Now, had the hole been a bit further forward, you would have had to file a groove in the rear of the barrel.
That wouldn't cause a structural problem but it would be a real PITA.

As for filling the area with some sort of bedding compound I don't see where it would provide much additional barrel support because you would end up having to drill most of it away anyway.

Keep on with your project. :hatsoff:
 
Zonni is right.
That rear bolt and the tang bolt will hold the breech of the rifle quite steady. I wouldn't worry about that little bit of wood...you are going to be removing allot more, before you have that lock done :thumbsup:
You are doing a great job on your first build.
Did you use a 10/32 for it? Also did you check the front hole to make sure your ramrod clears the bolt??
 
thanks guys. you've restored my morale.

yep, the rear bolt was a 10-32 and the front was 8-32.
The rear bolt passes right thru the middle of the tang bolster.

The front bolt hole did not break into the the RR channel - I cheated a little the other way to make sure - the clearance bit actually scored the bottom of the barrel.
Wiped out the "C" in Green Mountain's ".50 Cal" stamp.

On to tapping and inletting lock guts.

To repeat, this forum and the helpful members are the best.
 
Use the inletting procedure that is outlined in Dixon's book.. bridle, tumbler, sear, sear spring and main spring.
Keep in mine you will have to relieve some wood on the top of the lock plate for the cock to move freely.
I always miss that and wonder why the lock doesn't work :cursing:
Did you drill the holes for the side plate yet?
 
nope on the sideplate holes.
another snafu this afternoon. :shake:
shoulda gone fishin' this weekend.

snapped off the tap in the front lockplate hole.
Pretty much flush on both sides.
(Rear tapping thru bolster went great - go figure.)
anyway, can't shatter it with a punch.
drill bits won't touch it.
bought a diamond burr for Dremel, that barely dented it.
gonna continue to inlet lock innards, and then send plate off to someone to fix it.
guess I'll call TOW to see if they'll do it, or Jim Chambers, maybe....
It's a Chambers deluxe large Siler from Track.
I thought things were goin a little too smoothly... :surrender:
 
Were you using tapping oil?

Also, never use HS steel taps. If they break, you can't crush the pieces out.

If you don't want to send them out to Chambers, Brownell's sells tapping extractors.
 
The first thing to do..is just let is sit for a day.
It's always seems worse then it is seems. :v
We have all broken taps.. :cursing:
Try to use a fine pointed tool and lightly twist it out.
Remember that you can always go to a bigger bolt.
I would use some oil and a fine pointed tool and drive it out from the back as a last resort.
It's just a part of the building process :hmm:
Problems will occur and you find a way to deal with them.
Regards
Mike
 
You might be able to back it out by using a pin punch or something similar and a small hammer. You may want to sharpen the point of the punch.

What you want to do is make the tap turn out by tapping the punch on the broken edge of the tap. I learned this by watching maintenance men do it. I've tried this method with broken bolts and it works. It might work on the broken tap.

Oldarmy beat me to it! :doh:
 
oldarmy and Flint Hunter are on to something.

Be sure to wear glasses to protect your eyes. Then look at the tap. You will see the flutes going down into the hole.

Apply some thread cutting oil or even some WD-40 to lube the tap and let it sit for half an hour.
Then use a pin punch and a little hammer by holding the punch so that most of the energy the hammer will deliver will rotate the tap counter-clockwise (lefty loosey).
After a few taps of the hammer, move to the next flute and repeat the tapping (no pun intended).

Before long you should see it start to move. When it does keep on moving to the next flute and tapping with the hammer.
With some patients (sp?) you will be able to fix the problem and get on your way again. :)
 
Small taps are tough to remove. Smacking them with a punch to attempt to shatter it may have run your streak of luck right to the peg-o-meter. If you break a tap off, especially a small one, there is a chance that you can back it out. Once you smack it, it very well may be locked in place and require more drastic measures. Once broken, especially flush or submerged, if you can get a tool to fit in either scallop between the flutes, opposite each other and grasp them you can probably turn the tap out.

There's always the sinker EDM otherwise ;)

taps that small are tough to deal with... a magnifying glass is helpful to see what you are doing...
 
thanks guys.
the story may be worse than at first glance.
I thought I'd finish the last few threads with a plug tap, to avoid the run-out of cut metal and leave a nice finished look on the outside of the lockplate. Again - stupid idea.

I got about 1.5 turns of what I thought would only be 2 or 3 revolutions at most and 'pop'.
Well, the plug tap has only one, very thin flute.
Hard to find, let alone apply leverage too.

Here's a pic of the inside - broken side.

LockBrokenTap.jpg


I'm gonna ferment on it a while and then pick it up, try the tap-out method, and, if no go, then take it to a gunsmith or machine shop.
There is a broken edge I may be able to get some purchase on for tapping out.

Thanks for you tips fellas, perhaps what I need, next time I even think about improvising, is=> :slap:
 
Boy, for this being your first build, your work seems to be very clean and looks to be that of someone with much experience! Wish mine looked that good.

:thumbsup:
 
You are being WAY TOO HARD ON YOUR SELF.
Your work so far has and will continue to excellent :thumbsup:
The way I see it.
Get a dremal tool with a reinforced cut off wheel.
thin the wheel a little, by grinding the side on something. You want the slot to be thin enough so your screw driver doesn't slip
Cut a slot through the center of that mess and you should be able to twist it right out with a screw driver.
You might leave a mark on the inside of the lock plate.. Big deal.
Again, this is just a "learning experience" don't use a plug tap for this again.. The lock face is going to have to be lightly filed anyway.
 
Hey,
I see you already have a dremal tool :thumbsup:
The reinforced wheels.. buy the 20 pack at Lowes or Homedepo. Don't buy the cheap ones :nono:
They have a thousand uses.
Not PC :redface:, but will save you allot of time and are like an power file.. Just use with caution.
 
Thanks for the kind words, Bareback, but my inexperience is starting to show too!
Things not going so well on the broken tap.
slotted it and tried a custom-fitted screwdriver, but it just crumbled away bit by bit.
So now I'm down to about half-a-lockplate - thickness of broken tap still in the hole. :cursing:

BrokenTap.jpg


Finished inletting the lock internals, and moving on to trigger.

If anyone has any ideas how I might proceed with this front lockbolt hole, I'm all ears!
Can a real machine shop just drill that out, and I could go up to a 10-32 bolt ?
Or, I'm almost thinking of tapping another hole between this one and the mainspring, and recessing the bolthead "blind" behind the sideplate.
But I'd really rather only do that as a last resort.
 
More than one longrifle has been made with only one lockbolt holding the lock in place.

Much as it may pain you the existing forward hole can always be plugged with a hard wood dowel and some glue.
Then, find a short wood screw that has a head that is shaped like the rear lockscrews head and use it in the front sideplate hole.
You may find that screws called "sheet metal screws" often have heads that are more usable and the only real difference between them and a wood screw is that they are threaded all the way to the head. They work great for this kind of application.

I think in the long run, that would look better than having two screw holes in the front of the lockplate.

If you use this idea, just make sure the wooden plug that you will glue into the stock doesn't get into the ramrod hole. In other words, keep it fairly short. :grin:
 
Back
Top