• This community needs YOUR help today. We rely 100% on Supporting Memberships to fund our efforts. With the ever increasing fees of everything, we need help. We need more Supporting Members, today. Please invest back into this community. I will ship a few decals too in addition to all the account perks you get.


    Sign up here: https://www.muzzleloadingforum.com/account/upgrades
  • Friends, our 2nd Amendment rights are always under attack and the NRA has been a constant for decades in helping fight that fight.

    We have partnered with the NRA to offer you a discount on membership and Muzzleloading Forum gets a small percentage too of each membership, so you are supporting both the NRA and us.

    Use this link to sign up please; https://membership.nra.org/recruiters/join/XR045103

Building a Ferguson Rifle from Rifle Shoppe Part Set

Muzzleloading Forum

Help Support Muzzleloading Forum:

This site may earn a commission from merchant affiliate links, including eBay, Amazon, and others.
Joined
Nov 26, 2005
Messages
5,018
Reaction score
9,972
Hi Folks,
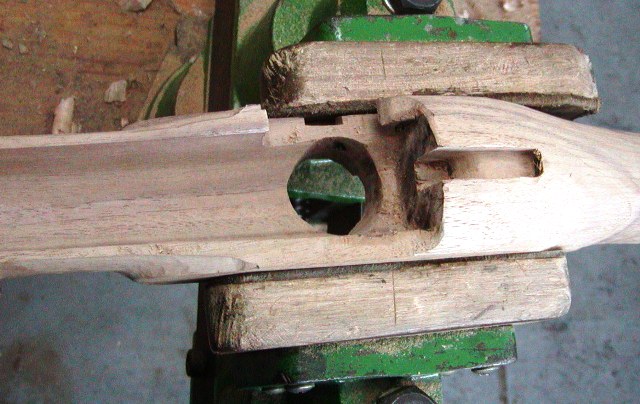
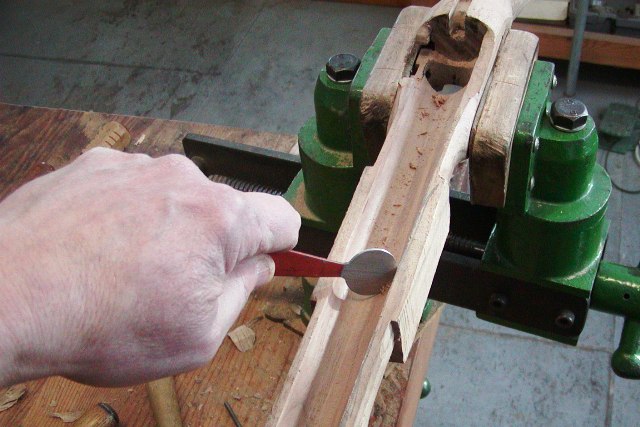
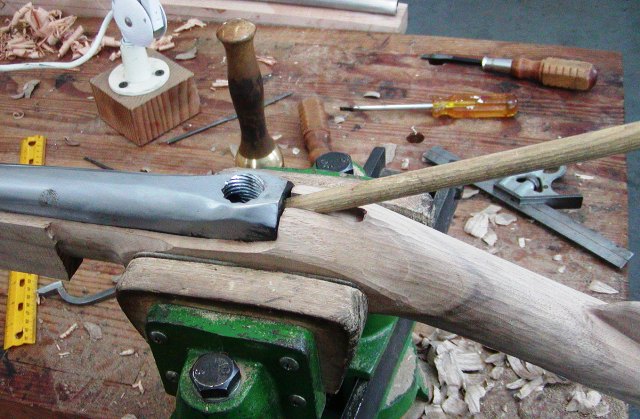
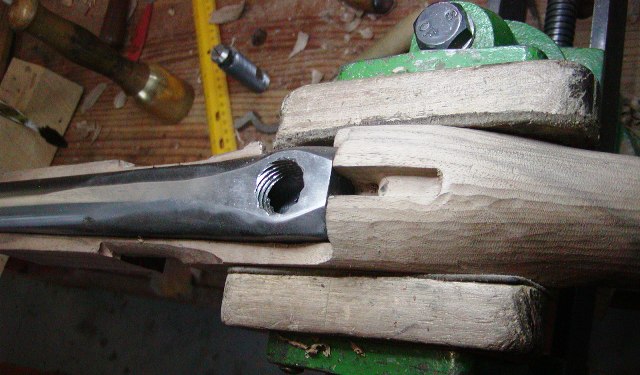
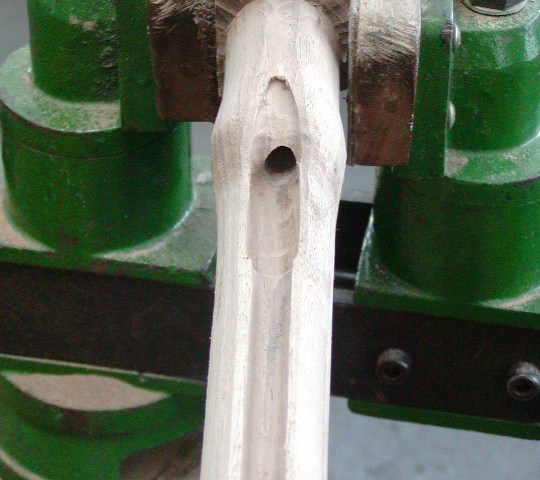
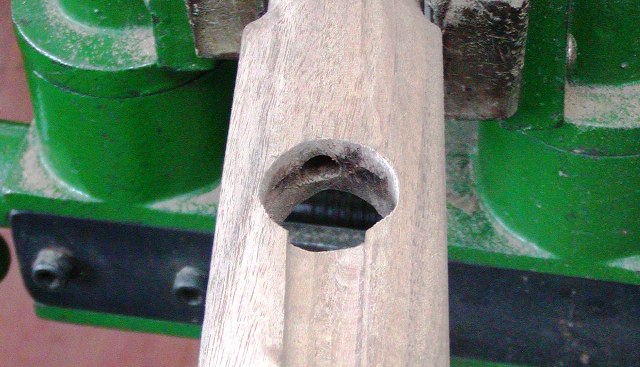
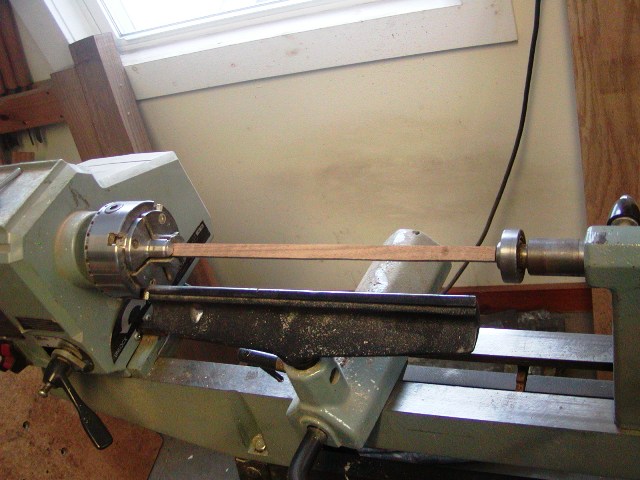
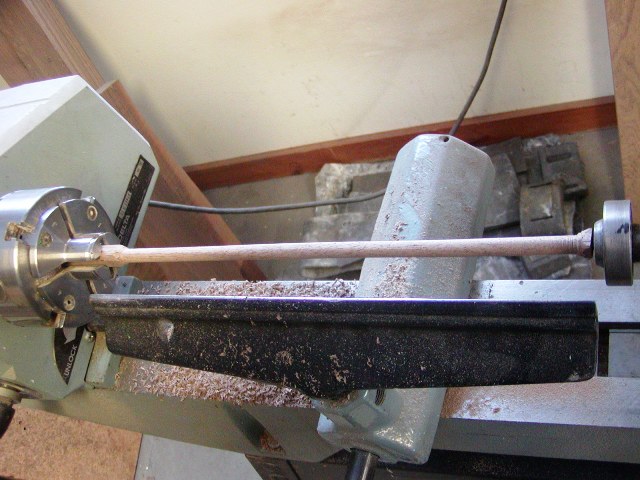
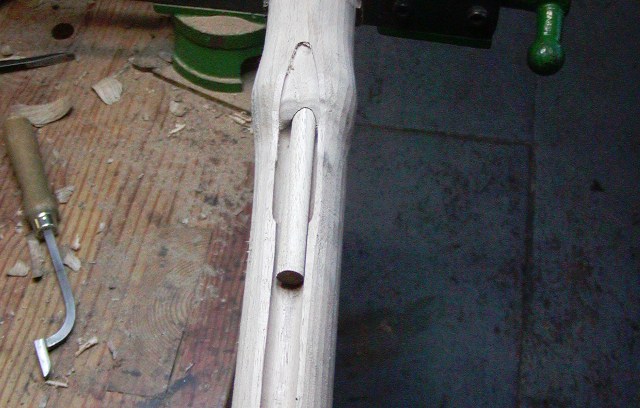
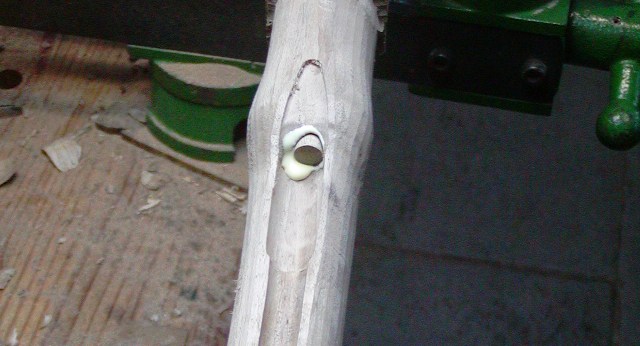
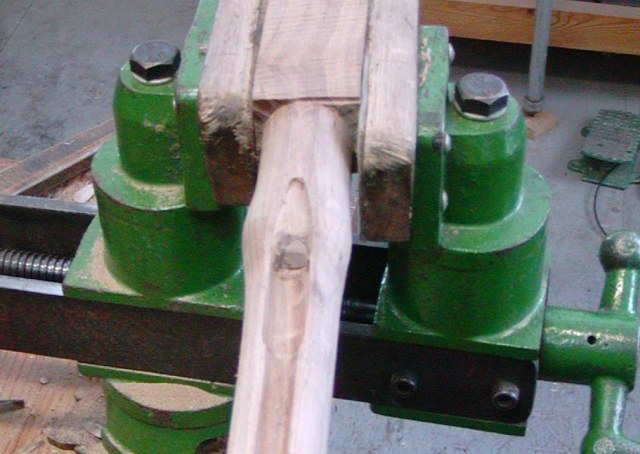
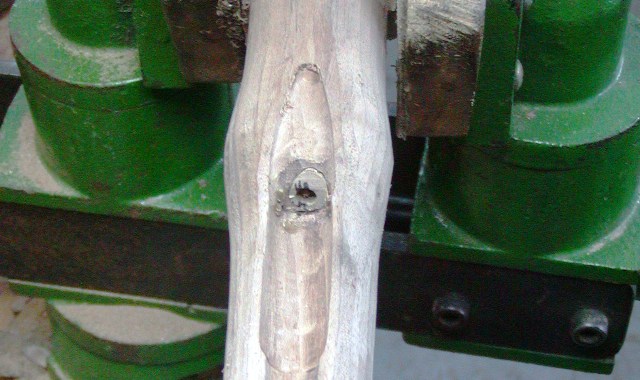
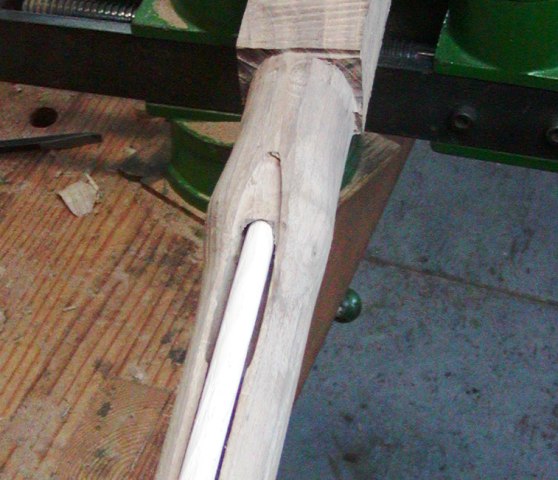
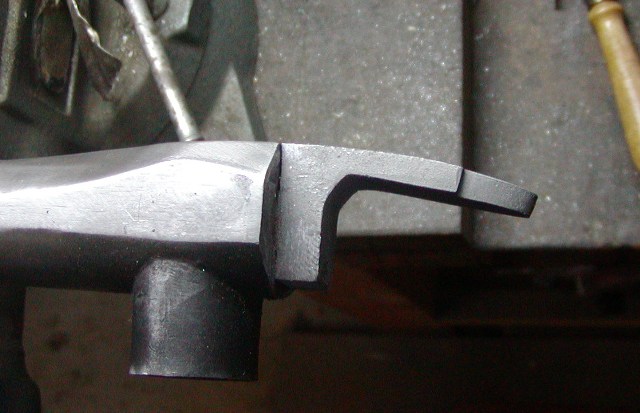
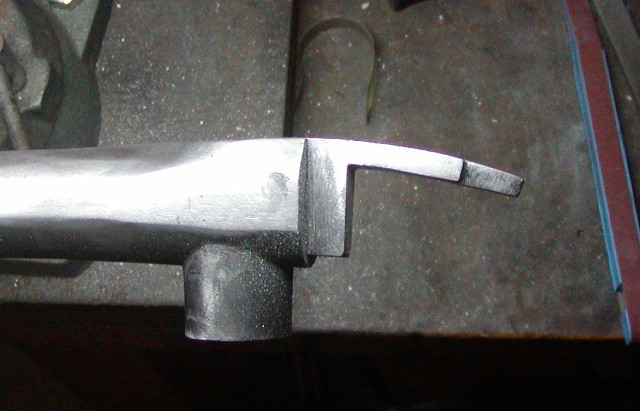
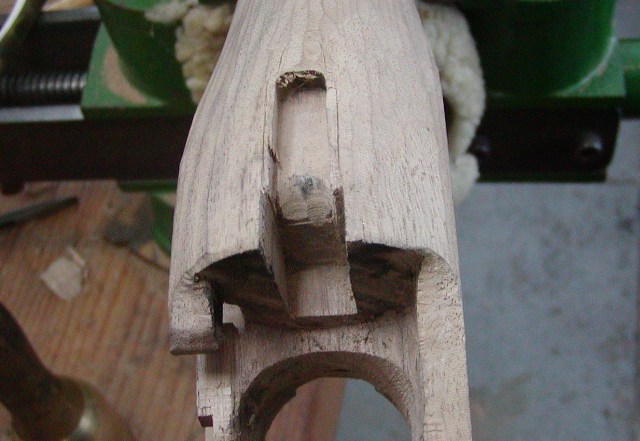
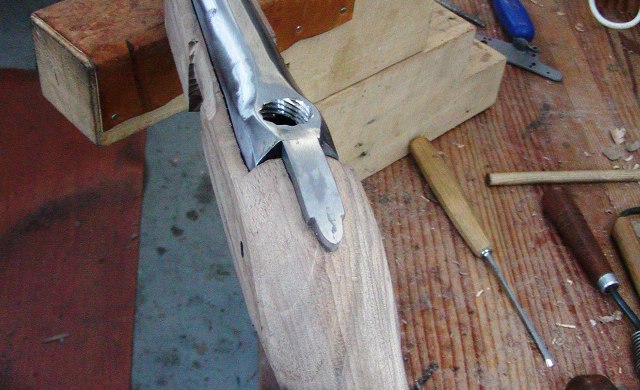
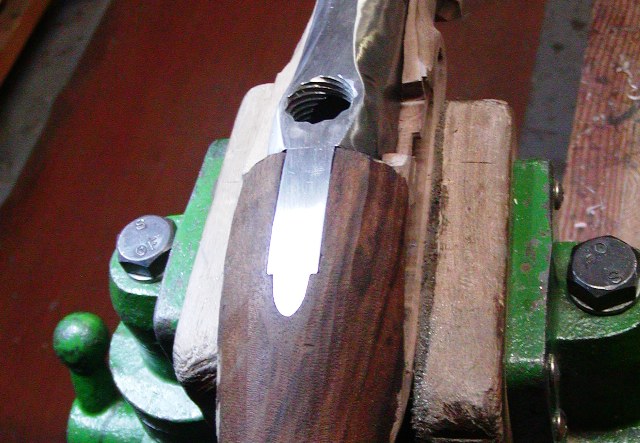
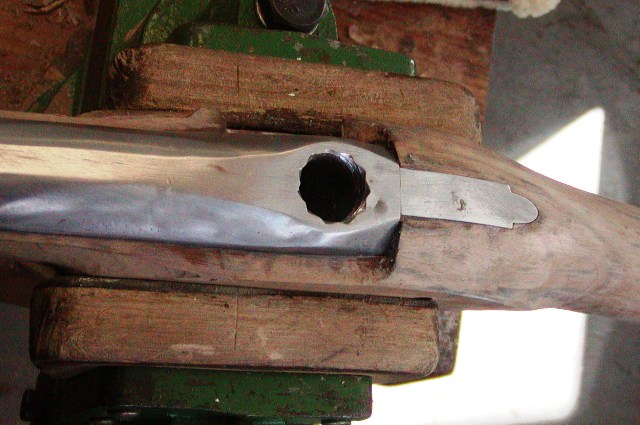
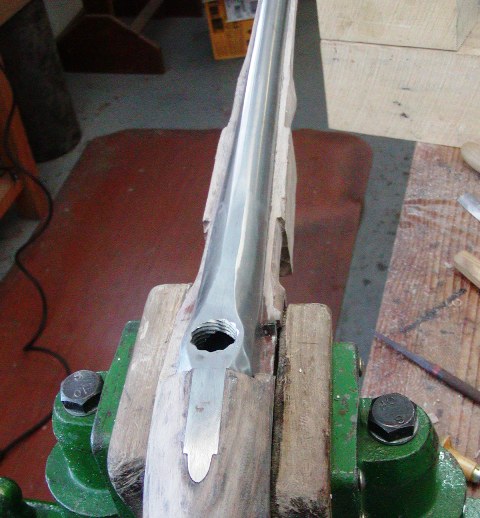
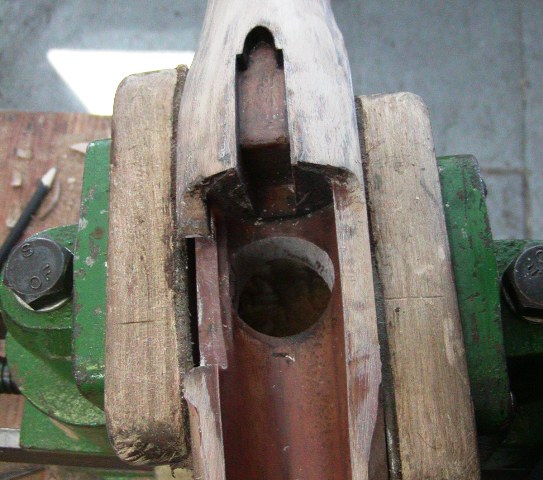
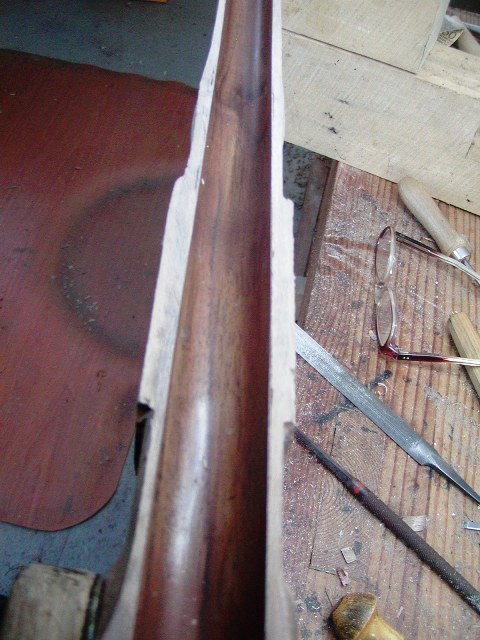
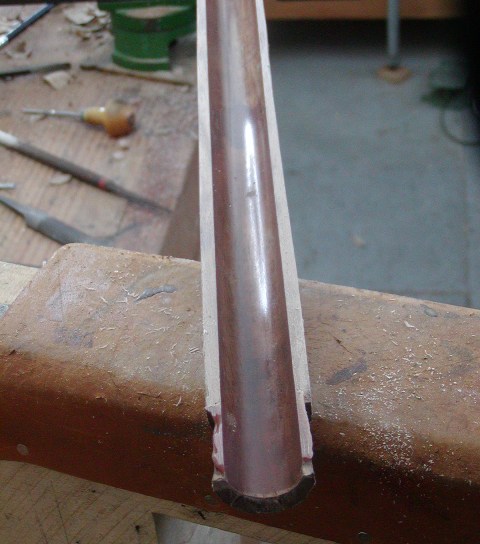
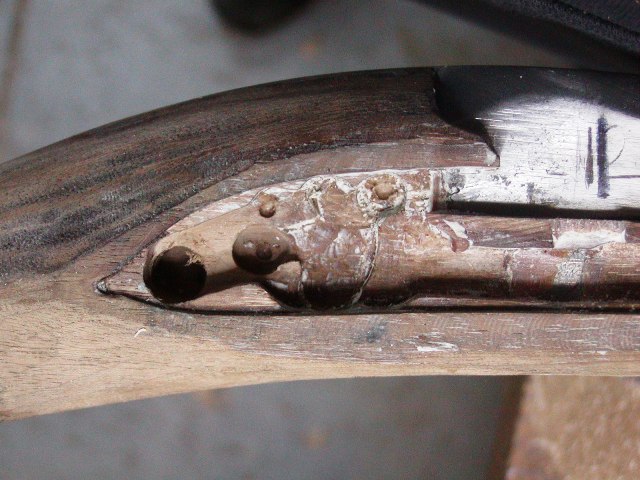
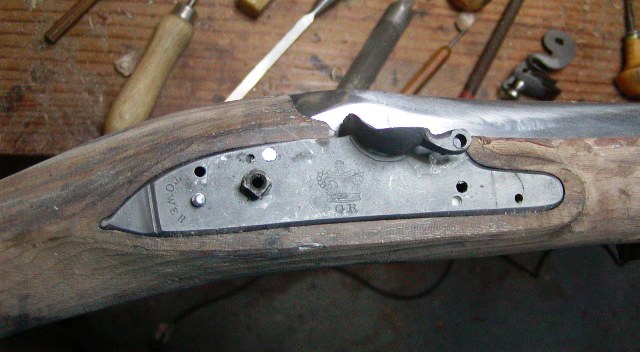
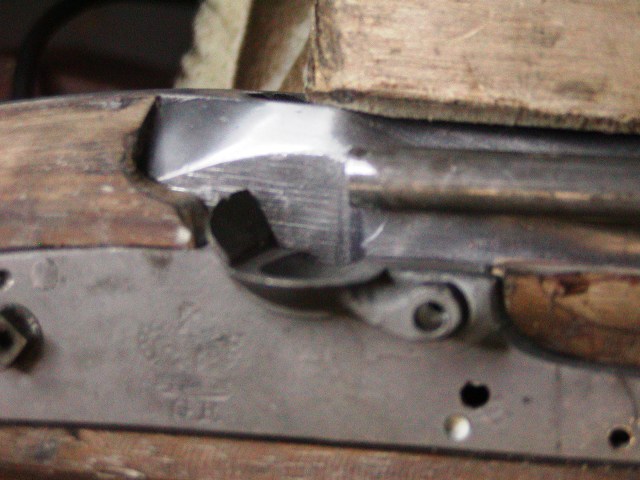
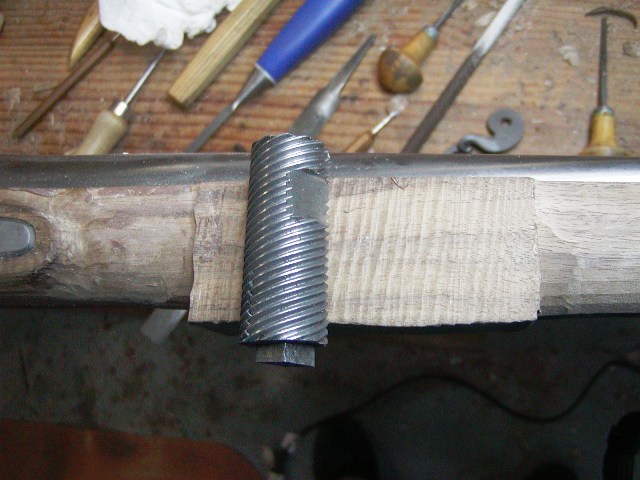
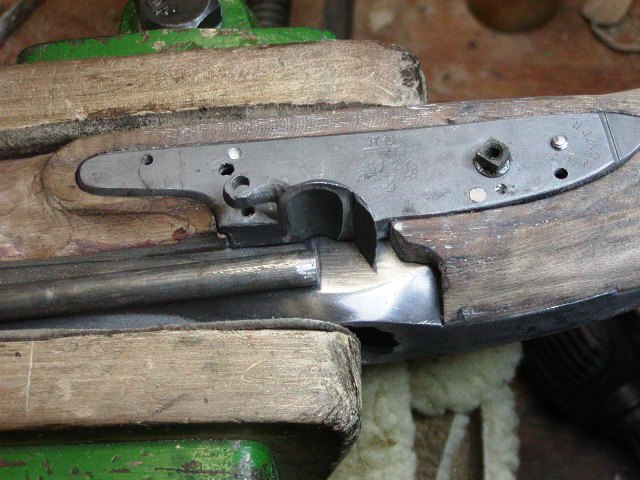
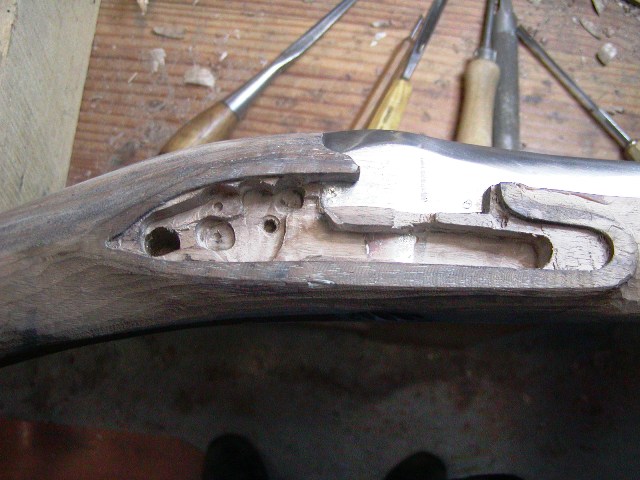
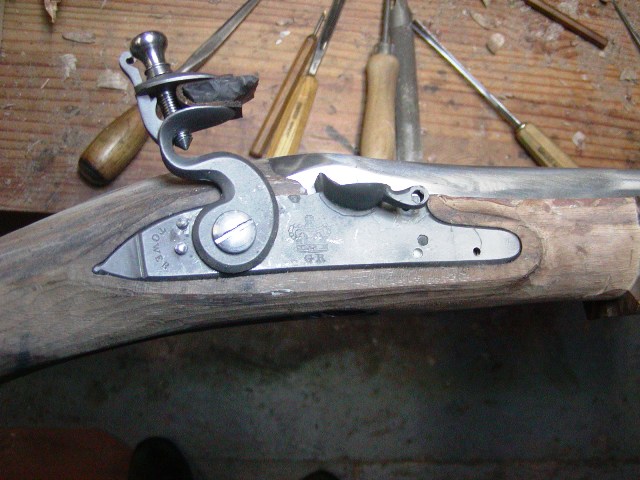
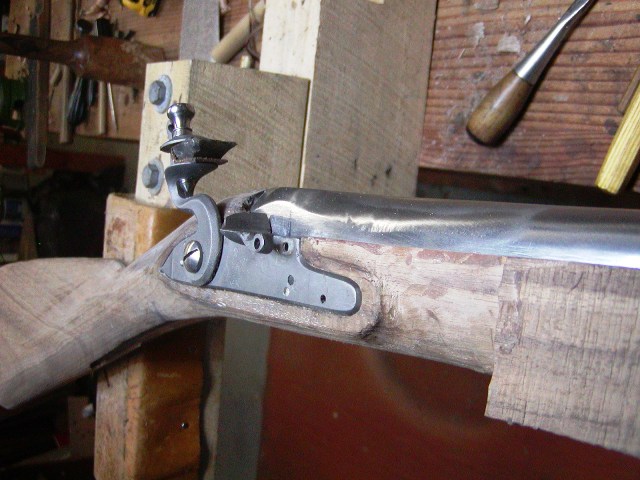
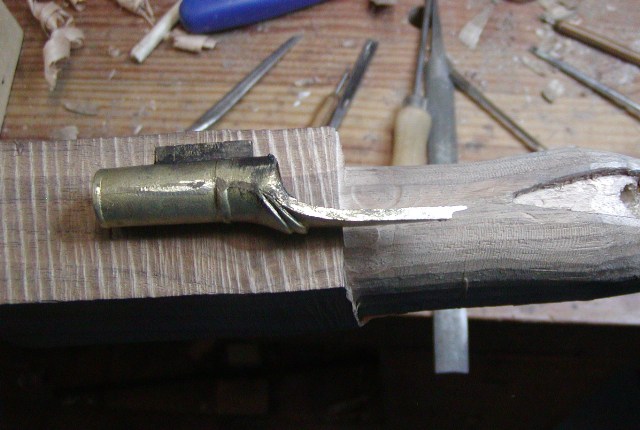
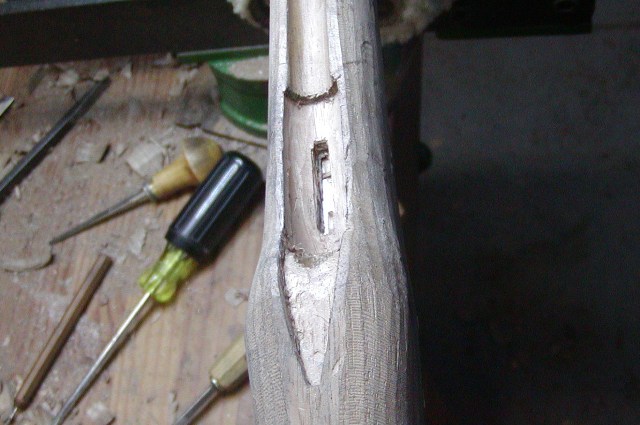
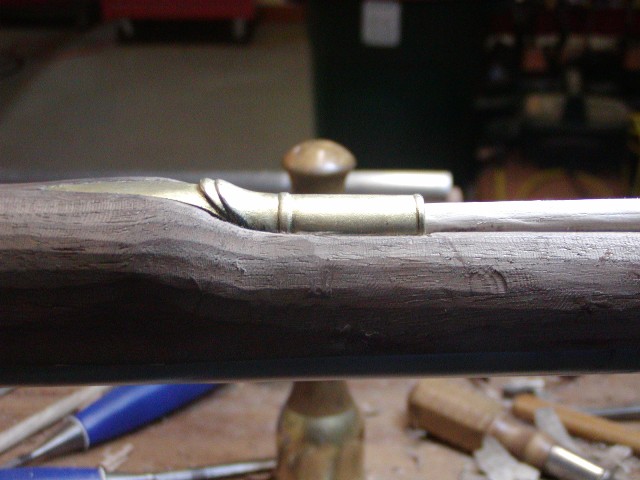
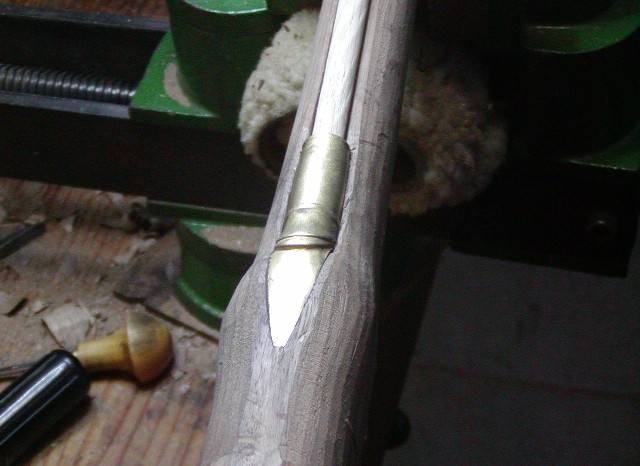
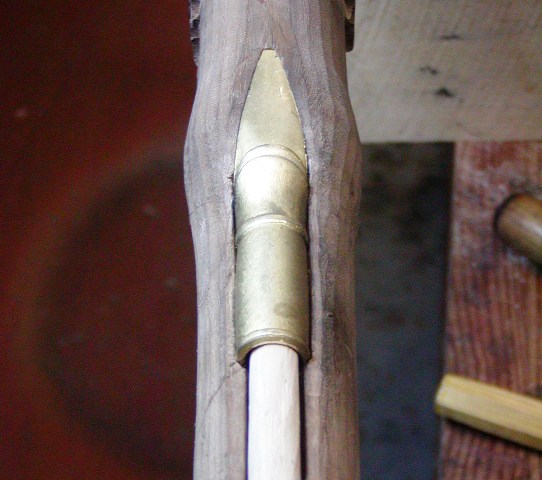
I am building this Ferguson rifle for a client down south. It is my third Ferguson but my first using the TRS precarved stock. I like Fergusons and shoot my personal rifle a lot. However, I have no illusions about the place of the Ferguson rifle in history. Patrick Ferguson and his rifle have almost a cult following. According to those folks if the British were not so stupid and made more Fergusons, we might have lost the Rev War. They also place Paddie on a pedestal as a far sighted visionary and superior officer. However, historical opinion and evidence is not so hegemonic. Ferguson did not invent the breech loading rifle design. He modified an existing design by Isaac de la Chaumette and made a few minor improvements. He was enough of an entrepreneur to stage demonstrations before the Ordnance and the king showing the advantages of his rifle. He was no fraud as a marksman and his demonstrations were legitimate and awe inspiring. But his rifle had some serious weaknesses as a military weapon. First, from the production standpoint, only a handful of British gun makers were qualified to make rifle barrel and breech. While those makers could produce 1,000 muzzleloading rifles, they struggled to make 100 Ferguson barrels and breeches and at 4 times the cost. Paddie put together his experimental rifle corps, who failed early marksmanship demonstrations but eventually congealed into a tight unit. That unit was thrust upon General William Howe in New York without his initial knowledge or consent. The rifle corps was a project of the king. General William Howe and his brother Admiral Richard Howe hated meddling in the American war by the government in Britain without it consulting them first. That put Ferguson and his experimental corps of riflemen on the wrong foot with Howe right away. They arrived in America and asked, "OK, here we are. What do you want us to do?" Anyway, they were put to use and Ferguson's riflemen acquitted themselves well but not superior to other groups like the German jaegers or John Simcoe' s Queens Rangers. They suffered heavy casualties during the Brandywine campaign and lost Ferguson owing to a serious wound. Ferguson recovered but his rifle corps was disbanded and the rifles ordered to be returned to stores in New York. That some of his rifleman kept their rifles is clear but to what extent remains a mystery. Ferguson was a good officer but neither Howe or Cornwallis trusted him. When he went south to operate under Cornwallis in South Carolina, Cornwallis did not trust him and was afraid he would impulsively get into trouble. He did at King's Mountain, a battle that should put to rest any illusion that Ferguson was a brilliant battlefield tactician or strategist.

dave
 
Hi,
So here is the TRS kit. The barrel is pretty well inlet but the hole for the screw breech needs to be opened and shaped. When doing this you have to fit the barrel, breech, and end of barrel simultaneously. When fitting the breech, make sure you hold the barrel up rather than let it drop into the forestock. The breech has to go straight down and not rocked forward. Fit it carefully and slowly using some sort of blacking. On this stock, the barrel channel also needed scraping to allow the barrel to sit down.

BIyPsmb.jpg

sahbaj7.jpg


I moved the barrel back a little in the channel but you cannot do much without creating a gap in front of the round screw breech. When fitting a Ferguson breech, make a little pry stick by tapering a dowel that can fit into the bore of the breech and lever it straight up each time the barrel is removed.
R0NaEe6.jpg
.

Eventually, the barrel will sit down into the stock.
OeW52hF.jpg

QqzOyqn.jpg


So the next issue, the ramrod hole was drilled way off center.
Nm78XYO.jpg

dTAv09U.jpg


Well, that is what lathes are for. I turned a walnut plug and glued it in the hole. Then I will drill a new hole.
6sDW3aT.jpg

Thp6jt6.jpg

OG4jvpv.jpg

EYboasV.jpg


It will all work out in the end.

dave
 
Ahhhh the fun of building with pre-carves! My limited experience with them has taught me a lot about making corrections (in general, not TRS). Do you think that plug will give you any trouble keeping the bit straight when you drill the new hole?
 
Hi
Ahhhh the fun of building with pre-carves! My limited experience with them has taught me a lot about making corrections (in general, not TRS). Do you think that plug will give you any trouble keeping the bit straight when you drill the new hole?
Hi,
Nope.

dave
 
Hi Rich,
I have not gotten a small metal turning lathe yet. I used my old Delta wood turning lathe.

dave
Dave, Tom C and my brother have forbidden me from getting a mini-lathe so I am working on getting a sound old lathe of modest size.

Great project, this Ferguson. You are really on a roll!
 
Hi,
I mostly straightened out the ramrod hole. It drifted a little to the side but at least the ramrod can fit through the rear pipe. The problem was the ramrod groove was misaligned and there is nothing I can do about that. It will all work fine in the end. I cut off the excess plug and then drilled a shallow hole where I wanted the ramrod drill to center.
AvbrwFf.jpg

NNVtBpW.jpg


That did the job but the plug still allowed the drill to angle slightly toward the original hole. However, the offset is small and will work fine.

E7IDGjl.jpg


Next, I prepared the breech plug and tang to be inletted. The plug is cast steel and the face is not finished so I ground and polished the face of the plug first. Then I cleaned up the bolster and tang. I got rid of the radius where the bolster joins the tang, which makes inletting a nightmare.
I6DP98E.jpg

Pwgjnvk.jpg

I also cleaned up all edges of the tang and file draft along all of those edges. It is now ready for inlet.

On the Ferguson with the screw breech, inletting the barrel tang is a little tricky. You want everything to line up. I mark the edges of the tang where they line up with the top of the barrel.
wd9pGri.jpg

Then I measure the depth of the tang bolster and use those lines to guide my mortising chisels. More to come.

dave
 
Hi,
Next was inletting the bolster of the tang so that the full tang could sit down on the wood.
fMMUEIE.jpg


But before doing that, I checked the tang measurements against Bailey's measurements and my own notes from examining the original Morristown gun. The TRS tang is 3/16" too long so I ground it back and shaped it properly. Once the bolster is in and the tang down on the wood, I trace it with a sharp knife. One trick I use is after tracing the outline with my knife, I trace the step and end of the tang with a pencil held vertically. Then I stab in my incised cut along the sides of the tang and my pencil line around the end. The reason for following the pencil line is that it initially creates a little slop in the mortise at the end of the tang. That extra space is important because as the curved tang is pressed into the wood, it has a tendency to push the barrel forward. That is not an immediate problem for normal barrels as you can eventually move the barrel back. On a Ferguson, however, you have the breech plug housing pushed forward as well, hitting the forward part of its hole in the stock. By creating a bit of excess space allowing the tang to move back as it is pushed in, the screw breech does not bind preventing the barrel from sitting down properly in the stock.
USLHMrS.jpg


Using inletting black as a guide, I finally get the breech and tang down all the way.
UnvzSkd.jpg


dave
 
Hi Rich,
I have not gotten a small metal turning lathe yet. I used my old Delta wood turning lathe.

dave
Hi Rich,
I have not gotten a small metal turning lathe yet. I used my old Delta wood turning lathe.

dave

I have a proxxon metal lathe, i get lots of use out of it for making screws, pipes, top jaw screws and rammer tips. Can also do pistol barrels up to 11”. There’s an extension too.
 
Hi,
A bit more done. The Ferguson had a fatal flaw as issued in 1777. The stock was very weak beneath the lock and across the screw plug breach. Both surviving ordnance rifles and most that were owned by officers are broken at the screw plug breech. The breakage might be due to external stresses on the stock during service but I suspect it could also be from recoil pushing the screw plug housing back like a jack hammer and cracking the stocks at their weakest point. Regardless, I strengthen the stock with a thin coating of Acra Glas. I make sure the barrel channel and breech mortise are coated. This is not thick bedding, rather a varnish thin coat that is pressed hard into the wood. I do not recommend you do this unless you have experience with Acra Glas and know what you are doing. First, the lock plate had to be fully inlet to block that side of the breech. Then the barrel and lock plate are coated twice with Butcher's Wax and buffed. Then I plug any holes into the lock mortise with clay. I used Acra Glas gel this time and tinted it with LMF walnut stain. I mixed the epoxy, slathered it evenly in the barrel channel and breech hole with a popsicle stick, installed the barrel, and pressed it home hard with "C" clamps. Most of the epoxy oozes out. I let it set for an hour and then scrap off the excess epoxy with a flat screw driver. I cranked the heat up in the shop to about 78 degrees F and left the stock to cure overnight.
This morning I removed the clamps, chipped away any excess epoxy along the barrel and then heated the barrel with a heat gun. With the barrel very warm, I turned the stock over and tapped the breech plug housing hard with hammer and wooden dowel. The barrel slowly came out nicely and here is the result after cleaning up the stock and barrel.
fJnTSGe.jpg

lkj4LxZ.jpg

2fIIKuc.jpg

lkw3hen.jpg

DxK3x2J.jpg


You can see how thin the bedding is. The wood grain shows clearly through it. It does not need to be thick. A varnish thin coat increases the strength of the wood
3 to 10 fold. I also relieve the back side of the breech hole so the breech plug housing is not tight against the hole in the stock.

Next is fully inletting the lock and ramrod pipes.

dave
 
If the Accra Glas gets on the bare wood when you compress the barrel into the stock does it scrape off? Getting ready to try it on an old TC stock. Thanks.
 
Hi,
Yes, you can file, rasp, chisel, and even plane it off. However, you want to avoid the overflow if your stock is already finished. I only do this on gunstocks that I am making and have not brought to final finish so I can clean off the epoxy and any residual staining in the wood. On already finish stocks you might want to place masking tape along the barrel channel to prevent the epoxy oozing on to the finished wood.

dave
 
Hi Folks,
Thank you for looking and commenting. I got more done and I want to address some common issues with this particular parts set that folks bring up a lot. I worked on inletting the lock, which raises some of those issues. First, I am in total agreement with Eric Krewson's complaint about precarved stocks with the locks fully or partially inlet. The only company that you can trust to completely machine inlet locks accurately is Kibler. That is a simple, blunt statement of fact. In all the rest, Eric and I would prefer that the stock profiler did not inlet the look at all. Fixing inaccurate machine inletting of locks is frustrating and sometimes impossible to bring up to a high standard. Moreover, fitting the lock correctly with the barrel and its vent hole can be a challenge. That is never more apparent than with this parts set.

I fully inlet the lock plate, making sure it was positioned as far forward as I could given the machine inlet. I'll come back to that later. With the plate in place I drilled through the lock holes to mark where the centers of the lock screws were relative to the machine inlet. They were off a bit as you can see below.
Yujfwre.jpg

Ignore the white residue from the clay I used to block the back of the plate when bedding the barrel. It all gets scraped away. You can see that the holes drilled through the existing lock plate holes are a bit off. Well, that means I cannot create a precise mortise but it won't be too bad. Out comes the Dremel destroyer with a router bit and away I go clearing away the obstructing wood, but cleanly and precisely given the adjustments I had to make. So, everything except the mainspring was inlet and the lock sets in just fine. I'll post photos of the mortise later.
4DmsiN7.jpg


The lock was assembled by TRS. The holes are accurate and the parts fit well but they they did not clean up or polish the inside of the plate, or fit the frizzen or of any springs with precision. That presents problems because I don't want to introduce slop into any part's fit during polishing and cleanup. In a word, the lock assembly is a just a bit better than what you get from L&R. It is nothing like Chambers or Kibler. I have methods to deal with this, which I will discuss later. The lock will eventually be very good when I am done.

Another issue that arises all the time is the position of the vent hole. I've advised quite a few folks making Fergusons from TRS parts and they all were concerned the lock was positioned too far back on the pre-carved stock such that the vent hole goes right into the screw plug. They are completely right. The position of the lock on the TRS stock is too far back compared with the originals. You cannot move the barrel much further back because of the hole cut for the breech housing. What to do. Here is what you do. First, put the screw plug in place in the breech, tighten it down and stick a long rod in the bore of the barrel until it hits the breech plug.. Mark the the rod at the muzzle. Then put the barrel in the stock and place the rod along side the barrel with your mark at the muzzle. The end of the rod shows the depth of the bore to the bottom of the rectangular notch in the breech plug.
sVujOyT.jpg

YogY7AJ.jpg


As you can see in the blurry photo, the notch is well forward of the center of the pan. On original Fergusons, the lock is further forward and the vent hole almost clears the plug entirely. You cannot duplicate that with the TRS stock. Instead, simply file the rectangular notch in the plug deeper to clear the vent hole. It does not take much. Check again using the long rod down the bore.

6Ms6Gfv.jpg


Now, I will eventually fit a White Lightning vent liner. When I do, I will show the result. The breech is wide and a simple drilled vent hole will have a long channel. A White Lightning liner will speed ignition significantly and reduce risks of mis- and hang-fires.

A major purpose of my posts is to offer up unbiased and detailed information that you may never get from any other sources. That is why I dive into details.

dave
 
Last edited:
And we all greatly appreciate those details Dave!

If I may ask … looking at the plug, on the lower left (just above the tenon/square boss) there appears to be a file cut partway or 1/3rd along and up the plug.

Is that the “cleaning notch”, that is often referred to in various books and/or articles on the Ferguson rifle, for black powder residue to be ‘scraped’ into? Is that the total length of it and/or the only such one?

Thanks in advance!

384A7BBC-1843-46A0-8D88-47C52FEDDBBC.jpeg
 
Hi Flint62Smoothy,
Yes it is a "fouling" groove meant to clear fouling from the threads. In reality, as cut on the TRS plug, it doesn't do much. Here is the important point to take away and store: the only fouling of the plug that will bind it is on the threads ABOVE the powder chamber. Those are the only threads that tighten enough to form a gas seal (the threads on the plug are tapered) and fit precisely enough to bind if badly fouled. The grooves on the bottom half of the plug are basically irrelevant. Moreover, the only gas escape you will experience firing a Ferguson is from the top of the breech hole, never from the bottom. If you lubricate the plug threads by dipping the plug in a hot mix of Crisco (tallow) and beeswax before setting out to shoot the gun, the screw breech will not bind despite fouling for 30-40 shots.

dave
 
Hi,
Today was a really good day. It snowed all day but my friend , Tom, plowed me out and I shoveled slowly but got all the pathways done. We have about 14" accumulated now. I did not have to go anywhere and the snow was beautiful on the landscape. Knowing I live alone, my neighbors and friends check on me when these storms hit. I got to spend a beautiful day in the shop watching the snow come down and working on neat stuff.

So I got the lock fully inlet. It came out well although not as prcise as I would like because of the machine inletting.

4DUgxu4.jpg


The mortise for the main spring was off quite a it but it did not take long to rectify. Eventually, the lock settled in nicely.

2FiGBM9.jpg

UmiKwF7.jpg


The lock cycles from rest to full cock just fine.

Next was the rear ramrod pipe. The casting is massive and I do not recall the originals being that heavy but that is not really a problem. Note the little prong on the end of the rear pipe tang.
VzDK4Ak.jpg


It is meant to hold the rear of the tang down in the wood. It really is not necessary with a tang so thick and rigid. Anyway, file it thinner a little and angle it down a little before inletting the pipe. The partial machine inlets are very good and really speed up the task. Cut the slot for the tab first so the pipe can set down, then inlet the main tube a bit until the tang sets down on the wood. Now you have a problem because that little prong won't allow the tang to set down vertically. So inlet the pipe as fully as you can until the tang sets down flat on the stock. Then inlet the full length of the tang to almost full depth measured by its thickness. Once down a bit, prick the back point of the tang mortise with an awl to create a hole below the surface of the wood. Bend the prong on the tang down just a little, and insert the pipe into its mortise, tapping it backward to set the prong. At this point, have the pipe dusted with inletting black so you can see where wood must be removed to set it down all the way. Always carefully remove it so the prong doesn't splinter the stock. Go slow and eventually the pipe will set down fully.

8GsOUwP.jpg

23vqzwr.jpg

l2R2iNF.jpg

rJBDfDa.jpg


Having written all that, let me just say, the heavy brass cast rear pipe really does not need the tang anchored with that prong. It is very rigid and not likely to flex out of the mortise. There really is no reason to keep the prong and if you file it off, inletting the rear pipe is much easier.

So I end this great day by making myself a dinner of meatloaf, baked potato and broccoli-cauliflower mix with lemon butter and parmesan cheese. Life is good.
dave
 
Back
Top