I have 4 hours in the triggerguard of my Woodsrunner. Filing, sanding, filing and sanding. Still not perfect but getting close. so many small voids.
Is there an easier way?
I have always used small sanding belt sticks. I also use them with spit or a light honing oil (spit is easier but the oil works better....just don't do what I did not long ago and start off using oil and then forget and stick the end of the sanding stick back in your mouth....

I use files (for large flat areas), then needle files and / or riflers where needed. Then the sanding sticks:
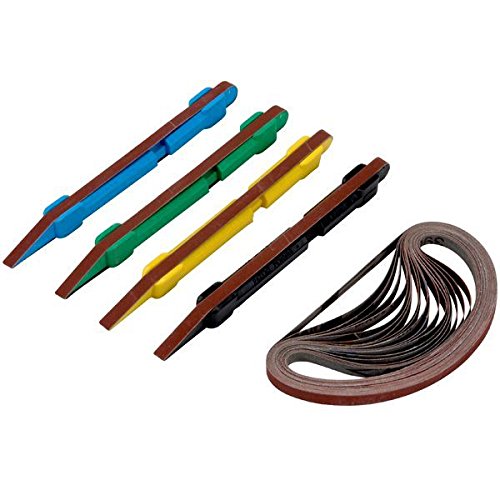
They are plastic and spring loaded to hold 1/4" wide sanding belts of various grits. I have a half a dozen of the sticks and keep one for each of the grits I use. I use them for polishing lock parts, brass parts, barrels, and stock details. As noted, when polishing metal, I usually use them with a light oil. The belts don't load up as much with the oil. Here is a link to some that are available on Amazon, but the sticks and belts are available from many sources including jewelry supply houses:
https://smile.amazon.com/dp/B079GHS13V?aaxitk=BjhPW.OfNRwSAJO2fZcH6w&pd_rd_i=B079GHS13V&pf_rd_p=591760d1-6468-480f-9b10-0ee9c85706fd&hsa_cr_id=9367417650701&sb-ci-n=productDescription&sb-ci-v=5 Piece Sanding Detailer Stick Set with 2 Extra Replacement Belts Per Stick, 5 Grits 120, 240, 320, 400 & 500 Grit Made in The USA for Sanding Wood, Metal & Plastics, Long Life Sanding Belts
And here is a set from Rio Grande. They also have better belts.....more expensive but better.
https://www.riogrande.com/product/sanding-stick-assortment-set-of-6/337286
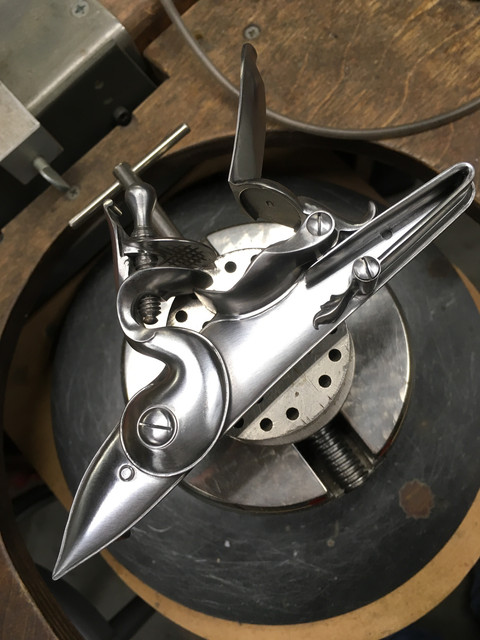
I use stones. Mostly the soft ones that will conform to contours quickly....again with a light oil.
A lock comes out looking like this:
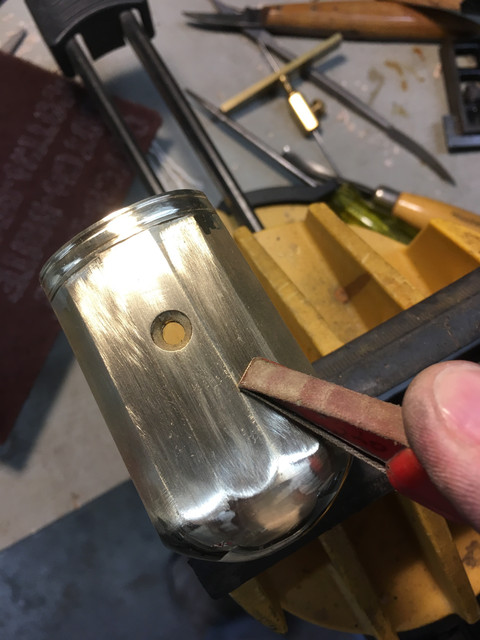
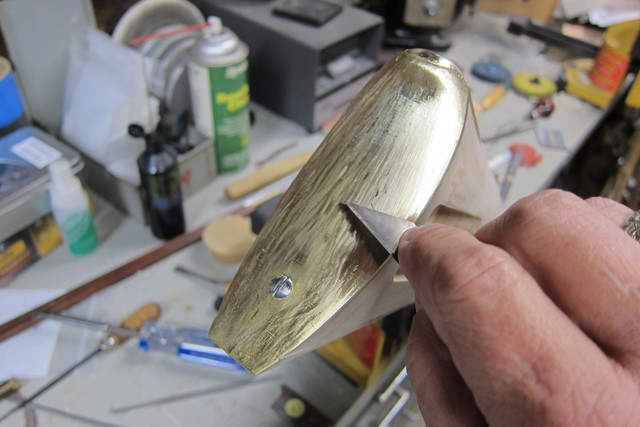
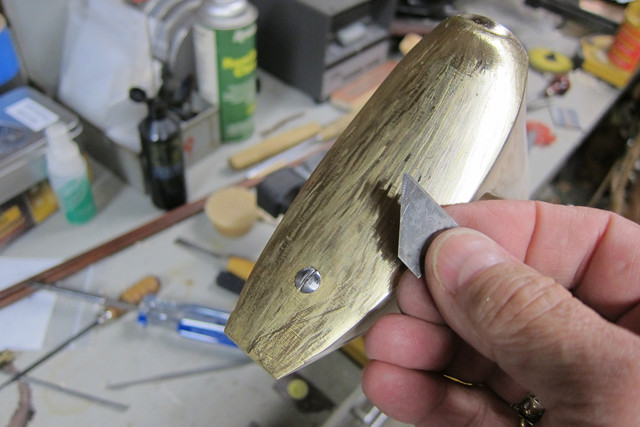
After initial shaping with files, etc., I scrape most of the surface of brass and some steel parts. I use the non sharpened edge of a utility blade. This is a blade being used to scrape brass. I use the same tool for brass, wood, and steel. I stone the two 45 degree edges to a sharp 90 and use both sides of those. Scraping a large butt plate takes about 30 minutes. Scraping a whole stock to get out file, rasp, or carving tool marks takes about an hour...more if there is a lot of intricate carving to scrape around. Then I use sandpaper where ever necessary or useful.
Here I am scraping a butt plate with the angled edge of a box cutter blade. It takes off brass more rapidly and more smoothly than a file and leaves a finish that does not take too much more work with the abrasive paper or sticks. I do the inside of the trigger guard bow like this as well. If the part is investment cast, I can start right in with the scraper. If it is sand cast, I usually hit all the surfaces with a file to knock down the roughness, and then start with the scraper.
Wood comes off really fast and I have to be careful not to take too much.
As I said, I scrape some steel parts as well. You just have to refresh the edge of the scraper much more often.
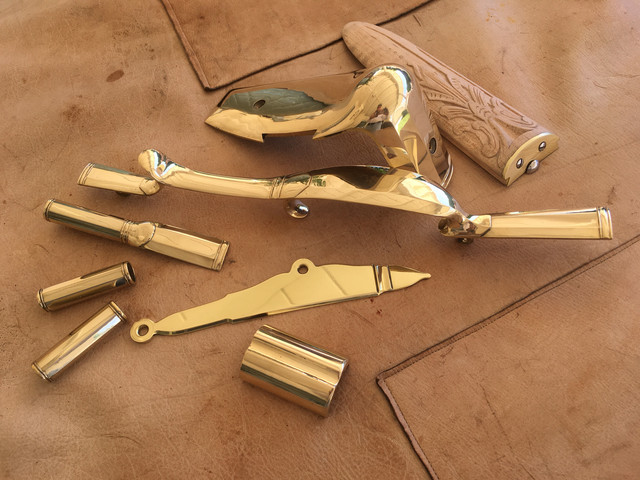
Took half the day, but all the brass parts for a Kibler Colonial rifle were final polished. These were taken to a fairly high gloss and I knocked them back some as I did the engraving. I usually take all the brass and steel to this level of polish first to make sure I'm not leaving any "unsightly" scratches or tool marks. I can see anything I don't like in the surface finish better at this point and then, when I take some of the gloss off as I engrave, I know the parts are clear of tool marks......which, like scratches on the stock, always show up at a lousy time in the finishing process