• This community needs YOUR help today. We rely 100% on Supporting Memberships to fund our efforts. With the ever increasing fees of everything, we need help. We need more Supporting Members, today. Please invest back into this community. I will ship a few decals too in addition to all the account perks you get.


    Sign up here: https://www.muzzleloadingforum.com/account/upgrades
  • Friends, our 2nd Amendment rights are always under attack and the NRA has been a constant for decades in helping fight that fight.

    We have partnered with the NRA to offer you a discount on membership and Muzzleloading Forum gets a small percentage too of each membership, so you are supporting both the NRA and us.

    Use this link to sign up please; https://membership.nra.org/recruiters/join/XR045103

brass matchlock

Muzzleloading Forum

Help Support Muzzleloading Forum:

This site may earn a commission from merchant affiliate links, including eBay, Amazon, and others.

Leonredbeard

54 Cal.
Joined
Apr 9, 2004
Messages
1,863
Reaction score
4
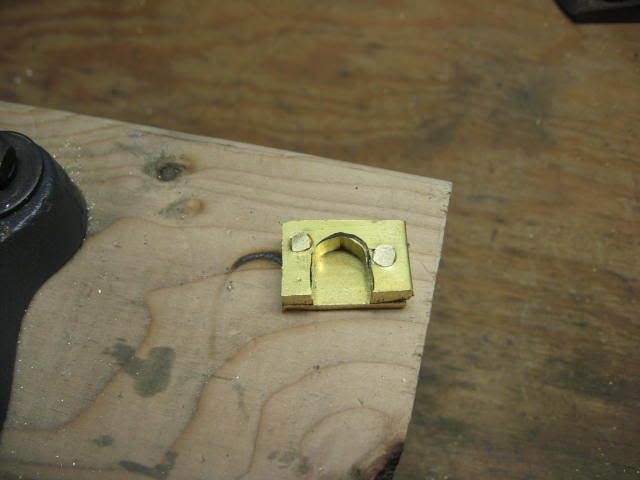
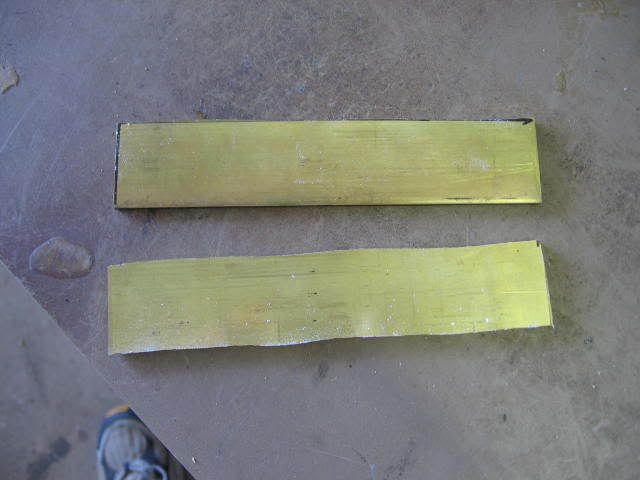
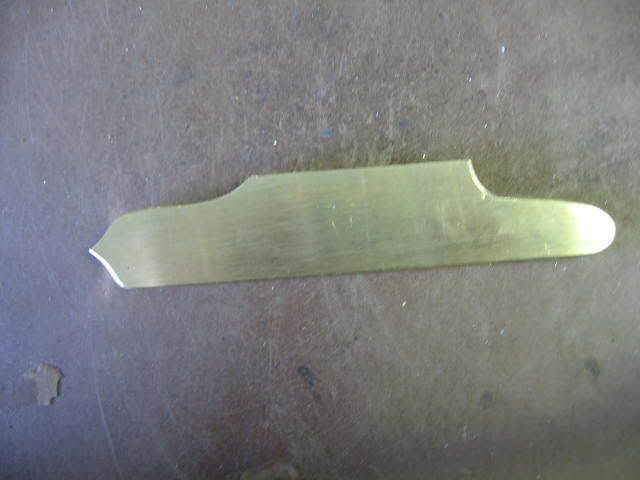
I am starting on building my new matchlock. I couldn't find brass plate as thick as I wanted so at Friendship I bought eighth inch thick plate and elected to join two thicknesses.
brassmatchlock001.jpg

I showed it to Don Getz and he said solder it. I was thinking rivet and since I am lousy at soldering I went with my own plan
brassmatchlock002.jpg

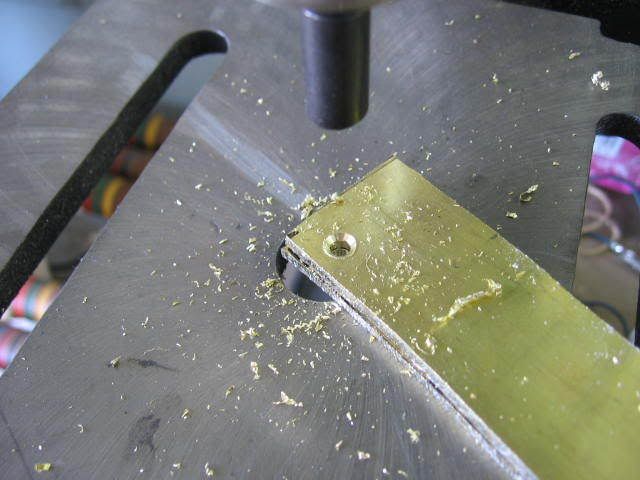
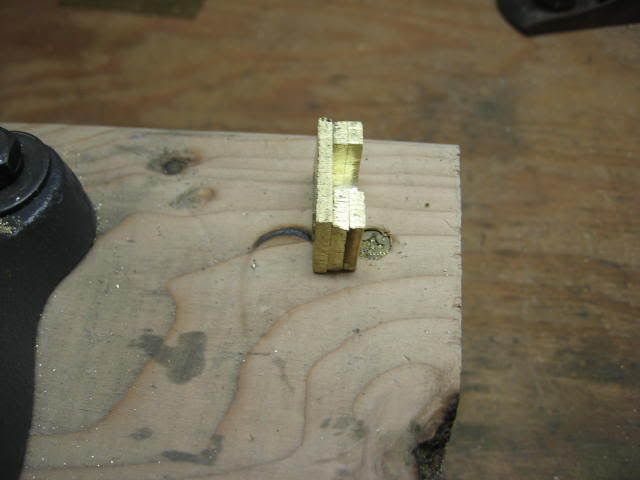
One rivet in. I am apparantly not too good at rivetting either.
brassmatchlock003.jpg

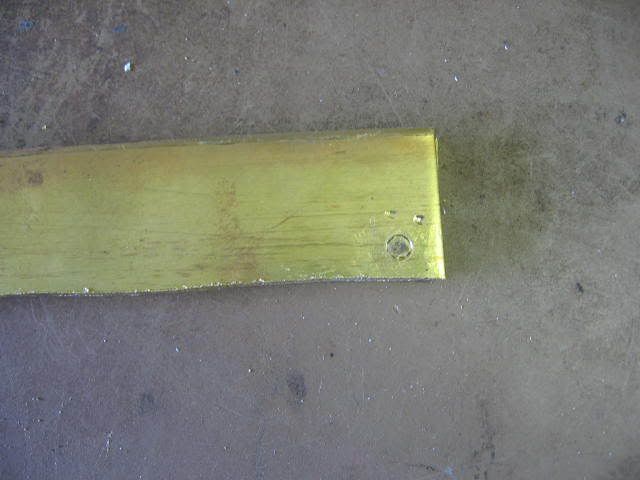
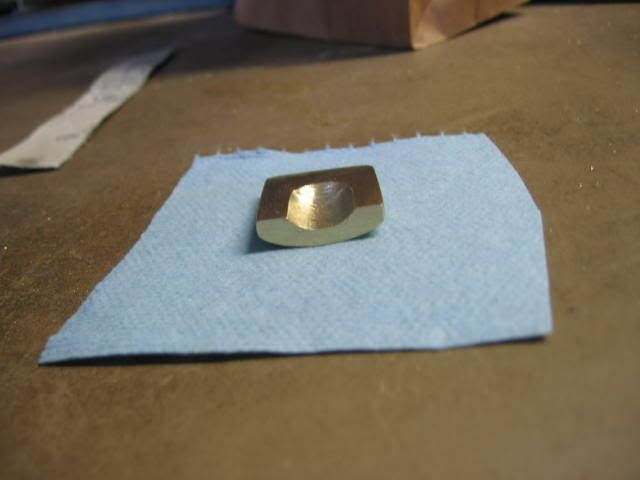
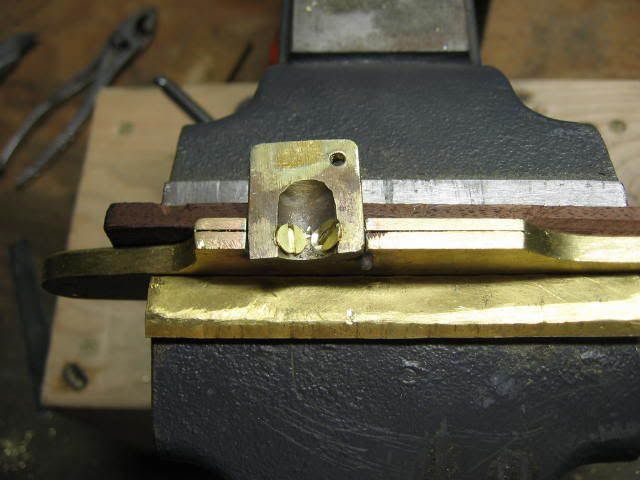
All rivetted. crude, huh?
brassmatchlock004.jpg

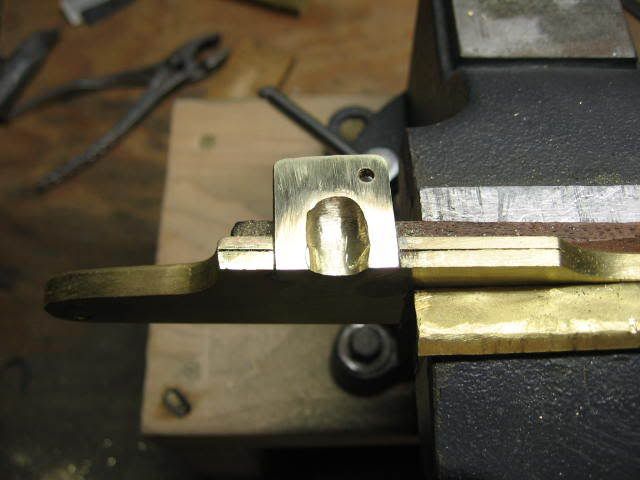
I am shocked at how it came out considering the crudity of the rivtting.
brassmatchlock005.jpg

volatpluvia
 
hey are we going for a Pitchy open work type action or a varent of your own. :grin:
 
Thanks, guys,
I am planning to put the works inside. I have only pictures to work from, so this will take careful thinking and execution. Next step is to make and install the pan. Then I think the dog and pivot and then to the inside. Just my thinking.
volatpluvia
 
ahh yes, you have now coined the term 'the pitchypatent lock', :applause: i would if go with it if i could in a simular matter. :thumbsup: as a matter of fact, i have been refering to with my budddy as to a description like that of ur lock :grin:
volatpluvia, what is the name of your personal lock type.. u have got nice names for the other guns so this should be good.
Great job both of you, fine craftsman :thumbsup:
 
Name? Hmmnnnn!? This will take some consideration. It might have to wait until it is more finished. A friend named my wheellock rifle for me. He said that when we walked down traders row at the Eastern Primitive Rendezvous that she got as much attention as the red haired gal at the dance. It stuck. I'll have to get his opinion

Titus,
It's time I said this. I just love the way we can all get together from continents away. Thanks for the kind words. I hope to live long enough and get enough money together to sometime visit SA and other places. The history, the history!

Volatpluvia
 
volatpluvia said:
Titus,
It's time I said this. I just love the way we can all get together from continents away. Thanks for the kind words. I hope to live long enough and get enough money together to sometime visit SA and other places. The history, the history!

Volatpluvia

V, I know what you mean. Its great how technology shrunk the world digitally and gives us a chance to chat on daily basis over thousands of Km's. Iffn you ever want to come over to this side of the Atlantic, my doors are open. Heinrich and I will ensure a memorable experience. :v :hatsoff:
 
Just don't call it the old "blue haired gal"! :hmm: :shocked2: :rotf:

Davy
 
I formed the pan last nite. Since I still did not have thick enough brass I joined three layers. This made it easy to form the bowl. I clamped two of the layers in the vise and cut and filed the bowl straight thru them and then joined them with the bottom. On the second hole I decided to stop putting a square peg in a round hole, litteraly. So I peened the corners into a roundish shape first. This really helped in filling the countersink. I also used brass cut from the handgonne as it is softer than the sheet brass and rivets more easily.
brasspan001.jpg

Showing the layers.
brasspan002.jpg

volatpluvia
 
Davy!
It took me a few minutes, but...I GET it! :bow: Hee! Hee! Your grandmother at the dance, :surrender: haw haw! :youcrazy: :rotf:
volatpluvia
 
Hi there,

Saw the pan. When Chuck had a flask explode in his hand, it might have been from a pan like yours. It is only theory, but we believe a piece of cord hid in there somewhere in the sandwich of layers. He has long since changed how he makes his pans. I would recomend a one piece clean machined out or forged pan.

Food for thought,

Pat
 
Patrick,
Hey, thanks for the input. How about a thin line of solder around the inside of the pan to keep bits of burning match from hiding. Maybe even fire it until it becomes semi fluid and forge the pieces? What do you think?
volatpluvia
 
I saw Hershal House do something like that in his video.He used Borax for flux,sprinkled it on ,brought it to heat,sprinkled a bit more flux,heated a little more then set aside to cool.
 
No problem,

I even wonder about my pans with a square shoulder endmill, if a spark could live in the corners. I sure look to see if there is anything alive in there before I prime. If I had a vote, one piece constuction with mill, or I have see pans put on end and drilled sideways making two pans at the same time. That's a easy clean way of forming the inside of the pan without a mill.

Hope that helps, good luck

Pat
 
Patrick,
I have brass thick enough to make a shallow pan. I can solder it onto the lockplate. I bought some solder and will take a deep breath and see if I can join some scrap first effectively. Otherwise I might just seal up the layers of the pan I have made.
volatpluvia
 
I found a slab cut from my brass handgonne that was plenty thick enough to make a pan.
newpan001.jpg

I thought to solder it onto the lock plate. Bill Kennedy once showed me and said, "first get the solder to stick to both pieces of metal and then get the solder to stick together. It worked for him. But I am really bad at soldering. So I did this.
panon001.jpg

Here it is polished up, I hope enough not to hide any shreds of smoldering match.
panon002.jpg

volatpluvia
 

Latest posts

Back
Top