He is ignorant of these and you are correct..it would not be right. It's not about PC this or PC that...putting sets does not solve the problem but causes several. Namely bependeing on lock design , it could destroy it. Secondly, it's basically redesigning the rifle.
The first thing to do is remove the lock and look in the mortise for any black and shiny spots on the wood. These are places where the mechanism rubs the wood.
 Untitled
 by
Travis Brown, on Flickr
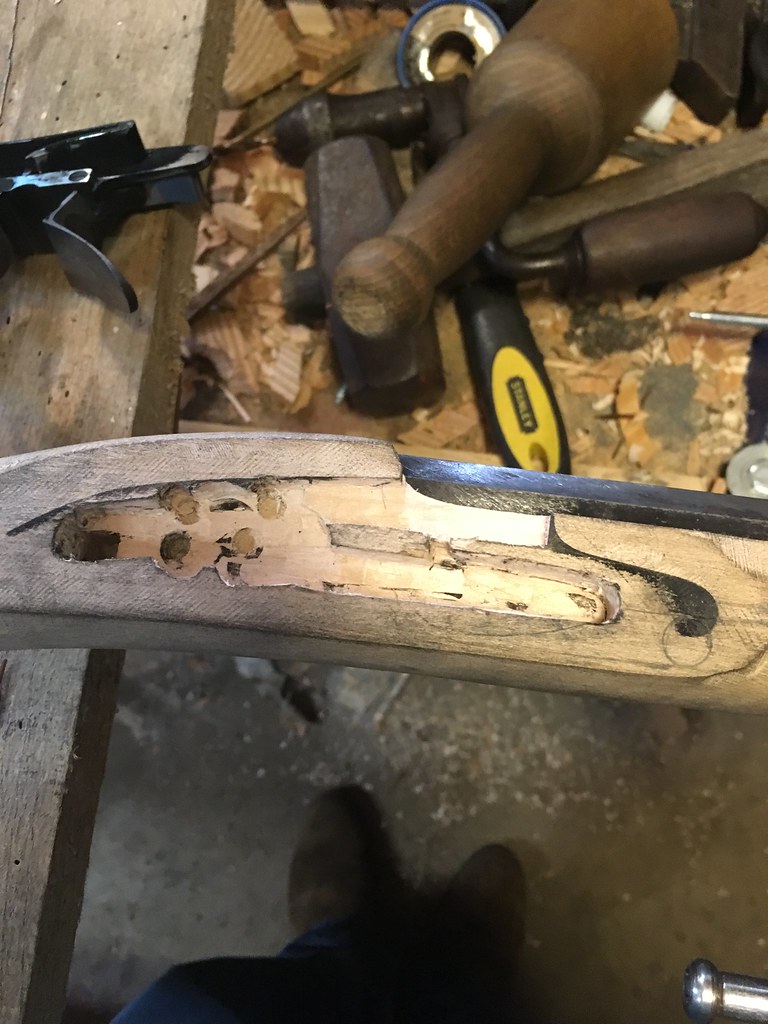
Above is a partially completed lock mortise. You can see where the tumbler bridle and parts of the tumbler under it are making contact. Now this is a new stock with sooted parts but even on a finished rifle, contact areas will be visible...they will be shiny. These areas of friction can slow down the lock enough to cause the problem.
 Untitled
 by
Travis Brown, on Flickr
The main thing you are checking for is friction points where the lock guts rub the wood. If you have these spots where the wood is in contact with " Moving" parts, you should be able to clean them up with sand paper or a fingernail file. Being a finished gun. Clever and careful use of sand paper should do it. You can wrap some sandpaper around the end a suitable stick...a pencil may work and use it like an eraser on these friction points.
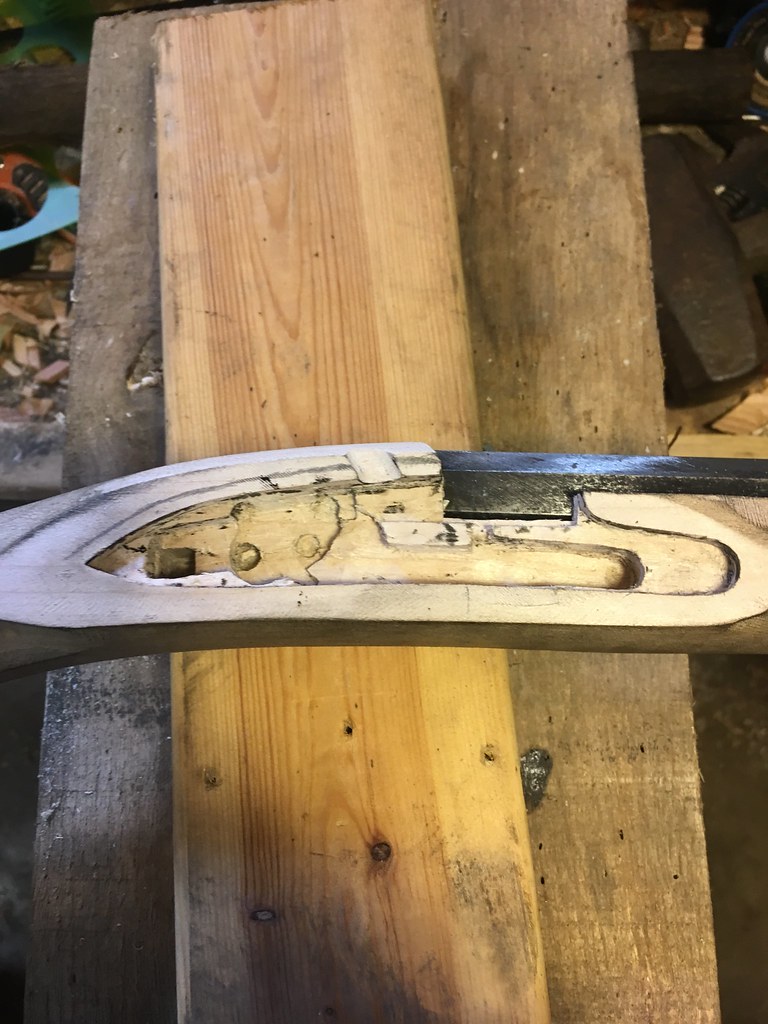
Above the lock mortise is nearly complete. This rifle has a square hole where the sear bar goes. On Your rifle it's a round hole. Above you can see where the the sear spring has printed in 2 spots between the square sear hole and the tumbler bridle mortise. The sear spring does not need to contact the wood.
Look down into the sear hole....look for contact points and slivers of wood or debris.
Operate the trigger. Work it back and fourth to make sure it's not binding in the inlet.
With the lock out....see if it has a fly. If it has a bridle it may be hard to see. Operate the lock cock it release it (do not snap it) right now you are just checking for smoothness.
Flintlocks can bite you if you are not familiar with them. You can snap them out of the rifle but the frizzen needs to always be down. You also have to hold it right. You're not trying to snap it. Snapping one with out the frizzen down can damage the cock. For finger safety it would be a good idea to make a little wooden flint.
All you need to do is inspect it. Work it for smoothness. With WD 40 spray the mechanism...give it a bath...work the lock. Sometimes the bridle screws for the tumbler will be too tight. You may need to back these off just a hair. Take an old tooth brush and give it a scrub.
All you are doing is looking for friction points and making sure the lock mechanism is clean and smooth and not binding from the screws being too tight.
Military locks sometimes have no fly. In operation you have to pull the trigger and keep it pulled. Don't snatch it but follow through with it. Sometimes being to timid in the trigger pull will cause the sear to catch the halfcock notch. On a military gun keep pulling the trigger through the shot.....follow through with it.
SUMMARY ....
Remove the lock. Inspect the lock mortise for contact points with the moving parts. Remove the wear points in the mortise. Make sure the sear hole is clear. Make sure the trigger works smoothly back and fourth.
With the lock in hand work it for smoothness. Make sure the bridle screws are not binding the mechanism. Give it bath in WD 40 as you work it back and fourth. Take a Tooth brush and scrub the lock guts....WD it and work it some more. When it works well oil it with some gun oil. You may have repeat this several times.
Military locks especially those without flys need follow through when you pull the trigger....squeeze the trigger and keep squeezing through the shot or tests.
This lock may need more work. It may need tuned. If so you need some special tools, namely a mainspring vise, super fine files or stones. If the problem persists...the lock will have to be dissembled and tuned. Try this first.


