-
This community needs YOUR help today. We rely 100% on Supporting Memberships to fund our efforts. With the ever increasing fees of everything, we need help. We need more Supporting Members, today. Please invest back into this community. I will ship a few decals too in addition to all the account perks you get.

Sign up here: https://www.muzzleloadingforum.com/account/upgrades -
Friends, our 2nd Amendment rights are always under attack and the NRA has been a constant for decades in helping fight that fight.
We have partnered with the NRA to offer you a discount on membership and Muzzleloading Forum gets a small percentage too of each membership, so you are supporting both the NRA and us.
Use this link to sign up please; https://membership.nra.org/recruiters/join/XR045103
You are using an out of date browser. It may not display this or other websites correctly.
You should upgrade or use an alternative browser.
You should upgrade or use an alternative browser.
Nailing inlay
- Thread starter JohnN
- Start date

Help Support Muzzleloading Forum:
This site may earn a commission from merchant affiliate
links, including eBay, Amazon, and others.
Col. Batguano
75 Cal.
- Joined
- Feb 10, 2011
- Messages
- 5,034
- Reaction score
- 1,407
It kind of varies. Particularly so in this case because the main purpose of the nails is cosmetic (epoxy is doing the main job of holding it in place). If you think about an original, where the nails or pins would be doing the holding job on the inlay, how many do you think it would take to hold down all those pointy edges? Not really trying to throw the question back at you, but without a picture it's sort of hard to give you much of an opinion. Just don't make the heads too big or too small.
Are the heads going to be in contact with your hand at all during the shooting? If so, make sure those heads get good and flush with the inlay!
 hotoSmile:
Are the heads going to be in contact with your hand at all during the shooting? If so, make sure those heads get good and flush with the inlay!
Disageee with the Col's statement that 'main purpose of the nails is cosmetic (epoxy is doing the main job of holding it in place)'. There is nothing for the epoxy to bite into and hold the inlay. Overtime temperature cycles and wood expansion and contraction the epoxy will let go of the inlay. Nails will be what hold inlay in place - kind of cliche to say it, but nails are traditional method of holding inlays. Epoxy provides a great base or bed for the inlay but long term will not hold it in place.
To the question of number of nails. I would use one in the center. Long term holding assumes star inlay sits flat in would before nail is put in place.
To the question of number of nails. I would use one in the center. Long term holding assumes star inlay sits flat in would before nail is put in place.
- Joined
- Nov 26, 2005
- Messages
- 5,024
- Reaction score
- 10,000
Hi John,
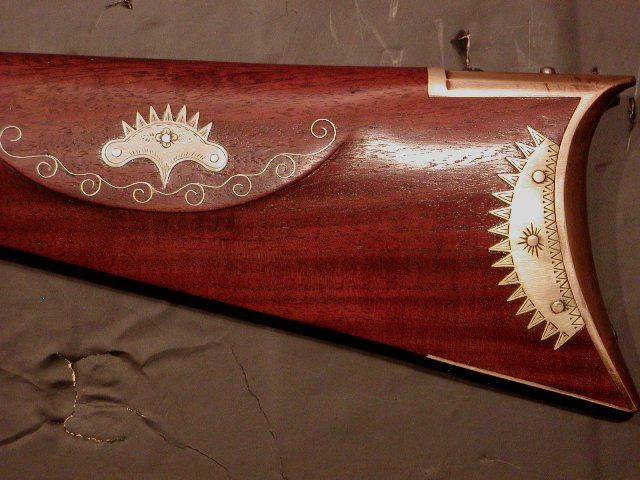
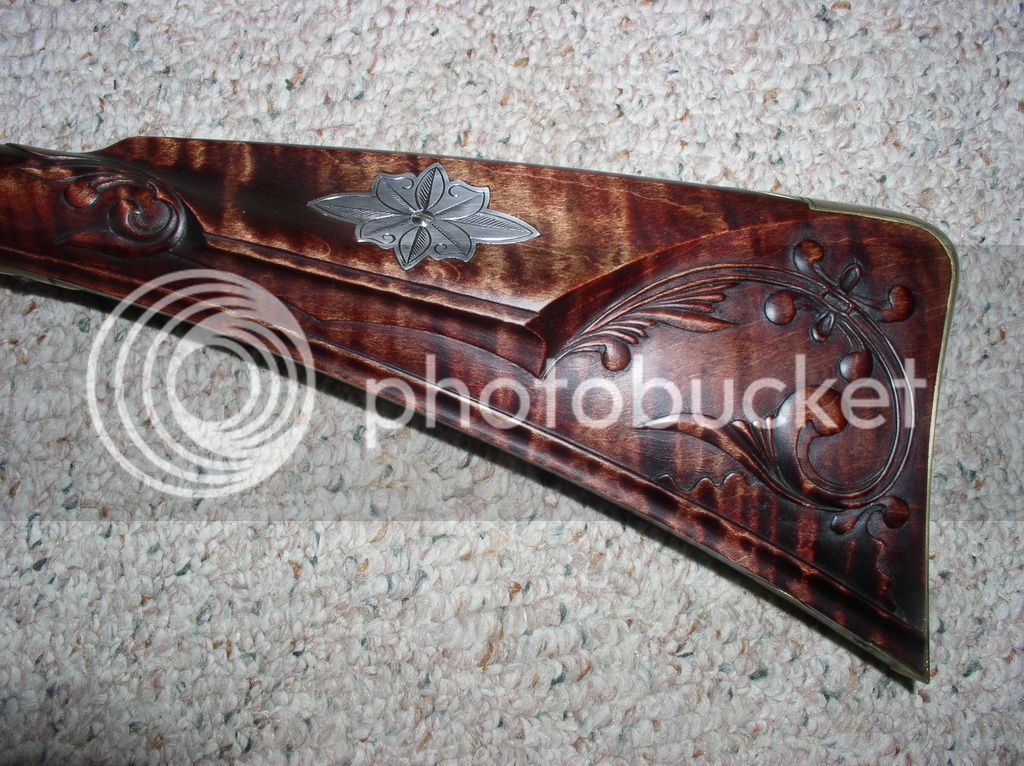
On most early American-made guns, the makers left the heads of the nails showing as in the first photo below, which is of work I did on an early 19th century New England rifle. It was important that the inlays were historically correct. I used small brass screws on the large brass inlay and peened the heads over and then filed them down to look like nail heads. I also used a little epoxy underneath. On the silver cheek inlay, I made small nails from silver wire, filed tiny notches or teeth in the nails, tapped them in and peened over the heads and filed to shape.
For the wrist inlay below with flush nails, I used the same procedure as above but first lightly countersunk the holes. Then I peened the tops of the silver nails into the countersinks, and then using stones and mineral oil, stoned the heads flush in the countersinks. I also used expoxy underneath and in the nail holes.
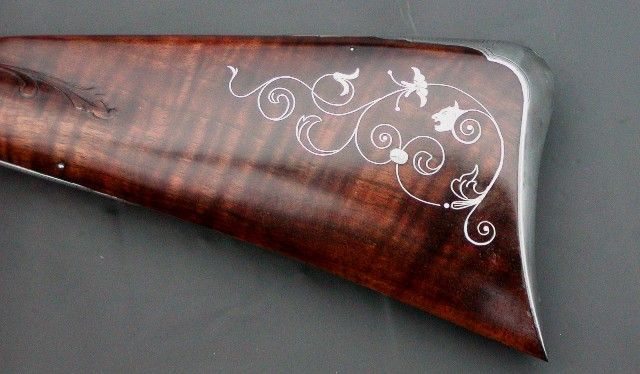
For the tiny silver inlays shown below, I position the inlay on the stock, cover it with a thin flexible steel ruler, and tap it. That creates a perfect impression on the wood, then cut the inlet as precisely as possible. I then use a tiny flat chisel to very slightly undercut the edges of the inlet. I put a little epoxy in the inlet and tap the inlay in place. The undercut locks the metal in place, particularly when the wood swells with stain and finish.
dave
On most early American-made guns, the makers left the heads of the nails showing as in the first photo below, which is of work I did on an early 19th century New England rifle. It was important that the inlays were historically correct. I used small brass screws on the large brass inlay and peened the heads over and then filed them down to look like nail heads. I also used a little epoxy underneath. On the silver cheek inlay, I made small nails from silver wire, filed tiny notches or teeth in the nails, tapped them in and peened over the heads and filed to shape.

For the wrist inlay below with flush nails, I used the same procedure as above but first lightly countersunk the holes. Then I peened the tops of the silver nails into the countersinks, and then using stones and mineral oil, stoned the heads flush in the countersinks. I also used expoxy underneath and in the nail holes.

For the tiny silver inlays shown below, I position the inlay on the stock, cover it with a thin flexible steel ruler, and tap it. That creates a perfect impression on the wood, then cut the inlet as precisely as possible. I then use a tiny flat chisel to very slightly undercut the edges of the inlet. I put a little epoxy in the inlet and tap the inlay in place. The undercut locks the metal in place, particularly when the wood swells with stain and finish.

dave
Billnpatti
Cannon
- Joined
- Aug 11, 2008
- Messages
- 7,340
- Reaction score
- 40
WOWIE! ZOWIE! That is some beautiful work. I am attempting to learn to do silver wire inlay and it ain't easy. I am hampered by the fact that I am not an artist. But, I am working at it. I don't think I can ever achieve the level of work that you do. It is beautiful!
The only stars I use are on Bucks County LRs because they must have one. A small center screw holds the star in which is removable. The silver wrist nameplate has 2 silver nails filed flush and the edges of the nameplate have a shallow groove filed in so the epoxy locks it in. Actually, the nails are redundant......Fred


- Joined
- Nov 26, 2005
- Messages
- 5,024
- Reaction score
- 10,000
Hi John,
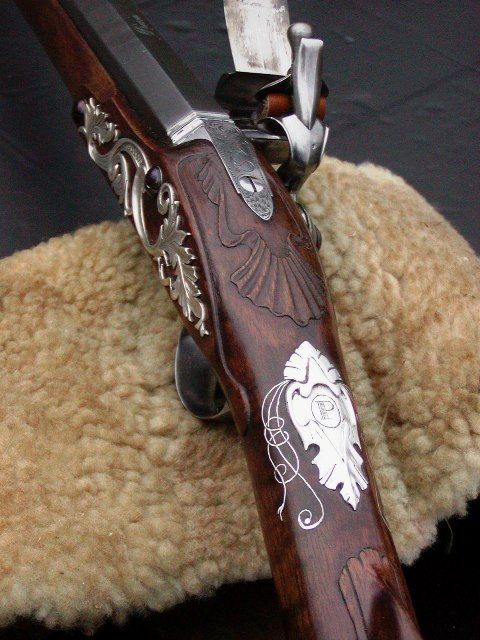
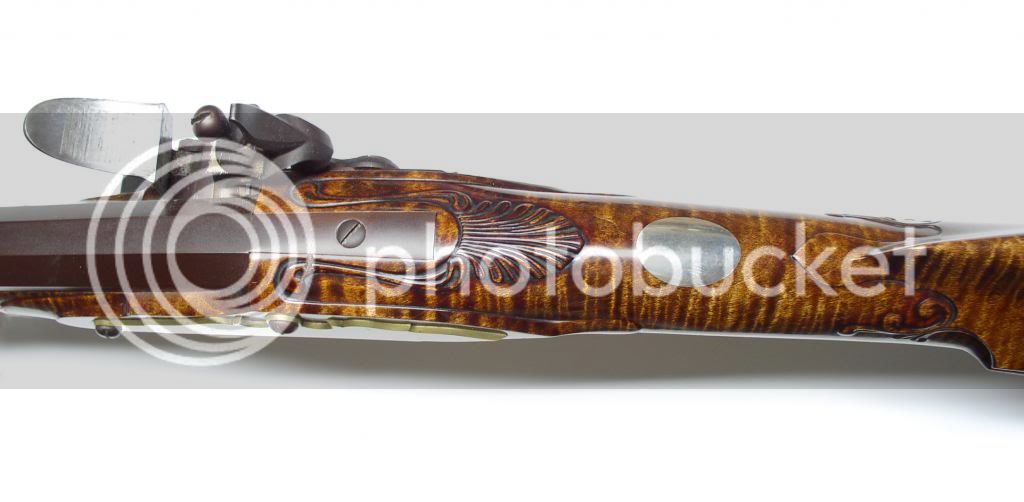
It appears to me that you still have a lot of wood to remove from the stock around the lock. The top of the stock should angle downward to more closely align with the top barrel flats. Look at the photos below to see how the lock area and handle are shaped. Note how narrow the flat molding around the lock is. The narrow molding looks much better than wide flats and it allows you to angle the top of the stock behind the barrel more for better architecture. Mind you, the pistols shown are English dueling pistols, which have their own special characteristics but their architecture is about as perfect as an 18th century pistol gets. The flat sides on the handle were typical for duelers at the time but may not be appropriate for your project.
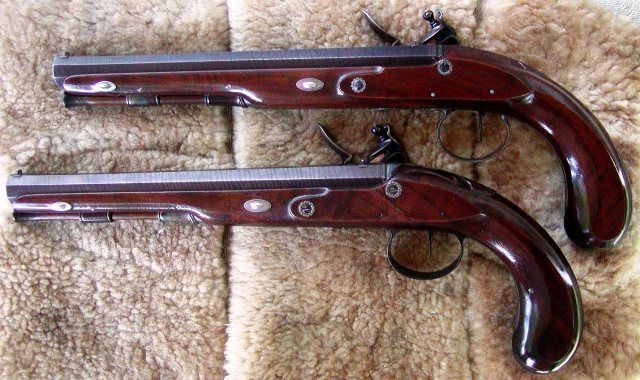
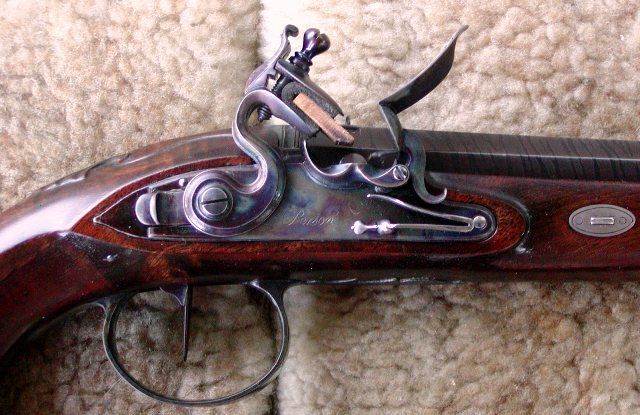
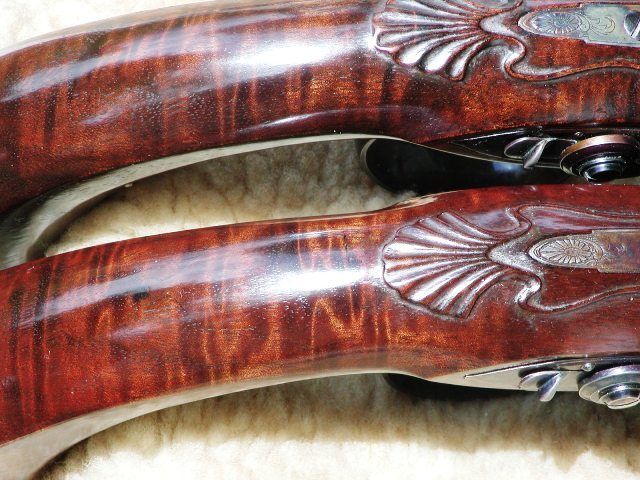
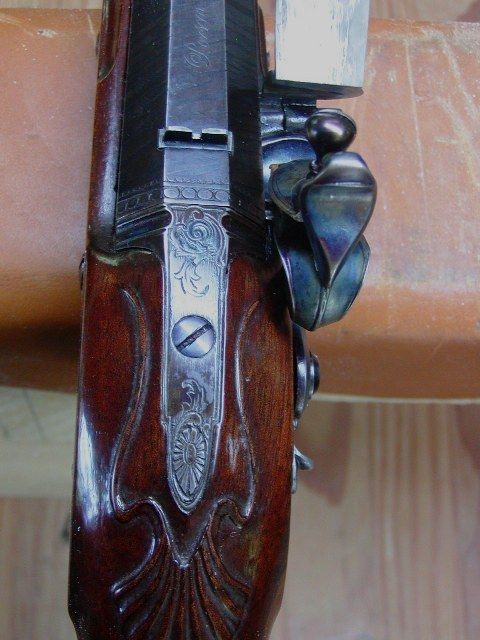
It appears to me that you still have a lot of wood to remove from the stock around the lock. The top of the stock should angle downward to more closely align with the top barrel flats. Look at the photos below to see how the lock area and handle are shaped. Note how narrow the flat molding around the lock is. The narrow molding looks much better than wide flats and it allows you to angle the top of the stock behind the barrel more for better architecture. Mind you, the pistols shown are English dueling pistols, which have their own special characteristics but their architecture is about as perfect as an 18th century pistol gets. The flat sides on the handle were typical for duelers at the time but may not be appropriate for your project.


Yeah, I was given a hodge podge of parts to try and build this pistol. There was already a star shape inlet in the stock when I got it so I ordered a piece of a similar shape but slightly larger to fill it. It wont be beautiful when done but it will be functional.


Col. Batguano
75 Cal.
- Joined
- Feb 10, 2011
- Messages
- 5,034
- Reaction score
- 1,407
Because it's a convex piece I would use 4. But instead of nails I would use flat headed brass screws. Counter sink them ever so slightly, and then file off the heads so the whole thing is flush to the inlay.
Inlays are generally done when your wood shape is very very close to its' final shape. If you have to do a bunch more than that, and take the metal along with the wood you may find yourself in a pickle where you file through the metal.
If you put a big draft on the inlay to get a tight wood to metal fit, when you start taking the metal away along with the wood the gap with the epoxy underneath may start opening up too. Darker stains can help cover those gaps up though so they're not quite so noticable.
- Joined
- Nov 26, 2005
- Messages
- 5,024
- Reaction score
- 10,000
Hi,
Those pistols were originally a kind of turn-off pistol in which the barrel unscrewed revealing a powder chamber for powder and ball. Then the barrel was screwed back on. That full side lock style fell out of fashion by the 1720s although I have photos of some French ones from a bit later. Most had swelled pommels like holster pistols but some were more cane-like similar to the typical back action turn-off pistols
dave
Similar threads
- Replies
- 19
- Views
- 974
- Replies
- 15
- Views
- 686


