• This community needs YOUR help today. We rely 100% on Supporting Memberships to fund our efforts. With the ever increasing fees of everything, we need help. We need more Supporting Members, today. Please invest back into this community. I will ship a few decals too in addition to all the account perks you get.


    Sign up here: https://www.muzzleloadingforum.com/account/upgrades
  • Friends, our 2nd Amendment rights are always under attack and the NRA has been a constant for decades in helping fight that fight.

    We have partnered with the NRA to offer you a discount on membership and Muzzleloading Forum gets a small percentage too of each membership, so you are supporting both the NRA and us.

    Use this link to sign up please; https://membership.nra.org/recruiters/join/XR045103

trigger pull reduction

Muzzleloading Forum

Help Support Muzzleloading Forum:

This site may earn a commission from merchant affiliate links, including eBay, Amazon, and others.

Brian Heap

40 Cal.
Joined
Apr 1, 2015
Messages
157
Reaction score
8
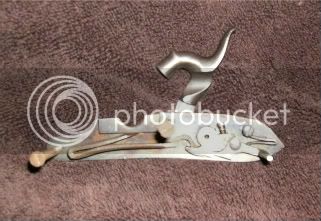
I have a traditions .50 caliber Kentucky rifle I build from a kit years ago, and am wanting to reduce the trigger pull, it's pretty hard. I've lost the darn instructions, so am not sure how to take it apart and get it back together. Also reduce the trigger pull. does someone know how I can do this without getting in trouble? Sure appreciate the help.
 
Thanks for the information, I really appreciate it. Maybe now I can get it apart and change the trigger pull to something more comfortable, :bow:
 
Note: Lock Removal Hint
On most models the ramrod retaining spring is attached to the stock by the lock plate screw closest to the barrel tenon pin or wedge. If that lock plate screw is unscrewed entirely, the spring may become dislodged in the stock. As a preventative measure, partially loosen that lock plate screw.
Place a piece of tape over screw head to hold the screw (and ramrod retain-ing spring) in place. Unscrew the remaining lock plate screw. Remove the
lock from the stock.

What they mean is the front lock screw, don't take it all the way out,,
 
Most Traditions locks(and older CVA's both made by the Spanish company I can't spell) that I have worked on have the contact angle on the tumbler where it contacts the sear at slightly less than 90 degrees. This is a "safety function" since it prevents the tumbler from "pushing off". But it actually requires you to "fight "the main spring. If you carefully and slowly pull the trigger with the lock at full cock you will notice the hammer moving slightly back before releasing.The contact angle should be exactly 90 degrees. If it is less than 90 you have the hard trigger pull, if it greater than 90 the tumbler will push off and not hold!You can stone the tumbler slightly to change the angle, but this is touchy since you can't stone metal back on if you take off too much. :idunno:
 
ohio ramrod said:
You can stone the tumbler slightly to change the angle, but this is touchy since you can't stone metal back on if you take off too much. :idunno:
There has never been a need to do that with any Traditions or CVA lock,, they all have this screw in the tumbler;

HPIM0501.jpg
 
With respect, the fact that screw reduces the sear engagement and thus the trigger pull, does not change the fact that when the full cock notch is angled towards the rear, it still partially cocks the hammer as you pull the trigger. That means the trigger pull gets harder and harder until it breaks/releases. A good trigger pull with the full cock notch at 90 degrees makes the trigger pull smooth throughout the pull and makes for better shooting.

Gus
 
Yup, but they are what they are.
The decades old Spanish designed and made locks.
The biggest improvement that can be made to these things is full disassemble and stoning the burrs off the parts, they just assembled the stamped out/cast parts without cleaning up burrs and edges.
But to just glean over the adjustment of that screw and go directly to changing the geometry of the tumbler,, :idunno:
 
Obi-Wan Cannoli said:
Traditions requires that you call them: 800-526-9556 or 860-388-4656

Unless something has changed with them, that's the ONLY way to communicate with them. Sure, they list email contacts and such on their site, but I've been waiting about 8 years now for answers to a series of email questions I sent them. Kinda soured me on the outfit behind the products, even as I continue to use some of them I bought back then.
 
Thank you very much all for the help, I'll see if I can get mine apart and check things out for burrs and such and fix that, then adjust the screw on the tumbler. :grin:
 
necchi said:
Yup, but they are what they are.
The decades old Spanish designed and made locks.
The biggest improvement that can be made to these things is full disassemble and stoning the burrs off the parts, they just assembled the stamped out/cast parts without cleaning up burrs and edges.
But to just glean over the adjustment of that screw and go directly to changing the geometry of the tumbler,, :idunno:

John,

I certainly understand they are what they are. I have worked trigger pulls on Military Locks since the early 70's and the quality of Italian made locks were fair to poor. They, too, had the full cock notch angled to the rear and often more than civilian locks.

Stoning the parts to remove burrs and polish the mating surfaces is important as the first step. However, I often if not usually found the original case hardening wasn't deep enough to hold up for long, especially when the sear engagement was reduced. So, since it was a good idea to case harden the tumbler and sear anyway, it was always best to get the full cock at 90 degrees before doing so.

I realize you can't make a silk purse out of a sow's ear, but in this case you can make a good broadcloth one out of it.

Gus
 
Just want to thank you fellars for all the help, I finally got the lock off so I could adjust the set screw and now I have a nice light trigger pull. I just want you all to know how very much I appreciate the help. :thumbsup:
 
With your sear engagement adjusting when using that little screw, just make sure the entire nose of the sear is engaged with the full cock slot.

More than a few people have adjusted the screw to the point that only a small fraction of the sear tip is engaged.

While doing this will make the sear release easily (giving the impression that the trigger pull has been lightened), it also makes the gun dangerous.

With only a small part of the sear tip engaged, the slightest jar or bump can cause it to release and the gun to fire.
 
Thanks, the sear is fully enguaged the way I have it now, so no worry there. The screw was never even close to being engaged when I checked it and was loose, that's why it was such a hard pull to fire, Now, it's great. All you fellows have helped me a great deal. Can't wait to go try it out now. Many thanks to you all.

Brian :thumbsup:
 
Back
Top