• This community needs YOUR help today. We rely 100% on Supporting Memberships to fund our efforts. With the ever increasing fees of everything, we need help. We need more Supporting Members, today. Please invest back into this community. I will ship a few decals too in addition to all the account perks you get.


    Sign up here: https://www.muzzleloadingforum.com/account/upgrades
  • Friends, our 2nd Amendment rights are always under attack and the NRA has been a constant for decades in helping fight that fight.

    We have partnered with the NRA to offer you a discount on membership and Muzzleloading Forum gets a small percentage too of each membership, so you are supporting both the NRA and us.

    Use this link to sign up please; https://membership.nra.org/recruiters/join/XR045103

Rifle carry strap

Muzzleloading Forum

Help Support Muzzleloading Forum:

This site may earn a commission from merchant affiliate links, including eBay, Amazon, and others.

Rickey Brown

40 Cal.
Joined
Jun 17, 2013
Messages
271
Reaction score
1
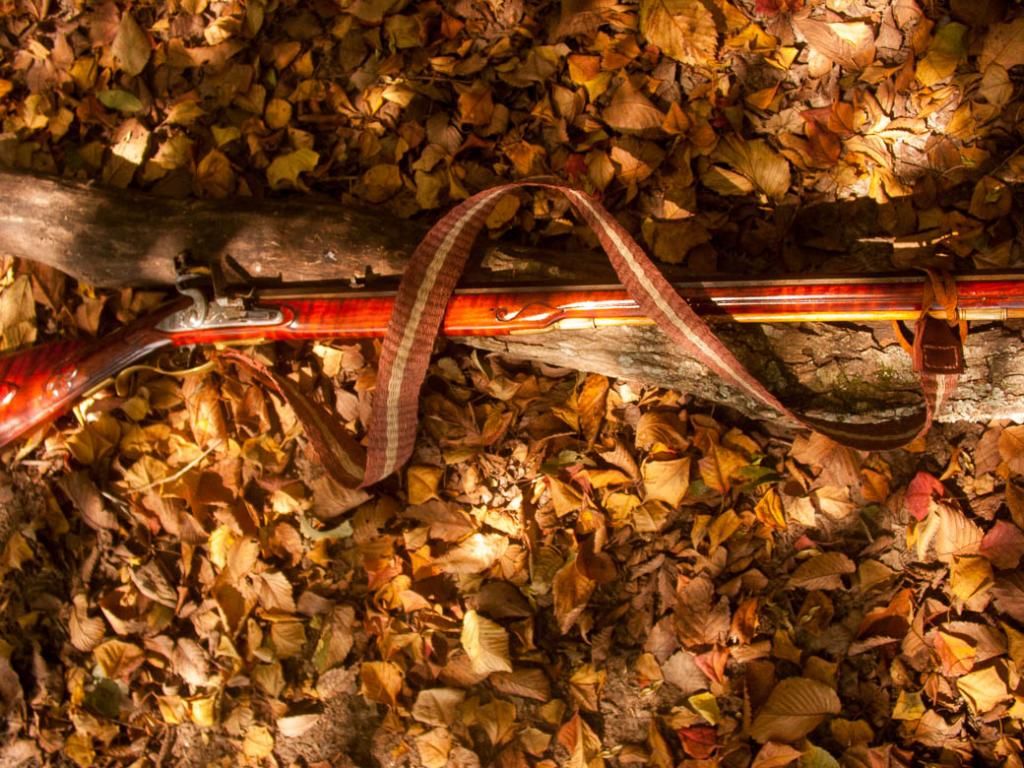
with hunting season fast approaching I'm in hurry up mode for final touches. I needed a carry strap for my long rifle. I made this one on the inkle loom out of hemp. I sewed the oil tanned leather patches with waxed hemp thread, ran out of linen. I cut some wangs from some rough out cowhide so it could be taken off
CRW_0676_zps03980e02.jpg
 
Hope it works out for you, but I always found a carrying strap a pest after a couple times out hunting and always in the way when getting ready to take a shot. ____ Maybe I'm just all thumbs!

Rick
 
Nice work, Henry! When I finish my next project, a Jaeger rifle, I plan on having a strap or sling attached.
 
I've always found them a necessity when dragging a deer or other big game out especially here in the mountains.
 
My carry strap is just a leather one. Comes off and carries in game bag. If I need to carry out something it comes out and on it goes.handy
 
That will work. But if used allot if will make a wear mark on the browned barrel, if that is a concern. :idunno:
That looks to be a very nice rifle & I was thinking marring the finish may be a concern. Even greased or oiled, where it wraps around the barrel it will change the browned finish there.

Keith Lisle
 
That is what I plan to do. I do sometimes need to carry it while doing other jobs and will keep it in my haversack until needed
 
Very nice looking. Did you make your inkle loom? I've been thinking of building one this winter.
 
If you make your Inkle loom, be sure to build it hell for strong. All of the joints need to be strong or they will fail in use. It seems that those pegs end up with a lot of tension on them and will fail if they are not good and strong. Also use a good hard wood such as oak. Pine will work but will not last as long as Oak.

It's a fun hobby and you can always use those straps for some fine blanket prizes or gifts. :thumbsup:
 
I built mine from some 1" tongue and groove maple flooring I had and the dowels are 1" hardwood, all joints are half lapped and the pegs are glued in with gorilla glue and 3" screws. It is very strong. I was a journeyman carpenter and cabinet maker for years
 
You can find plans for an Inkle loom on YouTube as well as some neat instructions. Some of the instructions are better than others so it is a good idea to watch more than one. What one leaves out, the other may cover. They also have some patterns for straps but you will need to become familiar with your loom before trying any of the fancy patterns. Later, they will be fun to try but get the basics down before trying any of the fancy stuff. :hatsoff:

Here's one set of plans: http://makezine.com/craft/how_to_build_an_inkle_loom/
 
Last edited by a moderator:
Nice job on weaving that sling!

I keep thinking about the German and Swiss Jaeger, Flint and Percussion Rifles that had a button a ways behind the trigger guard and a sort of flattened "D" shaped front sling swivel. This seems to me to be pretty clear indication the sling was meant to be taken off when not actually used to sling the rifle. Going up and down hills and mountains in the Alps on foot, it would have been handy to sling the rifle when ascending or descending.

There seems to be only a very small number of Flintlock Long Rifles with a front sling swivel or even the hole in the forearm and hole in the front of a trigger guard for sling swivels. They may have just brought a length of twine/rope to use as a sling when dragging out large game animals or climbing/descending hills or mountains in the East.

My best friend in life had a fine copy of an early 1750's/60's flintlock rifle on which he used a sling patterned after the one in this engraving of Dan Morgan by Alonzo Chappel. My buddy did not take it off his rifle when hunting or target shooting, though. The only problem was when the rifle and sling were made for him in the late 60's, I don't think my buddy realized the Chappel painting was done 50 years after General Morgan had died. http://www.alonzochappel.org/Portrait-of-Daniel-Morgan-(1736-1802).html

Gus
 
Last edited by a moderator:
I use a book written by Helene Bress ISBN 684-13870-0 has plans for the loom and weaving patterns as well. I use a pattern Generator from another site,,sweet. www.carolingianrealm.info this is a very good site,check it out.You can lay out the entire pattern and see what it looks like before you even start.When you get there go to the bottom of the page ,,miscellary then to inkle loom generator,,,enjoy.
 
I added a spring to the back side of the tensioner to make it easier to Warp the loom,holds the end till I get it run around the loom and tied..I got the spring off a Magnifying light.The one's that are a floor magnifyer.that hold the arm in place.I put the yarn in between the spring coils to hold it while I wrap the thread,no tacks,then when it is all warped I rotate the tensioner 180 degrees,releasing the warps,Two screws mount the spring to the back side of the tensioner.
 
Completed the Inkle loom with the help of my buddy who has a woodworking shop in his garage. With the right tools, only took 1 1/2 hours to finished ready for stain and urethane.
 
Back
Top