• This community needs YOUR help today. We rely 100% on Supporting Memberships to fund our efforts. With the ever increasing fees of everything, we need help. We need more Supporting Members, today. Please invest back into this community. I will ship a few decals too in addition to all the account perks you get.


    Sign up here: https://www.muzzleloadingforum.com/account/upgrades
  • Friends, our 2nd Amendment rights are always under attack and the NRA has been a constant for decades in helping fight that fight.

    We have partnered with the NRA to offer you a discount on membership and Muzzleloading Forum gets a small percentage too of each membership, so you are supporting both the NRA and us.

    Use this link to sign up please; https://membership.nra.org/recruiters/join/XR045103

Priming powder location in the pan

Muzzleloading Forum

Help Support Muzzleloading Forum:

This site may earn a commission from merchant affiliate links, including eBay, Amazon, and others.
This evening I tried to answer some of the questions that came up yesterday. I removed the cleanout screw that is directly opposite the vent and took a couple of shots aimed through the cleanout. On the final shot I set the camera up to look into the muzzle of the barrel stub to watch gases coming through the vent.

This first shot was taken to show how the setup worked. You are looking through the 1/4" cleanout at the vent hole on the opposite flat.
cleanouthole.jpg


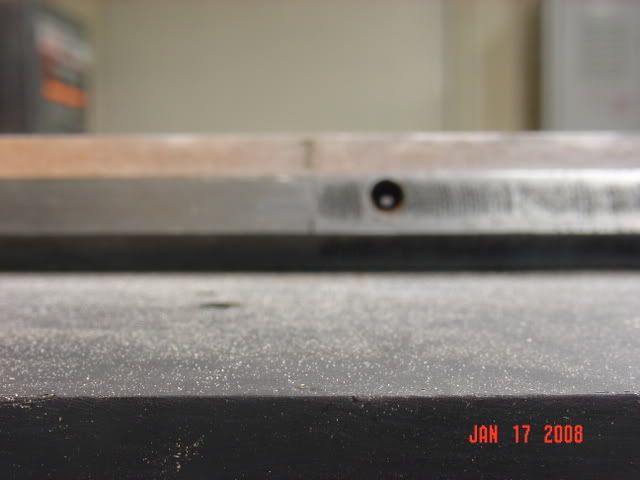
The camera was focused as close as possible at the cleanout. The pan was primed with 1.5 gr Swiss NullB. In both shots the camera was set to open 2 seconds. The shutter was opened and the pan ignited with a red hot wire.

In the first ignition shot, the priming powder was placed in the half of the pan closest to the vent without covering the hole. Note the amount of burning gases coming through the cleanout.
Pan_Middle.jpg


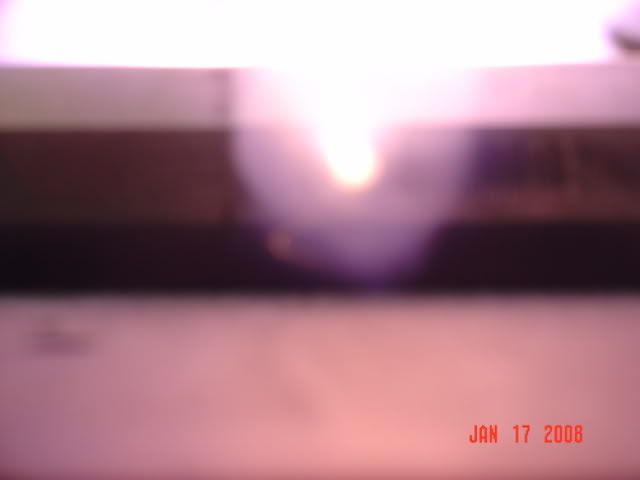
In the second shot the priming powder was placed in the half of the pan farthest from the vent. Again, note the amount of burning gases exiting the cleanout.
Pan_Outside.jpg


In the final shot the camera was aimed at the muzzle. The pan was primed in the closest half of the pan and camera and hot wire were used as in the first two shots.
Muzzle_shot1.jpg


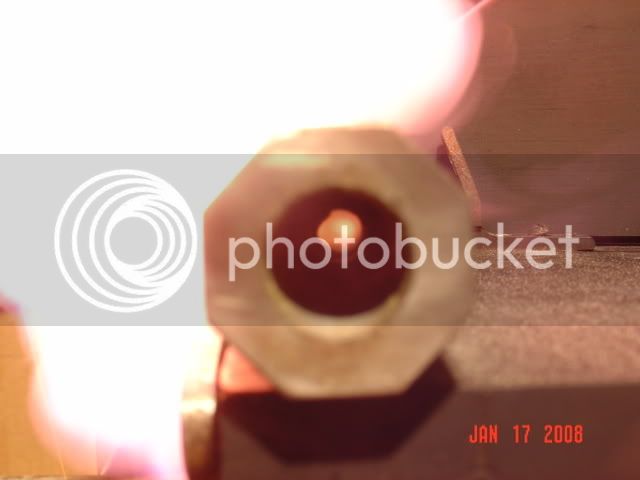
The whole pan side is whited out by the pan ignition. Remember this was only 1.5 gr. From this muzzle view, you can clearly see the burning gases that enter the vent. Also I believe that there is a "V" of gas faintly seen exiting the cleanout.

I was going to speculate here, but I won't. Please draw your own conclusions.

Regards,
Pletch
 
Pletch said:
I was going to speculate here, but I won't. Please draw your own conclusions.
No need for further speculation...completely conclusive to me...closest to the vent definitely produced the most gases into and through the vent, continuing right on through the breech plug and out the cleanout screw hole.

Conventional wisdom was nothing more than theory...outstanding work Pletch !!
:hatsoff: :hatsoff:
 
Larry: Its clear that fire seeks oxygen, and it will go for oxygen in the barrel if the fire is lit near the touch hole. Its also clear that the fire enters and comes through the barrel even when the prime is placed away from the touch hole. I do see the slight flame coming out of the cleanout hole in the 4th picture. It would be instructive to do the first two tests with the camera at that same muzzle location, to see how much or if a flame also comes through the barrel with them, too. With the first two test, shot through the clean out hole, you can see what appears to be fire in the barrel itself, indicating that the fire in the pan enters the barrel. What we can't determine in those two pictures is how much, or how far it enters.

Thanks again for these pics.
 
Nice little experiment.

I would have a hard time pulling the trigger and looking down the barrel to take a picture even with it not being loaded. :shocked2: :grin:
 
paulvallandigham said:
Larry: . . . .I do see the slight flame coming out of the cleanout hole in the 4th picture. It would be instructive to do the first two tests with the camera at that same muzzle location, to see how much or if a flame also comes through the barrel with them, too. With the first two test, shot through the clean out hole, you can see what appears to be fire in the barrel itself, indicating that the fire in the pan enters the barrel. What we can't determine in those two pictures is how much, or how far it enters.

Thanks again for these pics.

Hi Paul,
I agree that the muzzle shot might tell more about the quanity of fire. I did this stuff pretty late last night and wasn't planning on doing the muzzle shot thinking that it wouldn't work. Now I think it might help. In effect it provides a "side view" of the gases coming through.

Besides locating the prime right or left in the pan, I'd like to vary the amount powder as well.
I'm late for a meeting. more later
Pletch
 
I know everyone who has responded to Pletch's outstanding test results appreciates his contribution to the world of Flintlocks...I just hope everybody else who sees these tests fully appreciates just what a rare gift it is for these various results to be put before our very eyes.

All of Pletch's Flintlock action stills are some of the best examples of the old phrase "a picture is worth 1000 words" that I've seen..simply outstanding !
 
Interesting (and good work).

How did you time the shutter so the images are taken at the same instant during the ignition process? :hmm:

I pile my prime in the center and then rap my rifle with the heel of my hand to level it across the pan, maybe 3/4 full. Another country heard from.
 
Stumpkiller said:
Interesting (and good work).

How did you time the shutter so the images are taken at the same instant during the ignition process? :hmm:

I pile my prime in the center and then rap my rifle with the heel of my hand to level it across the pan, maybe 3/4 full. Another country heard from.

Stumpkiller,
The photography was/is done with the stutter open. In dim but not total darkness, I set the camera for a 2 second shutter opening. I prime the pan, heat the wire red hot, and trip the stutter. In the 2 second time window I touch the wire to the priming. Then I wait for the shutter to close and then look at the resulting pic. This would be murder to try with film camera. ---- BTW I see nothing wrong with your priming methods.

Paul, I'm sorry for the abrupt end of the last post. A close friend died of cancer recently and I promised Ed's widow some help. (Ed was my "partner in crime" when we did the patch separating from the ball.)

I think the "through the muzzle" look at right/left pan priming could come next, also I think I'd like to try different amounts of powder. I used 1.5 gr before. I thought about dropping that to 1/2 to 3/4 gr and maybe an amount above the original try - say 2-2.5 gr. Much more and I bet we reach a point of diminishing returns.

Regards,
Pletch
 
Shocking! I say SHOCKING! What would Timothy Murphey say? I don't know what Tim would say, but I know what I would say. I would say that you have done a fine job of devising and making experiments that suggest that I should change my priming practices. I plan to do my own practical experiments sans camera as soon as weather permits me to get out and be serious about checking what your work suggests in my old familiar guns. I'll prime the opposite of my current practice so as to bank the charge from the pan/hole junction toward the outside and give it an honest go. Regards, Wonky
 
Pletch said:
Stumpkiller said:
Interesting (and good work).

How did you time the shutter so the images are taken at the same instant during the ignition process? :hmm:

I pile my prime in the center and then rap my rifle with the heel of my hand to level it across the pan, maybe 3/4 full. Another country heard from.

Stumpkiller,
The photography was/is done with the stutter open. In dim but not total darkness, I set the camera for a 2 second shutter opening. I prime the pan, heat the wire red hot, and trip the stutter. In the 2 second time window I touch the wire to the priming. Then I wait for the shutter to close and then look at the resulting pic. This would be murder to try with film camera. ---- BTW I see nothing wrong with your priming methods.

Paul, I'm sorry for the abrupt end of the last post. A close friend died of cancer recently and I promised Ed's widow some help. (Ed was my "partner in crime" when we did the patch separating from the ball.)

I think the "through the muzzle" look at right/left pan priming could come next, also I think I'd like to try different amounts of powder. I used 1.5 gr before. I thought about dropping that to 1/2 to 3/4 gr and maybe an amount above the original try - say 2-2.5 gr. Much more and I bet we reach a point of diminishing returns.

Regards,
Pletch

In that case, GREAT WORK. You seen to have the bases covered and the trial was fair. Good stuff.

Now you need to test why it is that when you bump a tree with your boot or elbow the snow always falls onto the frizzen and/or down the neck of your jacket.
 
Stumpy's right about Murphys law regarding falling snow! For Sure!

Larry: If you do some more of the muzzle photos, it would help us all see the flame coming out the cleanout hole if there was something black in the background to see the flame against, NO? I am not suggesting that you run out and buy some black sheets, or something, but if you even have some black carbon paper, or construction paper, putting it behind the lock and barrel would improve the images we see dramatically.

I don't think that adding more powder to the pan is going to contribute anything we don't already know, and that is the more powder in the pan, the more likely your priming powder will be ignited.

Unless high speed, " Time lapse " photography is used, I don't see how a still shot with a long exposure is going to show us anything about how fast the fire enters the vent hole, or in what direction the prime burns first depending on where its placed in the pan.

I have tested my rifle with positioning the powder in different parts of the pan and moving away from under the vent seems to make the gun go off faster. That with a vent hole splitting a line across the top of the pan.

In my fowler, where the vent hole is above the pan, I can fill the pan right up and under the vent and get fast ignition. Moving the powder away from the vent hole does not seem to make ignition faster, and I have tried that just to see which would work better. I am very pleased with the ignition speed of my fowler.

Thanks again.
 
paulvallandigham said:
Stumpy's right about Murphys law regarding falling snow! For Sure!
I agree. The only thing I'd add to Stumpy's thoughts is that the snow always ends on the back side of my eyeglasses.
paulvallandigham said:
Larry: If you do some more of the muzzle photos, it would help us all see the flame coming out the cleanout hole if there was something black in the background to see the flame against, NO? I am not suggesting that you run out and buy some black sheets, or something, but if you even have some black carbon paper, or construction paper, putting it behind the lock and barrel would improve the images we see dramatically.
This is a good idea. When I worked last night I gave little thought to photo composition, thinking only about what I wanted to learn. Sometimes I can get tunneled in on an idea and don't think of details.) Your suggestion should not be hard to do.

paulvallandigham said:
I don't think that adding more powder to the pan is going to contribute anything we don't already know, and that is the more powder in the pan, the more likely your priming powder will be ignited.
I agree here. I am more interested in charges less than those already tried. At least in this pan, more powder seems unnecessary, especially noting the size of the fire that showed in the muzzle shot last night. I may try a heavier charge, but will probably weigh out .5 and 1.0 gr to go with the 1.5 gr tried before.

paulvallandigham said:
Unless high speed, " Time lapse " photography is used, I don't see how a still shot with a long exposure is going to show us anything about how fast the fire enters the vent hole, or in what direction the prime burns first depending on where its placed in the pan.

I agree here. We take the speed issue farther only with the computer timing, which was my original plan; I just got tunnelled in on the camera angle. Got to get back on my first task.


paulvallandigham said:
In my fowler, where the vent hole is above the pan, I can fill the pan right up and under the vent and get fast ignition. Moving the powder away from the vent hole does not seem to make ignition faster, and I have tried that just to see which would work better. I am very pleased with the ignition speed of my fowler.
Thanks again.
That reminds me, Paul, for these photos the vent was adjusted with its center just a hair above the top of the pan. (Sorry I chewed up your quote to answer in segments.)

Regards,
Pletch
 
FYI...There is an article at the top of this forum advocating that the priming powder be banked away from the vent.


"...bank the powder in the pan away from the touchhole, so that there is air under and around the touchhole for the flame to go towards. This helps direct the flame from the prime into the touchhole and to the main powder charge..."
 
YOu are right, Roundball. I even know the guy who wrote the article. He wrote it based on years of experience, using the guns he owned, and watching the guns of other shooters at his club, and on the line at Friendship, where he not only watched the best shooters, but talked to them between relays, over several years, trying to learn if there were any better ways.

My gunmaker came up with raising the vent hole up above the pan's top edge, and managed to put a vent liner in the flat without going over into the angled flat above, on my Fowler. I am not sure this would be possible on my smaller diameter rifle barrel, or on most rifle barrels that are 1" or less in Width, given the current choice of sizes in vent liners, from both factories and Jim Chambers.

For a small caliber rifle, like a .32 or .36, I think we would have to thread a piece of drill rod, insert it in the hole, and THEN drill the vent hole in a higher location. Then remove the plug and cone the inside. That seems to be a lot of work, but that is how better ideas get done.

Last year, my brother began learning barrel making and gun building from Phil Quaglino, a long time barrel maker and championship record holder with both rifles and pistols at the Nationals. Phil is the guy who told my brother that the vent should be .030" above the top line of the frizzen for most effective ignition, which is why I have mentioned that particular dimension several times here in the forums, but its not in the article. Looking at my fowler, I believe that my gunmaker used the same advice when he drilled and threaded my barrel for the vent liner.

Since my rifle's vent has not magically drifted upward, I still bank the priming powder away from the barrel, and rely on the larger SHOWER OF SPARKS I get because I wrap my flint in LEAD, not leather to insure positive, reliable ignition of the priming powder, and speedy ignition of the main charge in the the barrel.

If it were not for other experienced shooters who know me, coming down the firing line to ask me when I started shooting a percussion gun again, only to find me shooting my flintlock, I would never have known that I stumbled on to the way to speed up ignition of my rifle. I take no credit for the discovery here, other than to say I listen, and look and remember, and then analyze what I have been told, what I see, and what I remember to separate out the best from the rest. My friend, the late Don Latter still gets credit for showing me how to tune Flintlocks, to load them, to prime them, and to get them shooting fast; and I thank many other people, whose names I did not ask at the time, for sharing their thoughts, and letting me watch how they loaded their flintlocks, for what I know works today.Craig Witte, my gunbuilder, who has been a friend for more than 30 years and has always been generous with his knowledge about muzzle loading guns, his father, Curly Witte, who likewise has always been a true friend, and is a great gunsmith in his own right, both have added immensely to my knowledge about flintlocks, and how to make the little things work better.
 
Great work,very intresting :thumbsup: I came accross a very old flint smoothbore one day.it werent in shooting condition,the muzzle was in bad shape and the frizzen spring was capoot.The thing i found intresting was the pan was very shallow.Instead of digging it deeper some one had used a drill,most likely the old hand crank kind and drilled a hole in the pan right close and under the touch hole.It was then drilled at angles toward the center of the hole.Kinda like a half star.Maybe they new what they were doing.Be harder to clean most likely but it might have worked good.
 
Thanks for taking the time to do these tests and share so freely with the blackpowder community.

The only fly in the ointment here is the fact that you are essentially testing an "open air system", there is no charge or clean-out screw in the barrel which I feel would seriously affect the results. ??
 
ApprenticeBuilder said:
Thanks for taking the time to do these tests and share so freely with the blackpowder community.

The only fly in the ointment here is the fact that you are essentially testing an "open air system", there is no charge or clean-out screw in the barrel which I feel would seriously affect the results. ??
There's no fly in the ointment at all...you're missing the point of the experiment...the fact that the cleanout screw was removed was to simply amplify the visual illustration for the camera to capture and the results were clear.

A full breech of powder, or sand, would of course block the flame from passing through and out of the clean out screw on the other side, but thats irrelevant to what he was illustrating...the point he was after had already occurred much earlier on the opposite side of the barrel.,the clean out screw exit merely reflected the strength of the earlier action he was after.
:thumbsup:
 
Great work Pletch!

And as usual, great input from the experienced gurus on MLF. Speaking for the folks who are new to this endeavor.
:thumbsup:
 

Latest posts

Back
Top