Hi,
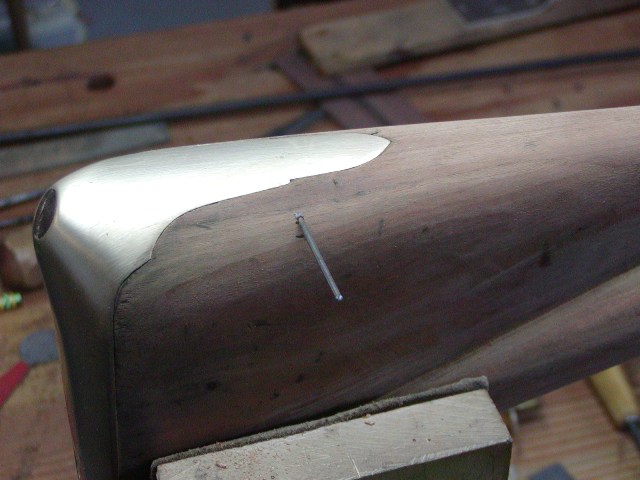
Before moving on to metal work, I wanted take care of the missing butt plate tang pin. Original Besses have a lug cast into the underside of the butt plate tang through which a pin is inserted. The location is always where the final shoulder is on the tang. On real Besses, the pin secured the top of the butt plate. On the Pedersoli, it cannot serve that purpose because there is no lug, however, the pin shows on originals so why not just add a pin to the Pedersoli. I simply drill a 1/16” hole through the butt and tap in a 1/16” pin trimmed to the width of the stock minus a little so the ends are sunken in the wood a tiny bit.
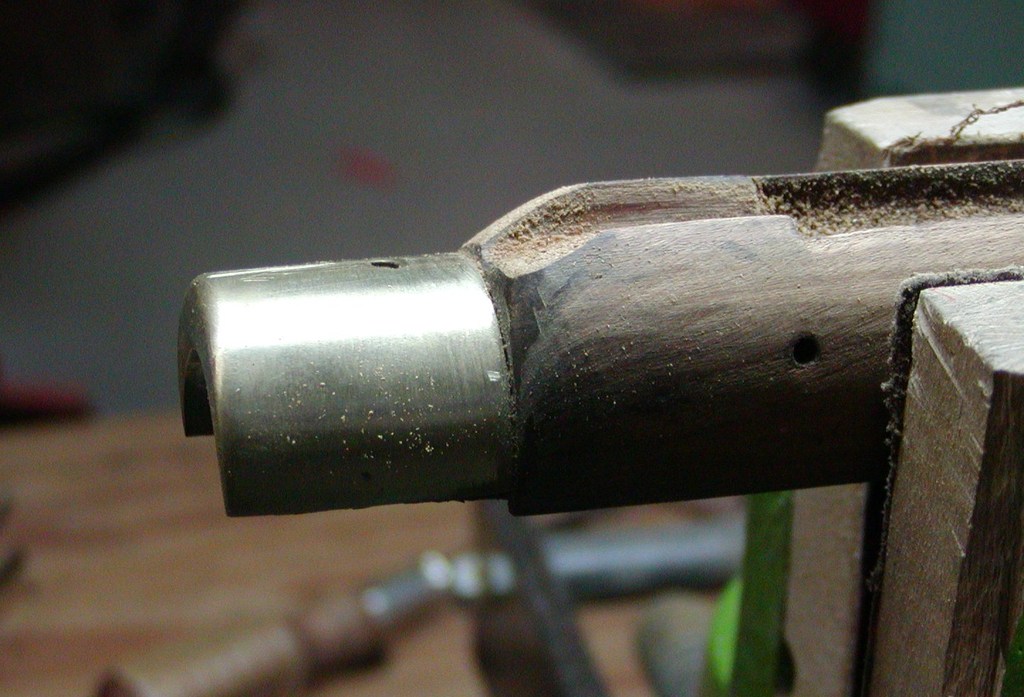
Oh boy, now to clean up the barrel After cleaning the bore with oil, patches, and steel wool to get out pitting, I began taking off the browning. I scrubbed the barrel with comet and a green Scotch-Brite pad, which cleans up the gunk and rubs away much of the brown. Then I use a 60 grit (yellow) 3-M bristle burr mounted on my Dremel to clean off the rest of the brown and polish the barrel. I wear a face mask when I do this because the burr kicks up a lot of very fine powder containing the browning. The little bristle burrs do a great job and work fast. I then rub the barrel with medium and fine Scotch-Brite pads dipped in water to polish the barrel a bit more. I’ll leave it at that for now.
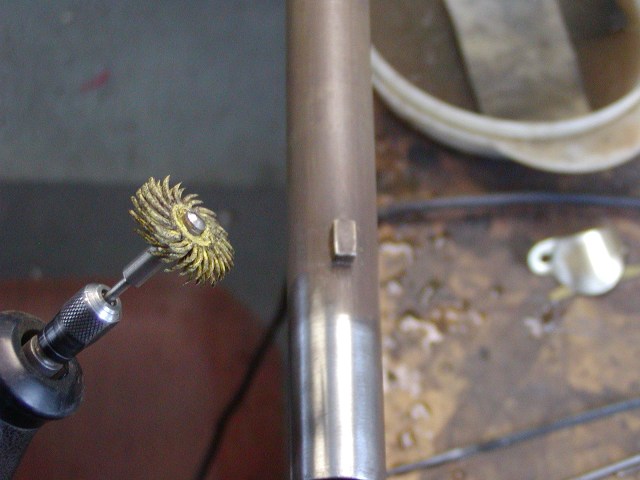
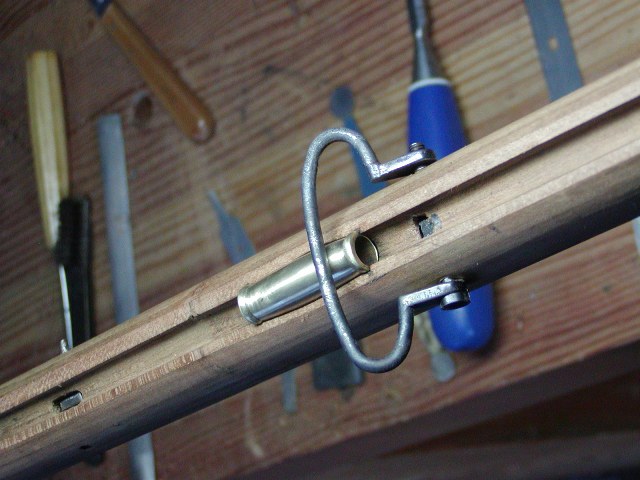
Original Besses have a lug brazed on the barrel through which the screw for the foreward slig swivel passes. This provides support for the swivel so that it is not entirely bearing on the wood. Pedersolis do not have the lug, which is a weakness. I will add a lug. I mark the location on the barrel and make a small lug with concave bottom from some mild steel scrap. It should be about 1/2”-5/8” long, about 7/16” wide, and 1/4” high. I basically make it using a hacksaw and some files. Making sure it fits nicely on the curve of the barrel, I solder it in place using Brownell’s Hi-Force 44 low temp silver bearing solder. This stuff is very strong but you have to make sure the surfaces to be soldered are very clean or the solder will not flow.
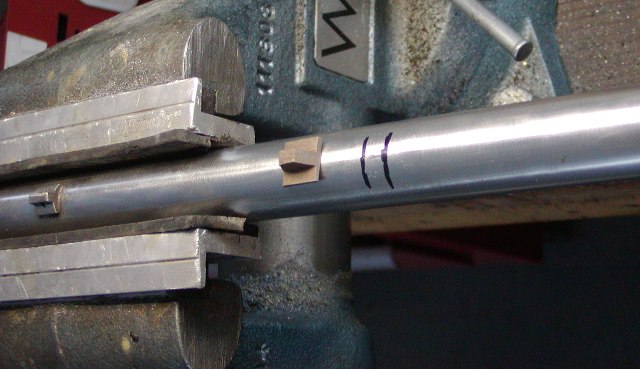
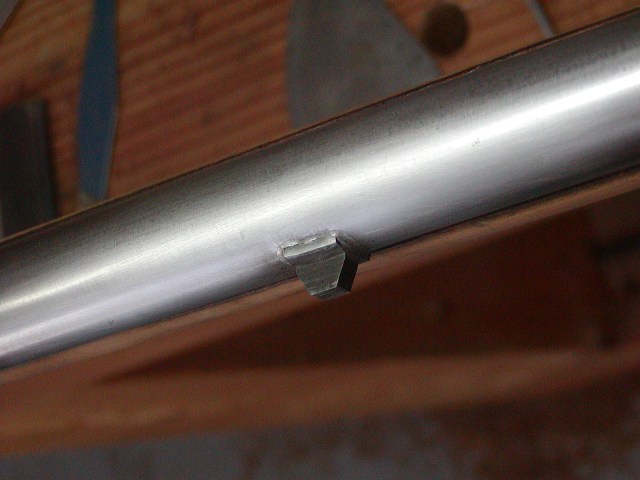
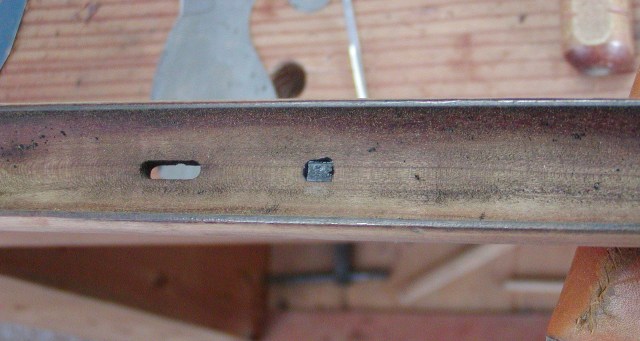
Once the lug is soldered in place, I coat the top with some inletting black and press the barrel into the barrel channel to mark the location for inletting the lug. Using 1/4” and 1/8” flat chsiels and a small #3 sweep gouge, I inlet the lug and its base. It is easy to do and don’t worry if it breaks into the ramrod channel because it is about 1/4” high, which is about the thickness of the web of wood between the barrel and ramrod. After inletting the lug, put the barrel in the stock and put the barrel pins in and tang bolt screwed into the trigger plate to set the barrel tightly in place. Then using a drill about half the diameter of the swivel screw, drill in the swivel hole from one side into the lug but don’t go completely through the lug. Then drill from the other side until through the lug. The holes should meet pretty closely. Then use a drill the diameter of the screw or a tiny bit larger, and repeat the drilling from both sides. If you are careful, it will all line up just fine. After mounting the swivel on the gun, I check to make sure it overlaps the ramrod thimble behind it. It must do that, or the swivel will block the ramrod going back down the channel during loading. Original swivels were welded rod. This one is cast and the loop is too neatly compressed such that it barely overlaps the thimble. I heat it and bend it to open it up so the overlap increases. In doing that, the swivel loop also looks a lot more authentic.
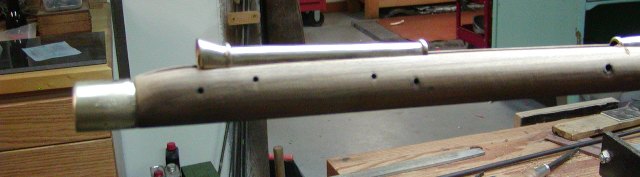
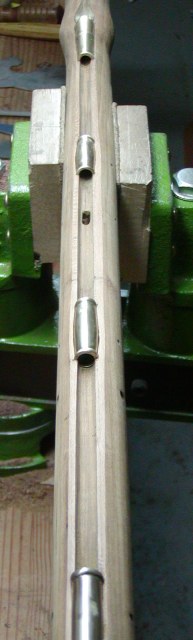
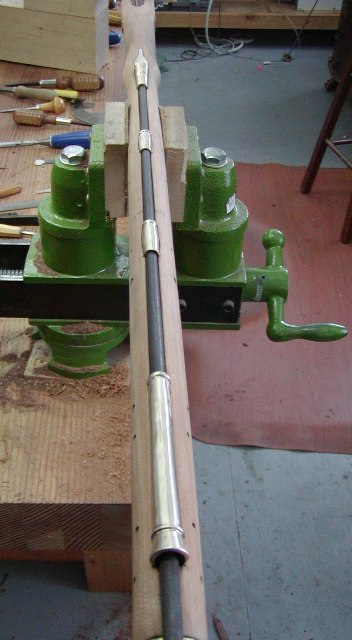
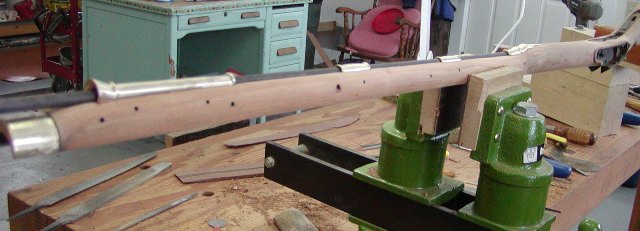
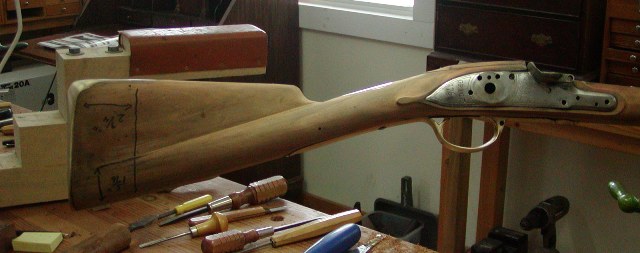
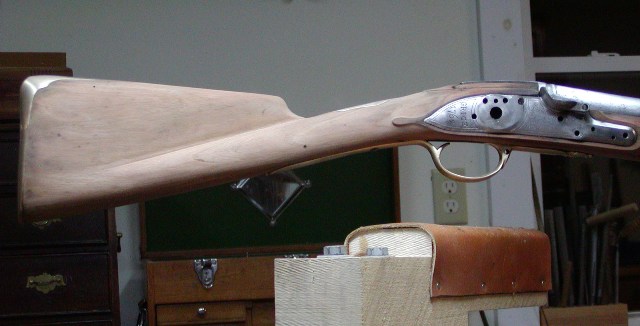
Well, I’ve done some metal work on the barrel but still have to work over the lock. However, I wanted to finish up the woodwork so I can get the stock stained and finished. While finish is drying, I can do the lock. I thinned the forestock with files and scrapers. The photos show how much ramrod is exposed as well as the thimbles.
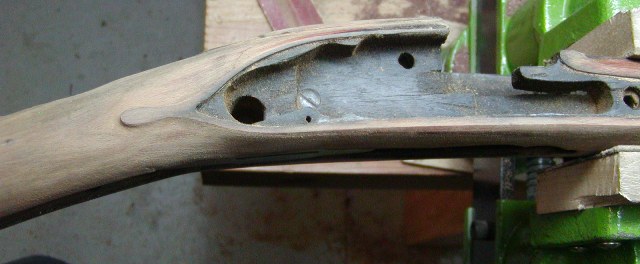
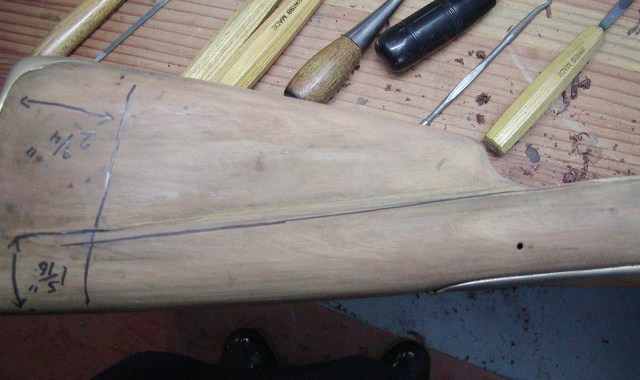
I am essentially done with the wood work that is historically correct for the gun. However, before the final scraping and finishing I will do one more thing that is not historically correct but helps create an illusion making the gun look more correct. Many of you may not want to do this but I want to show it anyway. I mentioned previously, that the buttplate is 1/4” ”“ 3/8” too short and they reduced the drop of the heel by almost an inch. That doesn’t seem like much but it makes a big difference in how the butt stock looks. The Pedersoli just does not have the proper drop in the heel or size of the butt. It looks too straight and almost like it is “perch bellied” and the butt stock looks too small relative to the lock. It is a real shame Pedersoli chose to do that. I make a modification which is not historically correct but that makes the stock look more correct. First, let me mention my “1/3 rule” for Bess butt stocks. It is based on direct measurements of originals and good photos of others that can be scaled. If you measure the length of the comb from the top of its nose to a line drawn vertically from the small of the buttplate, the baluster wrist should end 1/3 of that length in from the small of the buttplate. If you measure the height of the buttstock at that point, the baluster wrist comprises 1/3 of that height and that height remains fairly constant all the way up the wrist.
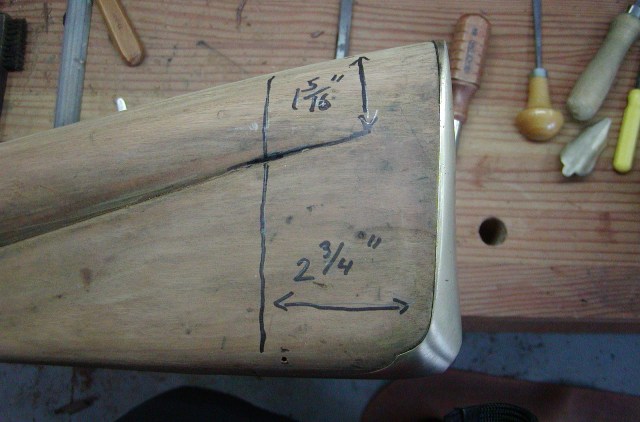
Pedersolis pretty well match that rule, however, the height measurement is smaller than originals. I find that if you angle the baluster wrist downward slightly such that it becomes thinner toward the buttplate and is a little less than the 1/3 rule, you can create an illusion of greater drop in the stock and a bigger buttstock.
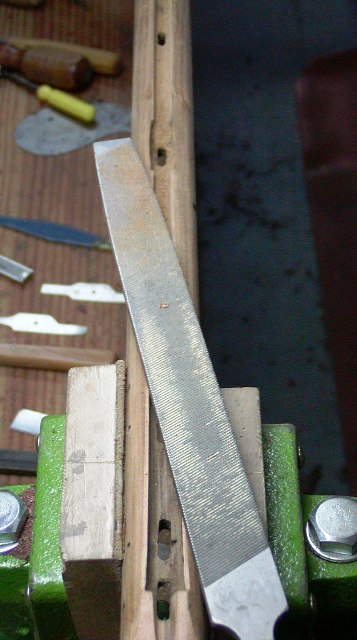
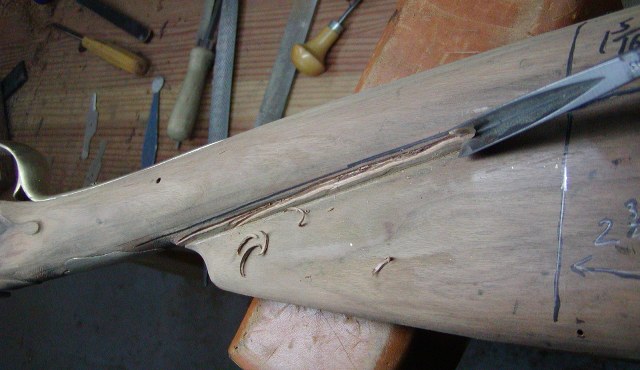
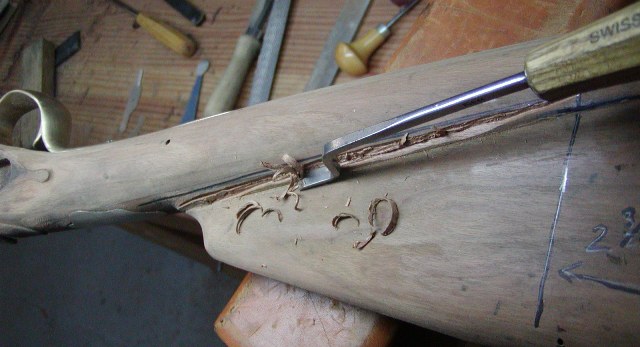
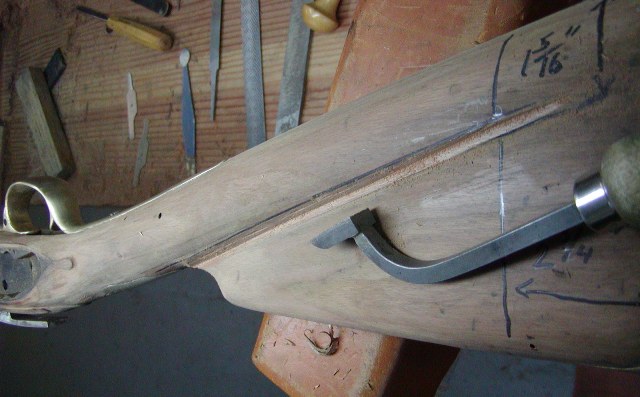
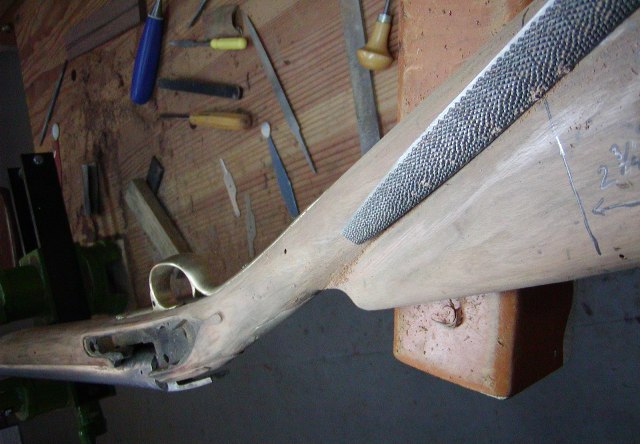
I make that adjustment starting with a large “V” chisel to cut into the crease on top of the baluster and then remove wood with a dogleg flat chisel. Then I smooth is out further with a bottoming file. I round off the flat top created by the chisels and files using my #49 Nicholson pattern makers rasp held as shown. Scrapers finish the job. Each side only takes me about 20 minutes. I also file down the wrist plate a bit to match the new wrist profile. When I have finished the stock and stained it, you will see the difference compared with the original Pedersoli profile.
Unfortunately, Pedersoli also made the wrist too long. Look at photos of originals and the amount of space between the wrist plate and the comb and barrel tang apron. The plate almost touches the apron. Now look at the Pedersoli Bess. You could shorten the space by 5/8” or more. Same with the spacing relative to the comb. That is another reason why the Pedersoli Bess never looks quite right. In fact, it sometimes reminds me more of the German Potsdam musket. It is a shame, but the only way you can get an accurate copy of a Bess is to make or buy a custom one from someone who knows what they are doing.
dave