More discussion between Artificer and me:
Dave,
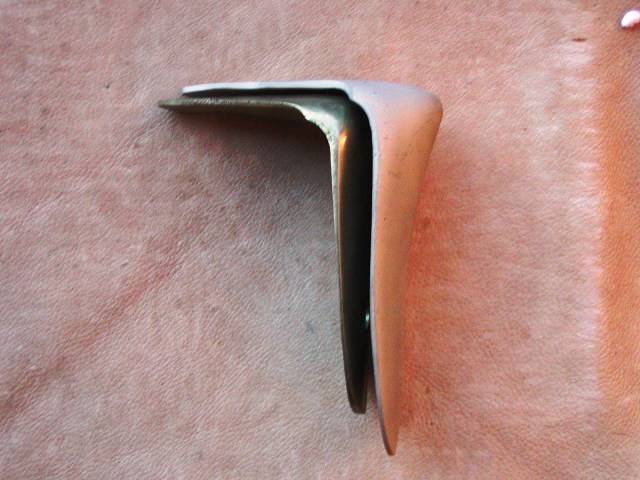
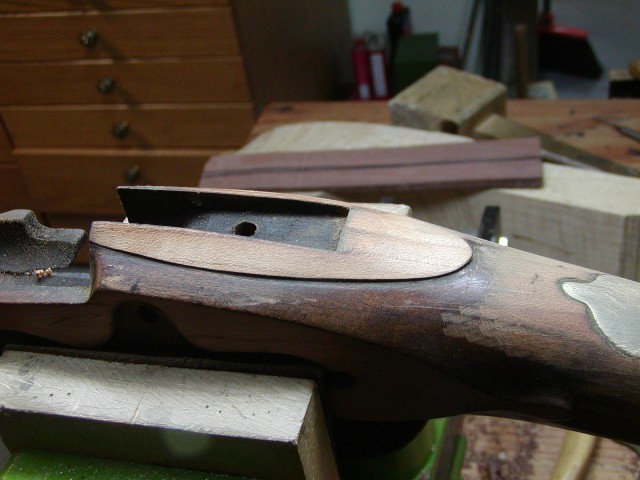
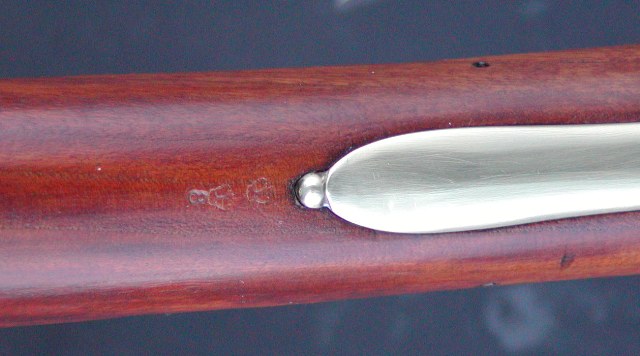
A “blind” pin to cover that the Pedersoli Buttplate does not have a tang? Brilliant.
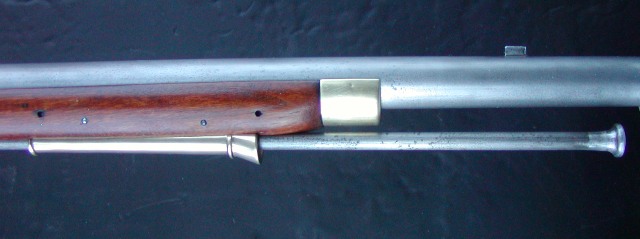
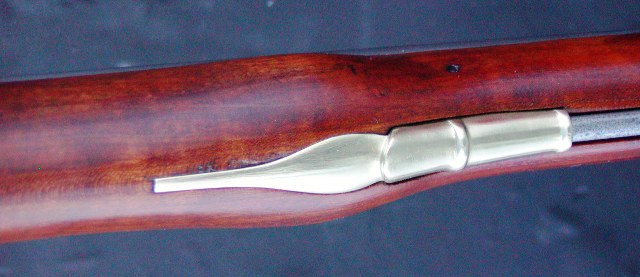
Never having cut a dovetail in what I consider a very thin walled barrel, how deep do you normally cut the dovetail for the sling swivel lug? Oh, I noticed you angled the fore and aft edges of the barrel lug more than I’ve seen on a couple of original muskets. Looks like it would make inletting them easier?
On both my circa Mid 1970’s Pedersoli Brown Bess Carbine and my late 1990’s Full Length Pedersoli Musket, the sling swivels that came on both of them were/are insanely too wide for period slings. I fixed that by replacing the sling swivels on my old Carbine, but have not done that yet on my full length Musket. I wonder, do you replace the factory swivels or perhaps cut out a piece from the middle of each swivel and weld or solder it back together, using the screw to align both halves?
Gus
Dave,
WOW, just 10 hours to turn a rough blank into a finished stock in the period? Even considering they used different workers who were best at doing things to the stocks, that is almost warp speed. I admire the guys who inletted the locks and buttplates.
Before you wrote this post on the beaver tails behind the lock, I had noticed you did not make very large ones and often seem to use a sort of flat point on yours. While looking at the forearms on a bunch of stocks on originals in three of Bailey’s books and “The Brown Bess,” I looked carefully at the beaver tails on those stocks. Have to say I never really noticed how much they differed, due to the different workmen who carved them.
I have greatly admired the beavertails and wrap around “Aprons,” as Bailey mentioned they were described in the period, that went from the panels to the bottom of the stock near the sides of the trigger guard on the Pattern 1730 Muskets to some Pattern 1740 Muskets. Bailey mentioned these were not only for esthetics, but also to reinforce the stock at those points. However, it must have been way to expensive as the carving was greatly simplified from the Pattern 1742 Muskets and beyond.
One would think the workmen at the Tower who stocked the muskets and assembled them, would have been paid fairly well for the times, but Bailey mentions they were pretty poorly paid, no matter what they did. Bailey gives examples of one guy who was brought to court for taking scrap brass and worn out lock parts to sell on the side. Another workman got caught taking a couple of broken/unserviceable bayonets and his defense was he was going to make some tools out of the metal. Though that defense was pretty crafty, they threw the book at him as well.
Gus
Hi Gus,
I am going to swap out the swivels for proper smaller ones for the Bess. Track of the Wolf sells the right size, however, the owner has a pretty wide sling and I am giving him the option of the new narrower swivels or keeping the old ones. The swivel loops that came with the gun are way too wide. I don't cut a dovetail in the barrel for the lug. I simply solder it on. The angled shape does make it easier to inlet and to remove less wood. Most originals were round but I disassembled one (India pattern Bess) that was angled. I like the big beaver tails on the earlier muskets and wish they continued them. They really are not hard to cut and can be done very quickly but they certainly require more time than the indifferent tails cut on the pattern 1742s and later. I feel for the poor workmen of that day. Some were salaried "day" workers and others were "piece" workers who were paid by the unit manufactured. The authorities really exploited the piece workers.
dave
Dave,
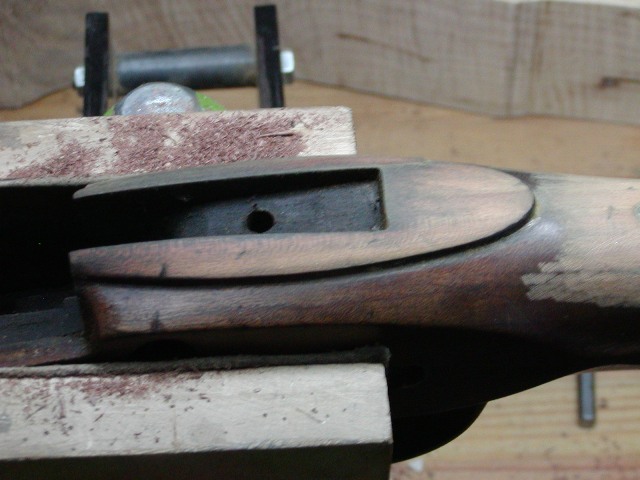
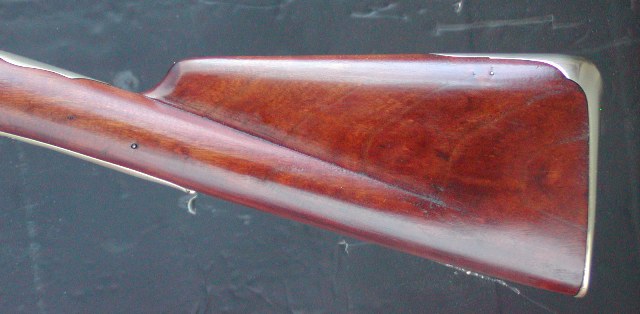
Prior to this last post of yours, I really did not understand what you meant about working the butt stock to make it appear more correct. I was fascinated by the ratios you found on original stocks. The effect of this modification is quite dramatic.
Gus
Dave,
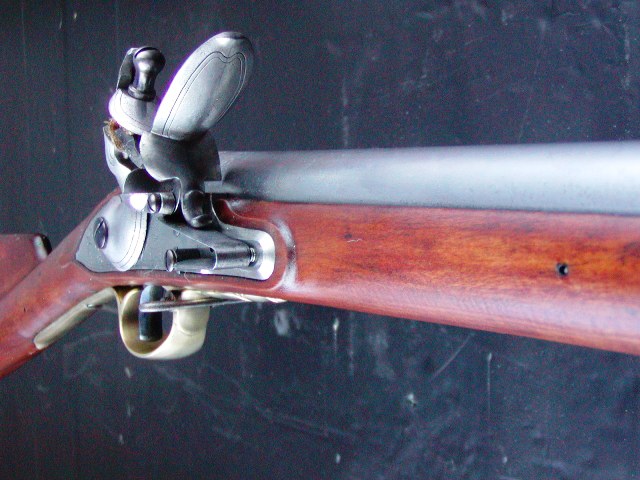
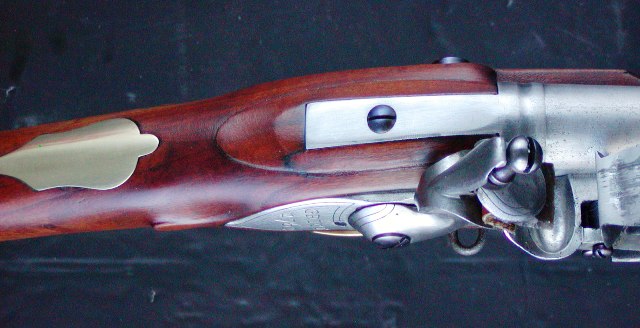
It is not very common at all, but I have seen Sears in Italian Military Percussion/Flintlock Muskets like this before and believe it or not, in some original Foreign Muskets and “Non Interchangeable Parts” Muskets. I thought perhaps the first one I saw had been bent in the heat treat process, but upon closer examination, I don’t think that was the case. Then I thought it may have been done to make up for possibly the position of the trigger bar being off, but again, I don’t think that was the case, either. I think they got bent during the machining process when the cutters got dull or the operator ran the machine too fast or it wasn’t lubricated properly? The original parts were probably bent when forged, after they came out of the forging dies and before they cooled.
As I’m sure you do, I usually replace this kind of bent Sear in Military Percussion/Flintlocks as the Repro Sears were both available and were not so expensive compared to what one might/would have to do to get it to work properly. However, Pedersoli Sears are NOT inexpensive or often readily available. Every now and then when I ran across this, it was with a repro that parts were not readily available for, though. Some examples were some of the “OFF” brands of Zouave muskets and even some of the COLT made muskets over the years. I did not try to stock COLT musket parts as they cost too much, were hard to get and there weren’t enough NSSA Shooters using them to put that kind of money into parts I rarely used. Real Parker Hale parts were also very expensive, BUT they always fit and worked in their locks and in most original locks that were made as “Interchangeable Parts” Muskets.
Anyway, though I certainly don’t like the way the rear of the sear bends outwards, as long as the “bolster” part of the Sear around the screw and the Face of the Screw is parallel to the lock plate, I found you could even do a good trigger job with this kind of second rate Sear, though you sometimes have to cut into the outer edge of the Sear behind the bolster to clear the inside of the Bridle. I did find I often had to clear extra wood in the lock mortise because of the bent shape and even a couple of times I had to cut the outer edge of the Sear Tail short, so it wouldn’t bottom out inside the mortise.
Well, if anyone can fix this Sear (if it needs much work) is you, but you have my condolences for finding the Sear in that condition.
Gus
Hi and thanks for the replies,
Gus, the sear is not bent. The hole is drilled at an angle. Somebody must have been drunk on the job. I guess it is also possible someone replaced the sear in the past and screwed up. Anyway, I will anneal the tumbler, bridle, and sear and then I think I am going to straighten out the hole probably with a rat tailed file. I am afraid a larger drill will simply follow the hole rather than straighten it. However, after filing it straight, I will run a bigger drill through it using my drill press to true it up. Fortunately, the sear and bridle have extra meat on them so I can enlargen the holes. Then I will make a new sear screw with thicker shank but similar thread size (it will have a shoulder). That should solve the problem. I don't have metric taps and dies so I will likely rethread the hole in the lockplate to 8-32 or 10-32 depending on what works best. All of the internal parts look like they came right out of the molds without any filing or fitting whatsoever. They look like parts from one of the Miroku locks. This is the worst Pedersoli Bess lock I have worked on. The good news is my finish dried nicely last night and another coat can be applied.
dave
Dave,
OMG, I have seen bent Sears over the years, but never a Pedersoli with the Sear hole drilled/tapped that far off center.
Do you happen to know the diameter of the current Sear Screw Thread? I wonder if even a 10-32 screw thread will be big enough for the screw hole, after you open the hole to square it up?
Parts as rough as a Miroku Bess? Good Grief.
Gus
Hi Gus,
You are right, the screw size is more like 12. I annealed the sear and straightened the hole. The original screw fits with a little slop but I want to make a bigger screw. Fortunately, the size difference won't be much. Also, on this lock, the mainspring barely catches the tumbler when the flintcock is at rest. I have to open up the hook a little and reshape the mainspring so it does not hang below the lockplate. This lock is a real hatchet job. Well, at least the frizzen fits on the pan without big gaps, so there is at least that going for it.
dave
Dave,
Well, at least the customer found the right guy to fix those deficiencies.
I had to refit the frizzen to the pan on almost all the Miroku Besses and even many Pedersoli Besses in my Unit to ensure they didn’t lose the prime during “Cast About.” I’m not sure if my 1990’s Pedersoli Bess actually required it, but I refitted the frizzen before I used it the first time, just to ensure I would never have that problem. Shooters don’t prime their pan and then “smartly” move the musket around so much in the loading process, so it doesn’t require their frizzens fit the pans as tightly as for reenactors
Gus
Dave,
I was expecting this post would be a doozy, considering the problems you already mentioned on the lock, but you far exceeded my expectations. I’m taking notes from your points on the springs as you have brought up some great points.
One point I have is about the Sear Spring contacting the Sear near the Screw bolster. Over the years, I’ve seen about a half dozen Repro Sear Springs on Military Locks that fit very close to or actually butted up against the bolster and actually caused a worse trigger pull because they bound up the Sear at that point. Now I know that is not what you meant and the Sear Spring still has to keep pressure on the Sear and allow it to move readily throughout its path of movement without binding. So I really enjoyed your description of heating and bending the Sear Spring.
I did not have the time or the equipment to do that at the NSSA Nationals I worked at over the years. So what I wound up doing in the case of the Sear Spring binding the Sear that way was either to carefully shorten the lower leg of the Sear Spring that was close to the Sear Screw a little bit (when it still gave proper tension and allowed free movement of the Sear) or replaced the Sear Spring. Of course most of the Military Lock Sear Springs I had were cheaper than one for a Pedersoli Bess and a lot easier to get.
REALLY looking forward to more posts.
Gus
Dave,
I purchased my old Brown Bess Carbine in I think it was the Fall 1974 Nationals of the North South Skirmish Association while working as a gunsmith in what was then known as "The Navy Arms Booth/Cabin." The Cabin actually belonged to Donald "Bucky" Malson who was one of Navy Arms' Distributors. Val Forgett, Jr. often came into the cabin at night, especially to raid the cookies sent by Mrs. Betty Higginson, CWO3 Frank Higginson's wife. Miss Betty's cookies were somewhat legendary.
After a few Nationals that I worked and had purchased my first copy of Dr. Bailey's first book, I asked Val Forgett, Jr. how the Navy Arms/Pedersoli Brown Bess had come to be made. He informed me that they had purchased an original and sent it to Italy to copy.
Val Forgett, Jr. was very knowledgeable on Civil War Guns and especially Civil War Cannon, but not that knowledgeable on Revolutionary War Arms at that time. Val was also always looking "for a deal" so the original Bess that was purchased was not necessarily the most authentic Bess that was available for purchase. Val did believe it was "correct" at the time it was purchased, though.
When that Bess was sent to Italy, it was not required that it was an exact copy, just as close as possible AND at a price that would sell in the U.S. This was the same way Val got the Repro Navy Colt revolver and “Zouave” Musket made in Italy. So none of the common Italian made Repro’s were exact copies and the quality was not as good as the originals.
In the mid 80’s at the SHOT Show in New Orleans, Sue Hawkins of EuroArms introduced me to Mr. Zoli of Zoli Arms, a huge maker of reproduction guns in Italy. Of course he was extremely busy at the Show, but took the time to answer a question that had been bugging me for years. I knew they could make more exact copies of the originals and of at least equal quality referencing their modern shotguns especially, so I asked him why they did not. He informed me that they surely could make exact reproductions and of better quality with modern steels, but they would not sell at the price that would have to be asked for that quality. He explained that a S&W Model 19 Revolver was then currently going for about $ 235.OO and almost NO ONE would pay that much for a Repro Colt Navy Revolver. So they built a gun that could sell for around $ 145.00 and they got complaints about that “high” of a price.
So when Pedersoli produced the prototypes of the Brown Bess for a price that would sell in the U.S., Val Forgett, Jr. said they were “close enough” for the price. I got the “Distributor Price” on my Brown Bess Carbine in the mid 70’s that was below Dealer Cost and Retail. I don’t remember exactly what I paid for it then, but it was around $ 340.00 or slightly more. Just three years or so before that, I had paid $ 175.00 Retail for my then brand new .50 Cal. T/C Hawken Rifle. The Brown Bess had cost me almost a Month’s Salary as a Single Marine Sergeant, even at the Distributor Price. So it was a pretty hefty investment to pay for a hobby.
So, bottom line, Pedersoli did not produce an exact copy of an Original Bess, just something “close enough” that could sell in the U.S. at a price it was worth making the reproductions to sell in the quantity needed to produce the guns for the U.S. market.
Gus
Wow Gus, thank you,
What a great bit of information and it all makes perfect sense given the objectives of the makers and retailers. I knew Bucky and Val through my brother John, who was a top NSSA shooter and a member of the International Muzzleloading Team for a short while. I got to see Val's barn in Sussex County, NJ where he had cannons and a Gatling gun. I have to tell you a story. Back in the early 1980s I was the deer management biologist for NJ Fish and Game. I was in charge of managing deer for the state north of Monmouth county. John brought me over to meet Bucky at his home in Lake Hopatcong, NJ. John introduced me and mentioned that I was a state biologist and Bucky responded "Well, we don't much care for biologists". I answered, "That's OK because we don't much care for puffed up pricks like you". He laughed so hard I thought he was going to have a coronary. We got on famously after that. Buck got me my Parker Hale Whitworth, which he personally selected for me as well as my brother, Nils's Pedersoli Bess, which is a really nice one.
Gus, I really appreciate your and Loyalist Dave's contributions to this thread. I think we are providing folks with some real meat here that they can use to understand the reproduction musket in their hands and how it can be improved to be a better ambassador of history. Thanks Gus and Dave,
dave
Dave,
I could not agree more that the Brown Bess was the most beautiful and elegant Military Musket of the 18th century. There is just something “right” about it that the French Muskets don’t have, even as you noted they were technically superior. I can see why the British Soldier favored it so much. In the hands of British Soldiers, it did very well against the “technically superior” French Flintlock Muskets in actual use for most of the period as well.
My very late 1990’s Pedersoli Bess also has the rammer too far from the barrel as you described in a recent post. I don’t think I will go to the additional modifications you described to correct that, but look forward to doing the other modifications you have shown.
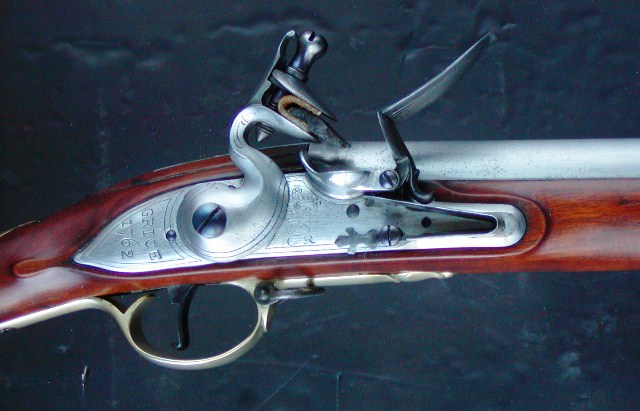
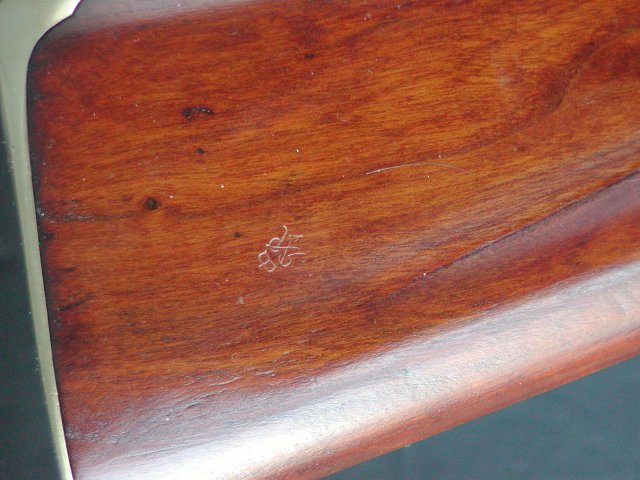
It has occurred to me that your modifications would also make the Pedersoli very much more authentic as a Civilian Contract Musket made during the FIW and before the AWI. Of course the King’s Cypher and Broad Arrow would have to be removed from the lock plate. Lock Contractors’ names appeared on these locks and sometimes the dates, though in different positions, normally. At least the “Grice” contractor name would be correct. Granted with the thumb piece and Entry Rammer Pipe, it would have been an upgrade Contract Musket, though.
Maybe near or at the turn of the current century, Pedersoli decided to make their muskets more authentic as “Dutch Muskets” that British Ordnance had to buy in large quantities for the Napoleonic Wars as once again they did not have nearly enough good Muskets when that war broke out? Gee, I hope they don’t cut the barrels down to 39 inches and screw with the locks and furniture even more, though.
New questions, if I can continue to be a bother? I never really understood how to adjust the “tip over point” of the bottom of the Frizzen or adjust the Frizzen Spring to the Main Spring. Would you be so kind to offer some tips on these?
Gus
Hi Gus,
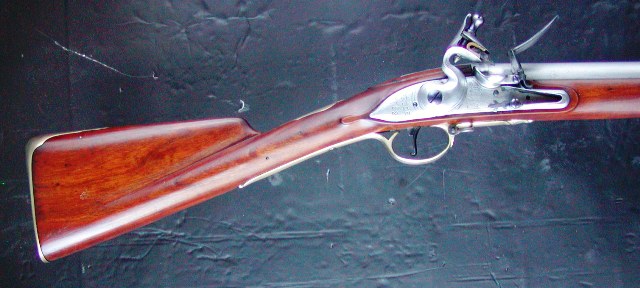
Thanks for the note. Fittingly, I am building an American militia musket that is made using older commercial contract musket parts. It will represent a pre F&I war commercial musket upgraded to a steel rammer and restocked in NY or NJ just before the AWI. It will look like a simplified long land pattern Bess stocked in curly maple.
With respect to your question, let me defer it until the next post on the lock. The photos I show will make answering your question easier.
dave
Dave,
That will be wonderful and I'm really looking forward to it.
Back in the 90’s, I purchased a number of original Main springs over the years that were made for the M 1842 Springfield. Their shape is very close to a Brown Bess spring, including the eye around the screw hole. However, I believe they are thicker than original Bess mainsprings in the body. I thought about using them in Brown Bess lock kits, but I have never been able to find out much of anything about balancing that spring to the Frizzen Spring.
So I await your upcoming post with extreme eager anticipation.
Gus
Dave,
Just wanted to thank you especially for this last post because there actually were two points “where the lights came on for the first time” in this one post.
The angle you showed to reduce the foot of the Frizzen and thus ensure the Tip Over Point was at the right spot of 30 degrees, was most helpful. It finally dawned on me how extremely small Frizzen feet could work on some locks.
The other point was much more subtle, though still rather profound at least to me. I’ve had to cut the full cock notches on large Military Tumblers further forward to save them after they were damaged or someone did not know what they were doing had messed them up. Of course I noticed this shortened the throw of a Percussion Hammer or a Flint Cock.
What I never thought about was the fact this made it easier for the Sear to be held out of the way of the half cock notch on the tumbler, as you pointed out. Looking back, I find it absolutely did that, but I just never thought about it before.
Looking forward to more.
Gus
Spikebuck,
So many of the questions you wrote are almost identical to the questions I had when I first began doing “trigger jobs” on large Military Locks in 1974.
On my first dozen or so tumblers, I scribed a line perpendicular to the center of the Tumbler pivot like Dave’s photo shows. I actually did that on both sides of the tumbler and used both lines to check to see I re-cut the full cock notch correctly. (Cutting the full cock notch perpendicular to the center of the tumbler as well as can be done is more important on a lock without a fly to get a good trigger pull.)
Over 30 years later when I purchased “The Gunsmith of Grenville County,” they had a neat little homemade tool to help do that. It was a thin piece of brass or steel shim stock that had a hole drilled in it just a few thousands of an inch larger in size than the bridle pivot on the tumbler. There was a line drawn perpendicular to the center of the hole and then the shim stock was cut/filed along that line. This tool is placed over the bridle pivot on the tumbler and then you scribe along the line, to have the same line shown in Dave’s photo. If you want to get real technical, you make a second one to go over the other pivot on the tumbler for the other side of the tumbler.
To make this tool/gadget you use a small piece of graph paper, because it is easy to mark the center of the hole and the line perpendicular to it. Then tape that to the shim stock. Center punch through the paper onto the shim stock at the center of the hole, lay a steel rule or other straight edge on the paper along the line and use a sharp scribe or knife to transfer the line to the shim stock. Drill the hole and cut file the shim stock along the line.
Now, not having a gadget like that, I had to learn how to scribe that line by eyeball and using a steel rule and scribe to scratch the line in the tumbler.
Something I learned to do to keep the full cock notch square across the tumbler might help you. I rubbed black permanent magic marker on the bottom curved edge of the tumbler close to the full cock notch. I actually turned the tumbler upside down to do that and then tightened it slightly snug in the vise. Then I took a square and laid one edge along the length of the exposed part of the tumbler and with the other side of the square, scribed a line across the exposed part of the tumbler. This line should be close to but not on the actual line of the full cock notch. You just use it as an eyeball reference when cutting the full cock notch across the tumbler.
I once worried and kept working my full cock notches until they were as exactly square/parallel to that line as possible and often checked it with a square. Well, as Dave mentions, that is not necessary. As long as the face of the full cock notch is smooth/flat, it can be a little off square across the tumbler. This because there is enough “slop” or looseness in the holes and parts of the lock.
One thing I still do is use the magic marker on the face of my sear to see that I have pretty good contact across the face. The original gunsmiths might have done the same thing with lamp black or candle black. You don’t have to have perfect contact all the way across, but a major portion of the sear face is good. Actually, most of the time I found when I stone the face of the factory sear with a Hard Arkansas stone, it will contact a flat full cock notch very well.
As to how deep the full cock notch has to be on a Brown Bess or other large military lock, a very general rule of thumb is it is normally about twice as deep as it needs to be from the factory. Often it doesn’t need to be that deep. I normally soft solder steel or bass shim stock on the tumbler to take up this space and reduce the trigger pull.
I’m going to go out on a limb a bit here. I prefer a trigger pull on a Brown Bess or other large military locks to be about 4 to 4 ½ pounds as checked with trigger pull weights because this will last a long time. A 3 ½ to 4 pound weight is OK but will wear a little faster. NSSA rules state a minimum of 3 pounds on a rifle musket (and this may be TOO light for a Military Flintlock Musket), BUT I would NOT go that light unless you can properly harden and anneal the tumbler and sear after you finish the work. (Of course to do that, you have to take the soft solder shim off, harden/anneal it and then re-solder the shim back on afterwards). Some folks cut the heck out of the half cock notch and full cock notch and re-harden and anneal the parts, BUT this is far beyond the skills of most hobbyists and some gunsmiths.
A smooth trigger right around 4 pounds is an absolute joy to use after having shot a gun with a 10-12 pound trigger pull from the factory.
Gus
Dave,
Sorry, my FIOS went bust for a while. Lost my internet, cable and phone all at the same time. They did get it fixed fairly quickly though.
If I may add one VERY UNCOMMON problem I have run across on Brown Bess’s, it is the really rare times the bottom of the Trigger is too long and actually hits or drags on the inside of the bow of the trigger guard. I have only run across this twice out of working a few dozen Bess’s, but the first time I ran across it, it almost drove me NUTS trying to figure out why the Sear Nose kept catching on the Half Cock.
I did all the “normal” and even some extraordinary things to ensure the Sear would not hit the Half Cock, but it still did it about 2 out of 5 times and as you know, ONCE is too much. I studied that Bess for over an hour trying to figure out what caused it and finally noticed a very small and slight rub on the trigger guard bow under the trigger. You could only BARELY feel the trigger rub there when pulling the trigger and most folks would not notice it, unless they were especially looking for it. OK, so I shortened the trigger just a bit and rounded the bottom a little more, so it cleared the trigger guard bow. That completely cured the problem of the Sear hitting the Half Cock along with everything else I had done. (The first time I found it, it was on a Miroku Bess which are known for the bent trigger guards, but I also found it one time on a Pedersoli.)
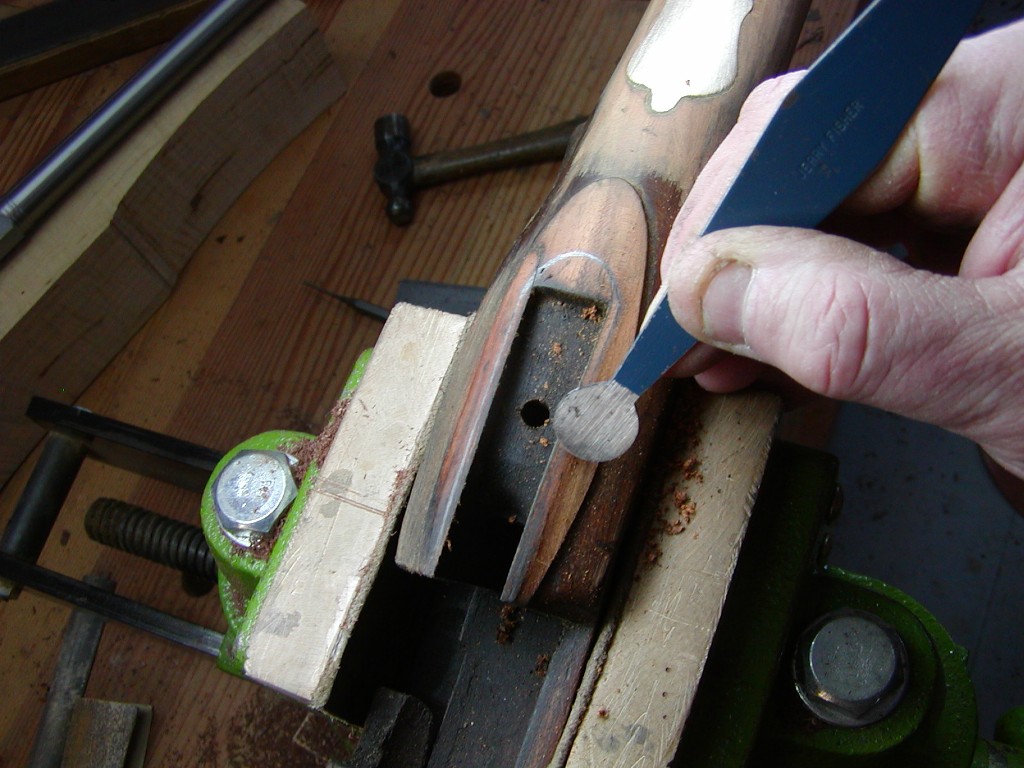
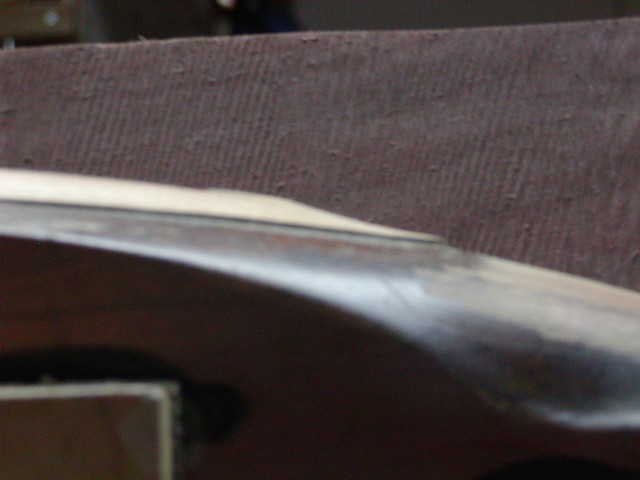
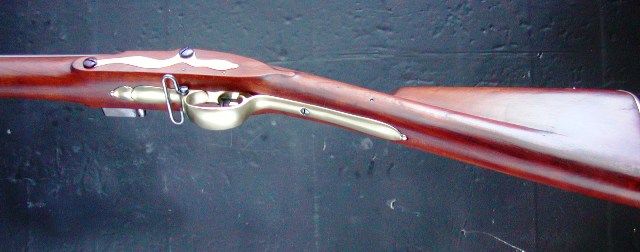
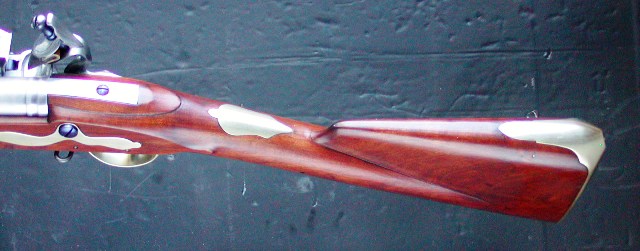
I have to say the Bess looks absolutely lovely after your modifications. The way you tapered the bottom of the “Hand Rail” of the stock would not have been noticeable had you not mentioned it, but it really does make the butt stock look much better.
I cannot thank you enough for this thread and all the pictures and explanations you offered. It is exceptionally gracious of you to have done it and is appreciated more than you might imagine.
Gus
Thanks Gus, 1601phill, and Rifleman,
On this Bess, Gus, the trigger slot was too long so the back end of the trigger would drop down too low. It was only constrained by the end of the trigger guard bow. With the extra metal welded in place, the back of the trigger catches the back of the trigger slot so it cannot drop down. Rifleman, I use Kase Nit because I don't know what the steel alloy is in the screws. It could have enough carbon to harden just by heating but they also may be mild steel. It cannot hurt to use case hardening compound. I do temper them to blue just to make sure the shafts don't get brittle and snap if tightened too hard. I urge the owners of these guns to remove the barrels at least once a year to clean and coat the bottoms with beeswax. I recommend they remove the locks and clean them up after every event. I also urge them to remove the sling and swivels after any event in which the sling is wet or sweaty, and oil the swivels to control rust. If they follow my advice they will be removing some of the screws quite frequently. I try and get them to take care of their investment.
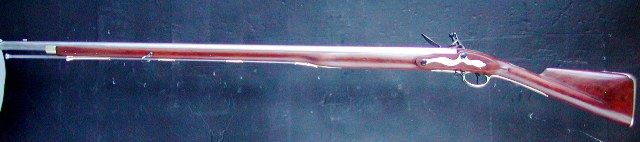
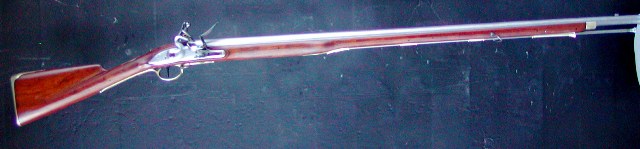
Thanks again everyone for looking and commenting. I will be posting the finished gun very soon.
dave
Dave,
There is a footnote Cuthbertson made about using yellow, red or black stain on the stocks to make all the stocks look the same. He also mentions varnishing the stock, which British Ordnance did not seem to do, but apparently was done by at least some Regiments. So at least some Brown Bess stocks would have been more shiny than we might expect today.
This has been a truly marvelous thread and the result was you turned an Ugly Duckling into a Sparkling Swan. I hope the owner appreciates it half as much as many of us do. With your and Claude's permission, I would love to see this thread made into a sticky. It really is that outstanding and I cannot thank you enough for educating us.
Gus


 ff a bit?) reminded me of a time when I had my ml shop in Indiana. Somehow I got on the mailing list of a large importer/distributor for foriegn (Italian and Spanish) ml repros. One of the items offered was a brass/bronze framed Remington Army c&b revolver. They had to be purchased in minimum quantities of a gross (144). The total price, with fees and shipping broke down to $4.00 each. I seriously considered buying a gross or two and going on the road selling to gunshops and at gunshows. At a resale of $25.00 to $100.00 each I could have covered travel expenses and made a decent profit. I was dissuaded by the low quality. IMHO, each would have had to be disassembled and tuned and the machine marks filed off the barrels to make them acceptable. But, I'm sure tons of them, and similar other repros, were sold in those early days of the ml revival.