• Friends, our 2nd Amendment rights are always under attack and the NRA has been a constant for decades in helping fight that fight.

    We have partnered with the NRA to offer you a discount on membership and Muzzleloading Forum gets a small percentage too of each membership, so you are supporting both the NRA and us.

    Use this link to sign up please; https://membership.nra.org/recruiters/join/XR045103

New .50 Cal Maple Stocked Rifle

Muzzleloading Forum

Help Support Muzzleloading Forum:

This site may earn a commission from merchant affiliate links, including eBay, Amazon, and others.
Joined
Mar 7, 2007
Messages
656
Reaction score
2,010
I am determined, while I have some rare free time between contracts, to finish as many of the partially started rifles and pistols I have put on hold as I learned enough from the great builders on this and other sites to know how much I didn't know (if that makes any sense....?)  The problem with completing projects I started before I learned as much as I have now is that I have to live with a lot of things that I would not now do the same way.  However, I have determined that I can learn more by making the best of what I have rather than throwing it all out and starting over.

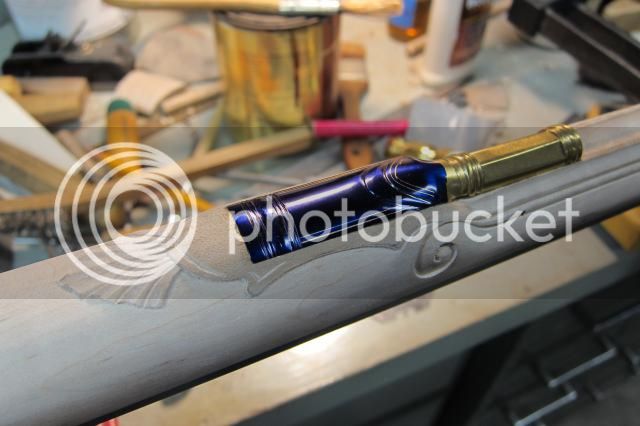
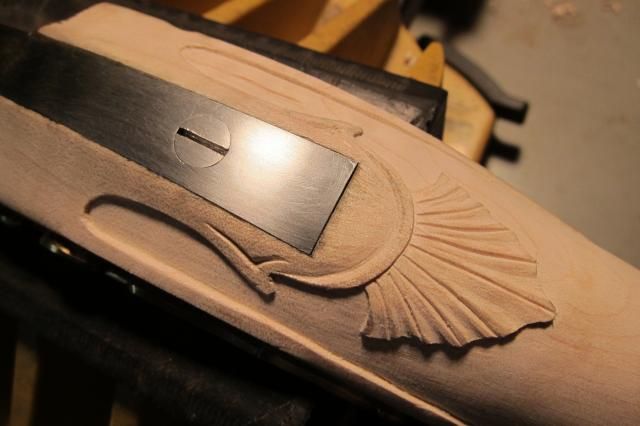
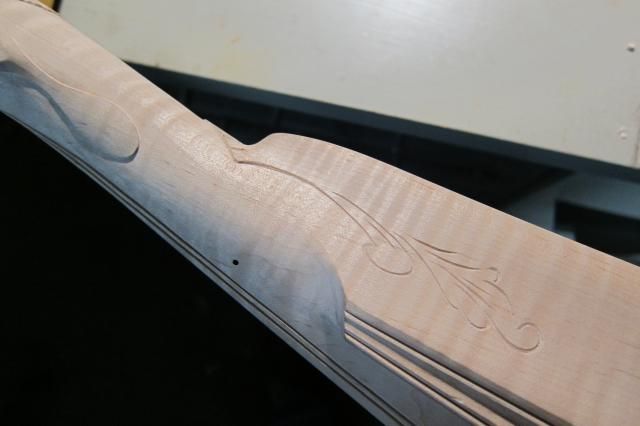
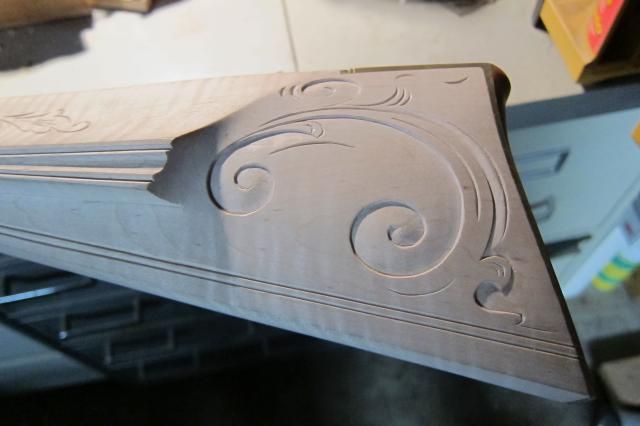
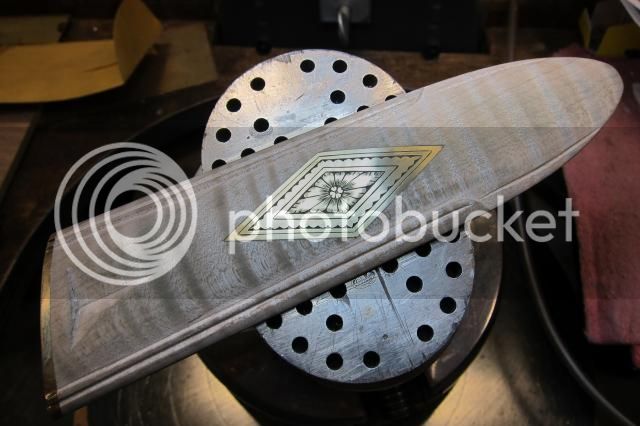
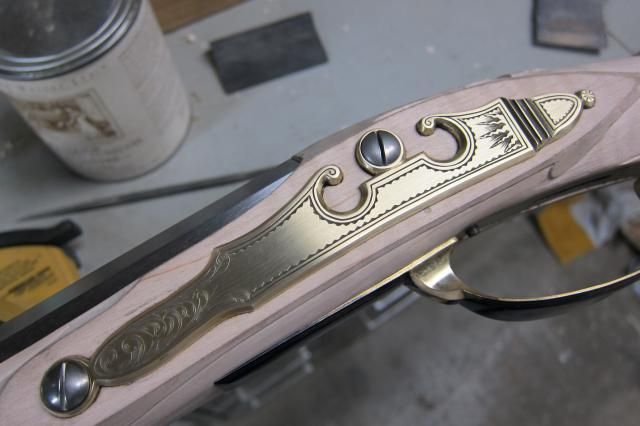
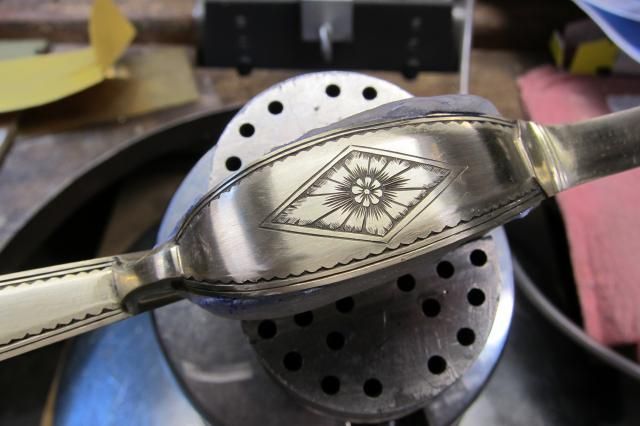
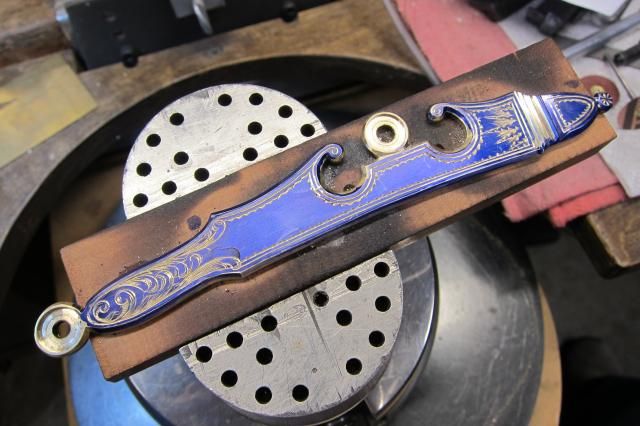
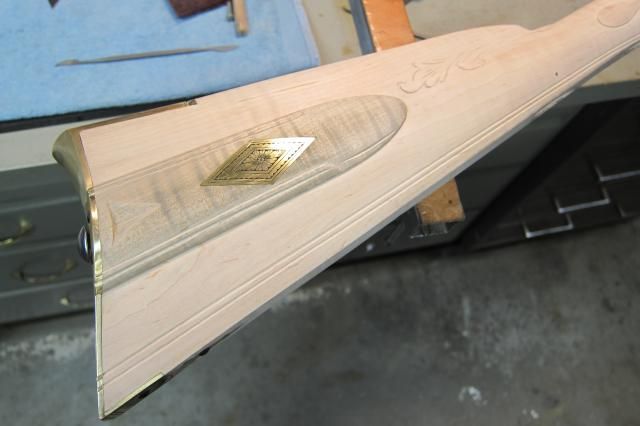
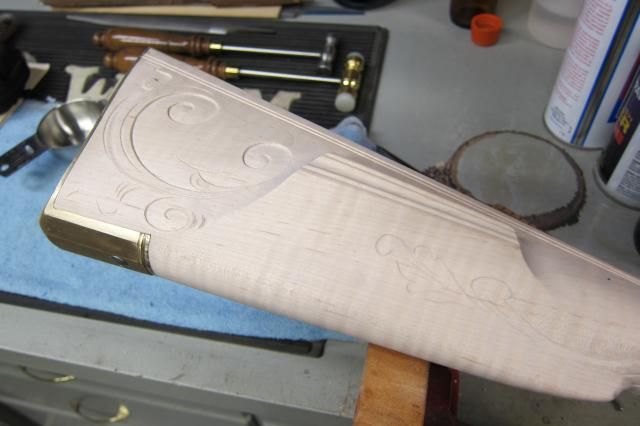
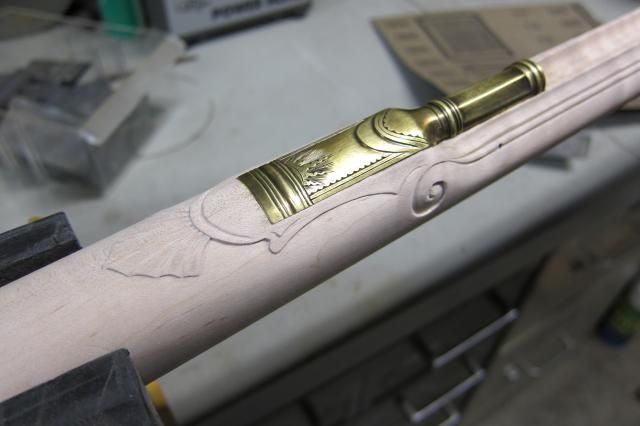
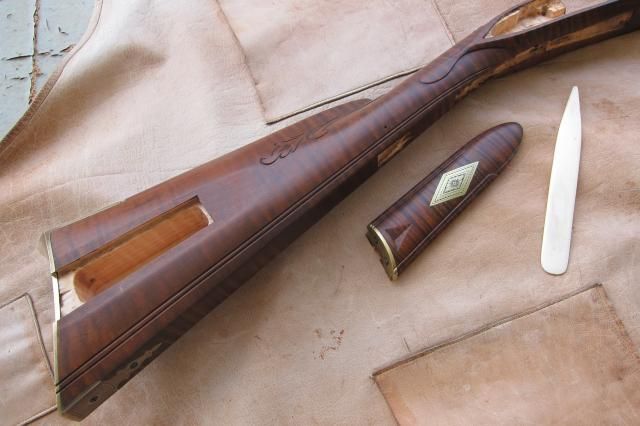
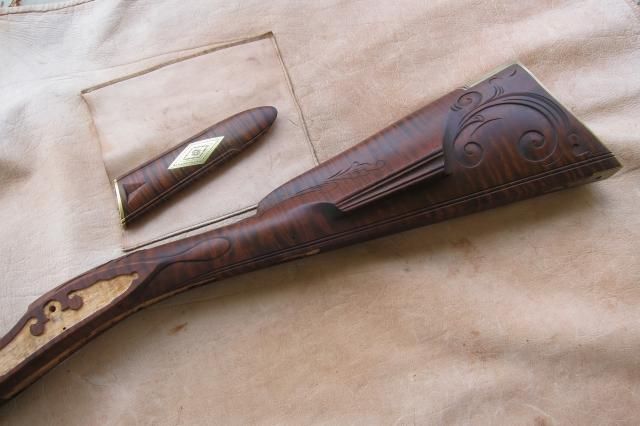
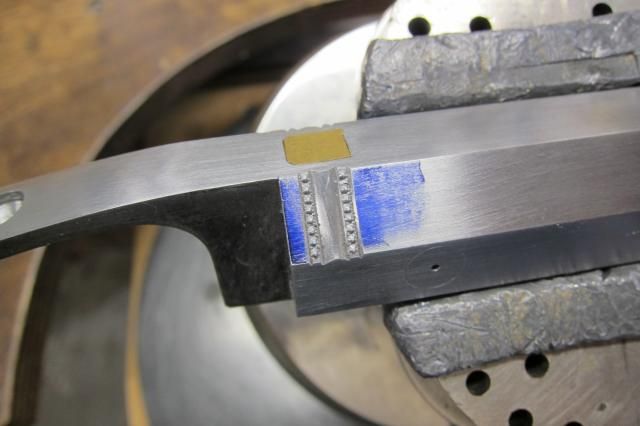
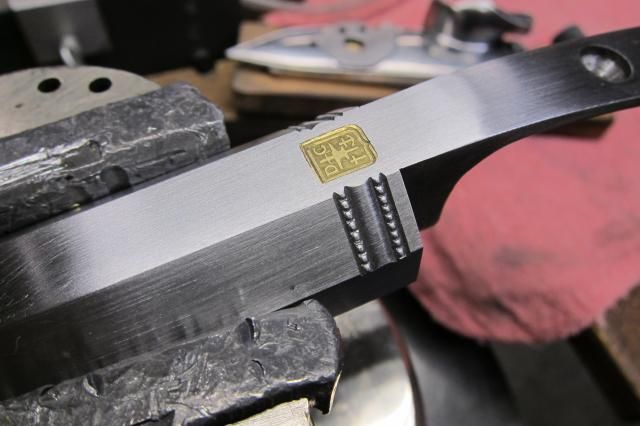
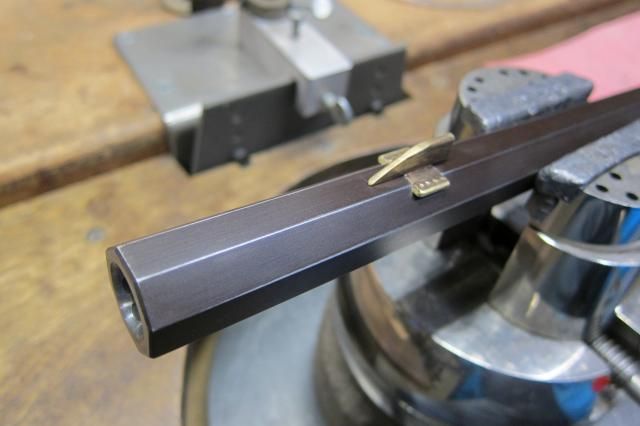
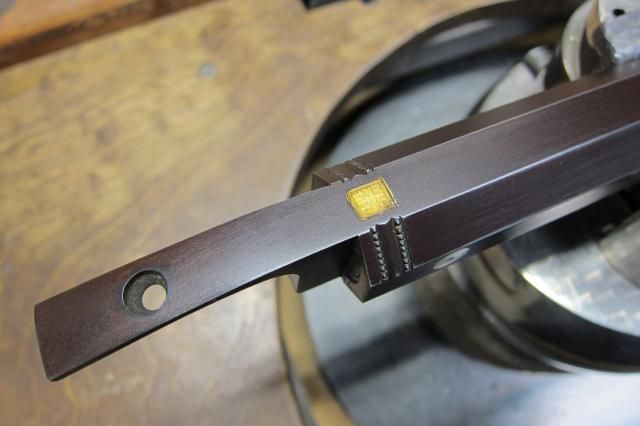
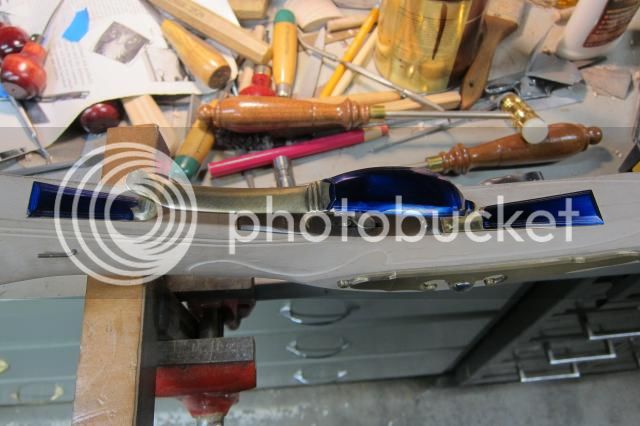
So here is another rifle that I really started in parallel with the walnut stocked rifle I just finished.  The architecture had long been established as well as some of the parts I used.  I had originally planned to make another brass patch box, but in building the copy of the Kibler rifle that I completed a while ago, I made my first wooden patch box got the hang of it.  I changed over to one here.  The barrel is a Rice, 42 inch, swamped, round bottom rifling in .50 cal.  I had already inletted a Chamber English round faced lock along with the barrel.  I liked the carving I copied on the Kibler rifle and am using many of the same elements here, with some modifications.

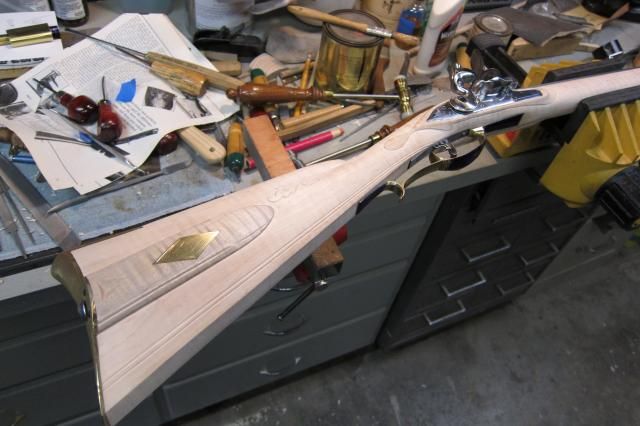
So here is is so far................
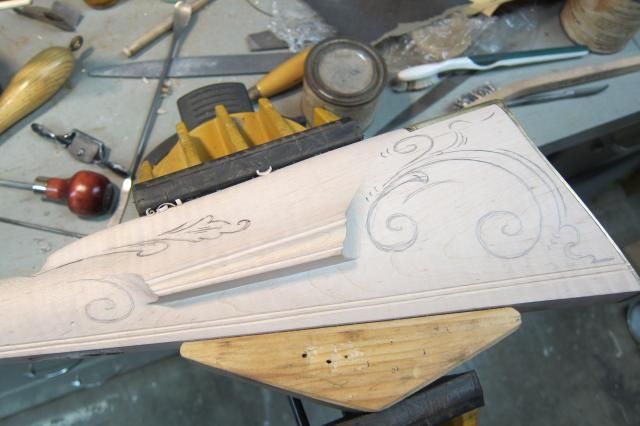
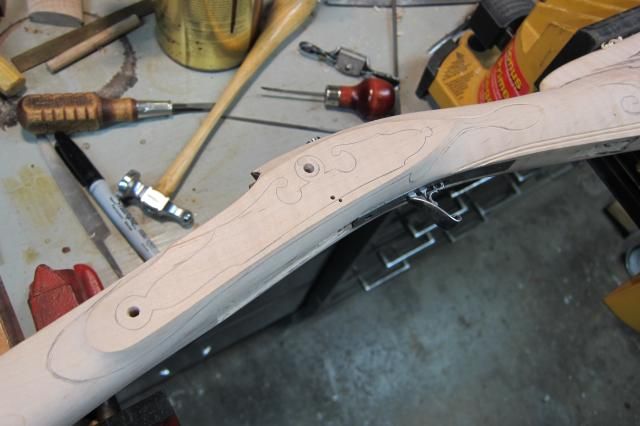
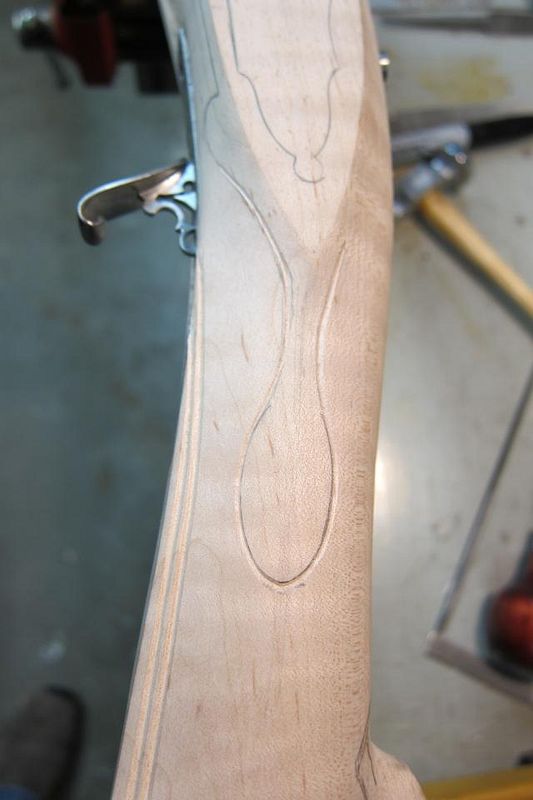
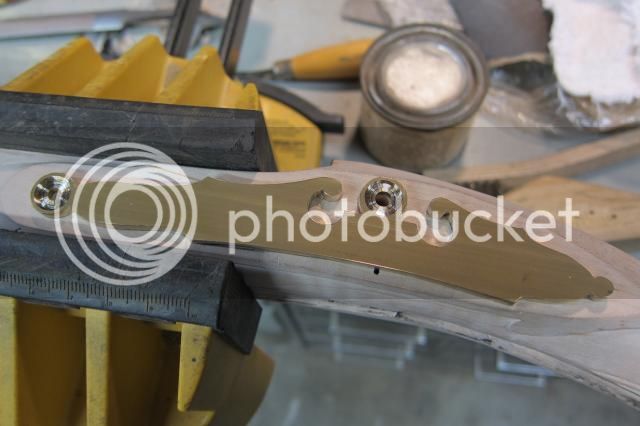
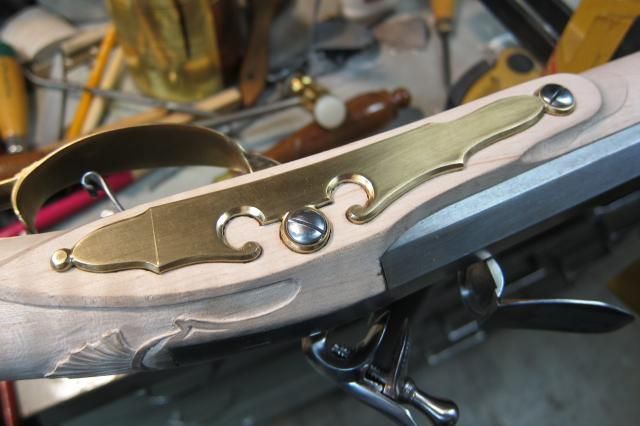
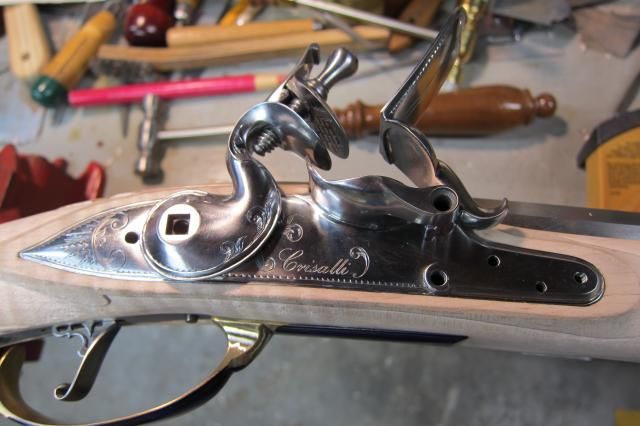
IMG_2359_zpsq3fzl2qa.jpg


IMG_2360_zpsliartv1m.jpg


IMG_2362_zpsjolk2rb5.jpg


IMG_2365_zpsueodulwh.jpg


IMG_2367_zpsgtowspku.jpg


IMG_2406_zpsczwhdqoz.jpg


IMG_2403_zpsah2oxgtq.jpg


IMG_2401_zps0isbmvtz.jpg


IMG_2410_zpsmqhb86th.jpg
 
Dave, you picked a good one to copy. Jim Kibler is one of the modern greats.
I haven't stepped out and tried a wood patchbox yet, maybe now is the time.
Very nice work.
 
Do you use Dykem's machinist blue and then scratch your designs in to it, rather than the engraving white and draw on it with a pencil?
 
Yes, that is Dykem.  I use many methods to get the original design down on the part, but often just Dykem the surface and sketch the design very, very lightly with a sharp scribe.  The part looks like this while I am working:

IMG_2423_zpsyhsqvv1p.jpg


Here the side plate has been attached to a scrap piece of wood with Super Glue (later released by heat), coated with Dykem, the design sketched, and then cut.  Before I remove the Dykem, I blacken the engraving with a "Q" tip and Brass Black.  In the fresh cuts, the Black works immediately and the Dykem keeps the rest of the surface from blackening.  Once the cuts are black, I wipe off the Dykem with lacquer thinner.
 
Dave,
I would enjoy it if you would also show n tell how you get such smooth wood contours~ I see on your workbench different gouges, but no riffle files. Out line with a zacto knife, or do you use the 'stab' method, or a sliding chisel method with the gouge that fits your contour???
your inner wood areas are so smooth....I work and work, and still have unevenness....I think I must be not holding my tongue right or something...
please demo if possible.....or tell us your method~~ :shocked2:
marc n tomtom
 
I asked the same thing a while back, and Dave answered kindly. The reply is in:

Post#1433459 (Topic#291292)

I don't know how to link to it though :grin:
 
Continuing the work on this rifle......

Finishing the carving

IMG_2431_zpsxjlajfew.jpg


IMG_2433_zpsjmxibtpb.jpg


IMG_2434_zpsp7akd8cl.jpg


Two applications of Aqua Fortis / iron stain with heat blush of each and the seal coat of Sutherland & Wells polymerized tung oil 50/50 with aged turpentine.

IMG_2437_zps7vrzjzc3.jpg


IMG_2439_zpsor9xcnse.jpg


Some barrel decoration in progress

IMG_2444_zpsmgl0x1pj.jpg
 
Wow! My chin is getting in the way while I type! Absolutely beautiful craftsmanship and detail. You sir are a true artist!
 
:surrender: Unbelievable... I can't help but imagine the items you mentioned in the earlier stages of your builds you'd like to have done differently... must have been just as incredible! Your attention to detail blows me away, I'm extremely anal with the details and this hobby as a whole... Looking upon your work certainly inspires me to work harder... even when I think I'm doing just fine! Beautiful, absolutely beautiful!
 
Absolutely beautiful Dave, with nary a single flaw. I particularly enjoyed the part about the sights, very original! You are truly a master craftsman, and your work is a true work of art.
 
Back
Top