


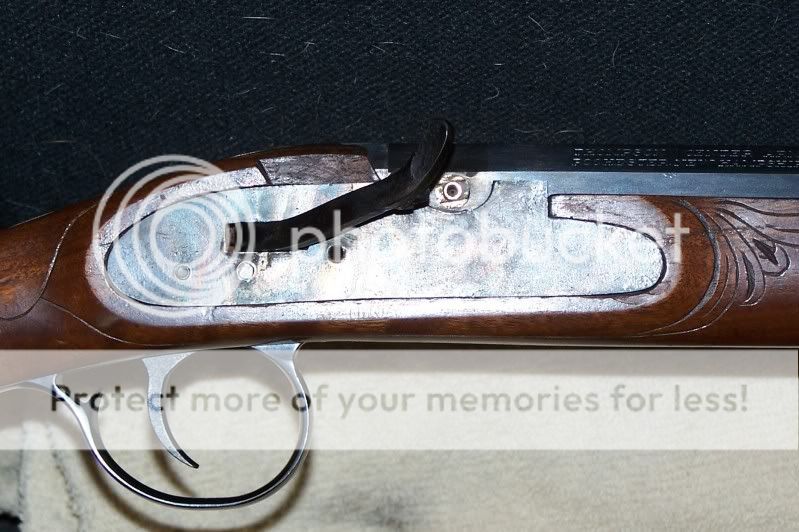
A forum member, Buckwheet, asked some time ago if I could build a sideslapper for a Lyman rifle. I told him I'd look into it and finally "gotaroundtoit", although this is on a T/C Pennsylvania Hunter. It was a rather straight forward project except for the fact that T/C, in their infinite wisdom, chose to put the sidelock screw smack in the middle of everything. I would have liked to use a flat leaf mainspring but working around the sidelock screw would make that very difficult so I chose to use a coil spring and plunger which just barely sneaks past the lock screw.
I wanted to come up with a design that any "handyman" could build with just a drill press and soldering torch. The lock plate is cut from 1/8" flat stock from the hardware store. The bolster at the top of the plate is hacksawed from 3/16" stock as is the spacer under the sear and the reinforcement to accept the lock screw. Those parts were then clamped onto the plate and silver soldered in place one by one. The hammer was hacksawed from 1/4x1" flat stock and the flash guard was a 1/4" hex nut drilled out to 5/16" ID and filed round and silver soldered to the hammer. The sear was cut from 5/16" square bar stock. The full cock notch was cut into the underside of the hammer with a Dremel cut-off wheel and both hammer and sear were case hardened.
I would make some changes if I were to do another but as is, it works! :haha:
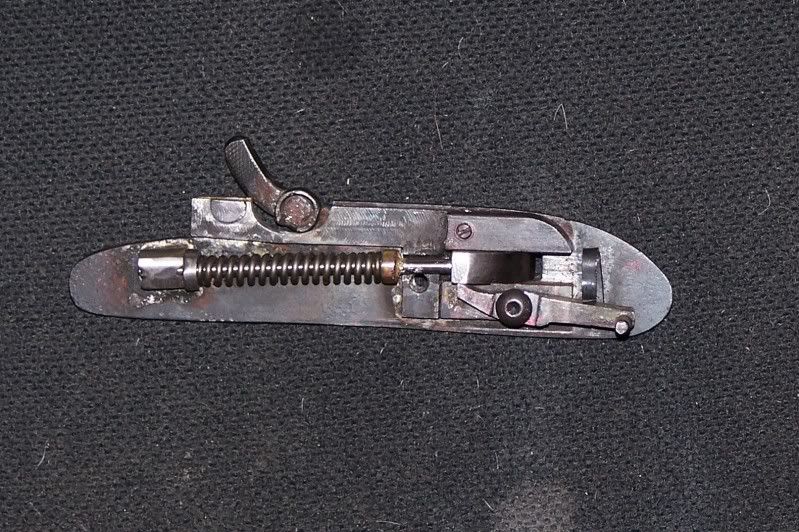
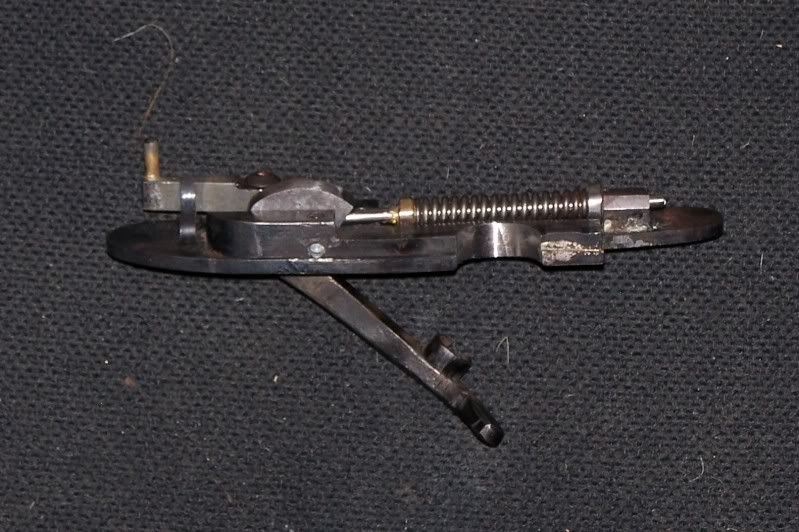
