• This community needs YOUR help today. We rely 100% on Supporting Memberships to fund our efforts. With the ever increasing fees of everything, we need help. We need more Supporting Members, today. Please invest back into this community. I will ship a few decals too in addition to all the account perks you get.


    Sign up here: https://www.muzzleloadingforum.com/account/upgrades
  • Friends, our 2nd Amendment rights are always under attack and the NRA has been a constant for decades in helping fight that fight.

    We have partnered with the NRA to offer you a discount on membership and Muzzleloading Forum gets a small percentage too of each membership, so you are supporting both the NRA and us.

    Use this link to sign up please; https://membership.nra.org/recruiters/join/XR045103

Making A Barrel

Muzzleloading Forum

Help Support Muzzleloading Forum:

This site may earn a commission from merchant affiliate links, including eBay, Amazon, and others.

Erzulis boat

45 Cal.
Joined
Jul 14, 2005
Messages
566
Reaction score
78
Picture235.jpg


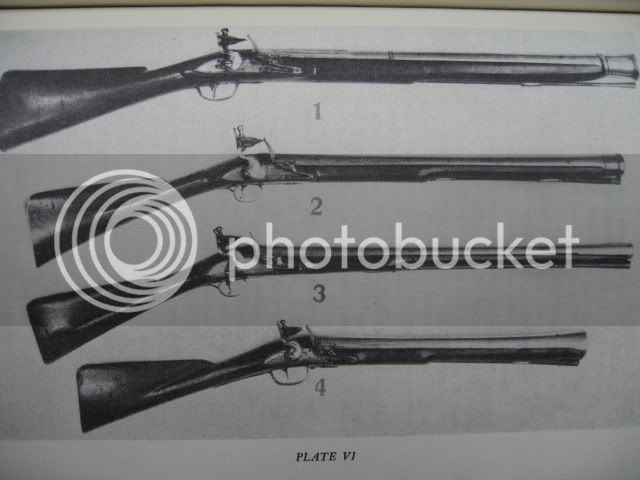
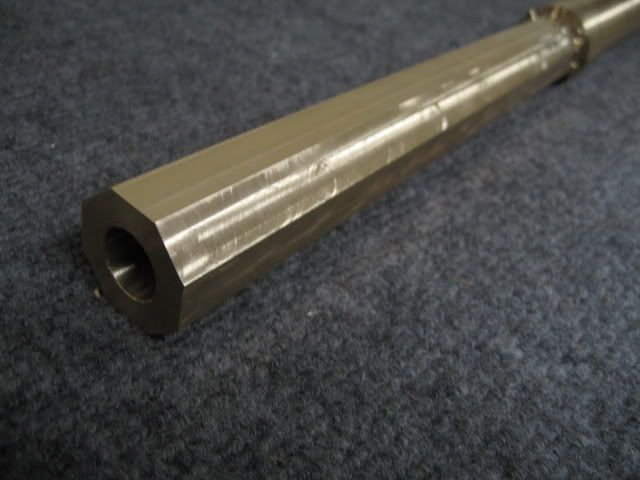
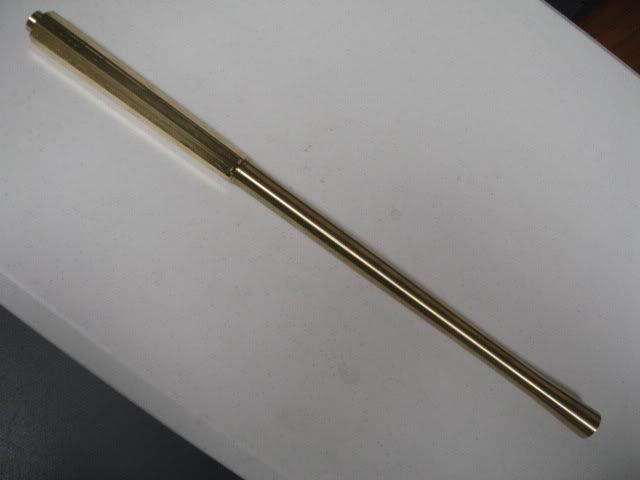
The build is the "Coaching Carbine" (Figure 3) and it has a 24" brass 17 bore barrel.

Picture238.jpg


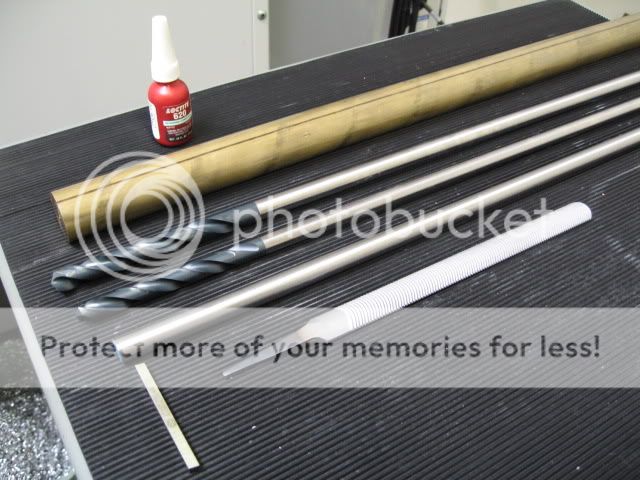
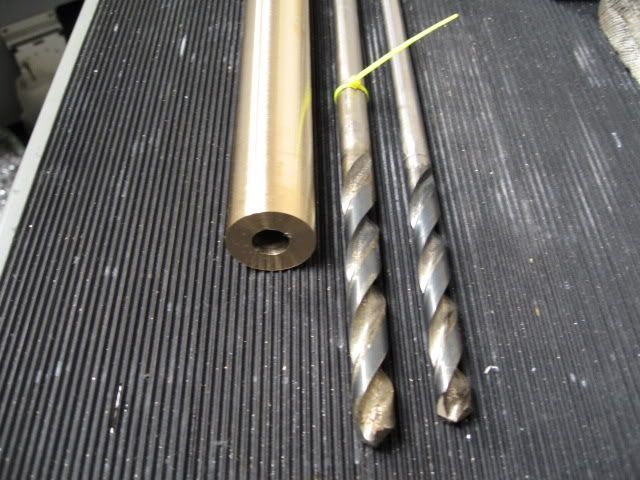
This is the material and basic tool layout.

The brass is a 27" long cylinder of alloy 485 with a yield strength of 54,000 PSI.

The drillbits are custom made from W01 drill rod and black oxide treated HSS. The bits are 7/16" and 1/2" in diameter. The fluted portion is a commercially available drillbit that was turned down at the shank to .300" by 1.15" long. The drill rod was bored to allow a press fit, and is retained by Loctite 620, and a .125 diameter pin.

The stock will be punched from both sides initially, then the 7/16" will go through followed by the 1/2".

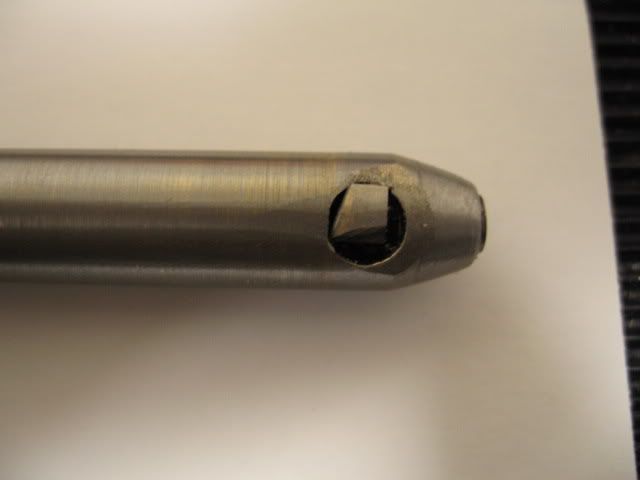
The .649 (17 guage) bore will be made with a custom tool. You will note the 1/2" drill rod with the 3/16" square M2 cutter at a right angle to it. This cutter will be set into the end of the precision rod, and will become a cutter. I will post pictures of this configuration.

The bar with the cutter will be PULLED BACK through the 1/2" hole to create a perfect bore that is precisely piloted by the 1/2" precision shaft. Unlike a cannon barrel with a blind bore, a rifle/smoothbore barrel can be made very easily by the pull through method.

I will post the images on this procedure, and how to make the tool.
 
:thumbsup: Watch out next thing ya know people like me will want to be buying them. :grin:
 
As the barrel stock looks like it is cold rolled material, you may be right when you say:
"The brass is a 27" long cylinder of alloy 485 with a yield strength of 54,000 PSI.".

That strength applies to material that is "half hard" but if the stock was annealed, it's yield strength is only about 25,000 PSI.

By the way, the half hard materials Ultimate Tensile strength is about 75,000 PSI but if it is annealed it drops to about 57,000 PSI.

If your not sure which condition the material is in, the half hard material will be around Rockwell B82. If it is annealed it will be around Rockwell B55.

Good thing it is a large caliber gun because typically, the breech pressures are fairly low.
 
It is 1/2 hard, it is remnant stock from shield shafting for a Deposition Gun (Laser Industry), this particular cylinder is certified at 54,000 PSI.

I have about 20 more feet! :grin:
 

Well thats way cool! :thumbsup: I look forward to your treatise on this ... its long over due on this site, and I am darn glad to see you bring it about! :grin:

Davy
 
Picture243.jpg


This is the 1/2" pilot hole drilled into the barrel. A very straightforward procedure, sans one issue.

You will note the wire tie (yellow) on the shank of the 1/2" drill. This is a moving (dynamic) depth gauge. Brass and bronze alloys are "grabby" to a dangerous degree if not controlled.

When the leading edge of a drill contacts the material, the bit wants to grab typically. If the bit is "anchored" as in the tailstock being secured, this is not a problem. As you punch it out, the wire tie will indicate the current depth, after cleaning the chips and applying cutting fluid, re-insert the bit, but not to the tie. Stop short about 1/8", secure the tailstock, then under control continue punching the stock out.

The initial drilling operation was done in 3/8" increments, take your time, and do not let the flutes become clogged with chips.

Tommorrow I will do the boring operation with our custom cutter.
 
Picture244.jpg


Here is the cutter. The bit is pretty tricky to grind, and with brass or bronze, certain critical angles must be made.

The leading cutting edge needs to be non aggressive, if you put on a severely angled face, the hole will be terrible. An easy, mellow cut is the secret.

You will need a solid lathe, so the "chuck it in a cordless drill trick" will not fly.

This tool is pulled back through the drilled hole, not run forward.

Next week, the fun begins, I will turn the "Wedding band" at the breech (Brown Bess style), thread the breechplug, and turn the swamped profile. :)
 
Picture003.jpg


Well, sorry about the time lapse in the barrel making thread, but I had to consolidate facilities and move a lot of machines.

I altered the "example" coaching carbine in that instead of a round breech, I decided that a tapered octagon would be more decorative, and easier to inlet.

I made angled tooling plates that follow the angle of the taper, and machined the flats one by one. Make sure that you have accounted for the start and finish flat to flat spans on the tapered section (octagonal).

I will then turn the "wedding band" at the transition and thread the breech.
 
I am curious Mr. Boat .. did you use a mill with an indexing plate to mill the flats. Like I said .. just curious. :hmm:

Davy
 
Davy, I machined a chunk of 1" by 3/8" (about 6 inches long) aluminum with the desired angle of the taper on the wide flat section. You can calculate the angle by the drawing or just eye ball it. I calculated the breech flat to flat (1.25") and the wedding band diameter (0.98")with the desired length of the tapered flat portion, and machined that angle.

Then, to keep things simple, just machine 3 more such aluminum angle plates using the first as the base guide.

Set an angle block in the bottom of the vise, so that the barrel muzzle is going upwards (or higher than the breech) and machine a flat. Do not worry about getting it to full depth, you are just trying to establish the first flat. Pull the barrel back out.

Then you can stack 2 of the angle plates to double the angle, then rotate the barrel 180 degrees, and machine the opposite flat (not all the way yet, you could of course, but it is better to get the octagon established).

Then, as the barrel is rotated, the 2 additional angle plates go into the vise jaws to hold the barrel. It is easier just to make 4 plates with the identical degree taper than it is to make a special compensation plate that is exactly double. This technique allows you to eye ball the first angle without resorting to calculations.

For the 45 degree flat, merely insert the barrel into the vise jaws with a protractor, and machine away. After the first 45 degree flat is machined, all the rest just follow the above sequence.

This could be done with an indexer, but the plate method is an easy way to do it without any fancy tooling.
 
Picture006.jpg

Done. This is a 24" long brass coaching carbine barrel that closely follows the arm in figure 3.

I chose to make it with a tapered octagonal section instead of the entirely cylindrical barrel depicted. The brass protrusion past the flats at the breech is merely a cylinder to be grabbed by the lathe chuck for polishing.

I will have to make a breechplug assembly next.

The photo quality is lacking, but you get the idea.
 
Looks great! Nice process .. I am no machinist(would like to have some of the skills) ... just interested in the process.

In my severe lack of knowledge I would not have thought about doing that way! Good stuff and nice work! :thumbsup:

Davy
 
One thing I like to do with a twist drill is crop the cutting lips slightly. Put a small flat on the cutting lip, this eliminates the grabbing affect when drilling brass/bronze, especially when the drill breaks thru.

Frank
 
Back
Top