• This community needs YOUR help today. We rely 100% on Supporting Memberships to fund our efforts. With the ever increasing fees of everything, we need help. We need more Supporting Members, today. Please invest back into this community. I will ship a few decals too in addition to all the account perks you get.


    Sign up here: https://www.muzzleloadingforum.com/account/upgrades
  • Friends, our 2nd Amendment rights are always under attack and the NRA has been a constant for decades in helping fight that fight.

    We have partnered with the NRA to offer you a discount on membership and Muzzleloading Forum gets a small percentage too of each membership, so you are supporting both the NRA and us.

    Use this link to sign up please; https://membership.nra.org/recruiters/join/XR045103

IH kit from Dunlap Woodcrafts - let the build commence

Muzzleloading Forum

Help Support Muzzleloading Forum:

This site may earn a commission from merchant affiliate links, including eBay, Amazon, and others.
Make yourself some of these to pad your vise, easy on and off, 3/4" plywood works the best.

vise pads.jpg
squirrel rifel start 001.JPG
 
Making some progress now. Once I got the breech plug out, things moved along. The barrel is seated, the bolster, tang, lock, and side plate are all inlet, and the lock bolts have been drilled and tapped.

20201121_195221.jpg

20201125_184631.jpg

20201125_151244.jpg

20201125_192601.jpg

20201125_192615.jpg


I'd say I'm about 95% happy with my work. The lock is a little looser in the mortise than I'd like - maybe with about a 1/64" or so of wiggle up and down. I'm not sure how that happened, since the lock plate was very snug when I inlet it by itself. I suppose the several dozen times I put it in and took it out compressed the wood on the inside edge.

The other thing I noticed - only after finishing with tapping the lock screws and assembling that part - is that there is a fingernail thick gap between the lock-side barrel flat and the stock, running from the forward end of the lock panel for about 12" and closing gradual. I really don't know what happened there, because the barrel was flat against the inside of the stock. There was inlettong black to prove it.
 
I have run into my first major hiccup with the build - the set triggers is too long and has too much rear travel for the trigger guard. This is how it sits unset. I see now why so many of y'all order without the triggers inlet.

20201127_180848.jpg


The parts are R.E. Davis large triggers and the Bivins guard. The rear set trigger has about 5/16" of rearward travel and is 1" above the trigger plate.

Right now, I have a few options.

1. Move the trigger guard back about 3/8" and cut off the tip of the set trigger. I would need to patch the front of the guard inlet.

2. See about finding a guard with a bigger bow. I'm not really in love with the one that came with the set, so there is something appealing here, though I'm certain I'll still have to patch part of the inlet, since a different guard will like have a different footprint.

3. See if Davis has a smaller set trigger that will fit in that plate. Still might need to either move the guard and/or find a new one. So, I'd still likely need to patch the inlet.

I'm open to any ideas!
 
Hi,
It is easy. I deal with this all the time. Trim a little off the rear trigger and bend it a little into a tighter curve. It won't make any difference with function. You almost always have to do that if you want to leave much space in front of the forward trigger.

dave
What Dave said- had to do the same once - looks and works just fine
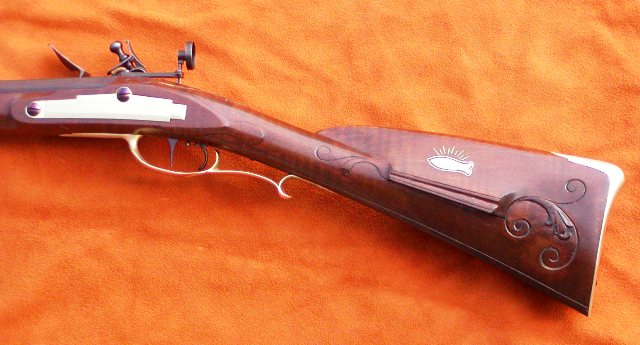
 
What Dave said- had to do the same once - looks and works just fine

Ok, I'm gonna go that route. Let me make sure I have the bending process down correctly.

Remove the trigger from the bar, heat to cherry red with a torch, and bend while hot. Heat the sear bar to cherry red and quench it in oil. Clean it back up, then put it in the oven for an hour or so at 550 degrees, then let it jaut cool down in the air. Reassemble. Did I miss anything?

Couple of questions?

1. I only have a propane torch. Is that sufficient? I was gonna clamp the sear bar in my vise and heat the trigger, but I worry the heavy iron vise will act as a giant heat sink and keep itnfrom getting hot enough.

2. Once it is got enough to bend, what do I do, exactly? Try to bend it around a smaller diameter bar or what? Do I tap it with a small hammer or try to push it with pliers or something?

I've tried to doyou homework on this, but this will be a first for working metal while red hot.
 
Hi,
You are thinking too much. Take the triggers apart. Place the blade or lever of the set trigger in a vise, which will act as a heat sink, take your propane torch and just heat the trigger about 1/3 the way up from the bottom. When red, give it a little bend forward with needle nose pliers. Let cool and assemble. You won't have ruined the hardening and tempering of the lever, which is what matters, so don't worry about re hardening and tempering the trigger. If more clearance is needed, grind the bottom of the trigger a little. You don't need a lot of clearance behind the set trigger because it really doesn't move that much. Below is an example in which the rear trigger had to be bent and shortened quite a bit to fit a guard that was not really designed for twin triggers.
vtyITem.jpg

dave
 
Ok, I'm gonna go that route. Let me make sure I have the bending process down correctly.

Remove the trigger from the bar, heat to cherry red with a torch, and bend while hot. Heat the sear bar to cherry red and quench it in oil. Clean it back up, then put it in the oven for an hour or so at 550 degrees, then let it jaut cool down in the air. Reassemble. Did I miss anything?

Couple of questions?

1. I only have a propane torch. Is that sufficient? I was gonna clamp the sear bar in my vise and heat the trigger, but I worry the heavy iron vise will act as a giant heat sink and keep itnfrom getting hot enough.

2. Once it is got enough to bend, what do I do, exactly? Try to bend it around a smaller diameter bar or what? Do I tap it with a small hammer or try to push it with pliers or something?

I've tried to doyou homework on this, but this will be a first for working metal while red hot.
Last one I did I pulled the rear trigger clamped it in a vise and lightly tapped it cold - it bent easily and uniformly
 
Thanks guys. The bending process worked way easier than I thought. I'll still have to move the guard back about 3/16" to accommodate the rear-pull, but I think it'll be ok. I'm work out ideas how to patch the guard inlet that will look good.
 
Hi,
Before moving the guard back, make sure you really have to because when you do that you will reduce the space in front of the forward trigger. If you have to, grind some of the rear curl of the guard away. It does not need to be that thick. Bend and shorten the rear trigger as much as you need to to clear the guard after grinding the guard thinner in the rear.

dave
 
I made some more progress, though I put the trigger guard on hold to cleary head. I went on and did the butt plate and toe plate. The toe plate is the first thing on this build that I inlet from complete bare wood. My chisel skills are definitely the weakest part of my woodworking game, so I'll need to practice up before I do the patchbox, and especially some carving later. In the end, it really was better than I I feared at first. A few small gaps in the toe plate, and it doesn't mate perfectly with the toe of the butt plate, but it's a lot better than I thought. Once it's got stain and finish, I'm thinking it'll be hard to tell.

20201130_213126.jpg

20201130_213119.jpg

20201130_213058.jpg
 
Ok, I'm closing in on the time to start really removing extra wood. As I start looking closely at it, I wanted to ask a question about the lines on the butt, particularly in regards to the patchbox and buttplate. As you can see here, the end of the buttstock curves inward to the edge of the buttplate. It was here that I rasped/filed away a good bit of extra wood to bring the stock flush with the buttplate, but it left this arc.

20201210_200939.jpg

20201210_200957.jpg


I presume (from all I've seen of other rifles) that I should file down the side of the butt until it is a straight line from the plate to the wrist? Otherwise, I would have to bend the patchbox to match the curve of the butt. Seeing as how it is really hard to replace wood once it has been removed, I wanted to check before I start filing.
 
Yup.
There is a lot of wood that still needs to come off.
When it's finished, that straight edge will lay against the side of the butt and touch the sides of the butt plate.

This is a very common mistake the people building kit guns from the big manufactures make when they sand their stocks down to match the butt plate and the end cap where the ramrod enters the stock. They get a good match on the mating area but the wood further away bulges out making the butt and the forestock look bloated.
 

Latest posts

Back
Top