- Joined
- May 28, 2022
- Messages
- 9,118
- Reaction score
- 22,012
- Location
- Louisiana & My camp in Mississippi
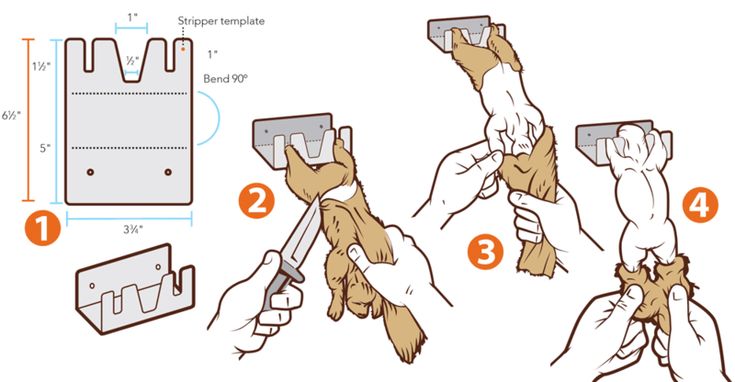
I haven’t squirrel hunted in years. One of my excuses was that I lost my old skinning stand that a buddy made for me many years ago. Now the grandkids are older and want to hunt and I have acquired a couple of appropriate BP squirrel weapons I had to build another skinning stand. I keep a fair amount of scrap steel here so I dug around and found what I thought would work. I traced out the design, cut, sanded, welded it to a piece of 2”x2” square tube, and painted it. Then mounted it on one of the support beams of my cooking and cleaning shed. I think it will work well and I’m anxious to try it out.