


Only Round
36 Cal.
- Joined
- Nov 15, 2005
- Messages
- 88
- Reaction score
- 1
So about a year and a half ago I picked up a "mostly finished" long rifle at a trade fair from a fairly well-known builder. The story was that some guy had brought in TEN (10!) buggered up high quality long rifle kit guns and traded them off for a custom build. This guy just could not drill a straight hole, file a square notch, inlet well or locate parts properly. 
Quite a few people told me I was wasting my time trying to fix all the problems with this gun, but the wood was fantastic and there was plenty of extra wood if I changed things a bit.
This was originally a Verner stock but after lots and lots of thinking I went with a William Antes Allentown/Bethlehem style, this allowed me to thin things down a bit just remove some of the problems.
The point of this whole post is that even if you think you've really messed things up, there are almost always ways to fix your mistakes!
Here's some early pics after I'd brought it home:
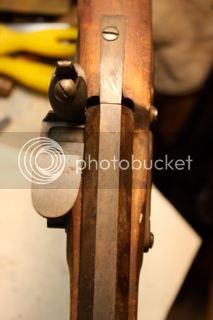
1st pic: Barrel is not even set all the way back, breech plug isn't in tight or square, tang bolt is off center, still a lot of extra wood on side plate side and rear lock bolt is so crooked the front of the side plate sticks out almost 1/4" in front of the lock.
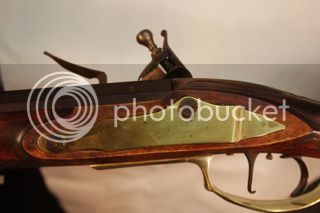
2nd pic: Here's the side plate, note trigger guard is attatched w/ a screw.
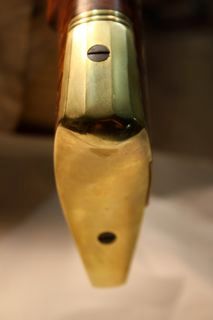
3rd pic: top buttplate screw is off center, lower screw is located in middle rear.
4th: Apparently couldn't figure out what to do with cheekpiece, rear of trigger guard isn't in contact w/wood, toeplate holes wander back and forth.
5th: Touch hole was actually located behind the breechplug shoulder. Lock inlet had large gaps and the rear of the lock was inlet deeper than the front.

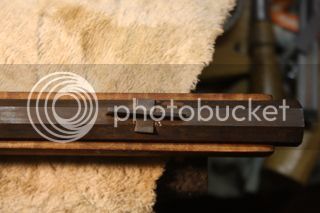
6th: Both sights and all 3 barrel lugs were this crooked.
7th: 3 5/16ths steel ramrod pipes were double pinned in a 3/8ths ramrod channel, don't know where he planned to put a nose cap.
I filled the holes in the tang, lock plate, butt plate and trigger guard by chamfering both sides of the hole, peening in new metal and filing the excess off on the outside. Since the touch hole was actually located behind the shoulder of the breech plug I just put in a screw, peened the outside and recut the threads inside.
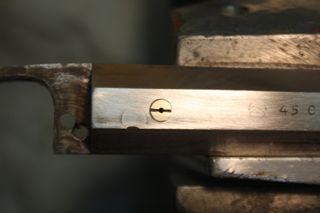
Here's the fixed touch hole:
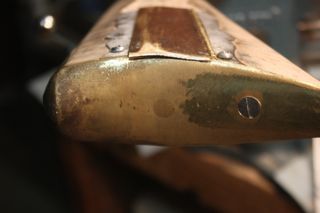
The rear of the buttplate:
A finished picture of the buttplate:
Since I had to move the barrel back, I would have had to drill new holes through the barrel lugs so I went with keys instead.
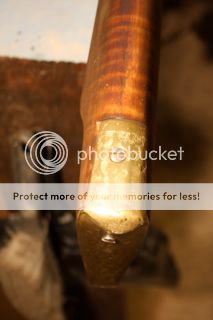
Here's a pic of the front pipe, key and nose cap.
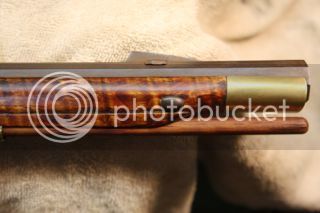
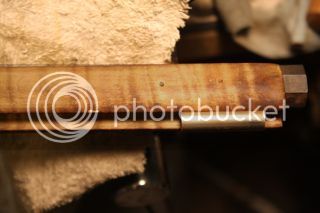
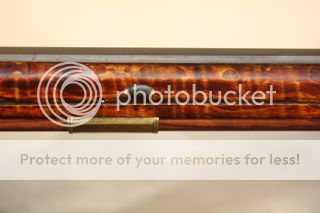
I was able to hide some of RR pipe holes in the incised line on the forestock but since the holes tended to wander, I just glued in a chunk of toothpick. They do show up, but you have to look pretty close. You can see two in front of the middle key here.
As far as the lock inlet went, I just decided to kind of start over. I planed off about 1/8" and inlet a new piece of wood on top as well as inletting some extra pieces in rear of the lock mortice where it was inlet too deep. The grain didn't quite match what was there before but it doesn't look too bad, huh?
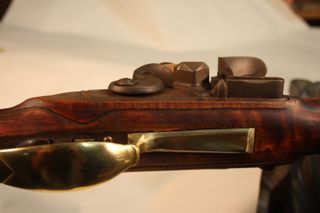
Here's the fixed side plate side, I put in some new wood in the front lock bolt hole but you can still somewhat see the original hole in front of the side plate.
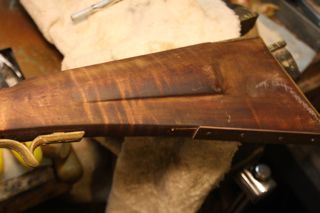
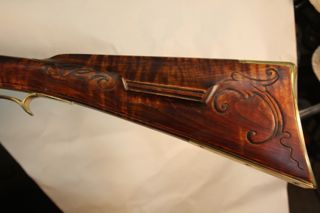
I did manage to reclaim enough thickness in the butt to get a good cheekpiece.
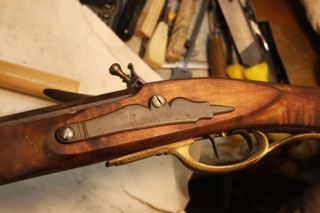
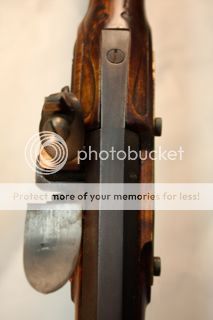
And here is a final picture showing the tang, lock and side plate.
See? All is NOT lost!
Quite a few people told me I was wasting my time trying to fix all the problems with this gun, but the wood was fantastic and there was plenty of extra wood if I changed things a bit.
This was originally a Verner stock but after lots and lots of thinking I went with a William Antes Allentown/Bethlehem style, this allowed me to thin things down a bit just remove some of the problems.
The point of this whole post is that even if you think you've really messed things up, there are almost always ways to fix your mistakes!
Here's some early pics after I'd brought it home:
1st pic: Barrel is not even set all the way back, breech plug isn't in tight or square, tang bolt is off center, still a lot of extra wood on side plate side and rear lock bolt is so crooked the front of the side plate sticks out almost 1/4" in front of the lock.
2nd pic: Here's the side plate, note trigger guard is attatched w/ a screw.
3rd pic: top buttplate screw is off center, lower screw is located in middle rear.
4th: Apparently couldn't figure out what to do with cheekpiece, rear of trigger guard isn't in contact w/wood, toeplate holes wander back and forth.
5th: Touch hole was actually located behind the breechplug shoulder. Lock inlet had large gaps and the rear of the lock was inlet deeper than the front.
6th: Both sights and all 3 barrel lugs were this crooked.
7th: 3 5/16ths steel ramrod pipes were double pinned in a 3/8ths ramrod channel, don't know where he planned to put a nose cap.
I filled the holes in the tang, lock plate, butt plate and trigger guard by chamfering both sides of the hole, peening in new metal and filing the excess off on the outside. Since the touch hole was actually located behind the shoulder of the breech plug I just put in a screw, peened the outside and recut the threads inside.
Here's the fixed touch hole:
The rear of the buttplate:
A finished picture of the buttplate:
Since I had to move the barrel back, I would have had to drill new holes through the barrel lugs so I went with keys instead.
Here's a pic of the front pipe, key and nose cap.
I was able to hide some of RR pipe holes in the incised line on the forestock but since the holes tended to wander, I just glued in a chunk of toothpick. They do show up, but you have to look pretty close. You can see two in front of the middle key here.
As far as the lock inlet went, I just decided to kind of start over. I planed off about 1/8" and inlet a new piece of wood on top as well as inletting some extra pieces in rear of the lock mortice where it was inlet too deep. The grain didn't quite match what was there before but it doesn't look too bad, huh?
Here's the fixed side plate side, I put in some new wood in the front lock bolt hole but you can still somewhat see the original hole in front of the side plate.
I did manage to reclaim enough thickness in the butt to get a good cheekpiece.
And here is a final picture showing the tang, lock and side plate.
See? All is NOT lost!
