• Friends, our 2nd Amendment rights are always under attack and the NRA has been a constant for decades in helping fight that fight.

    We have partnered with the NRA to offer you a discount on membership and Muzzleloading Forum gets a small percentage too of each membership, so you are supporting both the NRA and us.

    Use this link to sign up please; https://membership.nra.org/recruiters/join/XR045103

Center seam sheath

Muzzleloading Forum

Help Support Muzzleloading Forum:

This site may earn a commission from merchant affiliate links, including eBay, Amazon, and others.

Stophel

75 Cal.
Joined
Jul 8, 2005
Messages
5,949
Reaction score
858
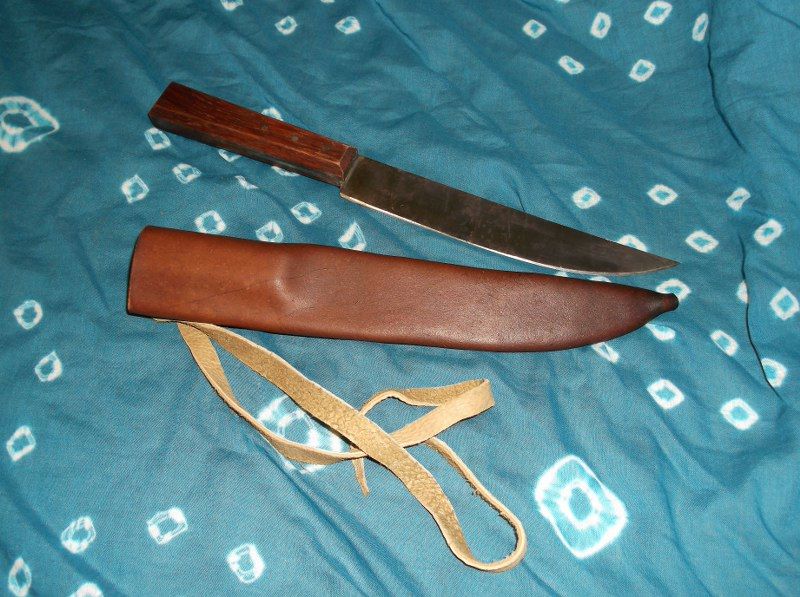
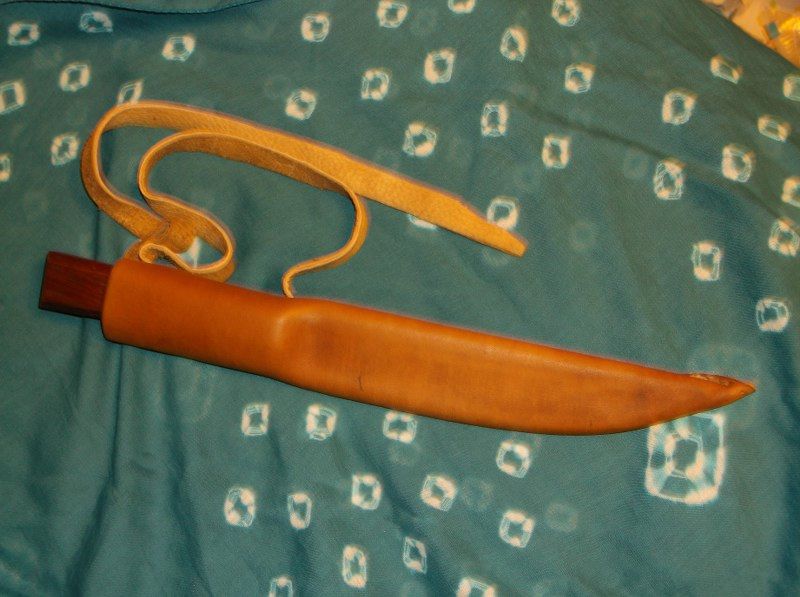
This is my first center (almost) seam 18th century knife sheath. It's not fully dry yet, and I've not oiled or waxed it or anything. The slight upsweep of the English style blade made it difficult for me to get the leather twisted around and the seam centered on the back, but it's good enough, I think. It's more or less 6-7 oz cowhide that I dyed in walnut hulls. Sewn with waxed flax thread. I could perhaps have done a better job with it if I had really taken my time, but I was preoccupied and kind of rushed through it, but it's fine, considering it's just a cheap trade knife that would have been imported by the zillions in the mid to late 18th century.

Picture033_800x597_zpsced8388f.jpg

Picture032_800x597_zps558077d7.jpg

not great photos, I know.

It actually wasn't too hard to do, and as I do more, and am more careful, I know I can do them better. If you can make a regular side seam sheath, and you have a vise to mash the seam flat, then you can make a center seam sheath. :wink:

And thanks to Wick for telling me once how he made his (mine is perhaps a bit more down and dirty... :grin: )

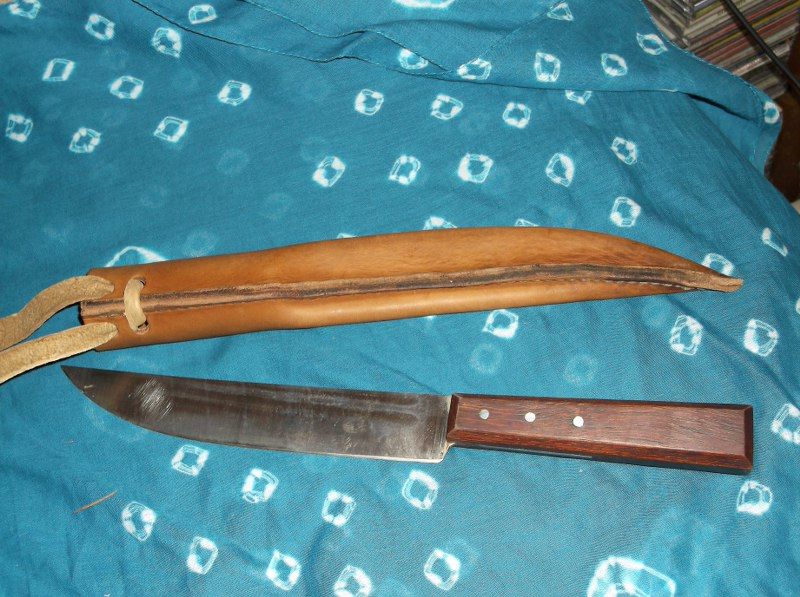
Oh, the knife is my "Red Handled Scalper", which I made from an Ontario "Hop Knife", which cost me something like $9 plus shipping. The handle I made from a piece of wood that looks to me like mahogany that I got from a pallet.
 
Ok, so... being as how I am unable to leave well enough alone, I managed to mess up my first sheath. Suffice to say, it involved boiling water, but we won't talk about that...

But, it gave me an opportunity to do it again. And this time... well, I impressed myself. :grin:

When I made this one, I accidentally made it too wide. The blade was loose in it. I got an idea....what if I put it into the boiling water now, when I have it sufficiently oversize... So, with wild idea in hand along with the wrapped up knife in the sheath, I dipped it into boiling hot water for about 20 seconds at a time, pulling it out, shaping it, checking it, etc. I managed to get it to shrink up exactly where I wanted it to, without screwing up the throat area. Oh, and boiling water darkens leather quite a bit! It is very dark red, almost matching the handle of the knife! And, of course, it's a little stiffer than it was, but not rock hard.

Picture035_800x597_zps49790ae3.jpg

Picture034_800x597_zps9200f9a0.jpg

Picture036_800x597_zps620afbd8.jpg
 
thanks for sharing, it looks good. I have been wanting to try and make a center seam sheath for a long time but also thought it was gonna be too difficult. Your post is very encourageing.I like what you did with the knife too, I have a few of those ontarios that I have put new handles on and re shaped, they are good knives , sharper than heck!!! :v
 
Not bad Chris. A definate improvement over the first, but as you found out, the boiling water is a bit tricky to work with. In your case the shrinking worked for the good, but if it is not needed just dampen the leather and bake it dry in your kitchen range at 135° to get the cuir bouilli effect. I've been useing a heat gun with good success, although that too requires much care to not over heat.
 
I learned that when you make this kind of sheath, the pattern needs to have a gentle step up on the edge where the handle will be inside, so that there's enough leather to go around it.
 
Chris - nice job but you're cuir bouilli method is not quite "right"- here's some of the best info on the method available http://www.personal.utulsa.edu/~marc-carlson/leather/hl.html

1) No need for boiling water - 160°-170° F is all you need
2) Then it needs to be dried with heat of 140°-160° for the correct hardness

Also there a couple of other methods of sewing that can be used that leave a more flat seam.
1) One is known as the hidden stitch which involves grooving the leather on a 45° angle and use curved needles with a curved awl to sew. After sewing - you use finer thread for this method Barbour 3 or 4 cord at 6-8 stitches per inch works good or you can use even finer silk thread at 8-12 SPI, you then glue down the "flaps" over the grooves over the thread.
2) The other method is to use the so-called baseball stitch (a stitch which is much older than the game) - you can see how here - http://www.picturetrail.com/sfx/album/view/829129
This works especially well when using an inner core of wood, leather, etc.

As for widening at the top over the handle area rather than a "step up" try flaring it out starting about an inch below the handle and adding a bit on each side as you work towards the top - it can be a straight angle or a bit of an arc. That's how I do my all of my pouch type sheaths whether center seam or side seam and after several thousand of them I can say it works..
 
Last edited by a moderator:

Latest posts

Back
Top