Goldhunter
54 Cal.
- Joined
- Mar 27, 2006
- Messages
- 1,596
- Reaction score
- 6
So after almost 2 years I’ve finally completed this build. It started out as a desire to build an Allentown-Bethlehem area rifle. This would be my second Flinter build and 4th overall (minus a couple of stock redos). Learning occurs on each one and eventually I’ll get better.
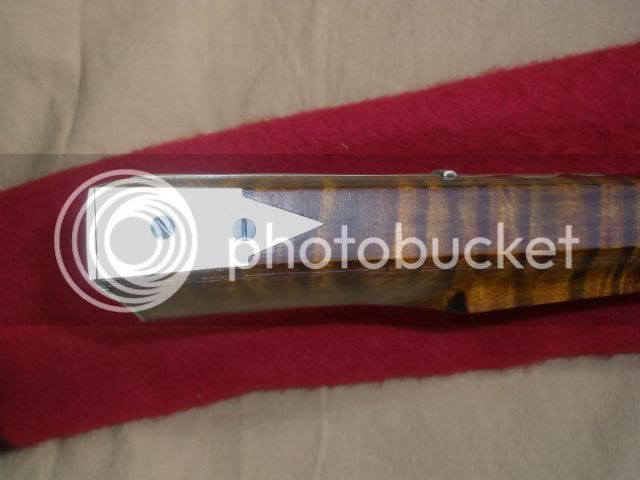
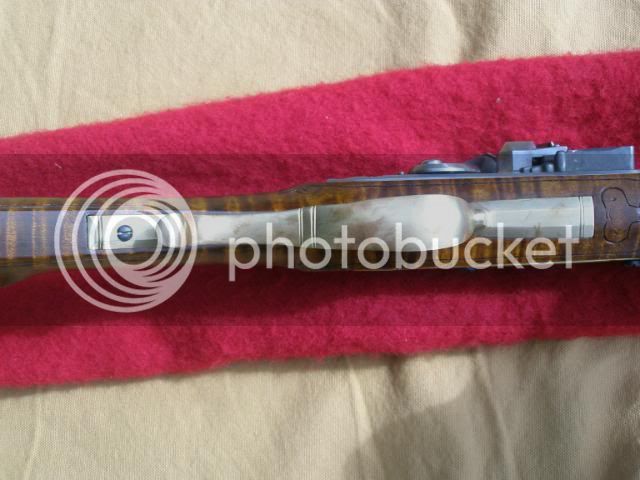
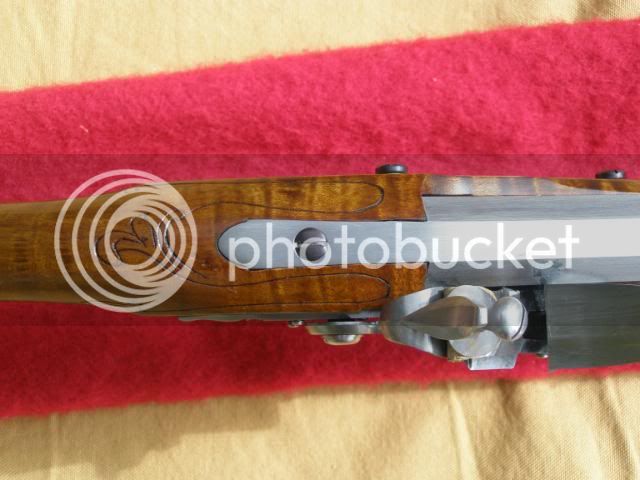
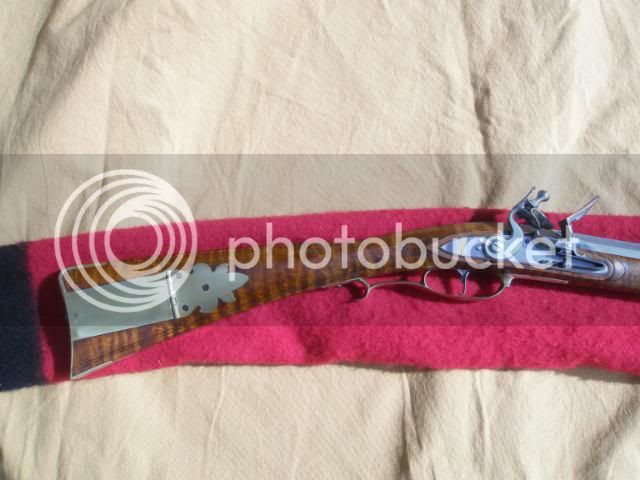
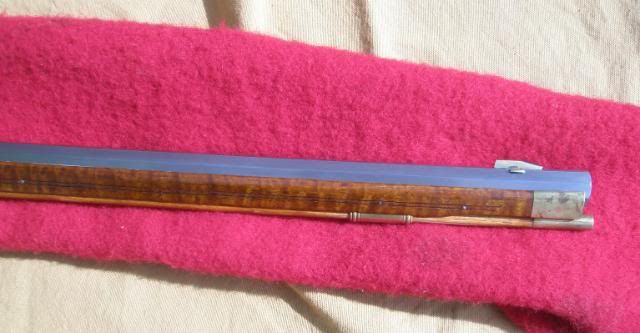
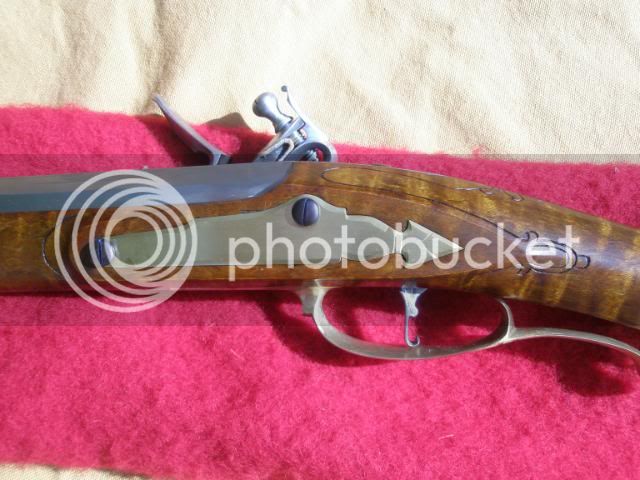
I quickly realized that this style would be difficult to “get right” but drove ahead undaunted (well, maybe a little). :barf: I build rifles for myself to use so any screw ups are mine to live with, and boy did this build try my patience. :shake: Besides, hopefully the mistakes will get covered up with “patina”. :wink: While I collected all the parts, I was looking at all the pictures I could get (RCA, internet, the ML Forum members) and noticed some characteristics to incorporate into the build that are common on these rifles. I realized it would be difficult to get the double arc on the bottom with a precarve but also noticed that some from the area didn’t necessarily have the double arc. :hmm: Things I decided to incorporate were the arrowhead side plate, “v” shaped fore end, open end nose cap, incised carving, the "fleur de li" shaped patch box, and noticed the TG had a common shape as did some of the butt plates. I didn’t get the top of the butt plate inlet correctly because of the precarve dimensions, so I did the best I could. I also ran into the issue of the butt plate being a bit thin on the inside corner when it was filed down. Inletting a small peice of wood in the corner helped, but didn't completely fix the unsightly gap.
This build really tried my patience. I almost scrapped the stock after a MAJOR screw up but decided to continue and finish it as a learning experience. I broke one trigger guard bending it because I didn’t anneal it well enough, bought a second that was too big, and almost ruined the third because when annealing it I put it in the water at an angle and too slow. It actually warped it! But I got it straightened out as best I could. It took me twice to get the nose cap right and it’s still a little rough. And when reassembling it last night I realized somehow my lock plate was slightly bent. The tail end was sticking proud of the inlet. So I had to carefully straighten it. I think in my finishing I was a little heavy handed on the lock panels and took them down a hair too much. Another lesson learned. :shake:
Specifics:
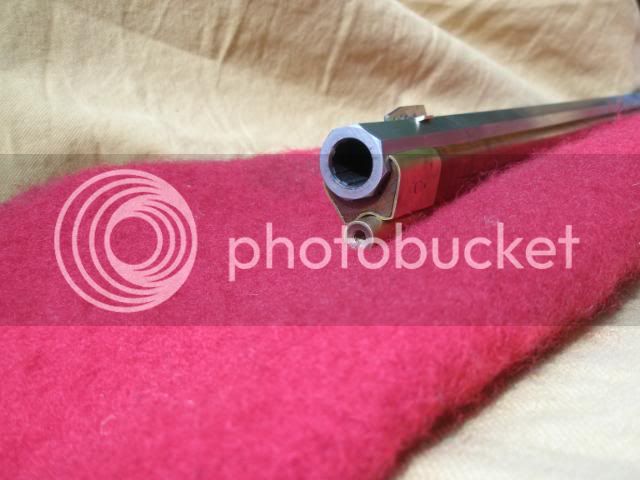
- 42” GM barrel, B weight .50 cal.
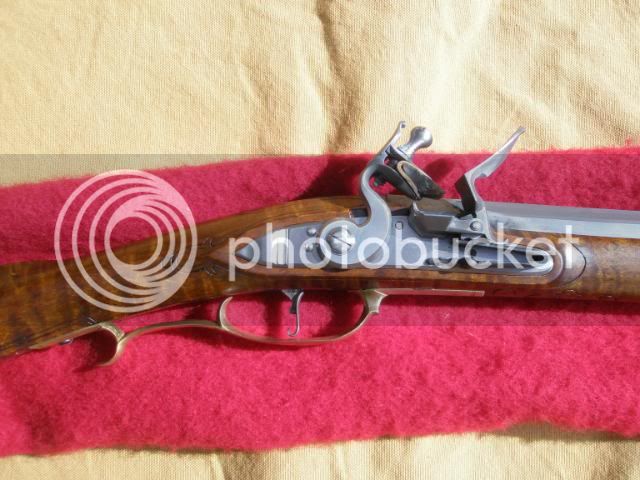
- Chambers Golden Age lock.
- Pecatonica River Lehigh precarve (only barrel and ramrod channels cut). I can’t remember the grade of wood; grade 3 I think.
- Butt plate and trigger guard from MBS.
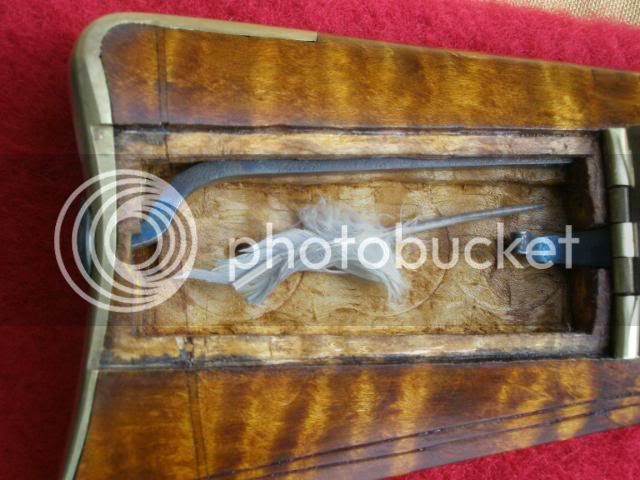
- trigger (Davis), rear sight, pipes, and patchbox from TOTW.
- Home made front sight, toe plate, side plate, nose cap, PB release and spring. The PB release was a bugger! All I had was a few pictures available to decide how best to do it. It works, that’s all I can say. The release was made from one piece of steal, the head formed, the shaft cut, ground and filed thinner, then heated and bent numerous times to get the right angles. It’s driven into the wood rather than screwed. The front sight is the barly corn type described by Jack Brooks.
Finish: This was my first time scraping and I’ll need a lot more practice to get better. Anyway, I sanded the stock to 220 and for the next three whiskerings I scraped using those glass slides. I had read that scraping helps clean up the grain more and it did on this. I used an AF stain made from Ferric Nitrate crystals dissolved in denatured alcohol. In my tests on the scrape wood provided with the kit the difference between the crystals in water and alcohol was night and day. The stock was sealed with a recipe for Violin Finish supplied by Eric Kettenburg years ago in MuzzleBlasts. It’s made from heated alcohol and seedlac. The mixture was thinned considerably, the stock flooded once, allowed to soak and wiped off (this stuff dries FAST). I buffed it back with 0000 steel wool because it got a bit think in places to even it out then burnished with a piece of brown paper bag; this was repeated for two more thinned coats. I’ve got about three hand rubbed boiled linseed coats (yes, I boiled it as per instructions I got from Dan Pharis, not used straight out of the bottle). I’ve settled on leaving the barrel in the white”¦..for now. I fire blued the screw heads for a little contrast.
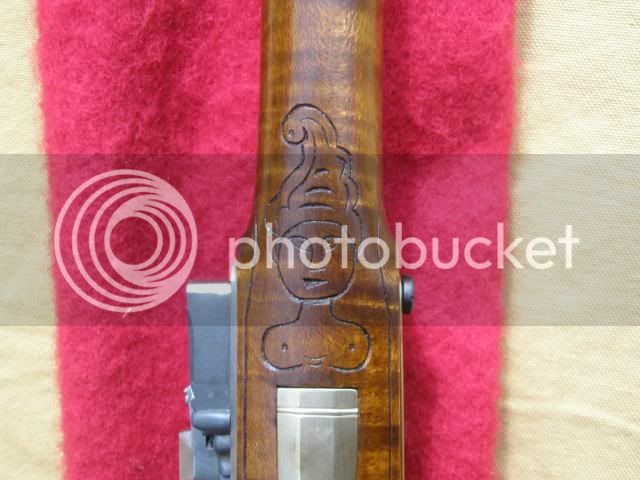
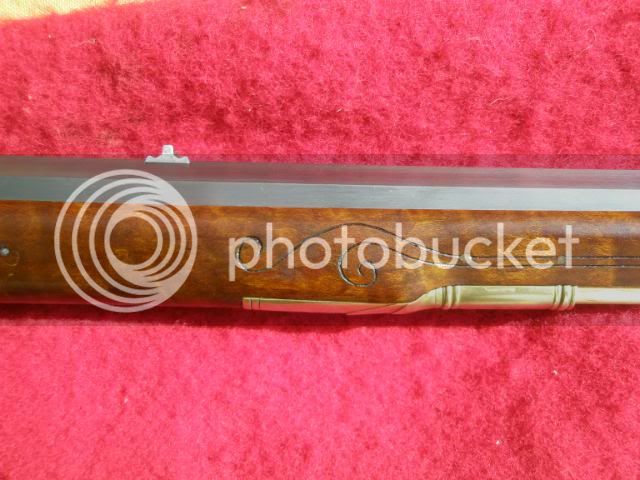
This is the most carving I have ever attempted. Overall I think it went well. The long parallel lines along the fore stock didn’t turn out as straight as I wanted. The lines started out straight but with cleaning them up they got wavy. I think the liberty head (or whatever it’s called) in front of the TG turned out well though. I’m kind of proud of that.
I’m going to shoot it today to get it sighted in. I’ll be taking it to the ALRA Western Gathering this next weekend to try my hand at the shooting festivities.
As always, critiques and suggestions from you find builders always welcome and taken to heart.
It was kind of over cast today so the pics may not be that great.
I quickly realized that this style would be difficult to “get right” but drove ahead undaunted (well, maybe a little). :barf: I build rifles for myself to use so any screw ups are mine to live with, and boy did this build try my patience. :shake: Besides, hopefully the mistakes will get covered up with “patina”. :wink: While I collected all the parts, I was looking at all the pictures I could get (RCA, internet, the ML Forum members) and noticed some characteristics to incorporate into the build that are common on these rifles. I realized it would be difficult to get the double arc on the bottom with a precarve but also noticed that some from the area didn’t necessarily have the double arc. :hmm: Things I decided to incorporate were the arrowhead side plate, “v” shaped fore end, open end nose cap, incised carving, the "fleur de li" shaped patch box, and noticed the TG had a common shape as did some of the butt plates. I didn’t get the top of the butt plate inlet correctly because of the precarve dimensions, so I did the best I could. I also ran into the issue of the butt plate being a bit thin on the inside corner when it was filed down. Inletting a small peice of wood in the corner helped, but didn't completely fix the unsightly gap.
This build really tried my patience. I almost scrapped the stock after a MAJOR screw up but decided to continue and finish it as a learning experience. I broke one trigger guard bending it because I didn’t anneal it well enough, bought a second that was too big, and almost ruined the third because when annealing it I put it in the water at an angle and too slow. It actually warped it! But I got it straightened out as best I could. It took me twice to get the nose cap right and it’s still a little rough. And when reassembling it last night I realized somehow my lock plate was slightly bent. The tail end was sticking proud of the inlet. So I had to carefully straighten it. I think in my finishing I was a little heavy handed on the lock panels and took them down a hair too much. Another lesson learned. :shake:
Specifics:
- 42” GM barrel, B weight .50 cal.
- Chambers Golden Age lock.
- Pecatonica River Lehigh precarve (only barrel and ramrod channels cut). I can’t remember the grade of wood; grade 3 I think.
- Butt plate and trigger guard from MBS.
- trigger (Davis), rear sight, pipes, and patchbox from TOTW.
- Home made front sight, toe plate, side plate, nose cap, PB release and spring. The PB release was a bugger! All I had was a few pictures available to decide how best to do it. It works, that’s all I can say. The release was made from one piece of steal, the head formed, the shaft cut, ground and filed thinner, then heated and bent numerous times to get the right angles. It’s driven into the wood rather than screwed. The front sight is the barly corn type described by Jack Brooks.
Finish: This was my first time scraping and I’ll need a lot more practice to get better. Anyway, I sanded the stock to 220 and for the next three whiskerings I scraped using those glass slides. I had read that scraping helps clean up the grain more and it did on this. I used an AF stain made from Ferric Nitrate crystals dissolved in denatured alcohol. In my tests on the scrape wood provided with the kit the difference between the crystals in water and alcohol was night and day. The stock was sealed with a recipe for Violin Finish supplied by Eric Kettenburg years ago in MuzzleBlasts. It’s made from heated alcohol and seedlac. The mixture was thinned considerably, the stock flooded once, allowed to soak and wiped off (this stuff dries FAST). I buffed it back with 0000 steel wool because it got a bit think in places to even it out then burnished with a piece of brown paper bag; this was repeated for two more thinned coats. I’ve got about three hand rubbed boiled linseed coats (yes, I boiled it as per instructions I got from Dan Pharis, not used straight out of the bottle). I’ve settled on leaving the barrel in the white”¦..for now. I fire blued the screw heads for a little contrast.
This is the most carving I have ever attempted. Overall I think it went well. The long parallel lines along the fore stock didn’t turn out as straight as I wanted. The lines started out straight but with cleaning them up they got wavy. I think the liberty head (or whatever it’s called) in front of the TG turned out well though. I’m kind of proud of that.
I’m going to shoot it today to get it sighted in. I’ll be taking it to the ALRA Western Gathering this next weekend to try my hand at the shooting festivities.
As always, critiques and suggestions from you find builders always welcome and taken to heart.
It was kind of over cast today so the pics may not be that great.