• This community needs YOUR help today. We rely 100% on Supporting Memberships to fund our efforts. With the ever increasing fees of everything, we need help. We need more Supporting Members, today. Please invest back into this community. I will ship a few decals too in addition to all the account perks you get.


    Sign up here: https://www.muzzleloadingforum.com/account/upgrades
  • Friends, our 2nd Amendment rights are always under attack and the NRA has been a constant for decades in helping fight that fight.

    We have partnered with the NRA to offer you a discount on membership and Muzzleloading Forum gets a small percentage too of each membership, so you are supporting both the NRA and us.

    Use this link to sign up please; https://membership.nra.org/recruiters/join/XR045103

sanding curly maple ?

Muzzleloading Forum

Help Support Muzzleloading Forum:

This site may earn a commission from merchant affiliate links, including eBay, Amazon, and others.
Hi,
Here are photos of maple stocks stained with ferric nitrate dissolved in water, which is the same as aqua fortis but with a weaker acid base. You can add other color too and control the color by using different concentrations. Using lye dissolved in water to neutralize any acid residue will also add more red to the color.
48BvIrd.jpg

dgntHRT.jpg

AKwpwwO.jpg

lW8E4sU.jpg

zp9U5yj.jpg

t42xBwY.jpg

NJt544q.jpg

OTRfVTX.jpg

ZfCMaLk.jpg


I don't have trouble with color control and black figure.

dave
You do beautiful work!
 
Curly maple can be made smooth as non curly maple by sanding and always using a backer behind your sandpaper. Backer can be a sanding block , a small or large flat rubber pencil eraser, a piece of cut off r/r for tight areas , and r/r channel. For a rippled antiqued look , as a few original rifles display , scrapers and burnishers , were primary tool's for smoothing wood , before applying the finish. I'm one of those folks that uses steel wool for the final overall smoothing on m/l stocks. My reason for using steel wool is the alcohol stain process I prefer . Once the first coat of alcohol stain is applied , a heat gun raises the grain to the extreme , making it perfect for the steel wool application. Obviously , the more coats of alco stain and dried with heat gun, the less whiskers to deal with. ............oldwood

I'm currently doing a build on a Jim Chambers Isaac Haines FL kit, with a very fancy curly Maple stock.
I've only finished one curly Maple stock before using the old Aqua fortis method, but want to simplify the process using Alcohol staining; can you advise me please from your own experience.
I'm firm on a deep red brown finish so your recommendations of commercial colours (Cabot perhaps) and processes are welcome.
 
Hi,
I was not arguing against alcohol stains. The method described by Oldwood sounds ideal for using those stains and I would follow his advice. I'll make a plug for Homer Dangler alcohol based stains if you go that route. Jim Klein sells them and they are an excellent choice. He has red brown, golden brown, dark brown, and orange toner stains, which can be used to make a wide variety of reddish brown colors. With respect to "aqua fortis" keep in mind that term originally meant just nitric acid (loud water). What we think of is iron dissolved in nitric acid, which is the same as a solution of ferric nitrate and water. I buy ferric nitrate in crystal form from the Science Company and dissolve it in water. It can also be dissolved in alcohol. I can experiment with different concentrations to get close to the colors I want on maple. However, it is not necessarily a one step process for me. Often the ferric nitrate provides a solid reddish brown base but is monochromatic meaning the colors are just different shades of the same brown. I often want more colors like orange and yellow in the mix. So I stain on top of the ferric nitrate with dyes or stains including alcohol stains. I end up with a more colorful stock but with a solid reddish brown base that will never fade. Here is an example of a ferric nitrate base with other colors on top.
GTFkaam.jpg

nLEPmUw.jpg

eJGvg82.jpg

VV7obI8.jpg

yXf6boY.jpg

Then compare the above with this Edward Marshall rifle below and you can see how I added yellow highlights. The Marshall was ferric nitrate alone but I did tint the finish a little with red.
vFonceu.jpg


dave
 
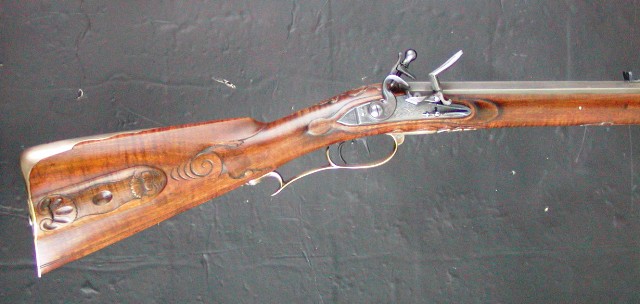
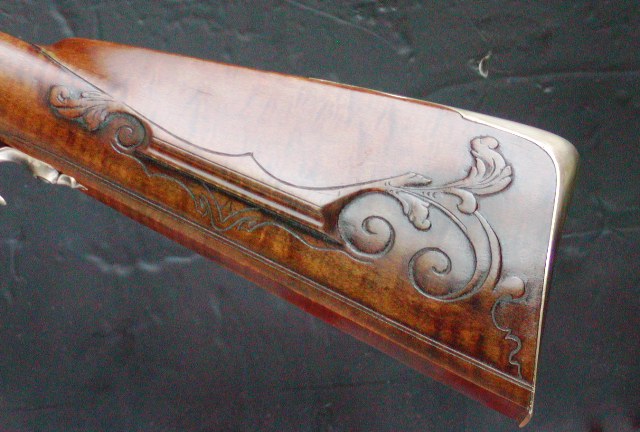
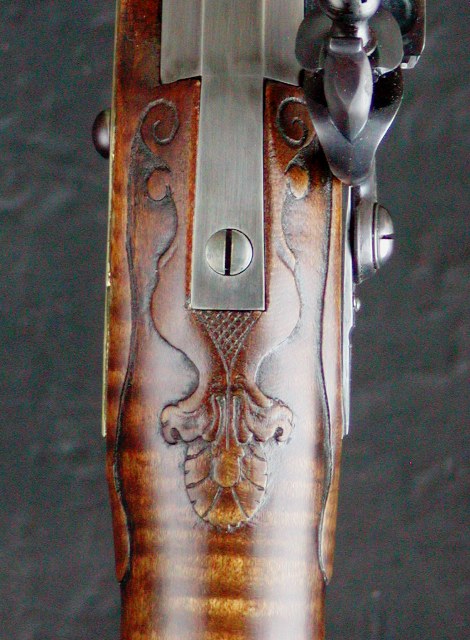
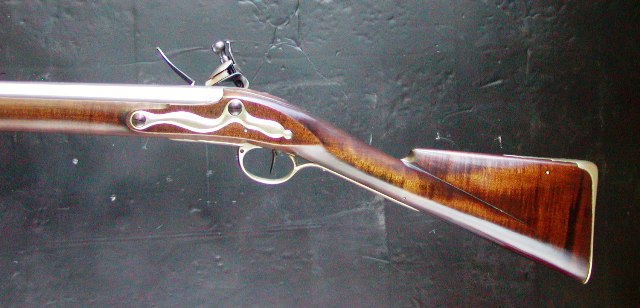
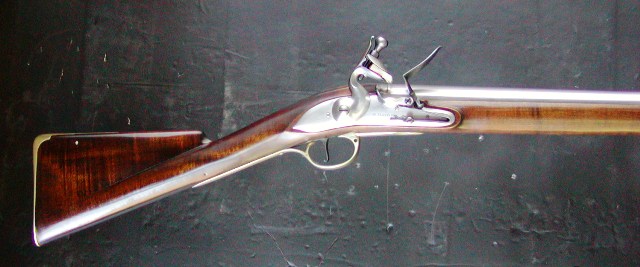
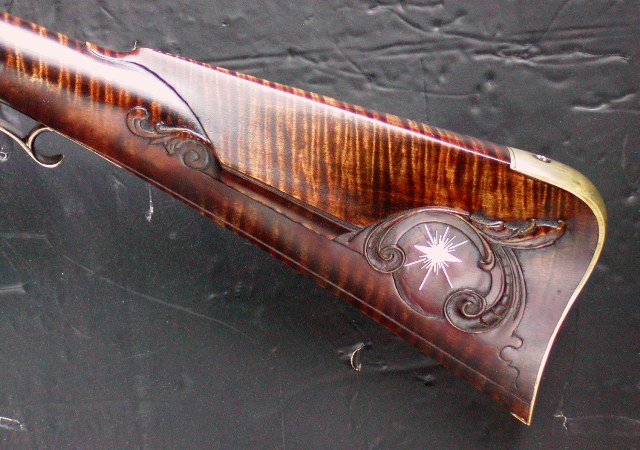
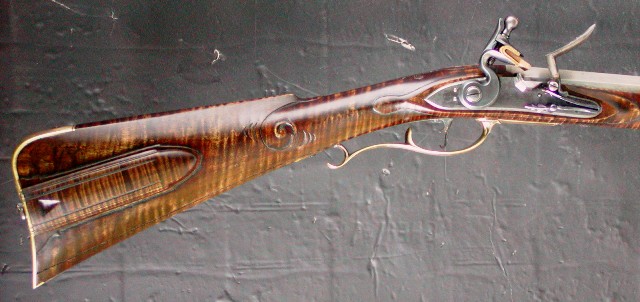
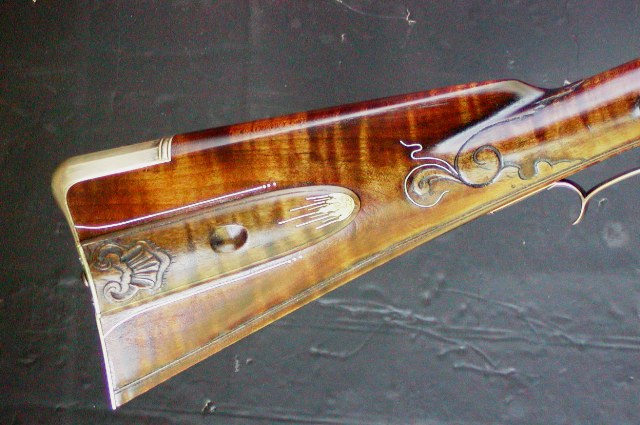
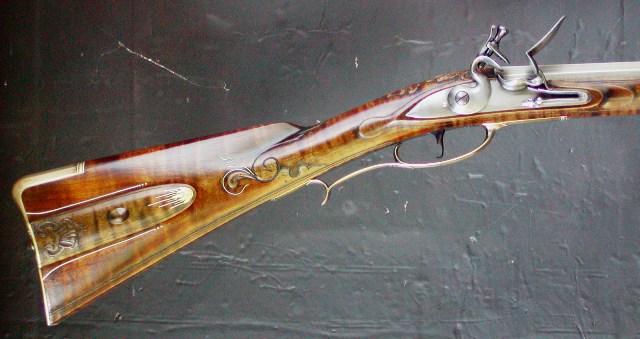
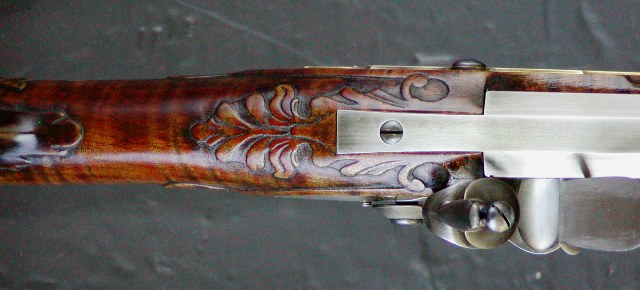
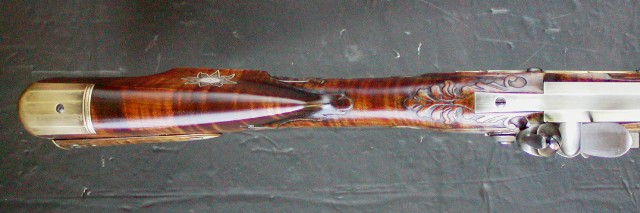
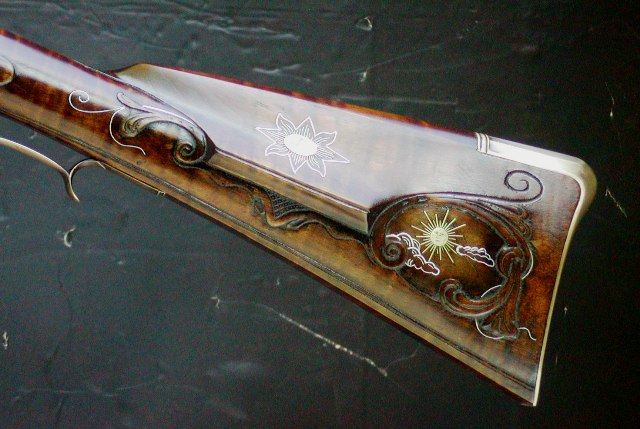
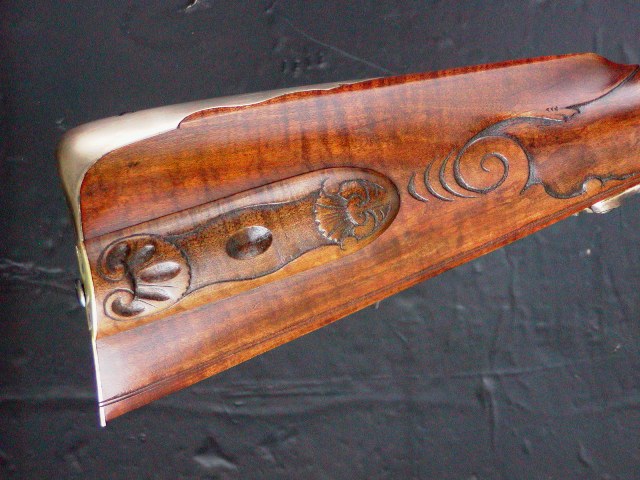
Coin............I have never used Cabot finishes , so have no experience w/ them. The basic idea using alcohol stains , is to set the stain colors in the wood before any finish is applied to the wood. The alcohol stains are available through any leather working outlet , Leather Unlimited , Tandy Leather , and some wood worker supply outlets carry alcohol stain. I have been buying all the stain I use from Leather Unlimited , by the quart, and mix my own colors for the piece of wood I'm working on. I mix small batches , a few oz. at a time and test in the barrel channel on unseen raw wood. Whatever wood you test the color stain on should have the base coat of black alcohol stain on first ,and dried w/a heat gun, and steel wooled to it's final black hue. This accentuates the curl before the test color is applied. After any heat gun drying , steel wool the black stain. It will look awful , a grey black color.
To do the red/brown finish you indicated , you might just buy a small bottle of Feibing's dark tan leather stain from Tandy. For a more redish hue, a small bottle of red or orange will do. Also , one good quality of alcohol stains is they can be lightened in color using common 91% drug store rubbing alcohol. The 91% has less water in it. Ok.................Once the color is decided on, here's the procedure.......... I didn't mention this before , but an explanation is due. To replace the chemical stain quality of darkening the curl , you use again , simply, black alcohol dye as the first color applied to the wood. Dry w/ heat gun immediately , and dewhisker w/OOOO steel wool. A second dewhiskering is usually not needed. At this time , the color you have already pre-tested , can be applied over the black. Always dry the wet stain w/ the heat gun,and steel wool lightly. This sounds complicated ,but it is very basic stuff, and can be done quickly , and as long as it is properly dried, the base coat of finish can be applied immediately. I use Danish oil or any of those type thin runny , soak into the wood finishes , for this step. One coat slopped on and wiped off is good. This is the part that is your choice. Sense I like a little depth to the final look, I use a gel polyurethane wipe on finish. A bout 3 or 4 coats applied over the sealer. The catch is , the gel poly doesn't dry well until the sealer is completely dry after 2 ,or 3 days , so let the sealer dry. Follow the instructions on the poly-gel can . Wipe on sparingly , and stop wiping when a shine appears , otherwise, you have like brush marks from the applicator cloth. After a day or so when the poly hardens up, a super soft touch of steel wool just dulls the finish in prep for the next coat of poly. Don't get heavy handed here. Apply a few more coats of poly then the magic. After the final super lite dulling w/ steel wool , and the poly is hard and dry, wipe the gun stock down with the Danish oil lightly and wipe the oil off immediately. This step fills and shines the poly . Let everything dry for a couple days , and finally a maintenance coat of Minwax , Special dark furniture wax is applied. By "maintenance coat" , I mean, the entire gun gets it. If out in bad weather, or just a trip to the range dulls the finish , one quick coat of wax brings the original look back to the finish. Been using this finish for 20 years , and it's the fastest , easiest , long lasting finish I've tried.....................Sorry for going off in the weeds.......... :) ..............oldwood
 
I use 220 grit wet/dry paper for the final sanding and whiskering. The first colorant applied is orange toner from Jim Klein which produces yellow undertones when dry, Klein's dark brown or reddish brown stains are applied....one or the other or both. When completely dry the stock is rubbed w/ 0000 steel wool to remove any unabsorbed stain. After vacuuming, 2 wipe on/wipe off coats of LMF sealer are applied w/ a soak in time of 10-15 mins. w/ a complete dry w/ each coat. A rubbing w/ 0000 steel removes any surface sealer. 2 sparse coats of Wahkon Bay Trucoat are applied w/ the fingers w/ a complete dry for each coat. The resultant finish is dull but a couple mins of rubbing w/ a fluffy towel yields a permanent, subdued sheen....Fred
TOW9.jpg
P1010027.JPG
 
Last edited:
I don't have a schedule for giveaways. :dunno: ........... Used to work a full time job , 41 yrs. and do some m/l work on the side. Now I'm retired since 06 , seems most what I do is DDG........Doctor's , Dentists , Groceries. Occasional m/l work , with a little time at the range. When nothing else is on the horizon ,I'll scratch build a backwoods mtn. rifle ,..............olswood
 
Back
Top