• This community needs YOUR help today. We rely 100% on Supporting Memberships to fund our efforts. With the ever increasing fees of everything, we need help. We need more Supporting Members, today. Please invest back into this community. I will ship a few decals too in addition to all the account perks you get.


    Sign up here: https://www.muzzleloadingforum.com/account/upgrades
  • Friends, our 2nd Amendment rights are always under attack and the NRA has been a constant for decades in helping fight that fight.

    We have partnered with the NRA to offer you a discount on membership and Muzzleloading Forum gets a small percentage too of each membership, so you are supporting both the NRA and us.

    Use this link to sign up please; https://membership.nra.org/recruiters/join/XR045103

Pattern 1730 Brown Bess almost ready for inspection

Muzzleloading Forum

Help Support Muzzleloading Forum:

This site may earn a commission from merchant affiliate links, including eBay, Amazon, and others.
WOW......DOUBLE WOW......Nope, still not good enough. That Musket deserves an unheard of TRIPLE WOW!!!

OK, I will have to admit this is one of my own personal "Three favorite dream guns from the 18th century."

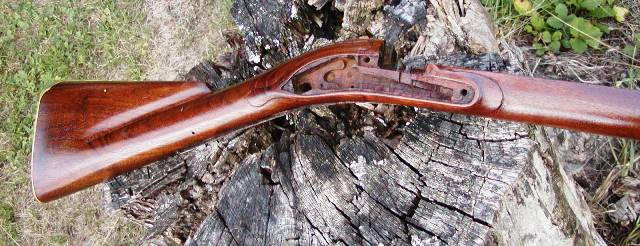
Having followed Dr. De Witt Bailey's works on British Military weapons and the Brown Bess in particular since the 1970's, I came to know the Pattern 1730 as well as one might without handling one. I loved the Banana Shaped lock and the ornate carving of the lock aprons that flowed down to the bottom side of the stock, but never cared for the early and rather dainty trigger guard nor the fact the lock was single bridled.

British Ordnance did not have much of a chance to do "R & D" on this musket when they began production and first re-armed the entire British Army worldwide with the musket. They found the dainty "Dutch Style" trigger guard did not stand up well on active service while in the process of re-arming the entire Army. So in 1740, they began "upgrading" the P 1730 Musket on then new production Muskets. Each had at least two, if not all three of the upgrades of 1. The more robust trigger guard, 2. The Double Bridle Lock and 3. Plainer Apron Carvings around the Breech Plug and Lock. But they continued to leave a plain rounded end on the front of the fore stock, which they did not correct until they added a nose cap on the P1748 Musket.

Much to my personal regret, P 1748 Muskets were not issued to the American Colonies during the FIW and if any at all actually made it to America, it wasn't until the AWI.

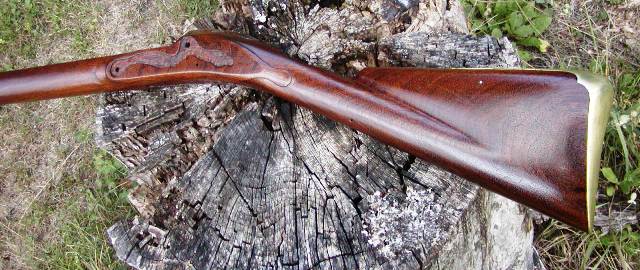
Since I admire the early P1740 wrap around lock aprons, the P1740 with that feature, the double bridle lock and the more robust trigger guard; the P1740 was much more to my liking than the original P 1730 or P 1742.

Sheet brass was sent with the parts and supplies for Artificers (Military Armorers) to make and fit nose bands to muskets in the FIW and the AWI, as they had not had a chance to re-fit nose caps to all earlier Pattern Muskets. However, from the ones I've seen in books and a couple of originals, none were fitted as nicely as Dave has done on this musket.

I ken Dave's musket is a Braw, Braw Lassie of a Brown Bess.

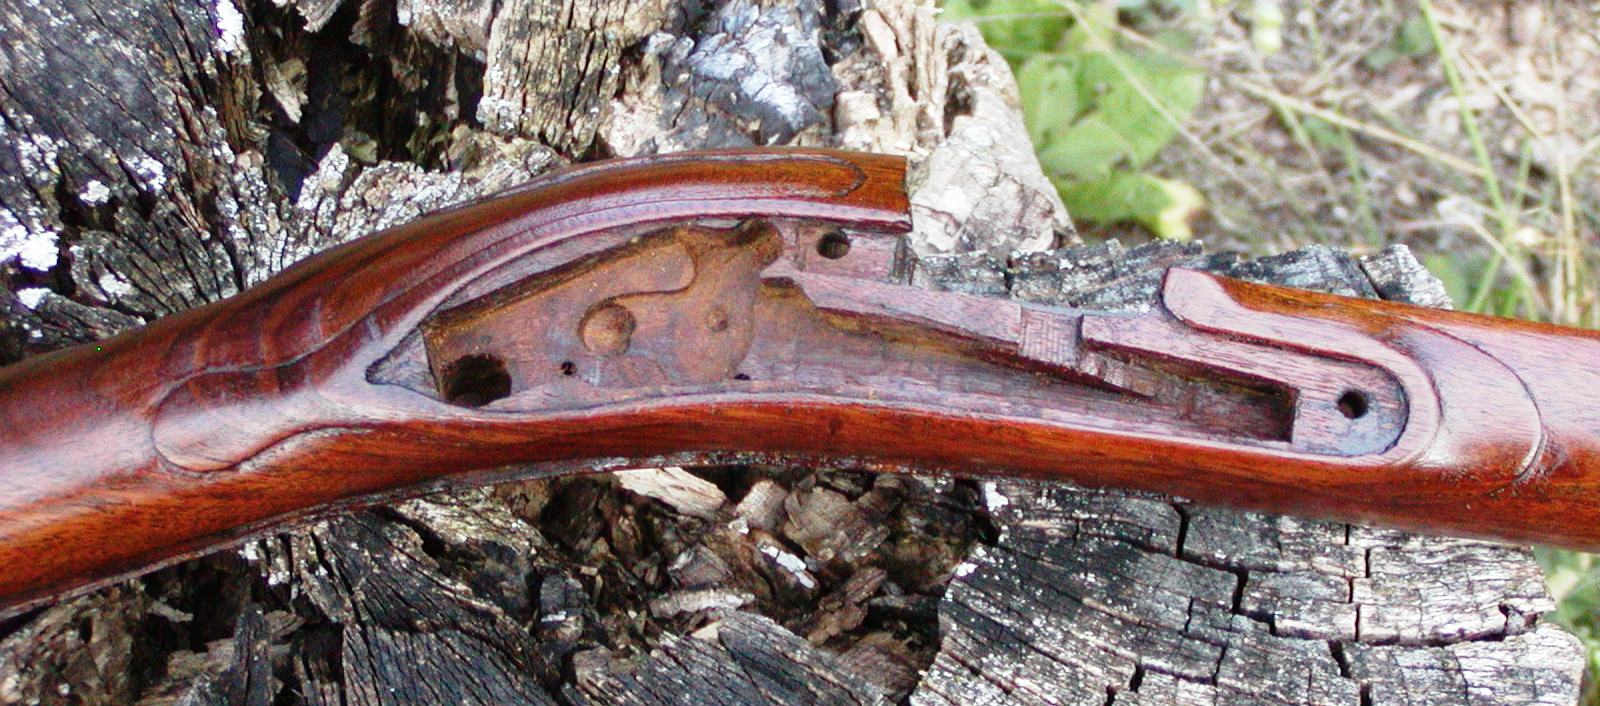
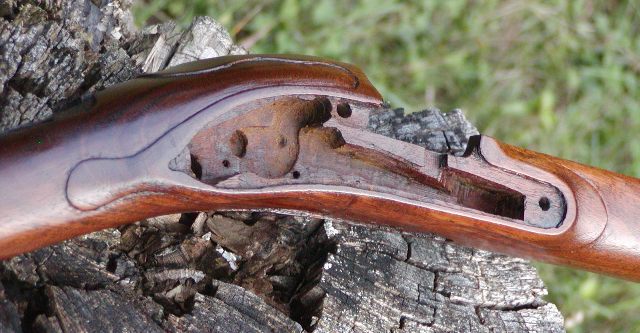
Oh, I've never been able to work the trigger on a repro Brown Bess to get it down much below 4 pounds trigger pull weight and still have the lock function correctly and not have the sear nose occasionally catch on the half cock notch. Now I could not change the position of the trigger pin in the stock to get a little less trigger pull weight. Is that how you got the trigger pull down to about 3 pounds, Dave?

Gus
 
Thanks for looking and commenting folks,
When I began inletting the lock, I used photos from Eric Goldstein and Stuart Mowbray's book on Brown Besses and my notes taken during restoration of some originals. I inlet the lock exactly like the photos in Goldstein's book and the lock, built from TRS parts, dropped right in with a little scraping to clear the mainspring. So removing the lock on this Bess will show how they were originally inlet. The photos below show the mortice.
GQAwwbR.jpg

LFLKanT.jpg

L0noif2.jpg

gzY2pvu.jpg


dave

As someone who has worked a lot on flint and percussion original and repro locks to do trigger jobs, it is difficult for me to express just how much better the lock inlet Dave did here compared to most repro muskets. Just like the originals, there are all kinds of wood surfaces that hold the lock plate were it is supposed to rest.

If you go back up to Dave's first post and look at the 8th photo down from the top, you can see how most repro's have the wood hogged out to a great degree under the lock plate. This allows the lock plate to tip with wear and open up space between the lock plate and barrel because the supporting surfaces of wood are so tiny and wear out quickly.

Private Soldiers in the period were expected to take the locks OUT of their musket on a daily basis and wipe the insides down with an oily rag to ensure they would not rust. Without all the support under the lock plate that Dave's and original lock inlets had, the lock would have worn down the supports easily and in maybe only a month, would have seen the lock plate tipping.

The secondary reason for leaving more wood in the inlet, is any wood you didn't have to carve out, kept this area of the stock much more structurally sound.

So the way Dave inlet the lock, will add many years to the life of the musket before repairs have to be made in the lock inlet area.

Gus
 
Hi Gus and thank you for the kind words,
All I can say is I do my homework. With respect to trigger pull keep in mind I built the lock so could incorporate features to reduce trigger pull from the very beginning. The first was to make sure the trigger was shaped and installed optimally. I shaped the trigger bar so the top edge was roughly parallel with the angle of the sear relative to the lock plate. Of course, I pinned it as high as possible and positioned it so the sear hits it about halfway down the trigger bar from the trigger's pivot. However, the really important feature is to make sure the top edge of half cock notch on the tumbler does not stick out further than the full cock notch. I appears the makers of the original locks did not worry much about this because the trigger pulls were set to be heavy. It becomes critical if you try to adjust for a light trigger. I take a caliper and hook one jaw over the tumbler spindle and set the other on the top edge of the full cock notch. Then I rotate it to the lip of the half cock notch. On all of the originals I've examined and almost all of the Pedersoli repros I've worked over, the lip of the half cock notch sticks out further than the caliper jaw. That has to be ground and stoned down to be equal or slightly below the full cock notch lip even if you have to cut the notch deeper to establish a lip to replace one mostly ground away. I also sometimes reduce the height of the full cock notch but always then I have to adjust the half cock as well.
I make sure the sear spring touches the sear at a fairly low angle and so that the end of the spring just about butts against boss for the sear screw. Sometimes the sear spring needs to be weakened by grinding or reshaping but I avoid doing that unless all he other tricks fail to give me the pull I desire. Finally, I grind the trigger bar such that it always maintains a little pressure on the sear. That eliminates trigger rattle at all positions of the flint cock as long as the sear always returns to the same position at rest, half, and full cock. If it doesn't, I shape the notches on the tumbler so that it does. As I know you are aware, you can rarely change one parameter without having to adjust a host of others.

dave
 
Last edited:
Hi Gus and thank you for the kind words,
All I can say is I do my homework. With respect to trigger pull keep in mind I built the lock so could incorporate features to reduce trigger pull from the very beginning. The first was to make sure the trigger was shaped and installed optimally. I shaped the trigger bar so the top edge was roughly parallel with the angle of the sear relative to the lock plate. Of course, I pinned it as high as possible and positioned it so the sear hits it about halfway down the trigger bar from the trigger's pivot. However, the really important feature is to make sure the top edge of half cock notch on the tumbler does not stick out further than the full cock notch. I appears the makers of the original locks did not worry much about this because the trigger pulls were set to be heavy. It becomes critical if you try to adjust for a light trigger. I take a caliper and hook one jaw over the tumbler spindle and set the other on the top edge of the full cock notch. Then I rotate it to the lip of the half cock notch. On all of the originals I've examined and almost all of the Pedersoli repros I've worked over, the lip of the half cock notch sticks out further than the caliper jaw. That has to be ground and stoned down to be equal or slightly below the full cock notch lip even if you have to cut the notch deeper to establish a lip to replace one mostly ground away. I also sometimes reduce the height of the full cock notch but always then I have to adjust the half cock as well.
I make sure the sear spring touches the sear at a fairly low angle and so that the end of the spring just about butts against boss for the sear screw. Sometimes the sear spring needs to be weakened by grinding or reshaping but I avoid doing that unless all he other tricks fail to give me the pull I desire. Finally, I grind the trigger bar such that it always maintains a little pressure on the sear. That eliminates trigger rattle at all positions of the flint cock as long as the sear always returns to the same position at rest, half, and full cock. If it doesn't, I shape the notches on the tumbler so that it does. As I know you are aware, you can rarely change one parameter without having to adjust a host of others.

dave

Actually Dave, Thank you for sharing the pics and info.

One thing I learned when working so many large military percussion and flintlock locks for a better trigger pull, was to "test" the relationship of the half cock to the sear nose before I assembled the lock. In a bare lock plate, I would put the tumbler in place and use just the sear screw and sear in addition. I then placed the sear in the full cock position and just after it dropped off that notch, held the sear in that position. The idea was I would grind/file down the half cock until it would pass the sear nose without touching when the sear was held this way.

I had to resort to doing that as many people didn't keep sufficient pressure on the trigger after the shot was fired, so the half cock wouldn't hit and damage the sear tip as the half cock rotates past it. Actually, those shooters who had a background in Olympic .22 or pellet rifle competition were the worst for doing that, because they were actually taught to "get off the trigger" as soon as it broke and so they wouldn't throw the shot off.

Very much agree that I don't like taking metal off the sear spring to reduce trigger pull weight, though I do round the bottom corner of the spring that contacts the top of the sear.

Gus
 
These are museum pieces! Beautiful work - If I had not already bought a Pedersoli for shooting I would love to have had you build me a long land.
 
I’m getting a custom Brown Bess , either buy one already made (hard to find) or have one made, hopefully by someone really good ( Hi Dave ;) ) that isn’t booked through the Second Coming. I also want a Type C trade gun, a slim waist and the rest of my hair back. Am I being unrealistic ?
 
Back
Top