• This community needs YOUR help today. We rely 100% on Supporting Memberships to fund our efforts. With the ever increasing fees of everything, we need help. We need more Supporting Members, today. Please invest back into this community. I will ship a few decals too in addition to all the account perks you get.


    Sign up here: https://www.muzzleloadingforum.com/account/upgrades
  • Friends, our 2nd Amendment rights are always under attack and the NRA has been a constant for decades in helping fight that fight.

    We have partnered with the NRA to offer you a discount on membership and Muzzleloading Forum gets a small percentage too of each membership, so you are supporting both the NRA and us.

    Use this link to sign up please; https://membership.nra.org/recruiters/join/XR045103

Lee Molds?

Muzzleloading Forum

Help Support Muzzleloading Forum:

This site may earn a commission from merchant affiliate links, including eBay, Amazon, and others.

Ray-Vigo

Yankee
Joined
Jul 5, 2009
Messages
558
Reaction score
145
Location
New England
I have a set of Lee Molds for roundball. I noticed that even when the mold is hot, it still leaves little lines/swirls in the ball. It looks like they match little lines/swirls in the cavity surface. Do these small swirls make a difference in a rifle ball's accuracy, or do they wash out in the spin? Are you guys polishing the cavity surfaces in these molds? If so, with what?
 
Those wrinkles are usually a sign your lead isn't a high enough temp. I heat until I get a little frost and no wrinkles on the cast balls. A lot of frost is an indication of too high a temp.
Kick up yer temp, work a little faster and let us know what happens.
 
On the left, lead too cold, wrinkles,
Center is just right
Right is too hot, frosty(*)
(*)The Frosted look from too hot only happens with alloyed lead.
Pure lead will take a very high heat and still cast properly,


HPIM0545.jpg


I should note that this can happen with Steel molds as well as Aluminum,,
 
I have a Lee .490 mould that has some machine marks. If I look for them, I can find the corresponding marks on my balls.

No effect on the accuracy though. :grin:
 
While on the subject of Lee moulds, do yours come out round? Mine are usually .002-.003 out of round and my .440 comes out .442-.443.
I've about given up on the moulds, sprue opening egg shaped, gap in the mould when closed tight etc.
Sorry guys,
David
 
I sometimes get machine marks from molds. Lee molds work, but they are not top-of-the-line molds. I'd suggest you get a Callahan bag mold, or if you are going to do a large amount of round ball, a Lyman or RCBS mold.

LD
 
The Frosted look from too hot only happens with alloyed lead.

I dispute that statement.
From first hand experience I respectfully say you are wrong.
When I had my ml shop in Indiana I would periodically drive into Cincinnati, OH and buy a large quantity of lead at wholesale from the National Lead facility there. I would then drive a route and sell to ml shops in OH and IN. At home I would then sell at retail and use for myself. This was as pure a soft lead as is possible to get. The balls could, and did, frost up with too high of casting temps.
Still, I consider the first signs of frosting as a good indicator of proper casting temps. I have never used a lead thermometer, this method works for me.
 
If the center line (line where the two molds halves mate) looks like the middle ball in Necchi's photo, then it's normal. If the center line has a prominent ridge, then the mold halves aren't closing completely or may be misaligned. If the swirls match the machining marks in the cavity, perfectly normal. Won't affect accuracy and will soon dissappear if you have a bunch of balls in a container (they will rub off). If the swirls look like wrinkles, the lead is too cold (study Necchi's photo).

And Rifleman, I agree with Necchi on the frosted balls. It's been my experience that pure lead will not frost, even when glowing red (and I've tried). The only time I got frosted balls was when I've thrown in wheel weights or old recovered bullets from the range. We may have to agree to disagree. :surrender: Bill
 
I actually got the info about alloyed lead here several years back, an sure enough it's proven at least to me to be true.
And as I got more pure lead the frosted ball went away.
I did get a thermometer to check where I was at and learned like many that with pure lead high temps don't matter, I've had it up too just over 800 with pure and no frost.
Best casting is/was done at 700-750.
I don't use the thermometer anymore, I just run the temp (coleman stove) up till I see the irredesent colors in the pot and back off a bit.

I cast for other than ML's too, and use alloyed lead on purpose, and if I run those casts too hot I see the frost,, :idunno:

So there's something going on,,
 
"I've about given up on the moulds, sprue opening egg shaped, gap in the mould when closed tight etc."

The egg shaped sprue probably won't affect accuracy. However, the inability of the mould to close tightly is a greater concern, but potentially repairable. Something, e.g. Pb, Al flashing or a burr of some kind, possibly even the horizontal steel [roller] bearing is causing the problem, which should be visible under magnification. A jeweler's file (fine cut) and/or a new #11 Xacto knife blade will help in lessening the problem. One last thought: Sometimes there's a slight burr or ding on the vertical locating surfaces on either side of the mold blocks. The file, etc. will smooth it out; i.e., IF the mould casts well enough in the first place to bother to fix.
 
Isn't it the antimony in the alloy that causes the frosting? Metallurgist Dennis Marshall, Jr. wrote several articles about trinary (Pb, Sn, Sb) alloys and frosting for the NRA, Lyman, RCBS, and the Cast Bullet Association.
 
Maven,
I've tried most everything I learned in the 50 some years of casting with moulds to fix these Lee moulds. I have studied each aspect, but the mould blocks seem to be bowed on the one.
The others seem to be the steel pins and grooves are not lined up. I have stoned, filed and modified to get them to be close but still they are offset.
I thank you for the response,
David
 
David, I frequently post on the Cast Boolits site (same user name) and believe me, I've read that complaint many times. Unfortunately, Lee Precision's quality control is sometimes an oxymoron, but they're generally very good about repairing, if not replacing their own mistakes. Btw, I've had a few of their lemons as well, but some of their moulds, e.g., their 6 cav. CF pistol and rifle designs, are outstanding!

Paul
 
I have several of these RB molds and most of them are great. I do have one 54 cal that closes 'funny'. It looks fully closed but when viewed from below, you can see the slight mismatch. I suspect it is in the horizontal key fit. It has become a habit to check this each time that I am ready to pour and the resulting balls are quite good.
 
Allot of times I think it's the handles on the Lee moulds. I have got a few that were finicky. The handles I think were tweaked just enough so they wouldn't come together straight. Usually fixable just by changing your technique. I tip my moulds lightly after closing to jar it enough to close all the way. Another is to close the mould while placed on something flat so it comes together even.
On the frost thing I won't even attempt to argue the point of whether pure lead will or won't. Absolutely pure lead is rare if not impossible to get and the point has been argued to death, probably here but other boards too. Point is really (lightly) frosted bullets or RBs shoot just as good as the unfrosted kind and you can get rid the frost after the fact easy enough it it bothers you. I quit trying to cast without getting the frost a long time ago and my headaches went away.
 
after a couple hundred pours the lees I have work good. Before that they gave me the fits. I had to debur etc I was apprehensive at first but looked close with a field magnifying glass of my kids and sure enough needed to be polished up a bit and viola off it went. I also really like my tanner mold,
 
I find that my lee moulds work better if I smoke them with a match or candle,especially on the small moulds.Sometime I have to smoke them every
100 or so balls if pouring alot. WALT
 
Remember to smoke a Lee mold lightly.

Lee molds work fine but if you are having a problem check this out. It is know a LEE-MENTING

From my friends at CAST BOOLITS:

Lee-Menting a Mold
...well at least for my 6 Lee moulds.

I like Lee molds for their price and light weight...and in general their bullet designs (most are well tested copies from over the years). I have disliked them because they've never dropped bullets to my satisfaction and frequently suffered from poor fill-out. One was so bad I resorted to prying the bullet out of one of the cavities with an awl applied to the bullet base. I checked for burrs, smoked it, cleaned it, used mold release, all I could think of...to no avail. I was ready to throw it, when I discovered the following solution quite by accident. That was three moulds ago. I now apply the following lee-ment to every new mould. It's worked every time. Bullets drop as well as they do from my RCBS and Lyman molds...first time, every time.

In my opinion, Lee moulds suffer from three main flaws...bad cavity finishing, poor venting, and bad handle to block fit. Higher end moulds don't...but the extra finishing and quality control adds to cost. So...expect to spend a little time to improve the Lee mould

Those of you who've given up on Lee moulds, I recommend you give the following a try. In addition to usual tools, you'll need a carbide tipped scribe and an aerosol graphite mould release (not for the reasons you suspect), and "Comet" cleanser. Several of the "lee-ments have been described by others and I used their experience in developing it. It's an hour well-spent to avoid "Lee frustration"

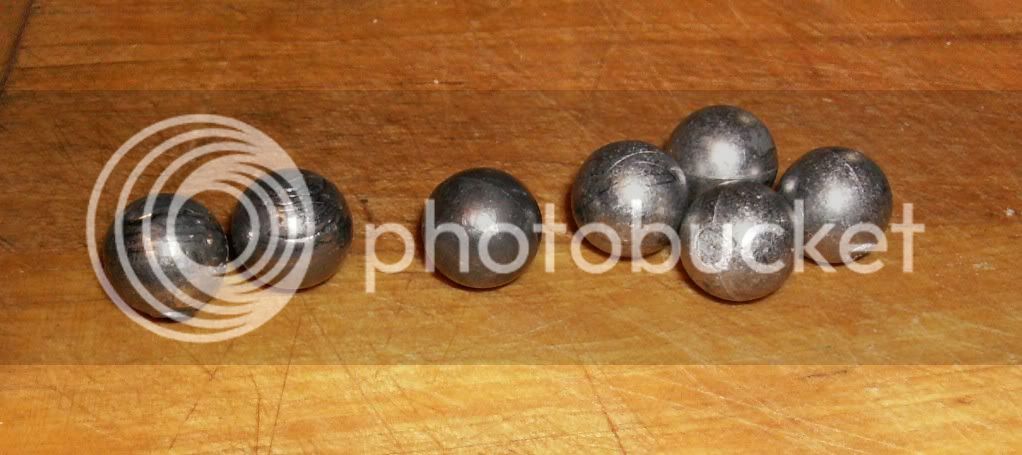
1. Look for any obvious burrs in the mould cavity and remove them with a sharp knife. Clean and lube the mold per instructions, smoke the mould if you wish, and begin casting. If your bullets fill out drop as advertised, consider yourself lucky, you need read no further. If not, cast 4 well filled-out bullets(hopefully the handle bolt pounding trick will free them) and save them (you'll likely need only two, the others are spares). While the mould is hot, carefully loosen the spue plate screw until it falls free under it's own weight. I've found that if I do this cold, it's too loose while hot. It you back it off too much, you need to tap a screw to hold the spue plate screw in place. Carefully (you don't want to drill the mould), place two bullets back in the mould and using about a 3/32 bit, drill a hole about 1/4 inch deep in the bullet base.

2. Clean the mold again. Now spray the entire cavity and mould face with graphite mold release. Let it dry and spray a second coat. The surfaces should be black. Remove the bolt holding the handles together so you can easily get at the mould faces. With a cloth, and "Comet" clean the block faces. The fine venting lines will stand out...filled with graphite. Take the carbide scribe and run it down each vent line, deepening and widening them (not too much but enough to be noticeable) between the mould cavity and the edge of the block. Put the handles back together. Fill-out problem solved.

3. Screw a 1 to 2 inch long screw into the hole in one of the bullets, wet the bullet, and sprinkle some Comet on it. Place it into the bullet cavity and with a drill at slow speed and the mould closed on the bullet, rotate the bullet in the cavity. Continue until the mould fully closes on it. (Comet as a polisher is another board members idea...don't remember who...but thanks...it works). Repeat a second time. Use another bullet for the other cavity, if you have one, and repeat. Now rinse the molds and with a toothbrush clean them. Carefull inspect the mould cavities. Burrs and high spots that were previously unnoticed will be seen easily as bright spots surrounted by black...depressions as black surrounted by white mold metal. With a sharp knife, scrape the burrs off and smooth any sharp depressions that represent an imperfection. Go back and repeat the Comet trick twice more for each cavity, clean and inspect the mould for burrs once more. Most of the graphite will be gone, some will remain but will be highly polished, and will help fill the inperfections...it is an aid...not a hindrance so leave it. You now have a polished and repaired cavity...it will drop bullets with the best of them. I don't need to smoke the mould...my old "impossible mould" now works beautifully...it had several imperfections in one cavity that I couldn't spot without the graphite trick. I found it by accident, In desperation had tried the mold release (don't use it for its advertised purpose...bad release problems lie elsewhere), but discovered its real value while trying the Comet mould polishing trick. Bullet release solved.

4. I use a 6 gallon plastic bucket when casting. I fill it with water and place a cloth with a four inch slip in it for water-quench bullets. For air cooled, I fill it with rags as a cushion. However, I lay a flat piece of wood (1X4) across the back half of the bucket. Most Lee moulds have bad handle alignment...especially the double cavities. They frequently don't meet squarely when opening or closing. This wears the block face as the two rub together ...eventually wearing off the vent lines. If you lay the rear of the mould blocks on the flat board when opening them, they will open squarely...same for closing. This saves the mould and aids in bullet release. Handle alignment solved.

Sorry about the long post...however, thought it might be of use to those of you who've given up on a Lee mold. If you're not satisfied with the performance of your Lee, I suggest you give it a try. I've had 100% success to date...it works!
Posted by MTWeatherMan

I use the same process with lapping compounds with some of my iron molds to resolve release problems and mild rust issues. This process can do wonders to restore an otherwise useless mould to better than new condition with round cavities.

You can imbed grit on the body bands of your lap boolits to get an extra .0005" in the body or imbed grit on the nose of your lap boolits to increase nose size. You have absolute control over this process by selecting the grit size you imbed your lapping boolits with.

I use 600 for light surface rust removal and polishing, 320 grit works well for body and nose size modifications followed by a polish with 600 or 800 grit.

You'll be surprised how long it’ll take to enlarge a boolit cavity .0005" with 320 grit.

Brownell's has polishing compounds as fine as 1200 grit. I'm going to guess that Comet Cleanser is twice that at 2400 grit.

To prevent surface rust store your iron moulds in a Rubbermaid food storage containers with airtight lids or an old GI ammo box and throw some of those silica gel packs (aka descant) that came in the packages of your electronics items.
Posted by Boomer
 

Latest posts

Back
Top