• This community needs YOUR help today. We rely 100% on Supporting Memberships to fund our efforts. With the ever increasing fees of everything, we need help. We need more Supporting Members, today. Please invest back into this community. I will ship a few decals too in addition to all the account perks you get.


    Sign up here: https://www.muzzleloadingforum.com/account/upgrades
  • Friends, our 2nd Amendment rights are always under attack and the NRA has been a constant for decades in helping fight that fight.

    We have partnered with the NRA to offer you a discount on membership and Muzzleloading Forum gets a small percentage too of each membership, so you are supporting both the NRA and us.

    Use this link to sign up please; https://membership.nra.org/recruiters/join/XR045103

Hand Axe

Muzzleloading Forum

Help Support Muzzleloading Forum:

This site may earn a commission from merchant affiliate links, including eBay, Amazon, and others.

Lin Rhea

32 Cal.
Joined
Dec 11, 2016
Messages
35
Reaction score
0
I sometimes get an opportunity to forge a small axe and I thought it might be interesting to see the general stages of forging.

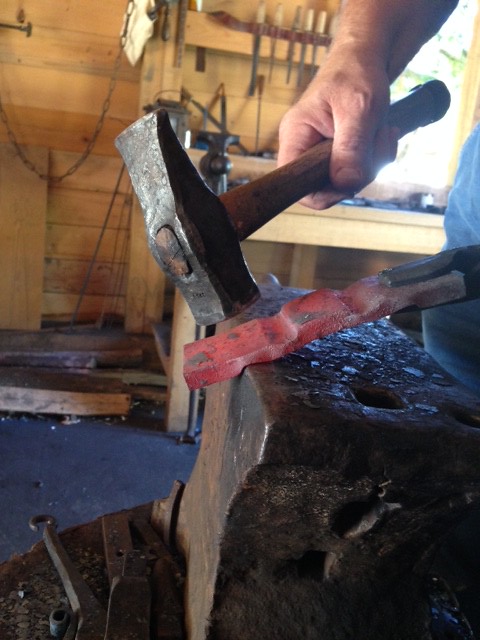
I start with a rectangular piece, the size of which is proportionate to the axe size. For a 1-1/4 lb belt axe, I use a starting bar about 1/2 inch thick X 2 inch wide X 7-1/2 inch long. I use mild steel or wrought iron since this is the body.

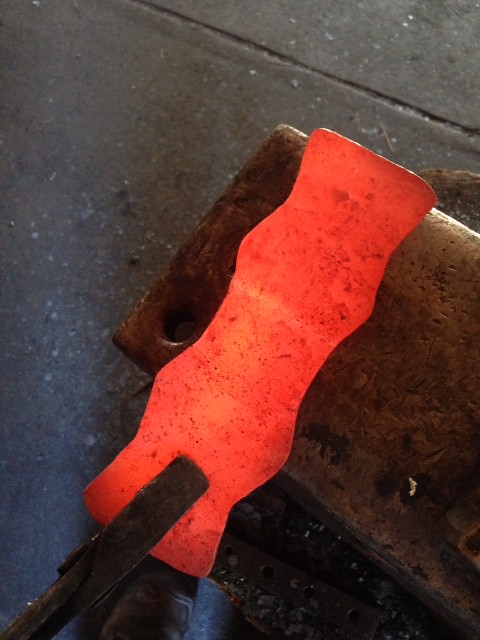
I forge that into the "bowtie".


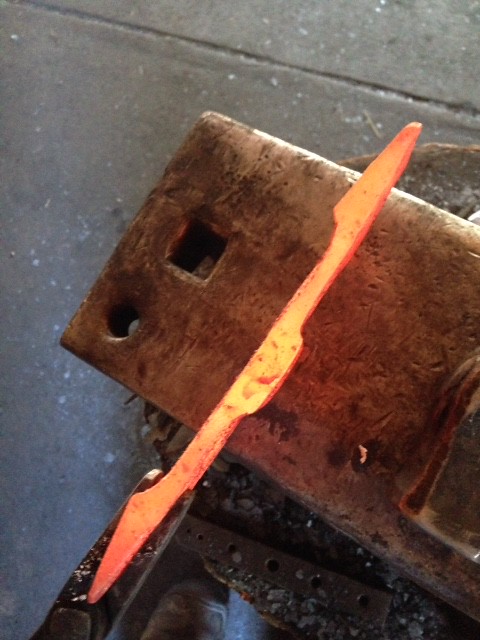
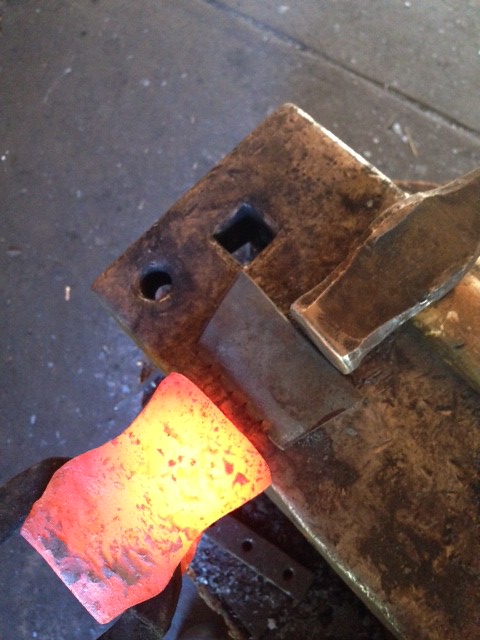
Then it is forged folded.
From this:


To this:


Now the steel bit is forged and sandwiched between the "jaws" and forge welded.
Fitting the bit:


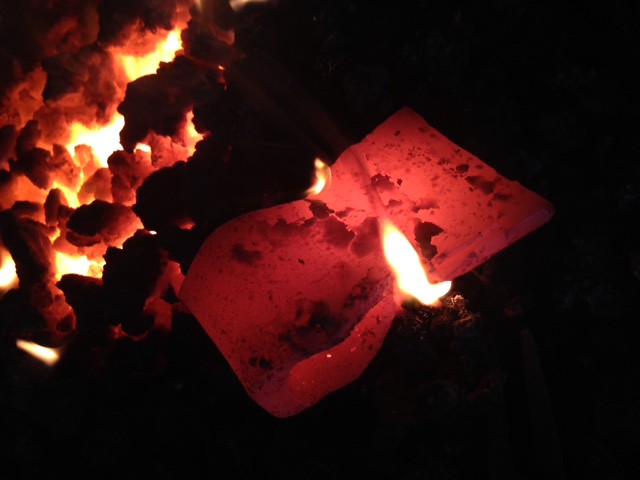
The weld is made and the edge is being spread.


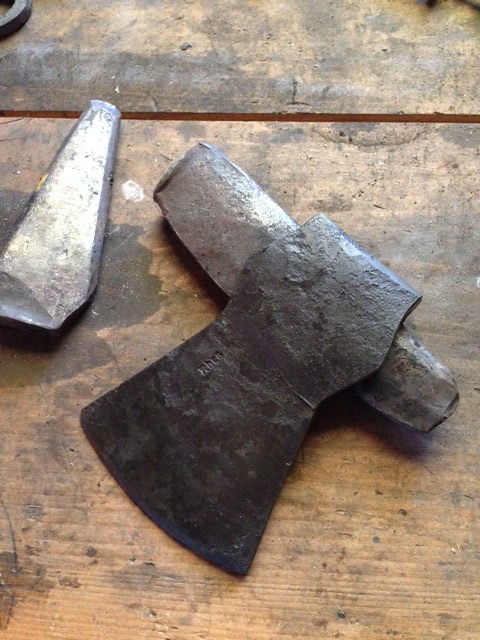
After the blade is spread and tapered a lot of straightening has to be done and a drift has to be inserted to shape the eye and support it during some of the last of the hammering to finish.


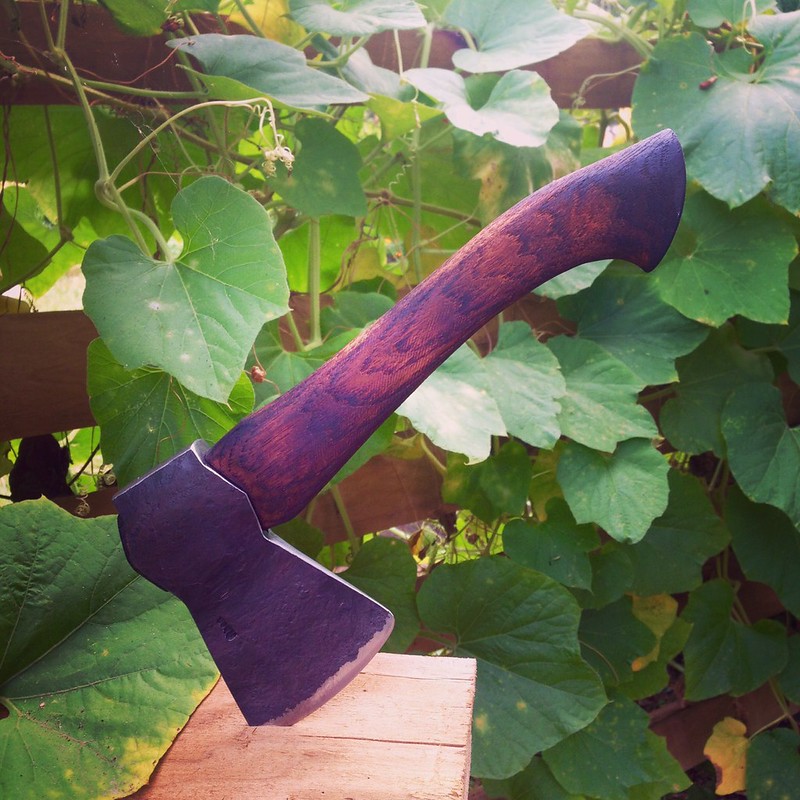
After heat treat, grind, and the handle is carved and fit.


There is a lot of ways to shape these to match different regional styles or periods. Hawks are made in a similar way. Plus there is the slitting and drifting method of forging them from a solid block.
 
Very nice work. :hatsoff: How much time does the forging typically take?
 
Very nice work. How much time does the forging typically take?

The answer depends. On who's forging it and what equipment is used. If I'm forging it by hand, I might take several hours just so I can take a break once and a while and I'm usually talking to folks that are watching. I can usually make one with a forged hammer finish in 8 hours, including the heat treatment. Carving the handle is another matter. A couple more hours on that.

I have a power hammer in my home shop and it don't take as long. This might sound a little cliché but the time is secondary. I take what ever time it takes. I want it to be right. That said, the material requires a high heat and efficient use of the time. "Strike while the iron is hot."
 
How thick are the walls of the eye and how thick is the poll end? I have been experimenting with making axes and thinning out the eye keeps messing me up.
 
How thick are the walls of the eye and how thick is the poll end? I have been experimenting with making axes and thinning out the eye keeps messing me up.

As with a lot of things, you have to plan it in the process. So if I want my eye wall thickness to end up 3/16 thick, I forge it a few thousandths thicker right at first. Notice the second photo above. The stock was 1/2 inch and I reduced it and stretched it with a target thickness and a target length. The length is the long dimension of the drift, fit tight.

As for the poll. Look at the 1st and 3rd photo. Notice the relationship of the eye walls to the poll. I intentionally left the poll a bit wide in the initial forging (photo 1) so I could upset it, thus thickening it, during the repositioning of the eye walls (photo 3). At this point, the eye has the material in place to accommodate the drift's size when it is eventually used. There's no need to drift till after the bit is welded in and all of the heavy heating and spreading has been done.

Don't be afraid to do some cutting or grinding along the way to trim off the ends of the bit just so you can "see" what's what.

Here's a photo of the initial forging of the bar. This must be done at a high heat. Yellow. In the photo, it has cooled off. Look at the diamond cross section of the eye wall. The area in the middle will be cross peened 90 degrees to widen and form the cheeks of the axe. But, it all has to be planned and accounted for in the process.
 
Very nice work. I am interested in the drift. Did you make that as well? How did you come up with the initial shape for the drift? I worked on one for a while and was not satisfied by anything that I made. Hammers and tongs were easy by comparison.

CS
 

Latest posts

Back
Top