• This community needs YOUR help today. We rely 100% on Supporting Memberships to fund our efforts. With the ever increasing fees of everything, we need help. We need more Supporting Members, today. Please invest back into this community. I will ship a few decals too in addition to all the account perks you get.


    Sign up here: https://www.muzzleloadingforum.com/account/upgrades
  • Friends, our 2nd Amendment rights are always under attack and the NRA has been a constant for decades in helping fight that fight.

    We have partnered with the NRA to offer you a discount on membership and Muzzleloading Forum gets a small percentage too of each membership, so you are supporting both the NRA and us.

    Use this link to sign up please; https://membership.nra.org/recruiters/join/XR045103

GPR Kit build modificaions

Muzzleloading Forum

Help Support Muzzleloading Forum:

This site may earn a commission from merchant affiliate links, including eBay, Amazon, and others.
Joined
Apr 9, 2004
Messages
1,039
Reaction score
95
Location
Central Washington
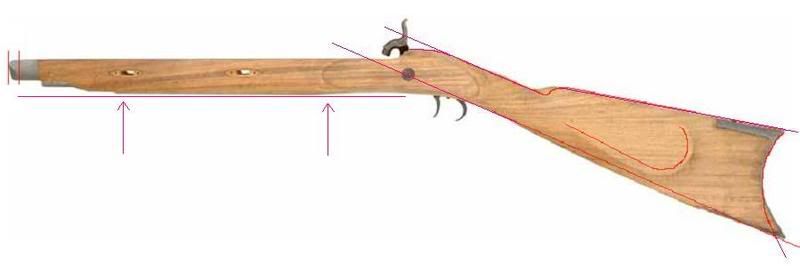
I had the idea to make a GPR Kit look a little more "Hawken like" using only the parts supplied. Started with a stock TOTW photo and added some sketches from ideas some of you suggested.

GPRmods2.jpg


Then shaped the stock - note how blond the wood is.

GPRright.jpg

GPRleft.jpg


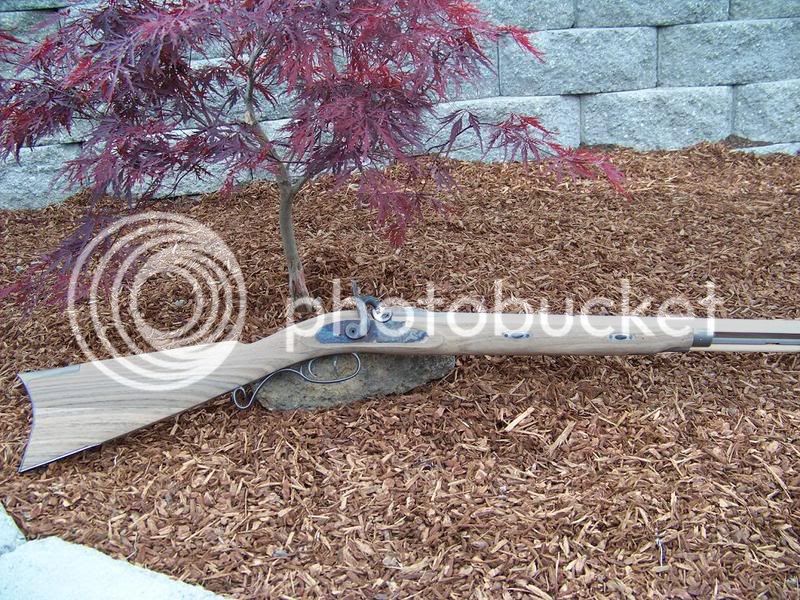
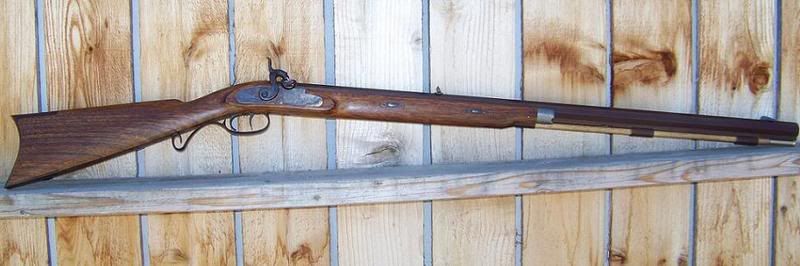
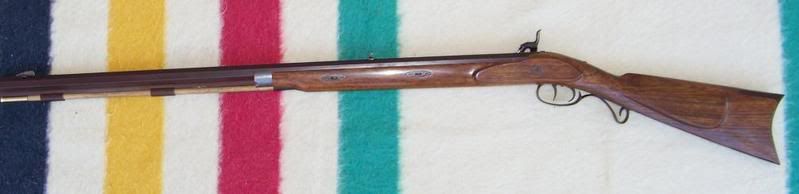
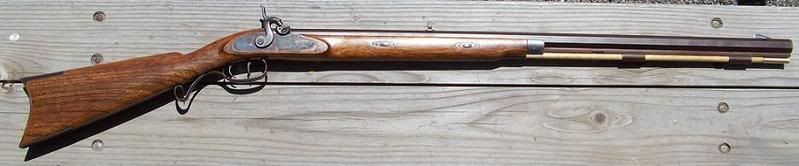
Finished rifle photos - right and left sides

GPR1.jpg

GPR3.jpg


Removed a LOT of wood from the cheek, comb and butstock taking most of the perch belly out.

GPR4.jpg

GPR5.jpg


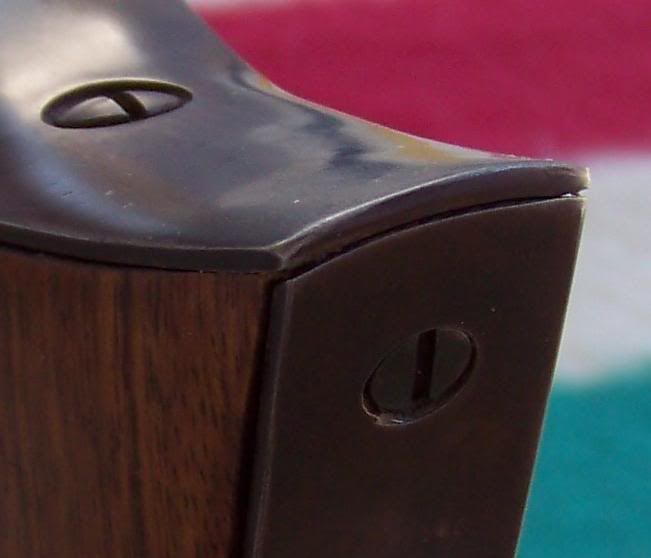
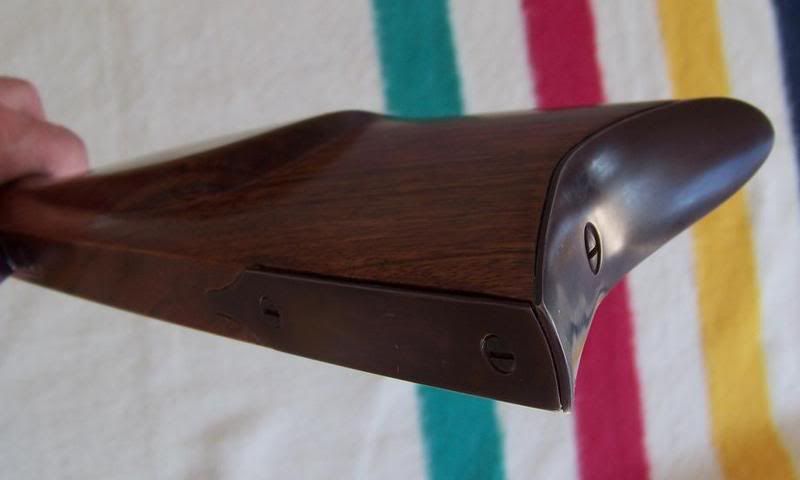
Changed the buttplate angle and shortened it leaving a concave area for the toe plate to be fitted into

GPR6.jpg


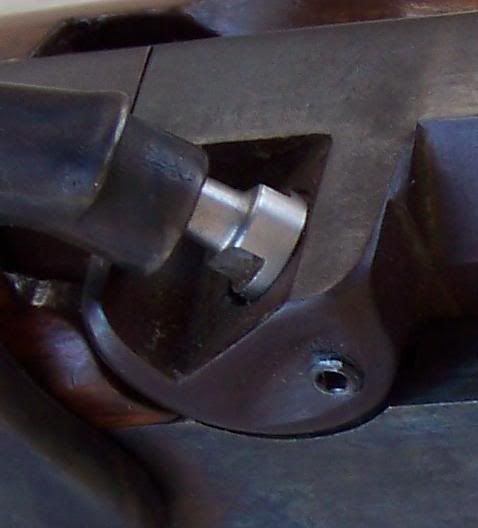
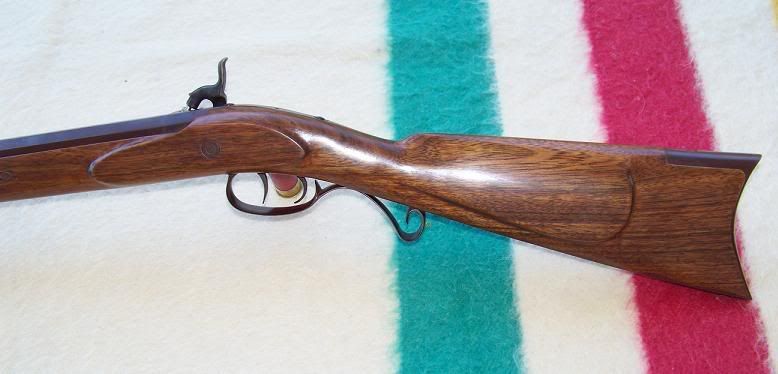
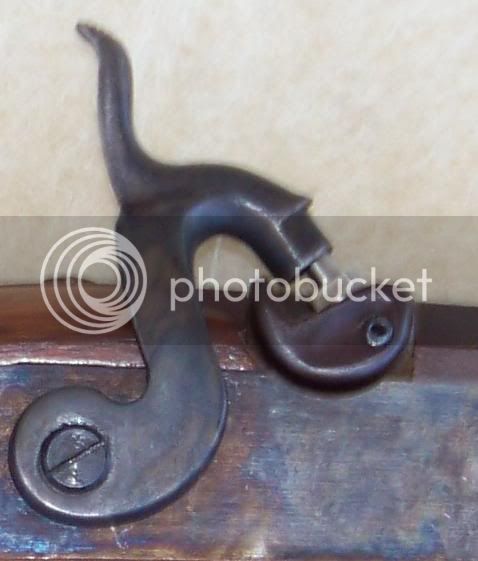
Reshaped the bolster to remove the sharp edges and look more like a snail.

GPR9.jpg


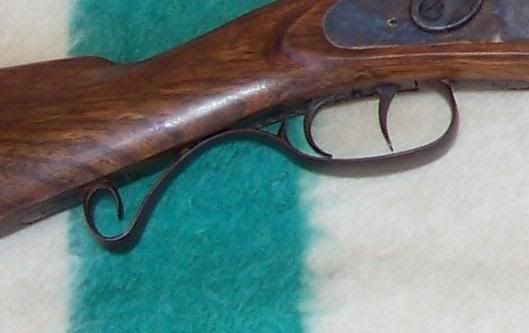
Filed under cuts on the trigger guard where it meets the plates so it doesn't look so much like a casting and straightend the front trigger slightly, reshaping the rear trigger for a bit more curve.

GPR10.jpg


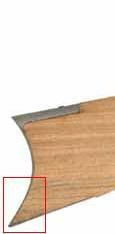
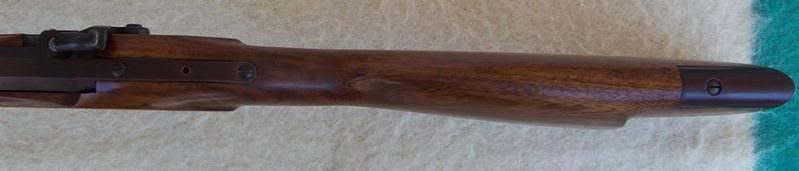
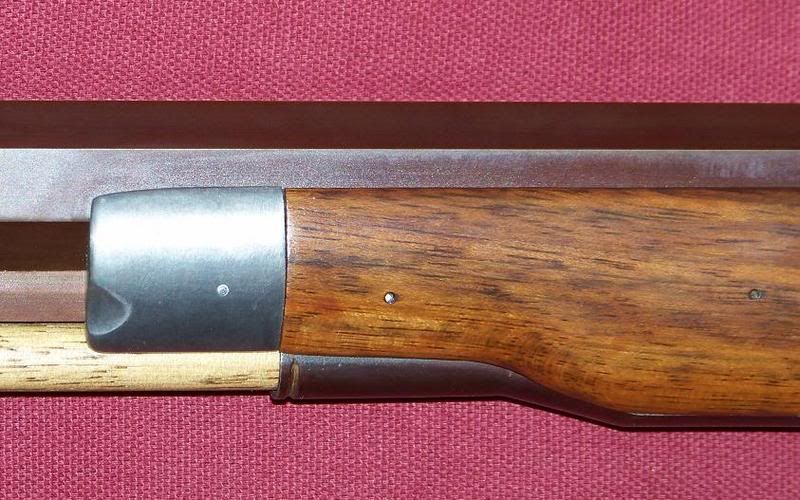
Shortened the nose cap and "pewterized" it with several coats of Naval Jelly, then waxed to keep from tarnishing. Note the rounded knife edge of the stock along the barrel.

GRR7.jpg


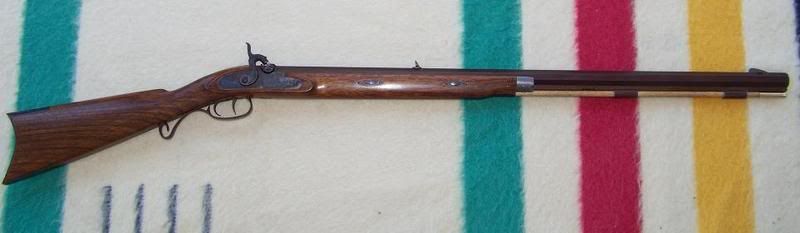
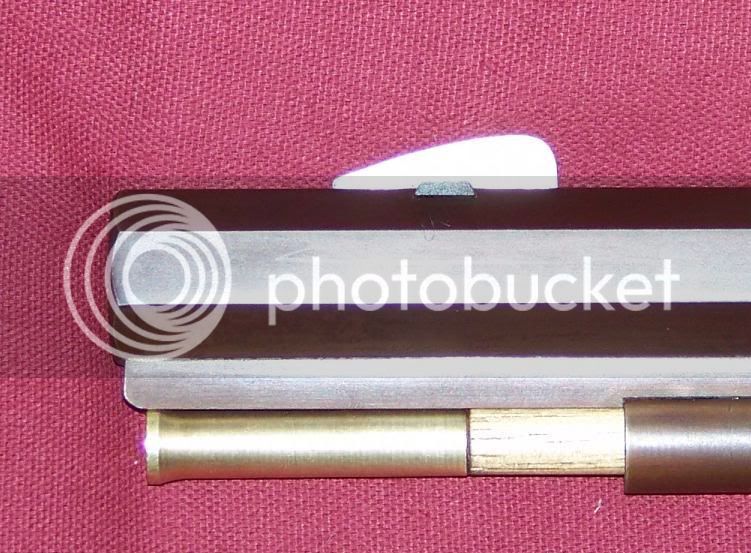
Browned barrel with Laurel Mountain solution and the rest of the Parts with BC Plumb Brown. Reshaped the front sight, cold blued then polished to look like silver.

GPR2.jpg


Finished with Minwax Dark Walnut stain, sanded and then 6 coats of Minwax Polly Shade satin Antique Mahogany and rubbed out with 0000 steel wool
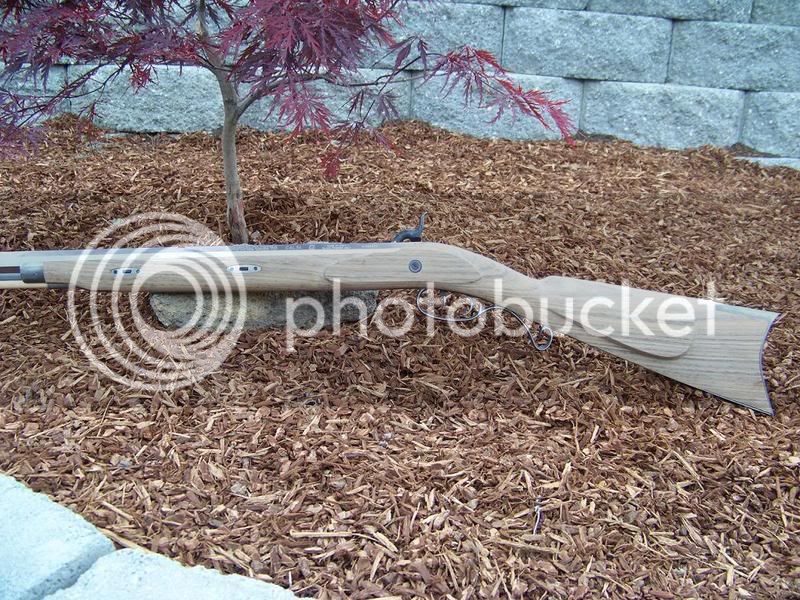
GPR8.jpg
 
Excellent work! Another GPR beauty. Nice touch on the "snail", never would have thought of that but you are right, the original shape is definitely "factory".

:hatsoff:
 
Thanks but I actually prefer your dark oiled finish better :grin: I used Urithane for it's durability since I intend to sell it and some people might not want to maintain the hand rubbed finish. There are a few things I'll do differently on the next one :thumbsup:
 
I agree, the snail adds a new detail I like and wouldn't have thought about. :thumbsup: I like it,.
 
Johnson,

WOW, She's wonderful. The idea of rounding the edges of the snail... Talk about a cut above, as you know I'm now doing a GPR and would also have never thought about that till your post and seeing your work. I am definatly following in your's and goldhunters footsteps :bow: as mine comes along this summer. Thanks so very much for sharing the ideas and photos.

James(Jay)Taylor
 
There's not a lot of change required to improve the look of the GPR snail and you might get even more artistic than I did. I just didn't care for it the way it was and did some Dremel work to relieve the sharp edges. As you can see, the clean out screw and nipple influence how much metal can safely be removed.

snail.jpg
 
that looks wonderful! i just ordered a GPR flinter, and i'm gonna follow your lead on the stock mods. i just hope mine finishes as nice as yours.
 
Johnson,

Thanks for the snail close up. Using a dremel was the only route I could think of to use, when I saw the pics first, yesterday. :hmm:
Thanks again,

Jay
 
Rusty,

Next one will be a different approach using additional parts... perhaps more oval shaped escutcheons, Hawken style patchbox and sights, trigger guard plate extentded, rework the triggers more, lenghthen the tang a bit... stuff like that. I also want to try Laurel Mountain stains for a richer overall color.
 
Your rifle really looks great. You and 41aironca or however his user name is spelled have really inspired me to tear mine down and redo it. odis
 
I think you'll like the LMF stain. I used the LMF Nut Brown on my redone GPR and gave it a reddish tint. gives it a nice warm color, IMO.
 
The wood on my kit is very dark all I used is an oil finish that I purchased from Rockler hardware. Thinning out the stock in certain places seems to make allot of difference. First I have to finish my Lancaster kit from TOW. odis
 
Great tutorial for a guy just starting a GPR kit. Going to incorporate all your mods. One question: When re-forming the buttplate, did you use heat or cold bend?
Great job!
Rangertrace---
 
The Buttplate as with most of the parts are soft and can be bent cold. I worked it in a vice with wood shims to flatten the lower 1/3.

buttplateangle.jpg


Changing the angle means you will be cutting some of it off and since the back is concave, you will need to fit the toe plate to the back of the buttplate.

toeplate.jpg
 

Latest posts

Back
Top