• This community needs YOUR help today. We rely 100% on Supporting Memberships to fund our efforts. With the ever increasing fees of everything, we need help. We need more Supporting Members, today. Please invest back into this community. I will ship a few decals too in addition to all the account perks you get.


    Sign up here: https://www.muzzleloadingforum.com/account/upgrades
  • Friends, our 2nd Amendment rights are always under attack and the NRA has been a constant for decades in helping fight that fight.

    We have partnered with the NRA to offer you a discount on membership and Muzzleloading Forum gets a small percentage too of each membership, so you are supporting both the NRA and us.

    Use this link to sign up please; https://membership.nra.org/recruiters/join/XR045103

too much banana..

Muzzleloading Forum

Help Support Muzzleloading Forum:

This site may earn a commission from merchant affiliate links, including eBay, Amazon, and others.

Roy

70 Cal.
Joined
Dec 12, 2005
Messages
4,763
Reaction score
4
I have never really cared for the amount of drop on these locks.. for most builds that is.. Sometimes change is needed.


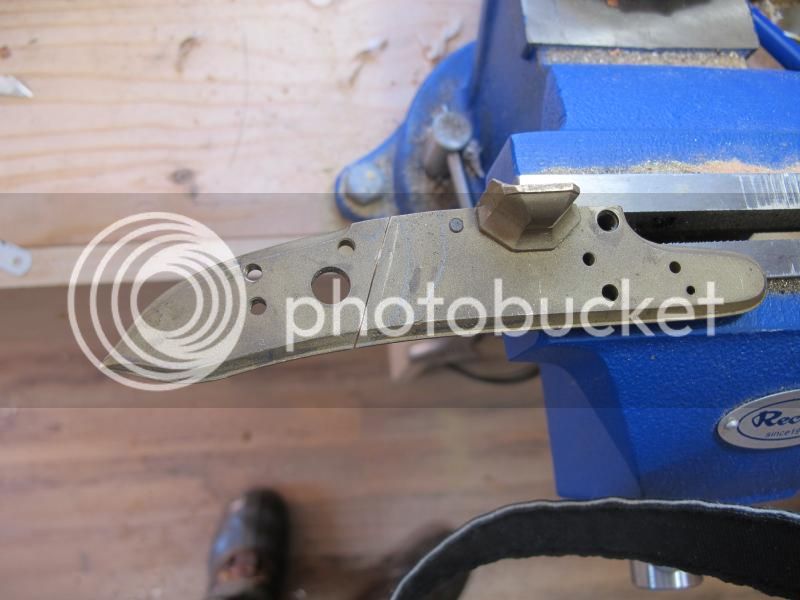
It doesn't look like much, but this raises the tail end up over 1/8".. although many would never know or be able to tell, it will make a big difference on the overall appearance of the rifle when finished..

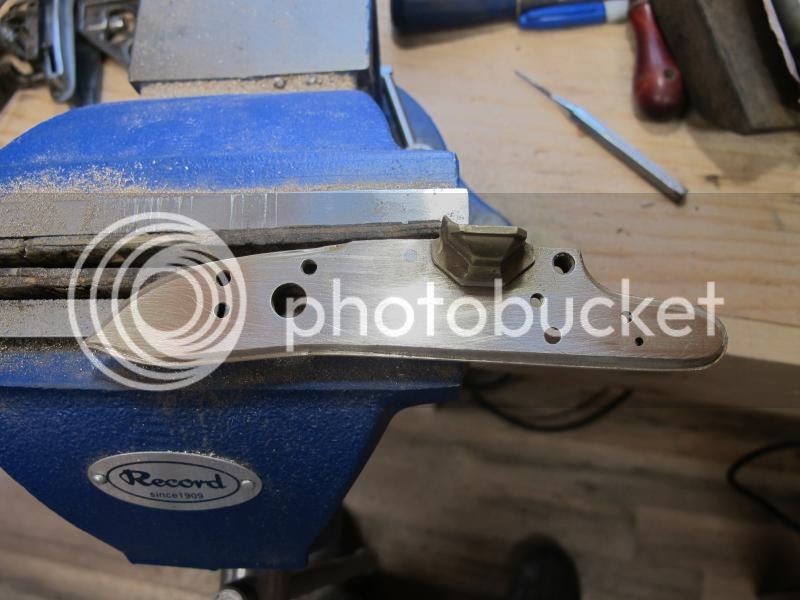
After looking at the pics I altered it a bit more, just need to do a bit more clean up and I will get another picture.
 
Is there something special about this lock you like ? With all the locks out there why not just get one you don't have to alter so much. Can you use the same mainspring and other internals ?
 
Anyone can just replace parts I guess.. Part of its the challenge of taking something stock and altering to fit what I want, doing something that most would not do or try. This is a heck of a lot easier of using TRS castings btw :haha: .
I will have to move the main spring a bit or change it out. :thumbsup:
 
I think we're I to cut it, I would cut it left of the tumbler hole. That way it would only effect the sear & spring, rather than effecting all the other internals.
I have done this on several Siler locks to get the tail down on the wrist a tad. Now I just change the lock to a Chambers Dale Johnson lock instead of modifying the lock plate.

Must that would attempt what you are doing would end up with a non-functioning lock !! You do some nice work.
:thumbsup:

Keith Lisle
 
This seam is where it will be always hidden by the Hammer.. or cock, if there is a discoloration between the plate and the braze. Except at the very bottom of the lock that is..
 
Birddog6 said:
You do some nice work.
:thumbsup:

Keith Lisle
:thumbsup: thanks.. been a while since I have had an area and in the right state of mind to do good work. Been a rough couple of years :haha:
 
Hi Roy,
I agree with you 100%. The reason I did not use Chamber's Early Germanic lock on my latest build was because of that banana shape. It locks you in to a specific architecture at the wrist. Your fix is very nice. I like the resulting lock a lot more.

dave
 
Yes, cut right beside the tumbler hole was hidden by the hammer. And I tig welded mine back together & browned it & you could not see the mod.
Course yours is brass ...... You might do a lil engraving to draw away from the seam.

Keith Lisle
 
Just a touch more of a change to the lock plate to make it flow a bit better...


I will probably do something with the reshaping of the pan, just need to look at some more pictures first..
 
Part of its the challenge of taking something stock and altering to fit what I want,

AND don't forget making it look like it wasn't altered when done. :grin:

I could do that...though nobody would want it after I got it changed, as I don't have the skill level nor the knowledge to get it to look right.... :haha:

LD
 
Roy, your a good bit more brave than I, cutting a lock apart and putting it back together like that ... I was going to complain that the curve was a bit wonky at the joint, but you fixed that in a later post, so I will simply admire your work in the "wow- I can't do that" category... the new lockplate looks wicked cool!
 
MSW said:
Roy, your a good bit more brave than I, cutting a lock apart and putting it back together like that ... I was going to complain that the curve was a bit wonky at the joint, but you fixed that in a later post, so I will simply admire your work in the "wow- I can't do that" category... the new lockplate looks wicked cool!

you should see it now :haha:


Still probably a few more things to do.. but I am fairly happy so far..
 
Yep.. but none of the file work :haha: I was going to silver solder it back together, but couldn't get it hot enough with what I had.
 
Looks great. Even better in person. Liked visiting you in the new shop the other day. Need to drop off the Cuitlahuac rifle for engraving. Maybe this weekend.

Stroh and Briggs. The Fayette School of Builders! :haha:
 
Pffft.. no need to be.. Just don't be afraid to try something different.. :v
 
Back
Top