• This community needs YOUR help today. We rely 100% on Supporting Memberships to fund our efforts. With the ever increasing fees of everything, we need help. We need more Supporting Members, today. Please invest back into this community. I will ship a few decals too in addition to all the account perks you get.


    Sign up here: https://www.muzzleloadingforum.com/account/upgrades
  • Friends, our 2nd Amendment rights are always under attack and the NRA has been a constant for decades in helping fight that fight.

    We have partnered with the NRA to offer you a discount on membership and Muzzleloading Forum gets a small percentage too of each membership, so you are supporting both the NRA and us.

    Use this link to sign up please; https://membership.nra.org/recruiters/join/XR045103

Inletting / fitting

Muzzleloading Forum

Help Support Muzzleloading Forum:

This site may earn a commission from merchant affiliate links, including eBay, Amazon, and others.

Thomas792

32 Cal
Joined
Feb 12, 2021
Messages
20
Reaction score
5
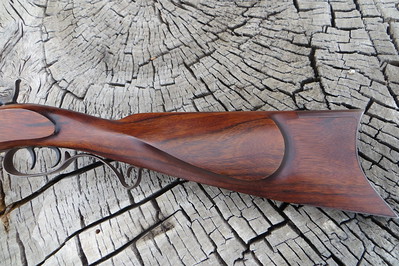
Hawken kit from Cabela’s I bought about 30 years ago.

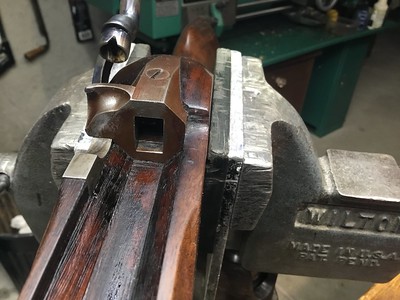
I’m not sure how to finish the wood to the left and right of the breech plug. The wood sticks above the the angled flat on the barrel. Never found a good picture of how they were originally finished. Not looking for exact reproduction, just something not “wrong”.

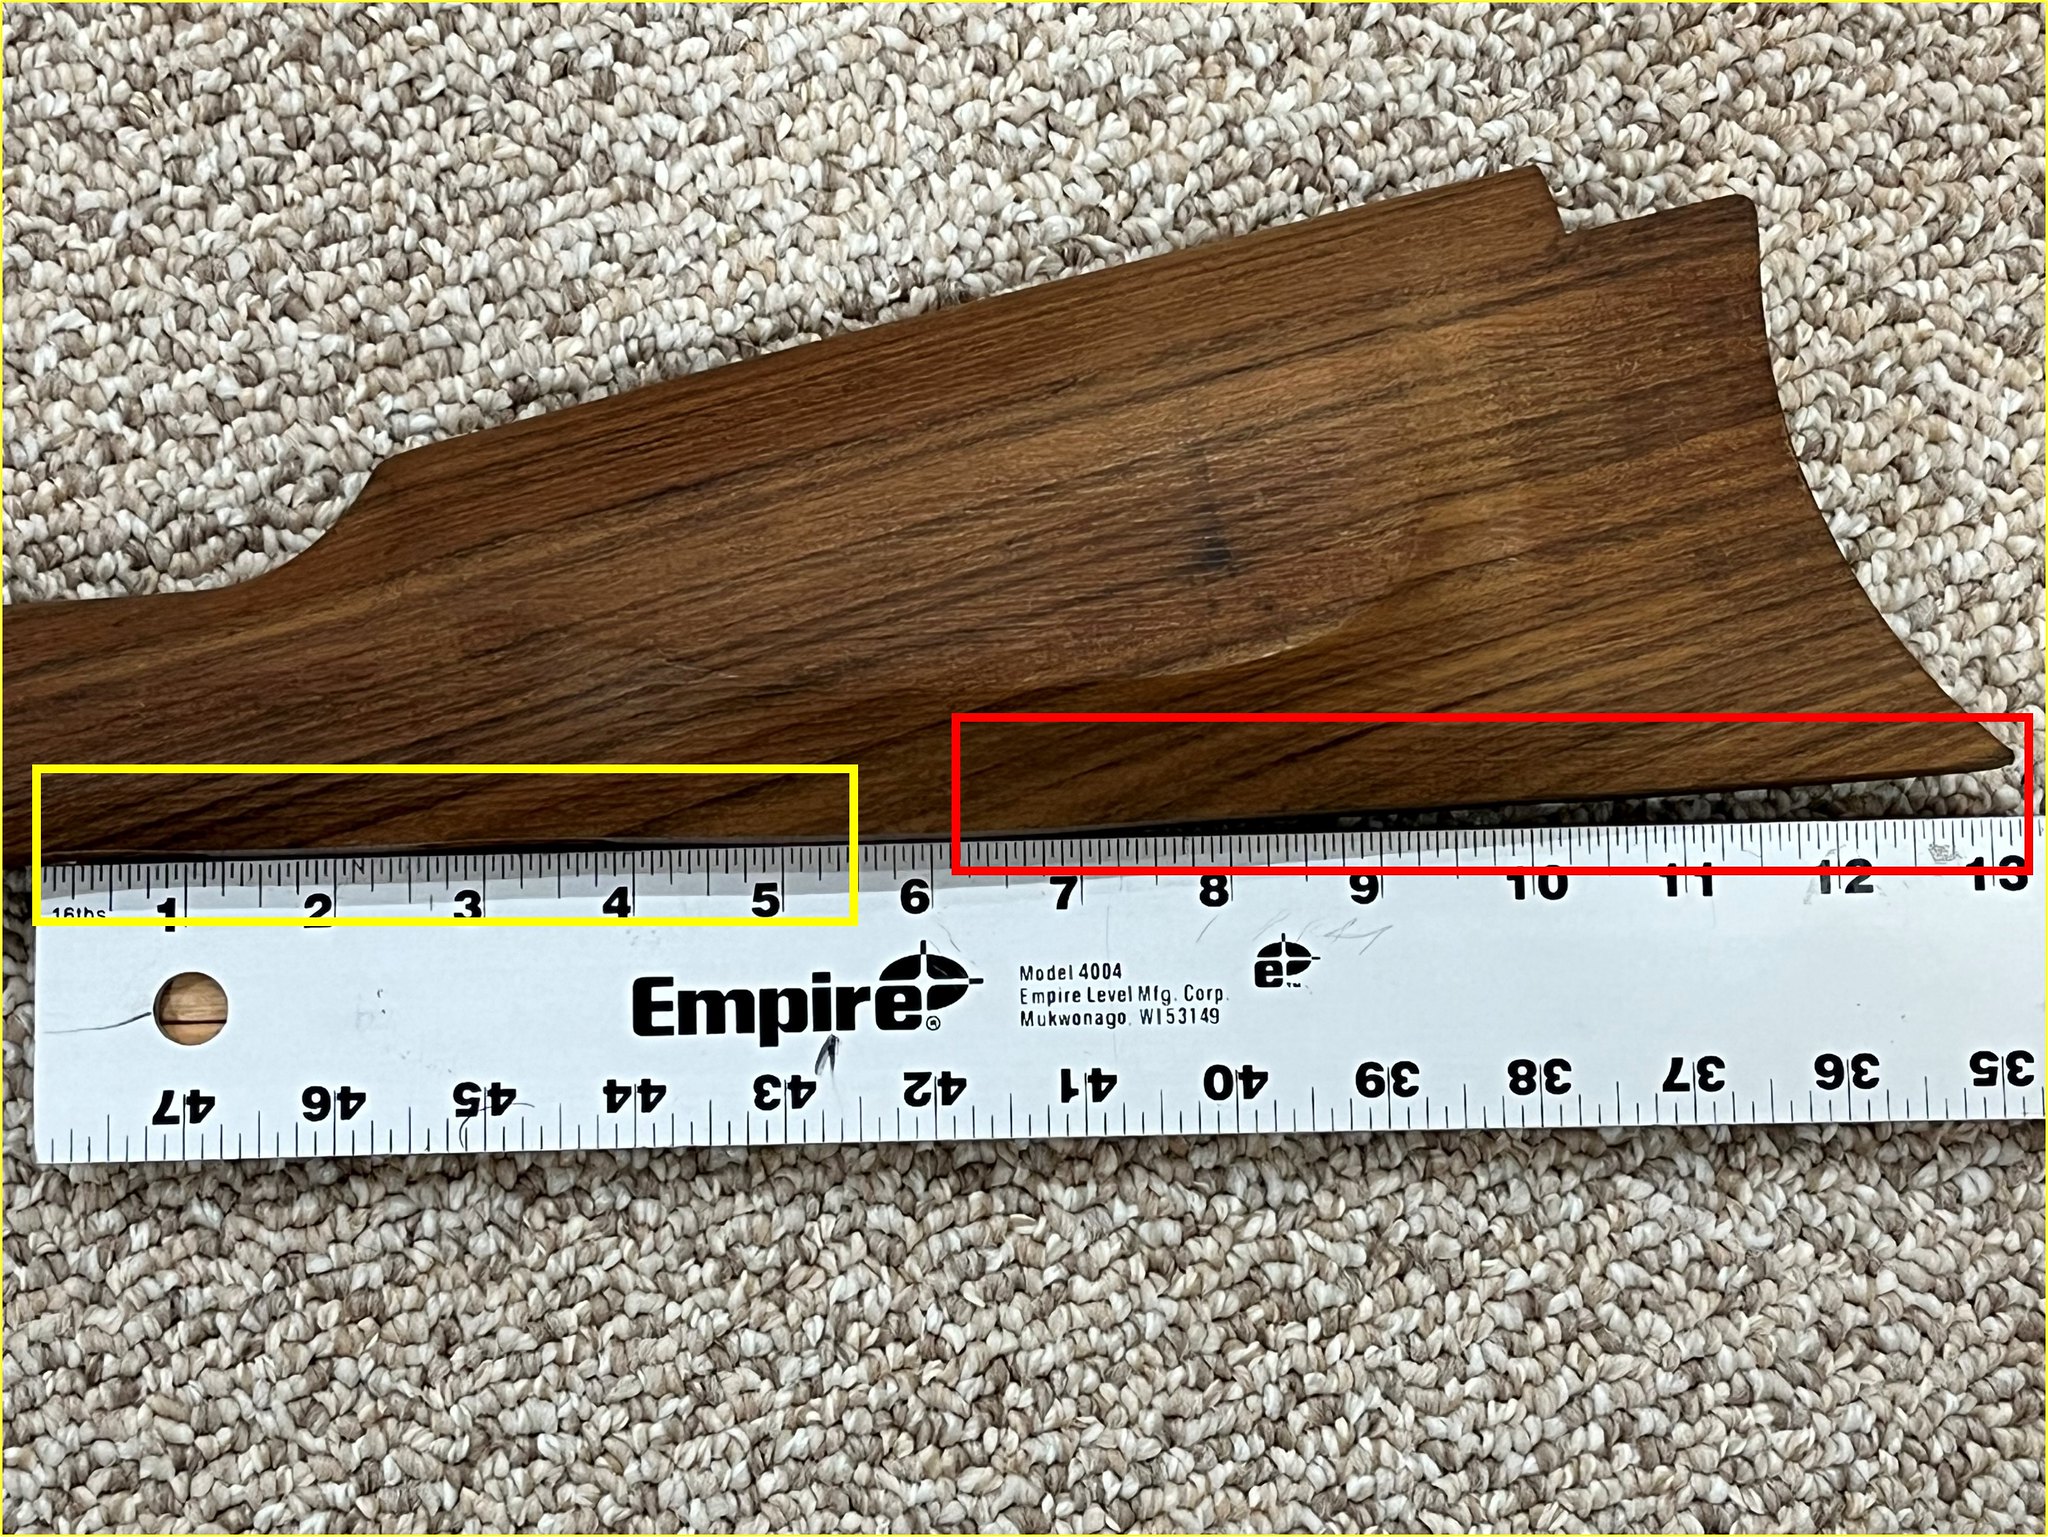
Bottom of the stock looks straight from trigger guard to butt on all the photos I’ve seen. Mine has a hump where the back end of the trigger guard attaches. Would I be wrong to flatten that area and reinlet the back trigger guard attachment? Or is there supposed to be a slight hump?
 
Need to figure out posting pictures. I remember using photo bucket years ago but they got strange with possession and rights.
 
Hopefully this is a picture looking from the muzzle end to the breech of the tang. Far too much wood on either side. I THINK I know what wood to take off but I need advice. I've been told its easier to take off wood than take it on so I'd like to go the easy route.
Tang by Prescott Boisvert, on Flickr
Fixed the photo - it looked odd.
 
Last edited:
Yes straighten the toe line and reshape the cheek piece while you’re at it.
IMG_1292 by Oliver Sudden, on Flickr
If you place a straight edge from the wrist to the toe along the stock, is there a "hump" mid way like mine?
Toe Line by Prescott Boisvert, on Flickr
Stock within the yellow rectangle is mostly straight. It curves away from the ruler in the red box. Not looking to make this a replica, just something a 12 year old wouldn't laugh at. Oh yeah, lots of shaping on the cheek piece.
 
I agree. The inletting was too much on the tang and not enough for the lock. I'm thinking of ways to take up the space - fiberglass bedding like a bolt action? When I attach the barrel to the tang and place it in the stock there is no movement so my concern is the poor fitment of the tang/breech area and how repetitive movement from recoil could cause the stock to crack.

My eye is immediately drawn to the extra wood in the two green squares and how there is an unsightly gap. I searched the internet and this seems to be a common issue. I'd like it to look a little more graceful so my thoughts are to remove wood so it more closely resembles the angled flats on the tang (either side of the top flat). Still searching though until I find something appealing. I've waited this long, a little longer won't hurt.
 
If you place a straight edge from the wrist to the toe along the stock, is there a "hump" mid way like mine?
Toe Line by Prescott Boisvert, on Flickr
Stock within the yellow rectangle is mostly straight. It curves away from the ruler in the red box. Not looking to make this a replica, just something a 12 year old wouldn't laugh at. Oh yeah, lots of shaping on the cheek piece.
Yes there was a lot of hump in the toe line but it can be reduced as in the picture to be less of a fish belly. The tang is beveled at the top edge which makes it look like a huge gape. The best fix would be weld along the bevel then reshape to a square edge. And if you were to do that you can reshape the top edge to a more graceful curve from the barrel to wrist. That kit ripe with opportunity to refine and improve, it’s only a question of how much do you want to do. It’s a pretty fair kit as is and can be grossly improved.
 
Bedding the tang with Accraglass is a good idea, it needs to fit well and have very solid contact with the stock in the recoil direction. A word of caution, get it completely assembled first, make sure everything else is good, THEN bed if you choose to go that way. If you bed early you can create a lot of work straightening out issues that weren't caught before the bedding.
 
Hopefully this is a picture looking from the muzzle end to the breech of the tang. Far too much wood on either side. I THINK I know what wood to take off but I need advice. I've been told its easier to take off wood than take it on so I'd like to go the easy route.
Tang by Prescott Boisvert, on Flickr
Fixed the photo - it looked odd.
Mine is not the Cabela kit but maybe this view will help you with the shaping of yours.
EA421546-BC22-4D7F-AEF8-C363D7232ED3 by Oliver Sudden, on Flickr
 
Due to the fact the lock is already inletted, you may be somewhat stuck on what to do as far as options go. I agree that it looks like the tang / breech looks like it needs to go lower. But where the lock is relative to the barrel / touch hole / percussion ignition system will determine if that's even an option

As far as taking up the gap on either side of the tang goes, I would splice in some wood in to both of the gaps, and then re-inlet it. Hold off on the glass bedding until you're much closer to the end.

Most of the "sand and assemble" kits have a LOT of excess wood on them that needs to come off. While you're at it, you might as well get a good look at both of the lock panels. Odds are about 100% that they are going to be WAY bigger then they should be.

Yes, get rid of the perch belly in the stock. A good tool to use for that is going to be a long-soled rasp, like the 2-handed Japanese rasp. You want to the long sole so you don't create waves in the toe line.

As suggested above, look at lots and lots of pictures. Not just from the macro; "gee I look the looks of that" perspective, but in examining all of the smaller areas, particularly the transition zones. The non "sand and assemble" kit pictures (such as the originals) are going to be the best. From there you can look at your stock to see if you have enough wood to make that possible.
 
Mine is not the Cabela kit but maybe this view will help you with the shaping of yours.
EA421546-BC22-4D7F-AEF8-C363D7232ED3 by Oliver Sudden, on Flickr
Your tang is shaped much differently than mine. I understand the welding but I think that's more than I'm willing to put into this. My tang goes from octagon directly to the long flat tail unlike yours which has the gradual progression from one section to another. I believe the solution to mine is to remove wood in the left and right squares from my picture to blend it into the flat portion the tang butts up against. On the left side (right in the picture) it will retain the "fillet" and on the right side (left in the picture) it will slope down towards the powder drum? that has the nipple in it.
 
Work and kids coming back from college had me busy the past few days. In my picture of the stock looking from muzzle to breech there is a portion about 1.5 inches long that is inletted much more than the rest of the barrel. That is why there is a significant gap all around the tang. Placing the tang in the stock along with the lock then putting the barrel in and finally the wedge, everything is tight with no movement and everything lines up. I would not be able to move it further down or further back to reduce the gap without screwing things up. So I think the position is final and acraglass will be used sparingly to fill in the voids but not enough the show. Is it possible to use sanding dust mixed with wood glue to fill in gaps around the top of the tang or would that look bad? My intent is no stain, just a finish of some sorts for a semi gloss look.

Regarding placement of all the pieces, when I got the kit it did not fit together. The barrel and tang fit together but when the tang was screwed in and the lock was inserted, the barrel would not set all the way in because the cut out in the bottom of the powder drum would not line up with the top of the lock plate. I had to move the lock plate 1/16 of an inch +/- a smidgen to get things to line up. After that was done, I was able to fit the trigger and finally the trigger guard. My last big thing to tackle is the stock shaping.

The wood around the lock on the lock side need so have 1/16 to 3/32 taken off it towards the center of the rifle. Then the non-lock side flat needs to have wood taken off towards the center to bring it to the same thickness (hope that makes sense.) The border around the lock ranges from about 3/16 to 3/8 inch and I think something a little smaller and certainly uniform would look a lot better. The transition would be made with a rat tail file and progress to 3/8 inch dowel wrapped in sand paper to give it a fillet edge. The same dimensions would be applied to the non-lock side. This would allow me to create a more rounded wrist area from the top to the sides vice what looks like an M14 stock where the receiver locks in (it's just too square and these are works of art as well as firearms.)

There was a YouTuber who I believe had a name of RayBilly or something like that who ordered parts and or material and cranked out muzzleloaders. One of this series was some 46 or so videos about 30 to 45 minutes each. They had every detail in there and I wish I could watch them again. He got a strike from YouTube and decided to delete all his videos except one telling people what platform he was moving to. Cannot find any information on him now but man were those videos great.
 
Your tang is shaped much differently than mine. I understand the welding but I think that's more than I'm willing to put into this. My tang goes from octagon directly to the long flat tail unlike yours which has the gradual progression from one section to another. I believe the solution to mine is to remove wood in the left and right squares from my picture to blend it into the flat portion the tang butts up against. On the left side (right in the picture) it will retain the "fillet" and on the right side (left in the picture) it will slope down towards the powder drum? that has the nipple in it.
You have a good plan, I wonder if setting the radius from the side plate panel back to reduce that pocket would help?
Using saw dust in that large a gap generally looks shoddy but a thin slice of wood stained and glued can blend rather well.
 
Back
Top