


This post may be helpful to those interested in building a rifle kit which doesn't have all of the inleting done by the manufacturer.
The stock was purchased with the barrel channel cut, the ramrod hole drilled and the general outline machined. It is a Pecatonica River "Transitional Kentucky" (or Christian's Spring) style of the French Indian War era.
The barrel is a Swamped .54 cal. Colerain 37"Marshall style which I mis-machined. To remove the error, 5 inches of the barrel was removed and the muzzle recrowned.
The lock and furniture are for a French fusil Type C.
As things progress I will add to this post.
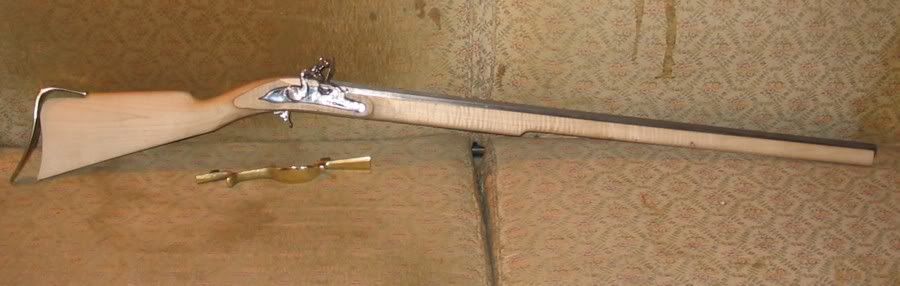
A picture of the gun as it exists today
The first thing to do is to finish inlaying the barrel and tang. The black stuff in the barrel channel is inlaying black. I used this to make sure the barrel was seated on both sides of the breechplug.
After the barrel is installed you will know where to locate the lock. You must completely disassemble the lock. Then locate the lockplate on the wood.
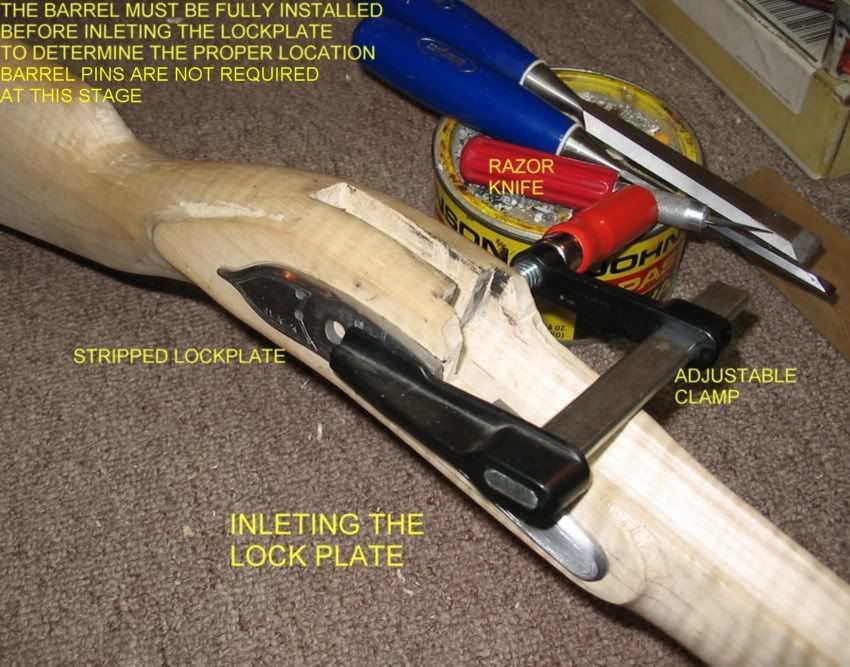
Using a razor knife trace the outside of the lockplate into the wood. Go around the lockplate at least twice. More is better. Then remove the lockplate and carefully chisel the wood to the cut lines.
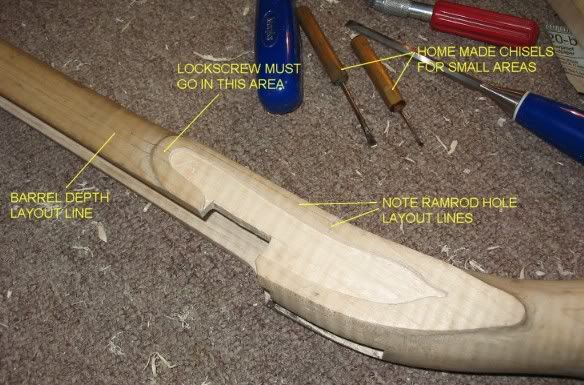
Once the wood is removed, recut the shape deeper and chisel it down.
I use a Dremal with a base to establish the depth and remove most of the wood. I do not use it closer than 1/8 inch from the edges as it can jump sideways and ruin the clean cut edges.
After the plate is inlayed, install the bridle on the lockplate. Use inlaying black or lipstick to transfer its image to the wood so you will know what areas need to be removed.
Do this with each part of the lock.
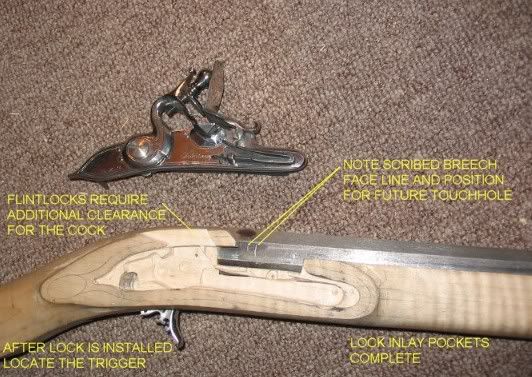
After the reassembled lock is fully inlayed and tested to make sure nothing is hanging up when it is cocked you can locate and inlet the trigger.
With a single trigger like this gun has, I locate the pivot point about 5/8 inch ahead of the locks sear release bar. This produces a moderate trigger release pressure.
The further forward the pivot point is from the lock sear release, the heaver the trigger pull will be. The location is of course up to you, after all, you may want a heaver trigger pull than I do.
After the trigger is inlayed you can lay out the loction of the butt plate. This location is the length of "pull" and should be established by measuring as follows:
With the shooting arm bent to a 90 degree angle and the trigger finger bent like it was firing the gun, measure from the second joint to the upper arm right by the elbow. This is the modern length of pull or distance from the trigger to the installed butt plate where it fits the shoulder.
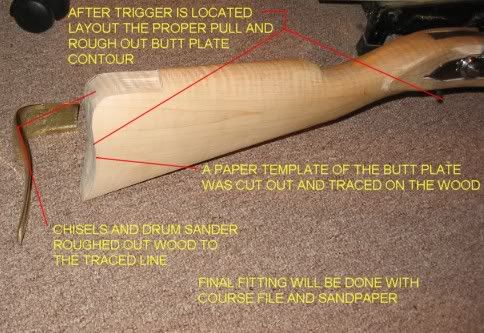
Make a paper template of the butt plate shape and transfer it to both sides of the stock. Cut/sand/grind the wood down to the lines.
Final shaping is done by sanding or fileing with a course double cut file.
By the way, there is nothing that says you can't bend the buttplate some to make it fit better. This is sometimes the easiest way to get a good fit when the casting is warped or just not quite fitting along one side.
The stock was purchased with the barrel channel cut, the ramrod hole drilled and the general outline machined. It is a Pecatonica River "Transitional Kentucky" (or Christian's Spring) style of the French Indian War era.
The barrel is a Swamped .54 cal. Colerain 37"Marshall style which I mis-machined. To remove the error, 5 inches of the barrel was removed and the muzzle recrowned.
The lock and furniture are for a French fusil Type C.
As things progress I will add to this post.
A picture of the gun as it exists today
The first thing to do is to finish inlaying the barrel and tang. The black stuff in the barrel channel is inlaying black. I used this to make sure the barrel was seated on both sides of the breechplug.
After the barrel is installed you will know where to locate the lock. You must completely disassemble the lock. Then locate the lockplate on the wood.
Using a razor knife trace the outside of the lockplate into the wood. Go around the lockplate at least twice. More is better. Then remove the lockplate and carefully chisel the wood to the cut lines.
Once the wood is removed, recut the shape deeper and chisel it down.
I use a Dremal with a base to establish the depth and remove most of the wood. I do not use it closer than 1/8 inch from the edges as it can jump sideways and ruin the clean cut edges.
After the plate is inlayed, install the bridle on the lockplate. Use inlaying black or lipstick to transfer its image to the wood so you will know what areas need to be removed.
Do this with each part of the lock.
After the reassembled lock is fully inlayed and tested to make sure nothing is hanging up when it is cocked you can locate and inlet the trigger.
With a single trigger like this gun has, I locate the pivot point about 5/8 inch ahead of the locks sear release bar. This produces a moderate trigger release pressure.
The further forward the pivot point is from the lock sear release, the heaver the trigger pull will be. The location is of course up to you, after all, you may want a heaver trigger pull than I do.
After the trigger is inlayed you can lay out the loction of the butt plate. This location is the length of "pull" and should be established by measuring as follows:
With the shooting arm bent to a 90 degree angle and the trigger finger bent like it was firing the gun, measure from the second joint to the upper arm right by the elbow. This is the modern length of pull or distance from the trigger to the installed butt plate where it fits the shoulder.
Make a paper template of the butt plate shape and transfer it to both sides of the stock. Cut/sand/grind the wood down to the lines.
Final shaping is done by sanding or fileing with a course double cut file.
By the way, there is nothing that says you can't bend the buttplate some to make it fit better. This is sometimes the easiest way to get a good fit when the casting is warped or just not quite fitting along one side.
