• This community needs YOUR help today. We rely 100% on Supporting Memberships to fund our efforts. With the ever increasing fees of everything, we need help. We need more Supporting Members, today. Please invest back into this community. I will ship a few decals too in addition to all the account perks you get.


    Sign up here: https://www.muzzleloadingforum.com/account/upgrades
  • Friends, our 2nd Amendment rights are always under attack and the NRA has been a constant for decades in helping fight that fight.

    We have partnered with the NRA to offer you a discount on membership and Muzzleloading Forum gets a small percentage too of each membership, so you are supporting both the NRA and us.

    Use this link to sign up please; https://membership.nra.org/recruiters/join/XR045103

Pedersoli Frontier Rebuild Underway

Muzzleloading Forum

Help Support Muzzleloading Forum:

This site may earn a commission from merchant affiliate links, including eBay, Amazon, and others.
Joined
Nov 23, 2010
Messages
5,529
Reaction score
5,618
Location
On the Mississippi in SE Minnesota
My next project is to completely rebuild my old Pedersoli Frontier. This is just going to be a "no pressure" fun rebuild that will hopefully result in a nice looking rifle when done, though not of any particular school. My real goal is to end up with a nice lightweight flintlock for my wife.

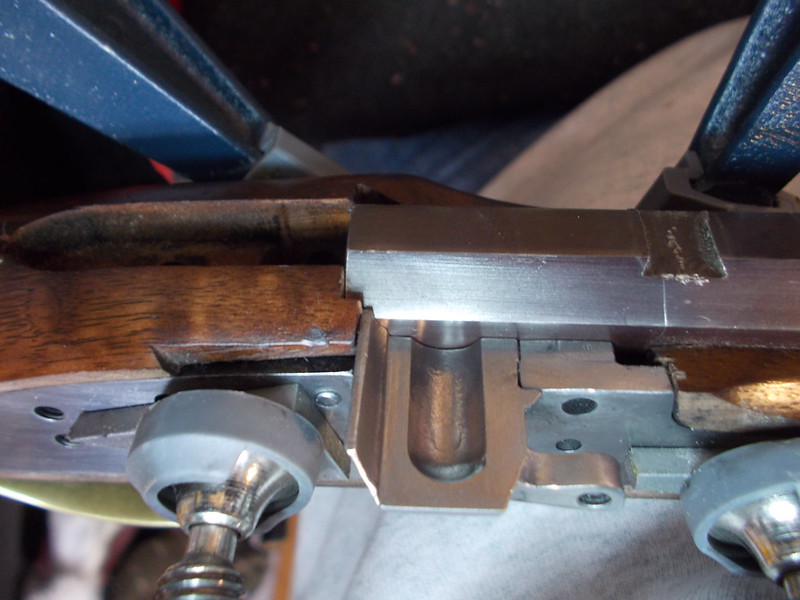
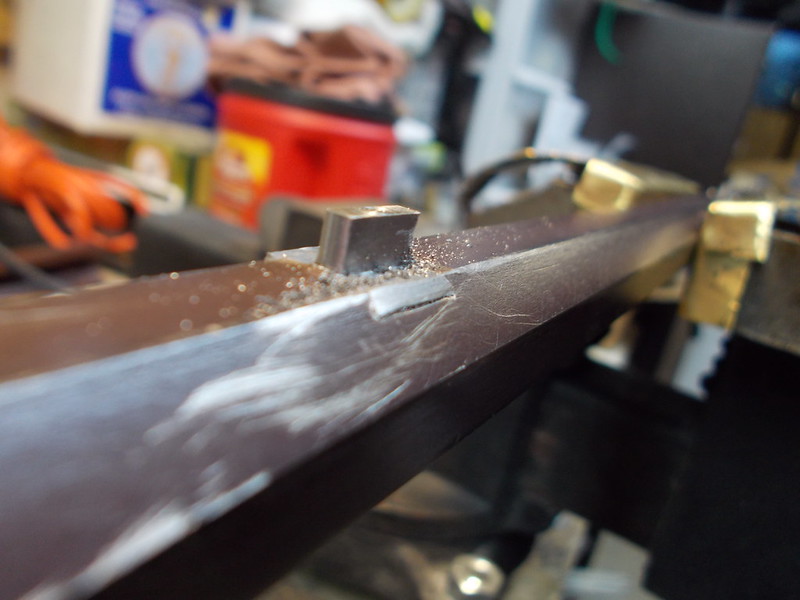
The base I started with was a .36 caliber percussion. I've already had Bobby Hoyt rebore the 13/16" barrel to 45 caliber with 1-56 twist round bottom grooves. He also cut off the patent breech since the drum hole was so low it had exposed threads into the next flat. :shocked2: So that took the 39' barrel down to 38".

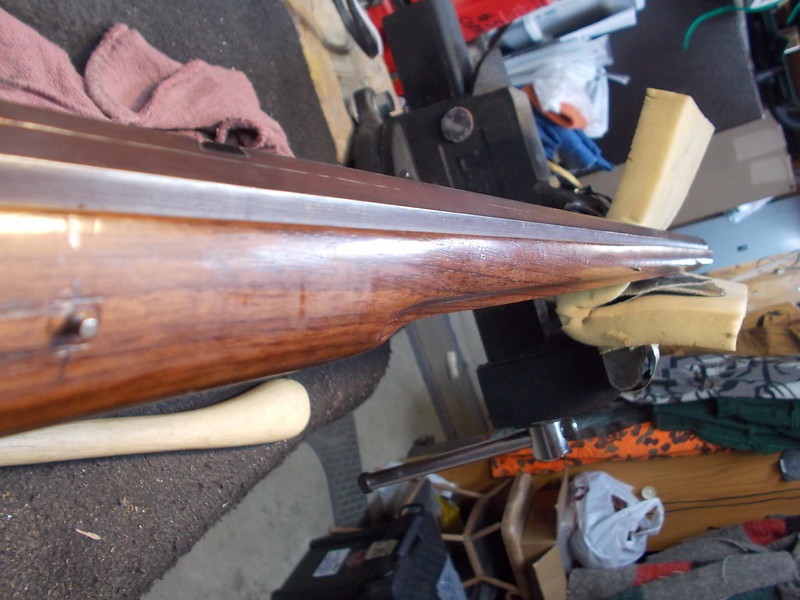
I've started another Flickr Album to document the process. I've already done the breech plug fitting (was supposed to be done when the barrel came back to me but wasn't, so forced me to learn something new :grin: ).

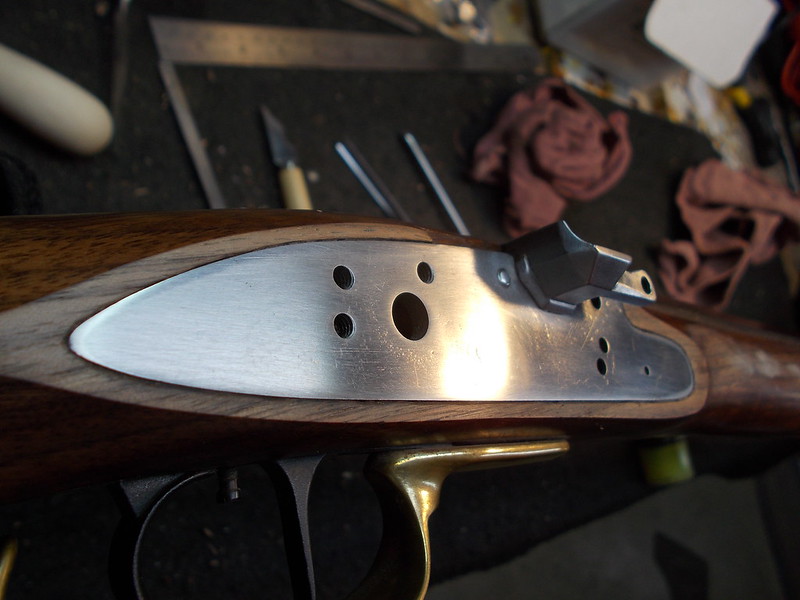
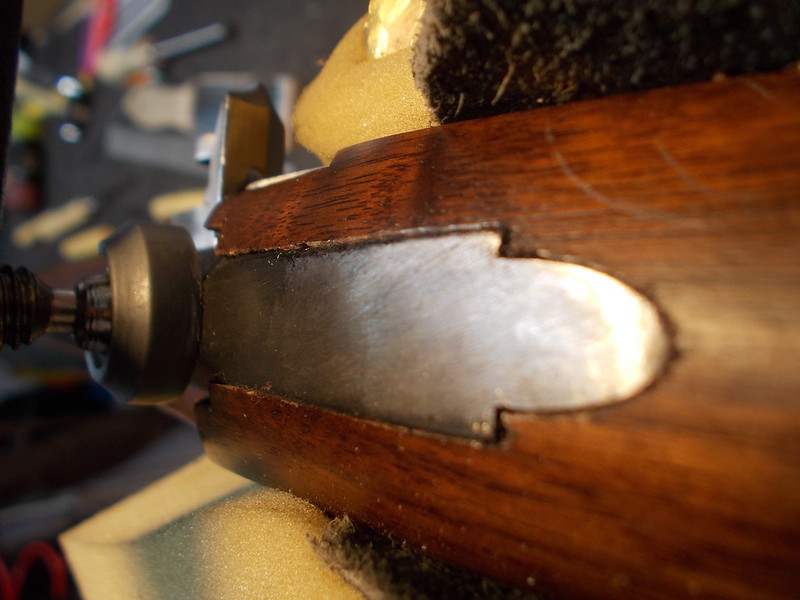
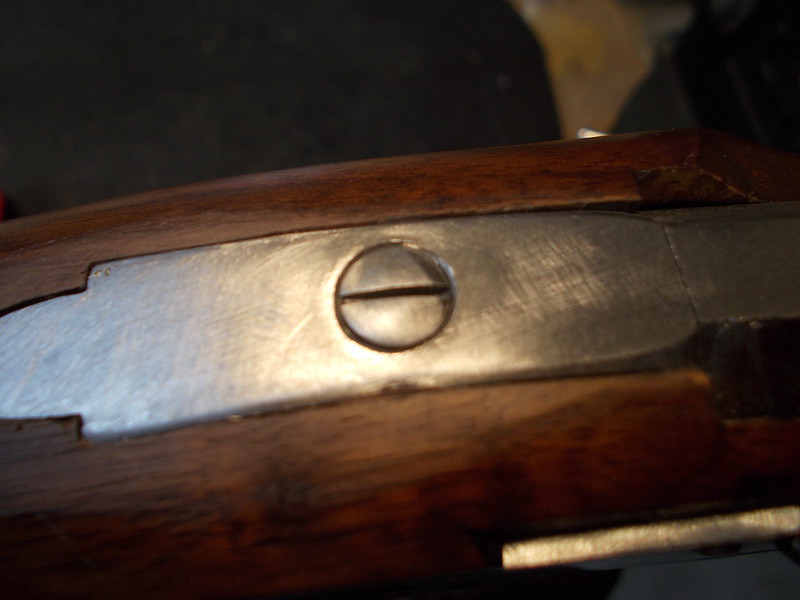
Since this is being converted from percussion to flint and the drop in options from Pedersoli and L&R were "bad" and "worse," I'm using a quality Chambers builders lock. I've started the process of working that to fit the existing mortice.

When done, this will not be recognizable as the old Frontier! If you have an interest, feel free to follow along. As with my Flint Hawken album, if you double click on a picture, it will enlarge the size and allow you to see the build notes I am making under the pic.
https://www.flickr.com/photos/100435142@N08/sets/72157650877821348
 
Last edited by a moderator:
I've had the impulse to dramatically slim the forend on mine. I'll be interested in seeing what you do with the stock config.
 
Definitely sticking around for this! :thumbsup:

I really like the wrist-on-back profile of those guns, but the forend always looked chunky to me.
 
I have three focus areas on the stock.

No 1 is clearly the forestock. One could park a small car on that flat spot on the end of the forestock under the muzzle! :wink: And the angular shape has to go as will the wide edges along the barrel. That fat girl is going to go on a substantial diet! :grin:

No 2 is the convex shape of the cheekpiece. To me, this not only looks "fat" but it holds one's face away from getting on target more quickly. That will get dished out to a convex shape.

No 3 are the lock panels. While these aren't too bad as is, they could use some refining.

There also seems to be excess wood on the belly, but I have to check where the ramrod hole is in relation before I start taking anything off that spot.

This is going to be a really fun project! Glad to have you guys along.
 
Spikebuck said:
This is going to be a really fun project! Glad to have you guys along.

Looking forward to it! Thanks for your willingness to let us follow along.

Any thoughts about adding a muzzle cap to go with with that forend slimming? I like the idea, but I'm kinda stymied on just how to configure it to look "right."
 
I will be adding a brass muzzle cap. In my case it will be a bit easier because I'm cutting about an inch off the stock, which will be most of the horrible flat spot, since my barrel is about an inch shorter now. So I guess you and I will both find out how that works! :grin:

First I need to get my lock inlet and my barrel moved back about 3/32" to line up with the pan correctly. Then I'll move to the forestock. So it shouldn't be too long down the road.
 
If I had one of these guns, I would be doing exactly the same things that you are. Really looking forward to the finished product!
 
I made a search using several verbs with shaping lock to mortise and got not hits, but it's probably there somewhere.

Anyway I was wondering if it was easier to shape a lock plate to fit the mortise, or to shape a mortise to a lock plate. Seems like you could accidently chip off too big a sliver of wood easier than you could file off too much with a bastard file. But then I have only tried (trying) the lock plate to the mortise. Slow and tedious, but don't think I have messed it up too bad yet. :confused:
 
Most builders shape the edges of the lockplate (if they think it needs it. I usually don't) first.

Then, the lockplate is inletted into the wood for form the mortise.

Done correctly, the edge of the lockplate will serve as the steel guide for the pointed end of a Hobby Knife (Exacto knife).

By keeping the lockplate clamped into a fixed position and the hobby knife blade resting against the lockplate, the tip will be able to repeatedly cut straight down into the wood creating a line to line fit with the plate with no gaps whatsoever.
 
Hierarkie said:
Anyway I was wondering if it was easier to shape a lock plate to fit the mortise, or to shape a mortise to a lock plate.

In a "normal" build I would file a bevel all the way around my existing lock plate, then inlet it in the appropriate position per Zonie's described method.

In this case I have to be even more careful because I already have a very thin bottom edge on a completely finished mortise and I'm starting with a Builder's Lock...a square lock plate. So, I made a rubbing of the existing mortice. I've transferred that onto the square plate carefully positioning to be sure the internals and pan line up correctly, and then I'm cutting and filing out the plate to nearly the final shape.

Once I'm very, very close to the existing lock inlet shape, I'll file my bevel and finish the process just like it was a new build...inletting the lock plate into the wood for a perfect fit.

If it weren't for having to deal with an existing finished mortice, it would be just like a normal build and millimeters off on the lock plate shape wouldn't matter that much.

I did most of the plate shaping last night, but haven't posted the pics yet in my Flickr album. will probably post them this weekend.
 
The rebuild is moving along.

The installation of the Chamber's Builder's Lock has gone from this:

031115 Making the Lock Pattern 2 by mdheaser

To This:

032415 Inletting the Lock Plate 9 by mdheaser

032415 Inletting the Lock Plate 13 by mdheaser

The tang went from this:

031015 Filing Down the Rebuilt Tang 1 by mdheaser

To this:

032515 Inletting the Tang 6 by mdheaser

The old mounting system Pedersoli uses of a screw-mounted barrel through the thimbles was discarded and lugs and pins installed:

032615 Installing Barrel Lugs 5 by mdheaser

032615 Installing Barrel Lugs 8 by mdheaser

032615 Reinstalling the Barrel 3 by mdheaser

Those big holes from the prior screw-based system will be filled in.

032615 Reinstalling the Barrel 5 by mdheaser

032615 Reinstalling the Barrel 8 by mdheaser

And the tang bolt installed. I had to reshape the head of the original Pedersoli screw (full story/reason on my Flickr page). I chucked it up in my drill press and "turned" the taper. In the bottom picture it looks like part of the top is missing, but it's just the bluing and a shadow. It's all there!

032715 Installing the Tang Bolt 3 by mdheaser

032715 Installing the Tang Bolt 4 by mdheaser

All of the pictures, each notated with what I am doing, is located in the Flickr Album for this project. To access the notes, simply double click on a picture and the notes are under the enlarged picture.
https://www.flickr.com/photos/100435142@N08/sets/72157650877821348/with/16950371025/

Now that the lock is installed and the barrel in it's new position, I can move on to the forestock shaping. This is going to be a MAJOR change to the look of this rifle. I will be starting by installing a brass nosecap and then significantly thinning the existing forestock. Stay tuned! :grin:
 
Last edited by a moderator:
Spikebuck said:
Now that the lock is installed and the barrel in it's new position, I can move on to the forestock shaping. This is going to be a MAJOR change to the look of this rifle. I will be starting by installing a brass nosecap and then significantly thinning the existing forestock. Stay tuned! :grin:

Really looking forward to that! Thanks for keeping us posted. You're taking on more than I have been planning, but your results may well change my mind on that! :hatsoff:
 
Excellent work Spikebuck, and a very interesting process. Being that I am a hobby builder, I really enjoy looking at pictures of projects such as this. I posted about 80 photos of the step by step process of a southern mountain rifle that I built a couple of years ago, on facebook.
 
Hey this is wonderful! I'm doing the exact thing to a blue ridge rifle which both are particularly the same rifle. I just, (this morning) installed the barrel underlugs so the barrel will be pinned rather than the screw deal they currently use. Made some simple ramrod pipes that will be pinned as well. Replacing my lock, inlaying a simple Tennessee style lock plate along with a few other inlays. Refinishing my stock as well so planning on this being a neat, fun little project too! :thumbsup:
 
WOW! As a production rifle, I've always thought those had really good bones. And for the price have considered doing something similar. But if i did, mine would be far simpler than what you have taken on. Excellent post and even more excellent gallery. Please keep us posted on your progress!.... :hatsoff:
 
Mick C said:
Please keep us posted on your progress!

Thanks, all. The work on this gun will resume in December some time. My work on stuff like this tends to end with summer and fall activities.

Lots of work to do on this one yet. Taking all that "fat" off is my next step, so that will be interesting. This is my first work with walnut, so its a good learning experience compared to curly maple!
 
That walnut is a lot easier to work with than any curly maple. Enjoy that straight grain!!! I've had the pleasure of working with the most curliest grain I've ever had the pleasure of meeting. Its a grade 5 curly maple and its beautiful but man is it a pain.
 
Spikebuck said:
Now that the lock is installed and the barrel in it's new position, I can move on to the forestock shaping. This is going to be a MAJOR change to the look of this rifle. I will be starting by installing a brass nosecap and then significantly thinning the existing forestock. Stay tuned! :grin:

Instead of shaping the stock to mate with an existing cap, cut the stock the way it needs to be and make a cap to fit. You will like the end result better.
 

Latest posts

Back
Top