• This community needs YOUR help today. We rely 100% on Supporting Memberships to fund our efforts. With the ever increasing fees of everything, we need help. We need more Supporting Members, today. Please invest back into this community. I will ship a few decals too in addition to all the account perks you get.


    Sign up here: https://www.muzzleloadingforum.com/account/upgrades
  • Friends, our 2nd Amendment rights are always under attack and the NRA has been a constant for decades in helping fight that fight.

    We have partnered with the NRA to offer you a discount on membership and Muzzleloading Forum gets a small percentage too of each membership, so you are supporting both the NRA and us.

    Use this link to sign up please; https://membership.nra.org/recruiters/join/XR045103

Uberti Walker replica

Muzzleloading Forum

Help Support Muzzleloading Forum:

This site may earn a commission from merchant affiliate links, including eBay, Amazon, and others.
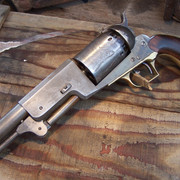
^^^ Yes, the loading lever does start to drop when the loads get near max (above 50 grains). I found a thin O-ring in the garage that works just fine to keep the lever in place, yet is not obtrusive. Pics coming later, as it's getting late tonight.

I will also post pictures of the holster while I was making it, and explain what I was doing.
 
Is the revolver in the picture a Uberti? I don't ever recall that they made an all brass frame on theirs. People are ruining their guns with Clorox to "age" them.. For the re enactor one would not be carrying a "contemporary or period" firearm with that much rusting and pitting. A friend was given some guns damaged in a house fire and successfully used vinegar and water to remove the rust. I did the same on a used, rusted but now salvageable dutch oven. Vinegar comes in more than one strength. I am seeing some 30% strength for making disenfectant solution. Grocery store white or apple cider vinegar is about 5%. The vinegar water solution I cleaned the dutch oven with was 1 part by volume vinegar to one part by volume water. It made a yellowish foam that floated to the top. Ran two solutions and when wiped out did not etch the cast iron. Cast iron is not the same are our modern rifle steels. Or old time wrought iron barrels. Dixie and maybe Cabelas was selling "antique" finished cap and ball revolvers.
 
On second examination the brass framed Spiller and Burr revolver is obviously not a Walker but the all steel second revolver image is. Some of the less expensive Italian cap and ball revolvers sold by Dixie and Cabelas used all brass frames on replicas that were originally steel or iron. .
 
Great holster work it really compliments the pistol. Did you have any trouble with the loading lever falling when you fired it?
With heavier loads, the loading lever did start to drop.

I found that a 5/8" I.D. O-ring will fit over the front sight and stay in place. After loading the gun (and before capping it) pull the O-ring over the loading lever.

Problem solved.
100_6643.JPG
100_6644.JPG
100_6645.JPG
100_6646.JPG
 
Here is how I make a holster. This one will be for my Griswold & Gunnison replica. First, you need a pattern...The walker holster is one of the few holsters I have ever made with a store bought pattern. So, I will show you how to make a pattern.

100_6648.JPG

100_6649.JPG

Fold the paper in half. Carefully roll the gun to the side and trace around it.
100_6650.JPG

Now draw a line 3/4" around the tracing.
100_6651.JPG
 
100_6652.JPG

Cut along the line, then fold the cut-out back on itself.
100_6653.JPG

If you make a mistake and cut off too much paper, just tape on some more!
100_6654.JPG

This holster will have a loop across the bottom, attached with brass rivets (made from brass screws).
 
100_6655.JPG


100_6656.JPG


Test fit...

100_6657.JPG


Temporarily attach the loop with staples, again checking for fit. I like how this one looks. Now it is time to transfer the pattern to a piece of leather.
 
Now, on to the Walker holster that I made last week. I transferred the paper pattern to the leather. To do that, you must case the leather (use a sponge to get it wet, then let it sit for about 10 minutes). USE ONLY VEGETABLE TANNED LEATHER!!! Chrome tanned leather will not work, and will only waste your time and resources. Place the pattern on the cased leather and trace the pattern with a scribe. This will leave a perfect pattern on the leather. Let it dry overnight.
100_6591.JPG


100_6592.JPG
100_6594.JPG
100_6595.JPG


You can see I modified the holster pattern by trimming off most of the skirt, and extending the length 3/4", to my liking.
 
Thanks, BP for the time it took to post all this. Every time I think I would like to make a holster, I decide against it. Then I come across something like you just explained, step by step, I think "maybe".
 
Back
Top