• This community needs YOUR help today. We rely 100% on Supporting Memberships to fund our efforts. With the ever increasing fees of everything, we need help. We need more Supporting Members, today. Please invest back into this community. I will ship a few decals too in addition to all the account perks you get.


    Sign up here: https://www.muzzleloadingforum.com/account/upgrades
  • Friends, our 2nd Amendment rights are always under attack and the NRA has been a constant for decades in helping fight that fight.

    We have partnered with the NRA to offer you a discount on membership and Muzzleloading Forum gets a small percentage too of each membership, so you are supporting both the NRA and us.

    Use this link to sign up please; https://membership.nra.org/recruiters/join/XR045103

New Work: Rifled English Fowler Stocked in Maple

Muzzleloading Forum

Help Support Muzzleloading Forum:

This site may earn a commission from merchant affiliate links, including eBay, Amazon, and others.
Joined
Nov 26, 2005
Messages
5,026
Reaction score
10,016
Hi Folks,
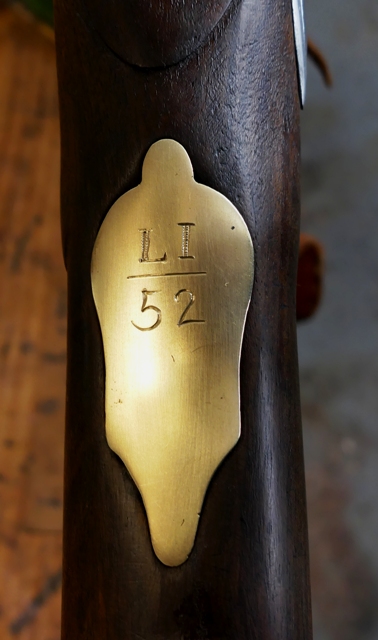
I haven't posted much recently because the Braintree Hill shop is very busy. We recently worked over a bunch of Pedersoli and Miroku Brown Besses, some requiring locks to be rebuilt. The main objective was to engrave regimental markings but quite a few needed serious lock work to function safely and reliably. Anyway, we did the engraving.


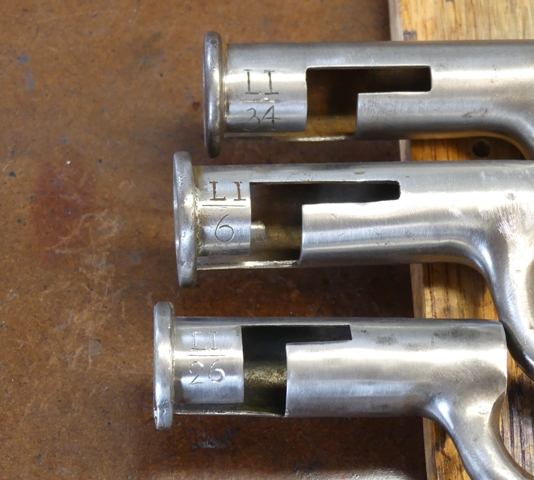
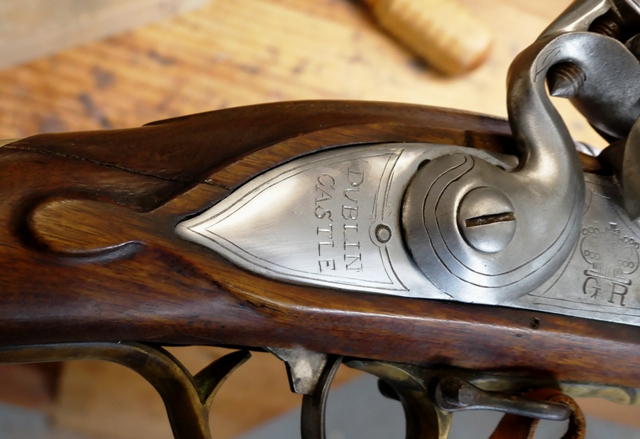
And we fixed the locks and guns in time for "Battle Road".

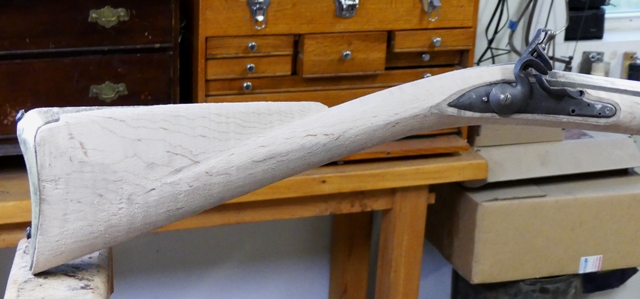
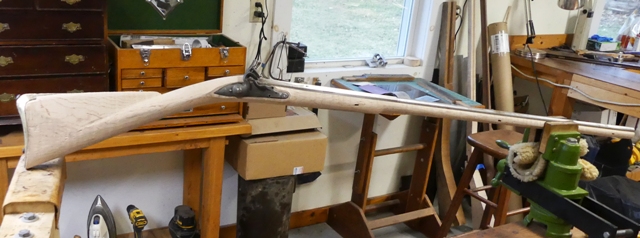
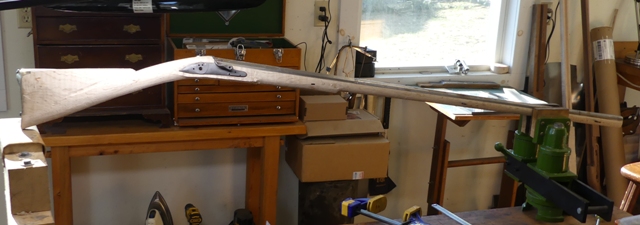
I am making a gun for a friend and client that copies a good quality English fowler but is modified using a maple stock and rifled barrel. It is a fantasy piece unlike most of my work. It will copy the design of this original gun.


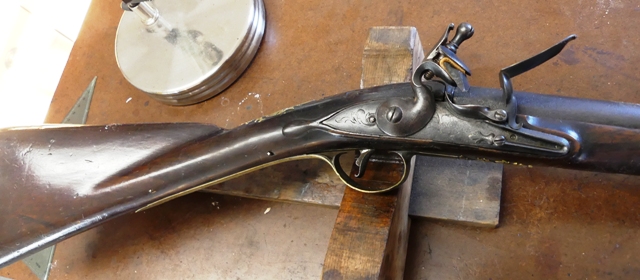
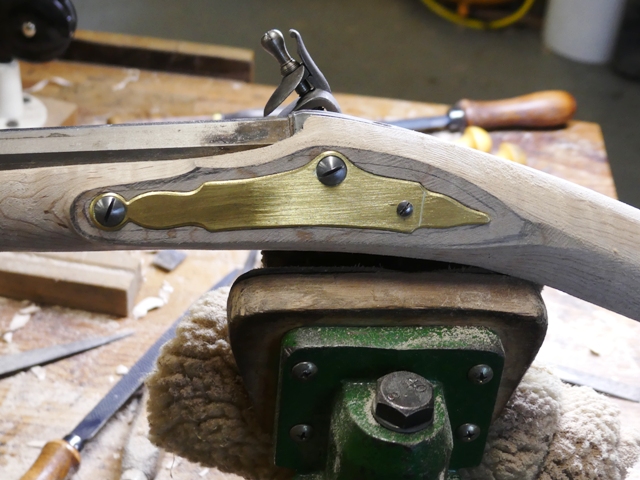
However, it will be a little more robust allowing for a strong full 3/8" diameter ramrod. The owner will hunt elk with it as well as deer. The barrel is octagon to round, 54 caliber, and 42" long by Rice. The lock is a Chamber's Colonial Virginia lock. The brass butt plate is the "Dubbs" longrifle plate sold by TOW but modified to look like ones commonly used on English fowlers. The stock is an exceptionally figured blank of hard maple. It has a humped standing breech and barrel keys.


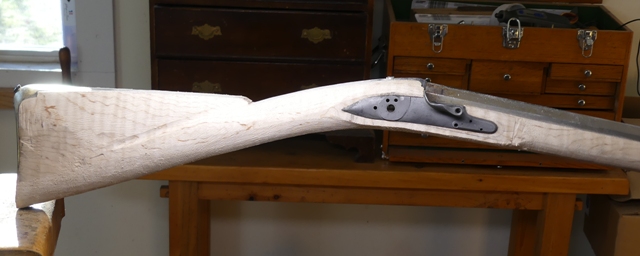
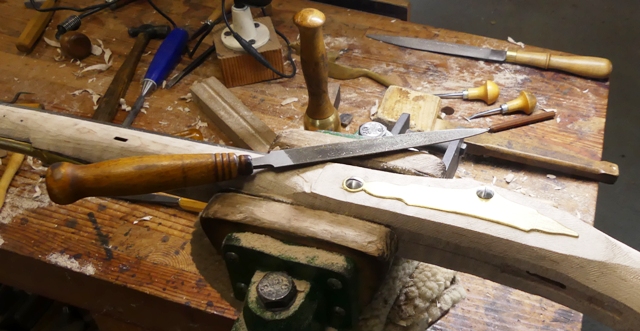
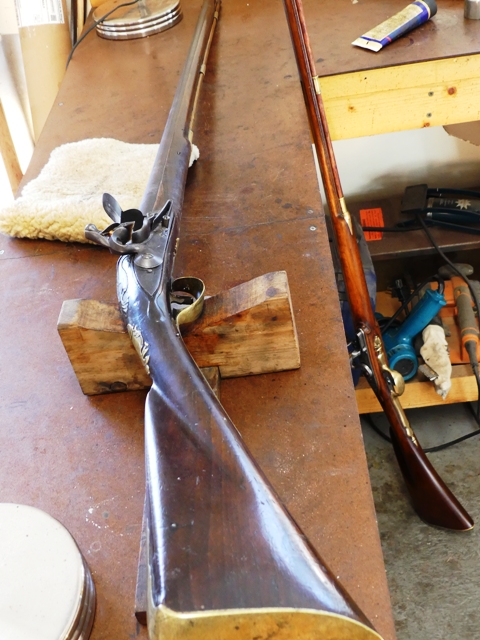
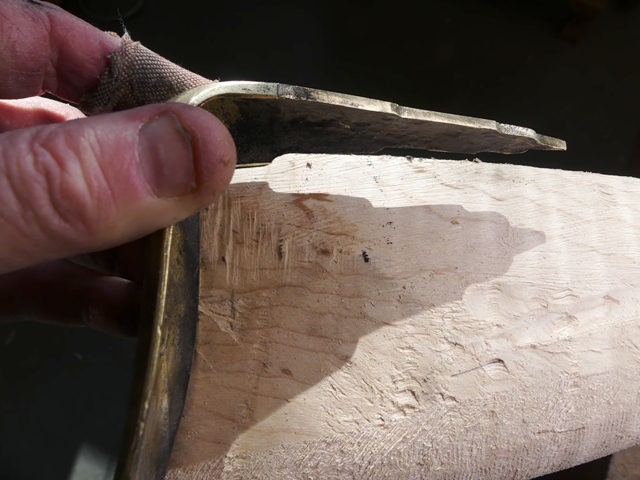
I've posted many times about inletting these kinds of buttplates but will do so again. They are not hard but a little fiddley. I first simply trace the profile of the plate on the stock marking the location of the first shoulder.


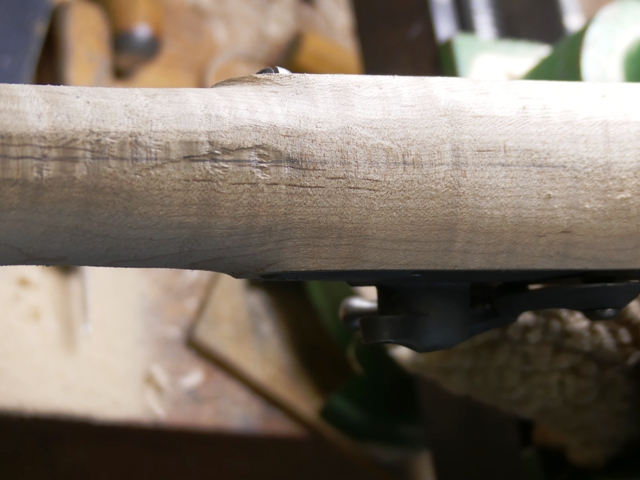
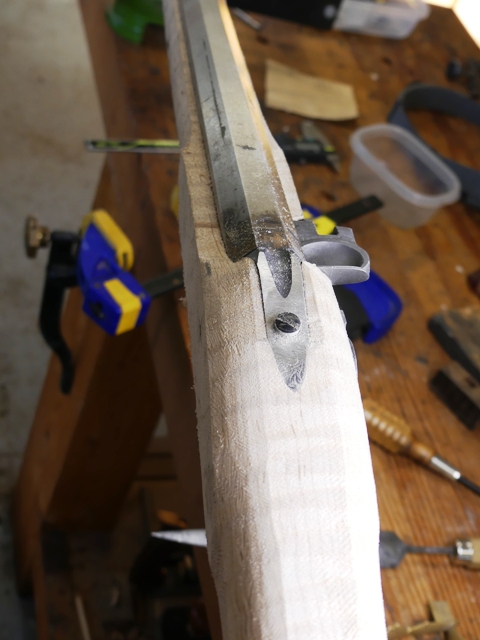
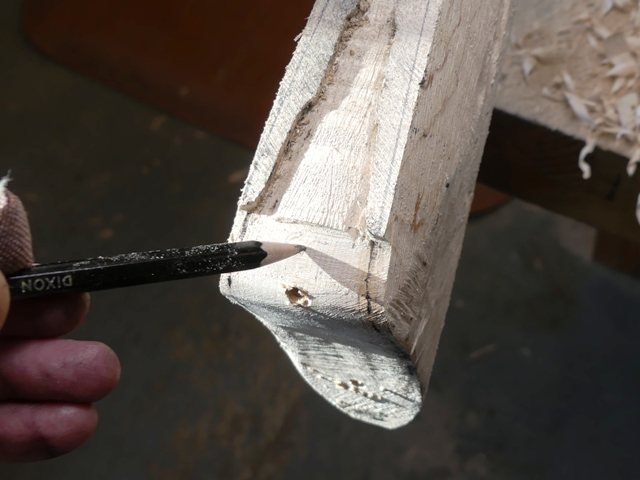
Then I trim the stock on the bandsaw to my tracing and accurately cut off the first shoulder with a Japanese hand saw.


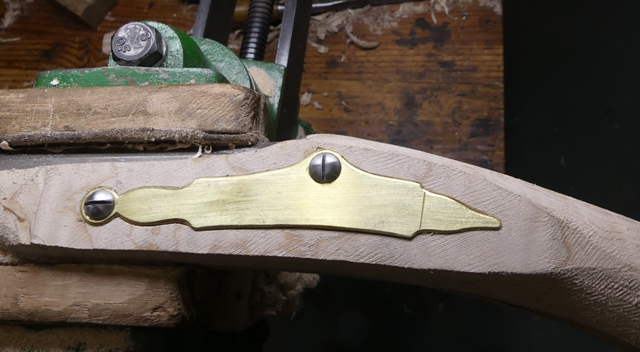
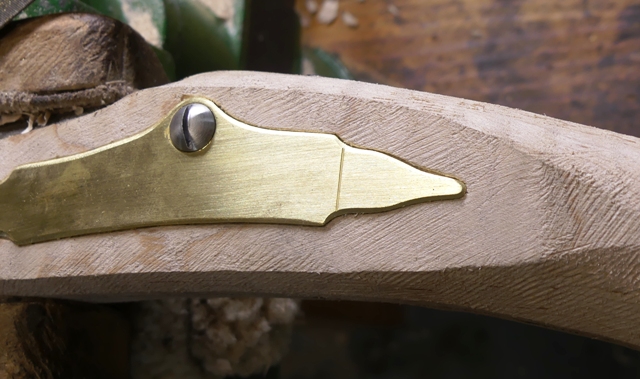
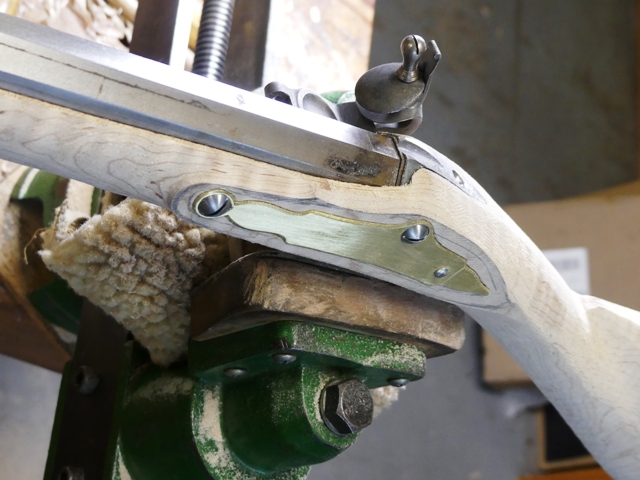
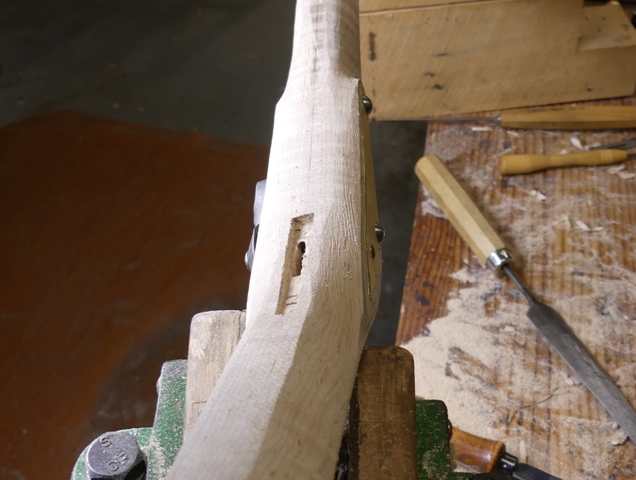
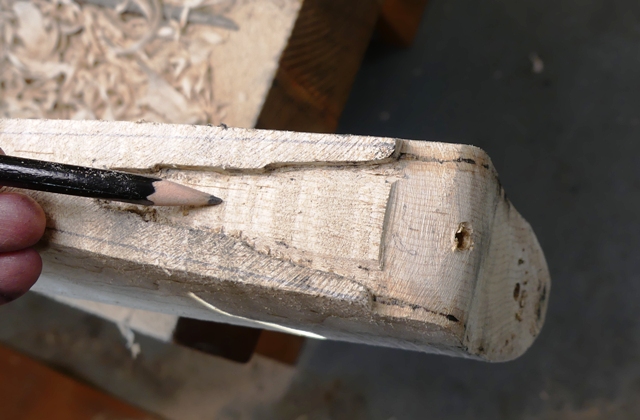
With that shoulder cut away, I can lay the tang down on the stock and trace the outline of the first part of it. I inlet it slowly from heel to end laying it down gradually into the stock.

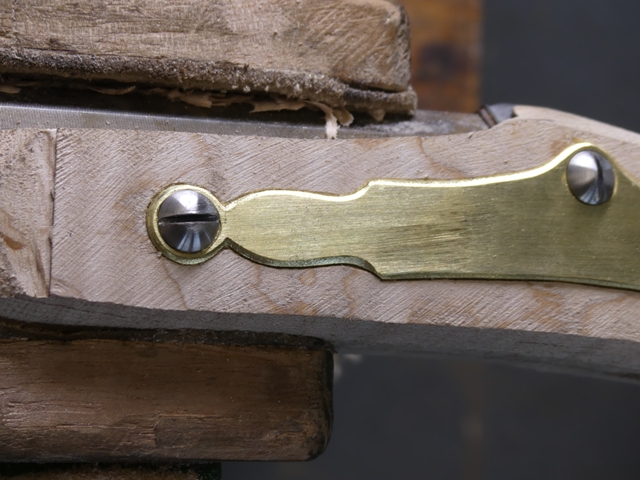
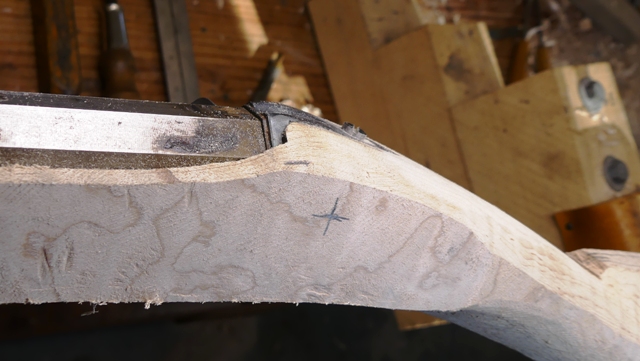
Because the tang gets progressively smaller toward the front, you can gradually move the plate forward on the stock until it is positioned correctly and all edges are tight against the stock.


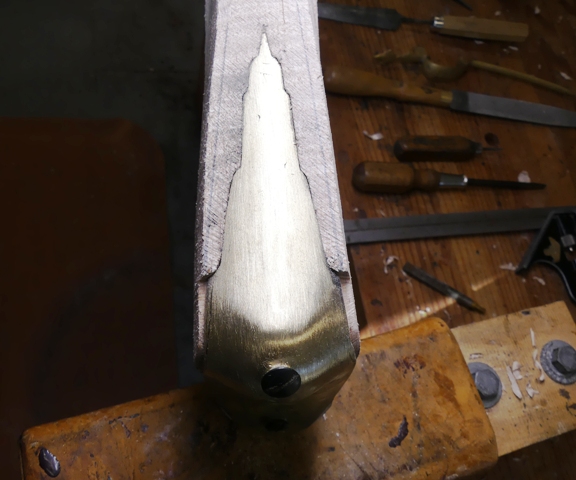
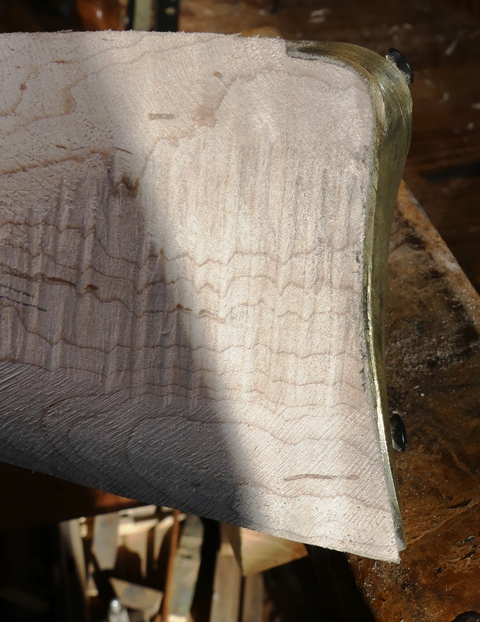
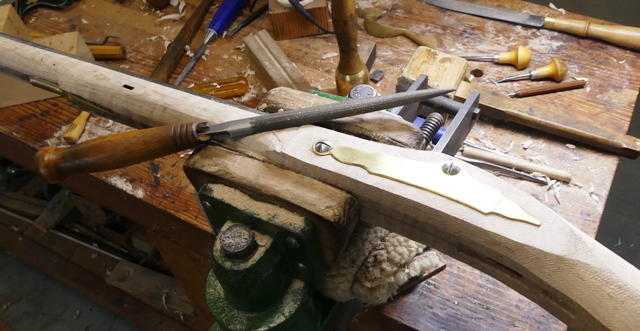
It is not hard but you need to go slow and use some sort of inletting black or smoke.

dave
 
Hi and thanks guys,
It is fun but the curly stock is tough to work. It is really hard and the figure risks tear outs. I have to use very shallow cuts when planing the stock. It is a fantasy not so much because of the maple stock but the rifled barrel. I have photos of a John Manton sporting gun made about 1800 and stocked in figured maple. So maple was used occasionally by the British makers and certainly fowlers stocked in 18th century America often had figured maple stocks. Grinslade shows a bunch of "British style" guns stocked in figured maple and even one in cherry, and another in ash.

Rich,
I always use the standard breech plug fitted to the barrel for the hook. I cut off the tang and file the bolster into the hook. The standing breech is from TRS. I buy half a dozen Twigg and Griffin breeches at a time and then shape them as I need. The machined breech by Rice is very nicely made but the tang portion is way too short. If you use large locks like Chambers or Kibler's round faced English locks, you have to have a trigger plate that extends way far forward to catch the breech bolt and then it interferes with the trigger guard tab. I don't know why Jason made it that way. It really limits its use and it does not look right. I have a lot on my plate at the moment. I am also working on a Baker rifle, which I have not posted yet, and I am finishing up a turn off pistol for the folks at Fort Dobbs, NC. It will be a very busy summer.

dave
Fort Dobbs is nearby and I know a reenactor who volunteers there. I will be watching any info about the turn off pistol going there!
 
Hi,
I am not going to post every detail of this project but I am going to select some segments that may be of real use to folks. One topic or question that comes up a lot on this and other forums is how to make or where can one get side plates and other decorative inlays. I recommend that folks try to make their own side plates so they can tailor the design to their guns and locks and it helps develop design and tool skills. The sideplate is the perfect inlay to learn from. It is mortised into a flat surface, it is large and often (not always) uncomplicated, and it can be fitted to your already drilled lock bolt holes. It is a much easier proposition than a patch box, toe plate, or even a wrist plate. Here is the side plate I made for this project. I wanted it to copy the original gun I am using as a model but the forward extension on that side plate did not adapt well to a shorter design that fits my lock. So I punted and used a generic design found on many British guns for the forward extension. The rest of the plate followed the original.


It is made from 3/32" thick brass sheet. It was made using a hack saw, two drill bits for an electric hand drill, and one half round file. That's it.


The contours of the file determined the contours of the side plate as if the file was both file and template. By using the same portion of the file at points that needed to be symmetrical, I kept it all even. This is basic tool work and the result is elegant and plausible given the objectives of the project. Learning file work is basic to gun making. When I was 9 or 10 years old and wanted to make things in my Dad's shop, he gave me an ugly chunk of pine and said file it into a 3 dimensional rectangle. Then he had me file it into a perfect cube. Once I did that to his satisfaction, he had me file it into a perfect sphere. I never forgot those lessons and later he had me do much the same with a chunk of brass.

dave
 
Hi,
I got a lot of shaping done. You can begin to see the final shape. It should be pretty elegant.


I am still not sure how slim I will make the wrist and lock section. This is a rifle that will be used for hunting big game including elk and moose so I think I may want it a little more robust than the original fowler that is my model. I am kind of thinking the size of Jim Kibler's colonial rifle through the wrist.


In shaping the lock and wrist area, I mainly use rasps. The only chisel (gouges) work is around the front nose of the lock and side plate panels. I've noted over the years that many folks struggle shaping these areas. I do not cut any moldings around the panels until the gun is fully shaped and ready for carving. I shape the areas as contours of the stock rather than separate "cut in" frames. One area that may trouble new builders is the step on the side plate side at the breech. On British guns this is rarely an abrupt step. It is almost always rounded and smoothed flowing downward toward the front either as a continuous line or with a slight step mirroring the lock side. On this gun, I am shaping it with a slight step because I've done so many with the continuous line.


Note that the concave surface above the nose and along the barrel is broad and almost flat and then transitions to a tight cove around the nose. I shape that with a very shallow sweep and a 3/4" diameter round scraper. You can see how the tang of the standing breech is perched rather than imbedded in a fatter rounded surface. The humped breech provides a very elegant profile. Another area that causes trouble for some is the underside of the lock area. I've seen countless guns on which the bottoms were too flat. I think folks get nervous about curving it because they think they need a flat surface for the trigger guard. It should be nicely rounded with a smooth transition joining with the more rounded forestock and the transition from convex shape to the concave shape of the throat joining the wrist.


This is all done with rasps, a half round file, and a large rat tailed file. It will eventually be smoothed with scrapers and the flats around the lock will be very thin except right at the nose.

dave
 
Back
Top