• Friends, our 2nd Amendment rights are always under attack and the NRA has been a constant for decades in helping fight that fight.

    We have partnered with the NRA to offer you a discount on membership and Muzzleloading Forum gets a small percentage too of each membership, so you are supporting both the NRA and us.

    Use this link to sign up please; https://membership.nra.org/recruiters/join/XR045103

Just ordered a Lyman GPR Kit

Muzzleloading Forum

Help Support Muzzleloading Forum:

This site may earn a commission from merchant affiliate links, including eBay, Amazon, and others.
Eric Krewson said:
No beginner should use a dremel tool.

I was a serious duck decoy carver at one time and am an expert with a dremel tool, I may use one very lightly in a few places on my guns but overall even for me it can bind and jump and you have a problem to solve.

Another thing; Round off that ugly flat spot behind the lock panel, nothing makes a gun build look more amateurish than to leave that big flat place on the wrist. There is no such flat place on any historic gun, ever.

:thumbsup:
Ah yes, the old evil wrist hump. Do an advanced search here to see plenty of discussion about that!
 
Take your time with it....

two things I advise.

When buying stuff to shoot it, the 54 cal ones like thicker patches and/or larger balls. Like .015" and .535". I never shot a 50 cal, but I can imagine they 'll like .495" and .015" more than .490 balls.

Also, take your sweet time getting the stock right. You might want to sand a bit more material to get the gun fit they way you like it.
 
Well, I launched into it today. I had some things planned to do today and they all fell through. That meant I had most of the day to work in the shop. I wish I had a good wood working bench with a long vise to use to hold the stock, but I made do with bar clamps and some heavy leather to protect the wood from clamp marks.

I was very please to find that once I put the tang in place the barrel dropped right in and no modifications of that channel were necessary.


I got the stock rasped to the point where I'm pretty comfortable with it. I'll start serious sanding tomorrow. I appreciate the advise on the lump behind the lock, that was seriously ugly, it's gone....

I did find that the Dremel was VERY useful for polishing some of the steel work. I picked up a polishing kit for it at Lowes and it has made short work of cleaning up the metal bits. Cleaning up the metal was the part I was not looking forward to on this build.

I'm having a blast so far
 
OK, once I got a little further into the project I realized that I needed to back up and re-do the furniture by hand. It looks much better now. Just about to start finishing the stock with Tru-oil. Waiting to see if we'll get a Florida warm spell here this month to get the browning done. I'm really enjoying this project, looking forward to shooting
 
I just put my third coat of Laurel Mountain browning solution on....I'm trusting what everyone has said about it getting better with later coats....the barrel is looking a little scary right now, the rest is looking good
 
Just a little tip.
Your gun will stand out, especially with that fine honey colored stock that you have, by giving all your screws and bolts a fire blued effect.
Heat each screw/bolt a bright cherry color then dip in oil, ( I do it twice )After heat blueing I spin polish each screw/bolt by pressing them against a piece of leather with oil on the leather ( the back side preferably.
Prior to heating, I polish each screw/bolt to a mirror finish.
I do so, by putting each screw/bolt in your handy dandy drill. Spin each screw to high rpm, then pressing a 220 grit metal sand paper against the screw head.
Paper should have a hard support behind the paper.
I do this to the screw progressively up to 800 grit.
Now you have a very polished screw or bolt head that will give a very bright blue color.
It took me longer to write (type ) this than it takes to do it.
You can even polish the wedge heads and heat blue them the same way.
For a finish touch make sure all slots on the screws are facing the same direction ( butt plate to muzzle end )You will be surprised how much better this looks rather than facing any way.
By the way, I really like the color you were able to get the walnut stock to settle at. Very unusual!
If you do your part and work that Lyman rifle, you will be a well respected shooter in your gathering of friends.
The Lyman GPR is one of the best platforms to make any builder/shooter a well respected shooter and builder. I say builder because there are so many hack jobs done to the GPR by part time, hurry get it over, claimant builders.
Good luck on yours ( you are doing very well as it seems )
Fred
 
Thanks, I appreciate the encouragement. The blued screw heads could be a nice contrast to the browned furniture...I'll give it some thought.
 
I've never had any success trying to blue screw heads by heating them red hot and quenching them in oil.
That just gives a dark gray look on my screws.

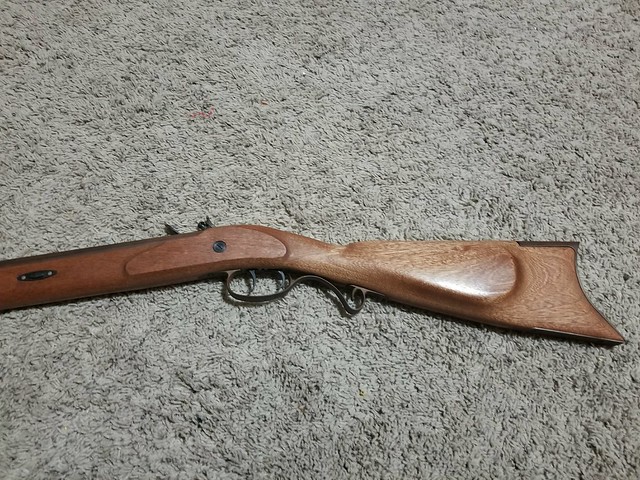
To heat blue screw heads or any other steel part I first polish the surface.

Then, I remove any oils or grease the surface might have on it.

Following this, in a bright area with good light, I gently hold the screw with some pliers and move the head into and out of an area just beyond the tip of my propane torch flame.

The idea here is to slowly raise the screw heads temperature.

As the metal heats it will first turn yellow.
This is followed by a straw yellow, a brown, purple/red and then blue.

The blue will start rather faint and rapidly darken to a rich dark blue.

At this instant, I plunge the screw into a can of oil to stop the color change and to provide a measure of protection.

If I wait too long, the dark blue will start to lighten to a gray color.

Once this gray color is reached, the only way of getting back to the dark blue color is to lightly sand the gray off, re-polish the surface and try again.

A gas or electric stove will also work to heat the screw if you don't have a propane or MAPP torch. :)
 
Pretty happy with how this came out, especially since I was learning a lot of techniques and ideas, now I need to decide what color I'm going to stain the ram rod...

39415024684_9c8efebca0_z.jpg


40093955322_e043ba77b3_z.jpg


39415032274_181ce73df2_z.jpg
 
Hey! thanks everybody, this was a new endeavor for me, outside my comfort zone. I appreciate the help and guidance I received, Great information!
 
Appears it goes BANG like it should!! :thumbsup:

For a ramrod color suggestion, after I watched the Olympics snowboarding last night......purple goes with about anything. :shocked2: :shocked2:
 
TXFlynHog said:
I love your choice of stain. I bought a Lyman GPR already assembled from Lyman, and the stain is a little dark and quite "dull" from them. Yours is much prettier!

That's straight up Tru-oil, I'm pretty pleased.

I got about 2 hours of range time with it today and learned a lot about shooting flint, had a blast, made a lot of smoke, turned some heads at the range....All good :grin: :grin: :grin: :grin:
 
Back
Top