-
This community needs YOUR help today. We rely 100% on Supporting Memberships to fund our efforts. With the ever increasing fees of everything, we need help. We need more Supporting Members, today. Please invest back into this community. I will ship a few decals too in addition to all the account perks you get.

Sign up here: https://www.muzzleloadingforum.com/account/upgrades -
Friends, our 2nd Amendment rights are always under attack and the NRA has been a constant for decades in helping fight that fight.
We have partnered with the NRA to offer you a discount on membership and Muzzleloading Forum gets a small percentage too of each membership, so you are supporting both the NRA and us.
Use this link to sign up please; https://membership.nra.org/recruiters/join/XR045103
You are using an out of date browser. It may not display this or other websites correctly.
You should upgrade or use an alternative browser.
You should upgrade or use an alternative browser.
another wheellie!
- Thread starter Leonredbeard
- Start date

Help Support Muzzleloading Forum:
This site may earn a commission from merchant affiliate
links, including eBay, Amazon, and others.
Leonredbeard
54 Cal.
- Joined
- Apr 9, 2004
- Messages
- 1,863
- Reaction score
- 4
Yep,
That small! And it is tedious. I have to be in the right frame of mind to go out there and do it.
Usually I have to think about it for a while as I am doing other things and then do it.
volatpluvia
That small! And it is tedious. I have to be in the right frame of mind to go out there and do it.
Usually I have to think about it for a while as I am doing other things and then do it.
volatpluvia
- Joined
- Jul 26, 2006
- Messages
- 646
- Reaction score
- 45
Excellent work, I am very impressed.
Leonredbeard
54 Cal.
- Joined
- Apr 9, 2004
- Messages
- 1,863
- Reaction score
- 4
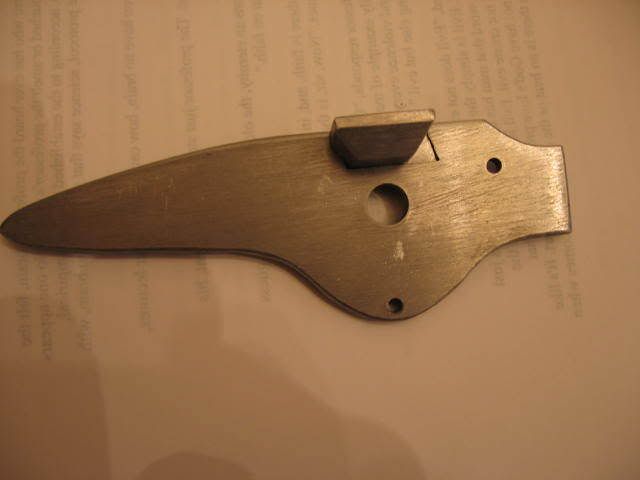
I decided to keep with the traditional lock here so I made a pan that locks into place like the originals. This nice pan started out yesterday morning as a rough hacksawed hunk of steel. I don't have the pan hollowed out yet so I am not showing that angle. I know now why the old masters put a flange around the pan/plate juncture, it hides the seam. Sorry I did not think of this in time and it is now made.
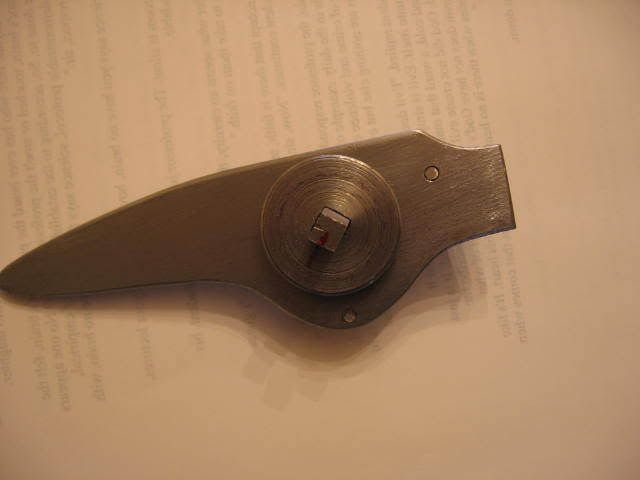
You know how it is, sometimes you can't do this without doing that? I fitted the wheel to the shaft so I could be sure of the pan placement. I am not shifting the pan and then the wheel forward this time. The flashole is not yet drilled. And if I can remember to do it, I will angle it forward into the chamber so as to direct the blast back and away from the pyrite.
volatpluvia

You know how it is, sometimes you can't do this without doing that? I fitted the wheel to the shaft so I could be sure of the pan placement. I am not shifting the pan and then the wheel forward this time. The flashole is not yet drilled. And if I can remember to do it, I will angle it forward into the chamber so as to direct the blast back and away from the pyrite.

volatpluvia
PitchyPine
69 Cal.
- Joined
- Oct 6, 2006
- Messages
- 3,418
- Reaction score
- 1
Looks nice, where is the serpentine go?
Does it go in front and if so where does it go, doesn`t look like much room for it.
She`s going to be a dandy. :thumbsup:
Does it go in front and if so where does it go, doesn`t look like much room for it.
She`s going to be a dandy. :thumbsup:
Leonredbeard
54 Cal.
- Joined
- Apr 9, 2004
- Messages
- 1,863
- Reaction score
- 4
Pitchy,
The dog, Pitchy, the dog! Of Course now, I have seen gonnes with both attachments. The owner was not confident in the new scratchie thing, so he wanted a matchie thing on there, Haw! Snicker! Did you know that once I lit the redhairedgal with a cigar? Hee, Hee!
volatpluvia
The dog, Pitchy, the dog! Of Course now, I have seen gonnes with both attachments. The owner was not confident in the new scratchie thing, so he wanted a matchie thing on there, Haw! Snicker! Did you know that once I lit the redhairedgal with a cigar? Hee, Hee!
volatpluvia
PitchyPine
69 Cal.
- Joined
- Oct 6, 2006
- Messages
- 3,418
- Reaction score
- 1
Sure glad you guys are here to keep me in line about the names of these contraptions. :redface: :haha:
Merry Christmas. :hatsoff:
Merry Christmas. :hatsoff:
Leonredbeard
54 Cal.
- Joined
- Apr 9, 2004
- Messages
- 1,863
- Reaction score
- 4
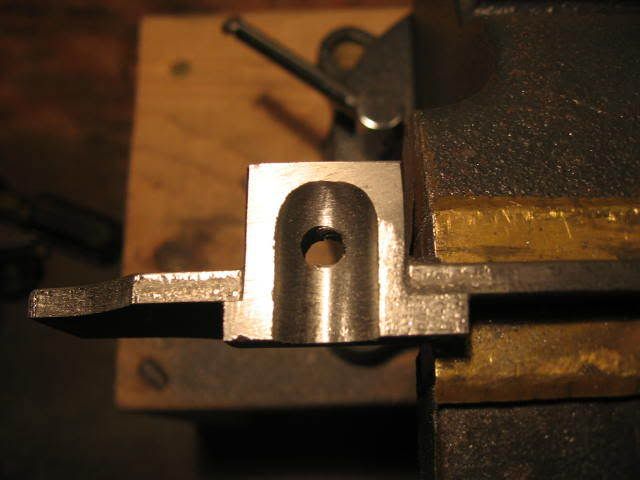
Another installment.
I should have another pic by the end of the week.
volatpluvia
I should have another pic by the end of the week.

volatpluvia
PitchyPine
69 Cal.
- Joined
- Oct 6, 2006
- Messages
- 3,418
- Reaction score
- 1
It`s gonna leak :shocked2: :haha:
Leonredbeard
54 Cal.
- Joined
- Apr 9, 2004
- Messages
- 1,863
- Reaction score
- 4
Pitchy,
The wheel will plug it, at least mostly, hee hee!
Mckutzy,
I ran across a cherry at the hardware store. It is half inch in diameter by an inch long. It has maybe fifteen cutting edges. I chucked it up in my Black and Decker eighteen volt drill/driver and it took a half hour. I was very pleased. I did the last steel pan with a quarter inch ball end mill. It took forever and made a rough job. I had to smooth it with little dremel type wheels.
But this is how smooth the cherry made it.
volatpluvia
PitchyPine
69 Cal.
- Joined
- Oct 6, 2006
- Messages
- 3,418
- Reaction score
- 1
Just kidding with ya, :grin: but how will a wheel plug a round hole unless it lays on its side. :hmm: that`ll be a small wheel bud. :blah: :haha:
Leonredbeard
54 Cal.
- Joined
- Apr 9, 2004
- Messages
- 1,863
- Reaction score
- 4
Pitchy,
The hole is now square and I am preparing to file the hole so the ridges of the wheel will mate with it and fit on the axle. I hope to have this done Saturday and pics posted by Sunday.
volatpluvia
The hole is now square and I am preparing to file the hole so the ridges of the wheel will mate with it and fit on the axle. I hope to have this done Saturday and pics posted by Sunday.
volatpluvia
PitchyPine
69 Cal.
- Joined
- Oct 6, 2006
- Messages
- 3,418
- Reaction score
- 1
Sounds good, you`ll be lighting powder before we know it. :thumbsup:
Leonredbeard
54 Cal.
- Joined
- Apr 9, 2004
- Messages
- 1,863
- Reaction score
- 4
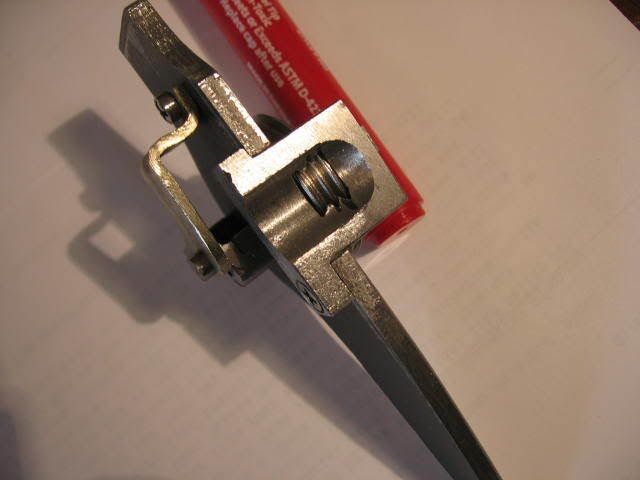
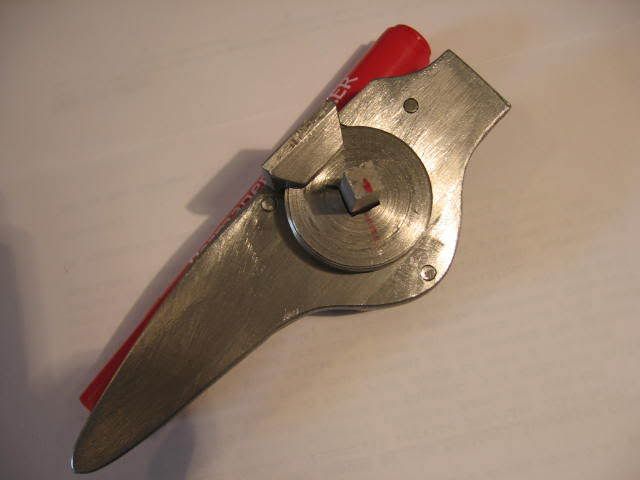
Here are two pics of wheel running thru the pan. I did not get as nice a fit as I would have liked.
But it will do, it is not a hunting gonne and the powder will stay in the pan long enough to prime and fire at the range.
volatpluvia
But it will do, it is not a hunting gonne and the powder will stay in the pan long enough to prime and fire at the range.


volatpluvia
Leonredbeard
54 Cal.
- Joined
- Apr 9, 2004
- Messages
- 1,863
- Reaction score
- 4
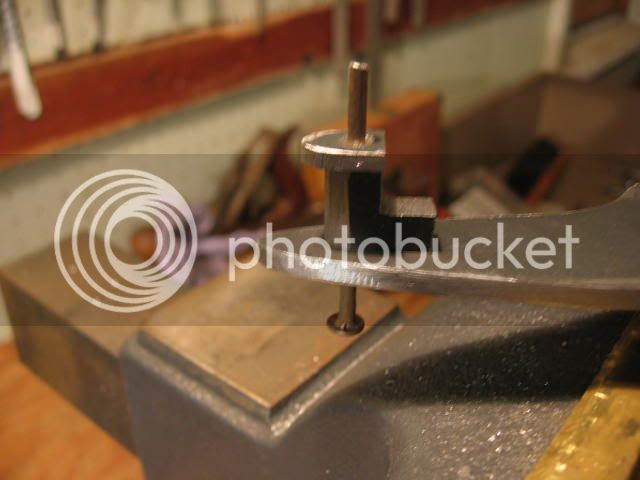
Here then is a picture of the lump that indexes the crook of the mainspring. The trigger sear is also mounted on the lower part. I got tired of tapping a screwing parts to the plate that never need to be removed, so I am riveting them on. That is a 7d common nail, nice and maleable and oh so available. I will put another through the lower part as soon as I get this one done. Then I will put the lump on there for the stationary end of the mainspring and it will hold the pivot of the mainsear.
volatpluvia

volatpluvia
PitchyPine
69 Cal.
- Joined
- Oct 6, 2006
- Messages
- 3,418
- Reaction score
- 1
Very good, :bow: I`m sure enjoying your build. :thumbsup:
Leonredbeard
54 Cal.
- Joined
- Apr 9, 2004
- Messages
- 1,863
- Reaction score
- 4
Mckutzy,
I will just rivet the pieces onto the lock plate, no glue, no solder. Since the part receives no real torque or stress it should stay forever.
volatpluvia
I will just rivet the pieces onto the lock plate, no glue, no solder. Since the part receives no real torque or stress it should stay forever.
volatpluvia
Leonredbeard
54 Cal.
- Joined
- Apr 9, 2004
- Messages
- 1,863
- Reaction score
- 4
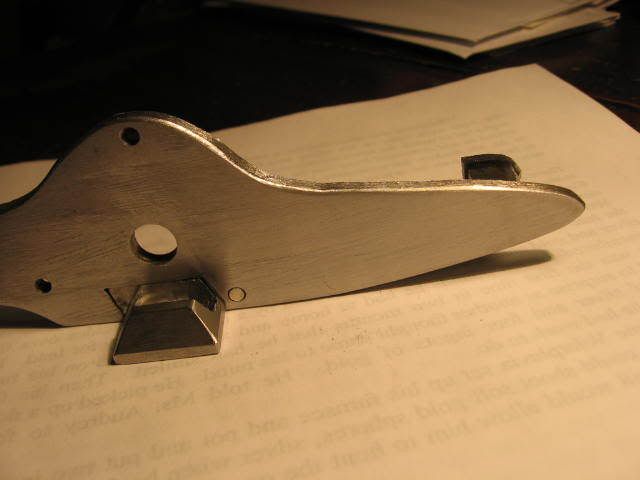
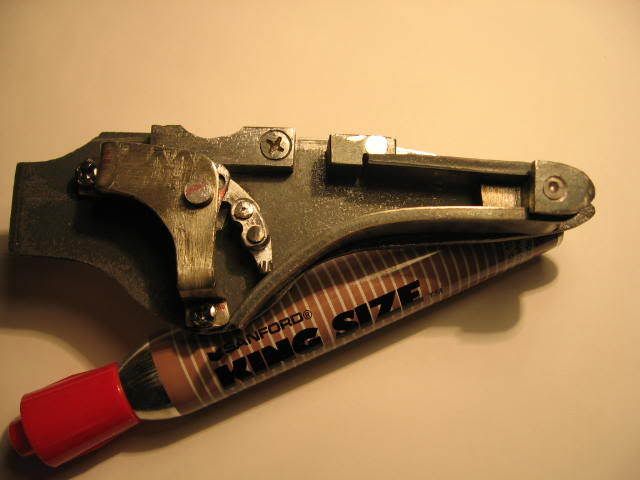
Here is a pic of the two lumps riveted onto the lock plate, one rivet each.
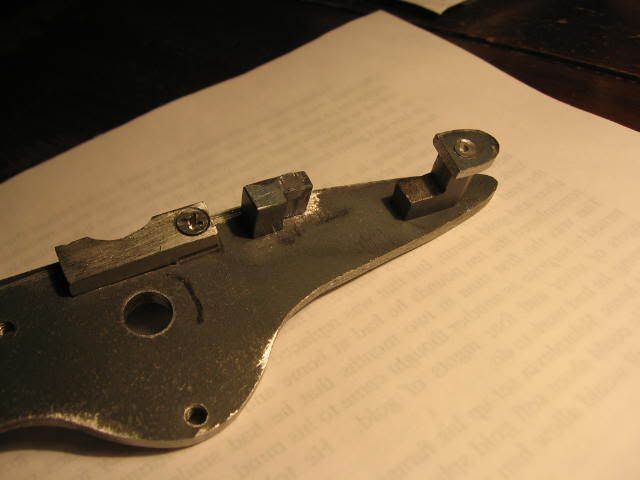
The nice thing about rivets is they disappear on the front side of the plate. One of them I didn't quite get the countersink filled in so a sliver shows.
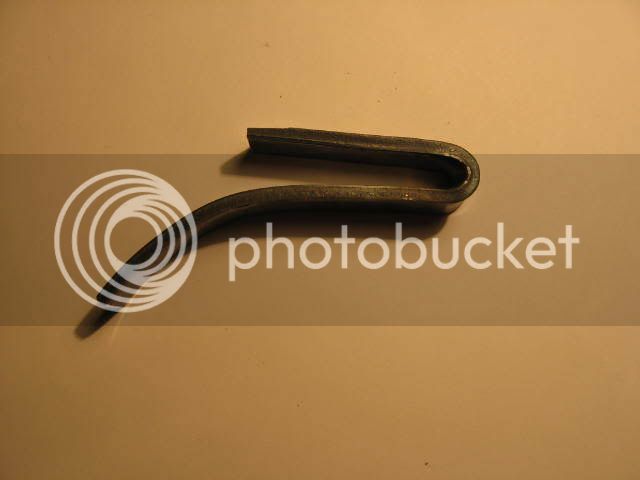
Yesterday afternoon I got out a piece of springstock and my mapp gas torch and forged this spring.
Anyone who wants to give me advice on how to taper the active end of this spring is invited to do so.
volatpluvia

The nice thing about rivets is they disappear on the front side of the plate. One of them I didn't quite get the countersink filled in so a sliver shows.

Yesterday afternoon I got out a piece of springstock and my mapp gas torch and forged this spring.

Anyone who wants to give me advice on how to taper the active end of this spring is invited to do so.

volatpluvia
Similar threads
- Replies
- 5
- Views
- 2K


