• Friends, our 2nd Amendment rights are always under attack and the NRA has been a constant for decades in helping fight that fight.

    We have partnered with the NRA to offer you a discount on membership and Muzzleloading Forum gets a small percentage too of each membership, so you are supporting both the NRA and us.

    Use this link to sign up please; https://membership.nra.org/recruiters/join/XR045103

Buttplate layout

Muzzleloading Forum

Help Support Muzzleloading Forum:

This site may earn a commission from merchant affiliate links, including eBay, Amazon, and others.
That sharp bend by the heal is what is giving me fits... I'm trying to file my way into it, so slow and steady I guess. I left a good margin there and I'm trying to sneak up to it. I sure hope it all falls together. I'm calling it quits for the night.
 
I have a Bedford with a 15" LOP, and I'm 5'9" and 175 lbs. At first I thought it was going to be WAY too long, but it has double spurs on the trigger guard that allows me to hook my middle finger and pinky in there to get a good cheek weld on the stock. I also use it on the crook of my arm, rather than at the shoulder, so it fits pretty well. On a late Lancaster I have a 14 1/4" LOP, and that hooks in my arm and fits well too. With my Isaac Haines with a broader plate. I use a 13 1/2". So LOP in and by itself is not the entire story. It's also about getting a good cheek weld.
 
Best advice I ever received was to put the chisel down and walk the dog if I became impatient and wanted to give it a good hard shove.......

White Fox
 
I have been using the file and just taking a little off at a time. Getting closer, but not quite there yet.

We are heading out to the TSO concert tonight (not sure why it hasn't been cancelled yet due to blizzard conditions in Cleveland Ohio) but will get some pictures up soon. It's frustrating that I'm not there yet with the fit, but patience I guess. Maybe someone can point out where I should file to make it all fit just perfect. Right now though it's just file a bit, tap the buttplate on with black, and check where the marks are again.... then repeat. :)
 
Okay, here are the pics. As you can see, the starboard side of the plate has more of a gap. I assume I need to bring the port side (side plate side) down a bit so it sits more flush. To the eye, everything looks flush, so maybe the plate is a little off, or I just can't see it.

Starboard Side (lock side)
IMG_4528.jpg


Port Side (side plate side)
IMG_4527.jpg


Aft end
IMG_4526.jpg
 
The butt screw will draw it in tighter, and, you can use a hammer and bend the butt plate to fit the wood too.
 
Col. Batguano said:
The butt screw will draw it in tighter, and, you can use a hammer and bend the butt plate to fit the wood too.
It's best to get the fit perfect as possible before drilling for screws. If there are gaps then it will have to be removed, the gaps addressed and then, depending on how much wood is removed, the holes may not line up again and you have to plug and redrill.

As far as closing the gaps with a hammer....good luck on an investment cast steel buttplate....or bronze for that matter. This is not soft brass that can simply be peened to fit. This stuff is HARD.

Slow and steady wins the race. Enjoy, J.D.
 
You are hitting on the top of the plate & barely on the toe. That gap you see now....... that is how much wood has to come off where it is hitting now, to bring that in flush.

DO NOT try to hammer it..... that toe wood is fragile & you will be gluing it back on. As mentioned, those investment cast steel plates are very hard & they don't bend. To bend one correctly, you have to heat it red hot. Try to bend it cold & you will spring it everyplace & have to start over, plus have the toe wood to glue back on.

Keep at it, you are getting very close. :thumbsup:

Keith Lisle
 
Ain't this fun? :rotf:

Just keep telling yourself, "This is FUN!
This is FUN. This is fun?"

It will prepare you for inletting the ramrod entry pipe.
 
necchi said:
Now, Sharpen that chisel and start cutting the black off,
That end grain is some tuff stuff to cut,, ain't it?
Chisel it off? I'm afraid to...I have just been using a file to take a little off at a time.
 
Most likely, you will not get a flush fit on both sides & a tight inlet using a file. A file has the tendency to round the edge, thus you have a flat edge on the plate = gap. YOu may get it close, but you will not get that metal/wood fit like they grew together with a file to remove the lat tidbit or wood.

I use carving tools & chisels. They have to be razor sharp so they shave, even across grain.

Keep working it til it looks like this, then you have it fitted correctly.

Dsc09487.jpg


Keith Lisle
 
what BirdDog said... i've had good luck with putting wet-dry sandpaper on float glass (you can get the stuff as fine as 2000 grit at an autobody store) and then strup your edge with a bit of leather and maybe some jewelers' rouge. you should get your tools sharp enough to do surgery; scary sharp!

the end grain will look so pretty by the time you're done with the inlet that you'll want to just leave the metal thingy on the bench, so that you can admire your skill and finesse ...
:rotf: :rotf:

but don't despair- there are other challenges ahead!

(the build is looking pretty good, by the way).

make good smoke!
 
I assume it doesn't matter in which direction I chisel the end grain or does it (e.g. top to bottom vs side to side)?
 
I concur. Even end grain will cut better in one direction than the other. Better to slice outside in than inside out though. Slicing from the inside will chip out your edges.

Enjoy, J.D.
 
Okay... I have sharpened the chisels and they are shaving just fine (just using my hand to ever so slightly shave off some of the wood). I don't mean to second guess all the wisdom here, but to this greenhorn, I would think the risk of gaps would be greater with chisels, but I guess if I keep it extremely sharp and just shave, I should be okay?
 
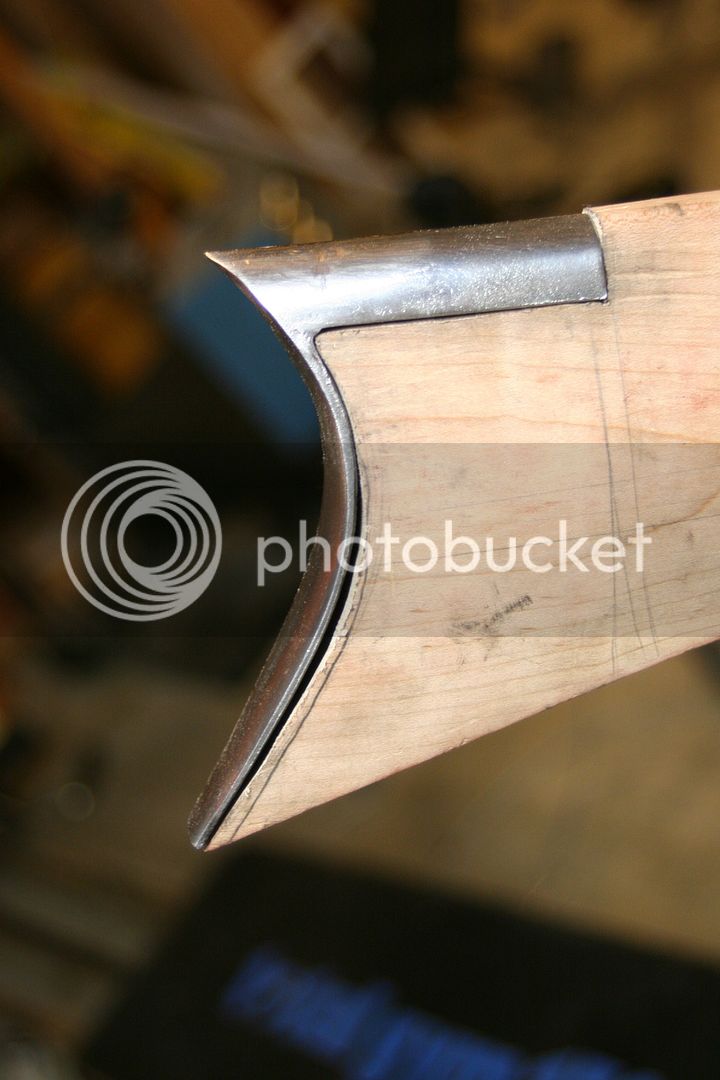
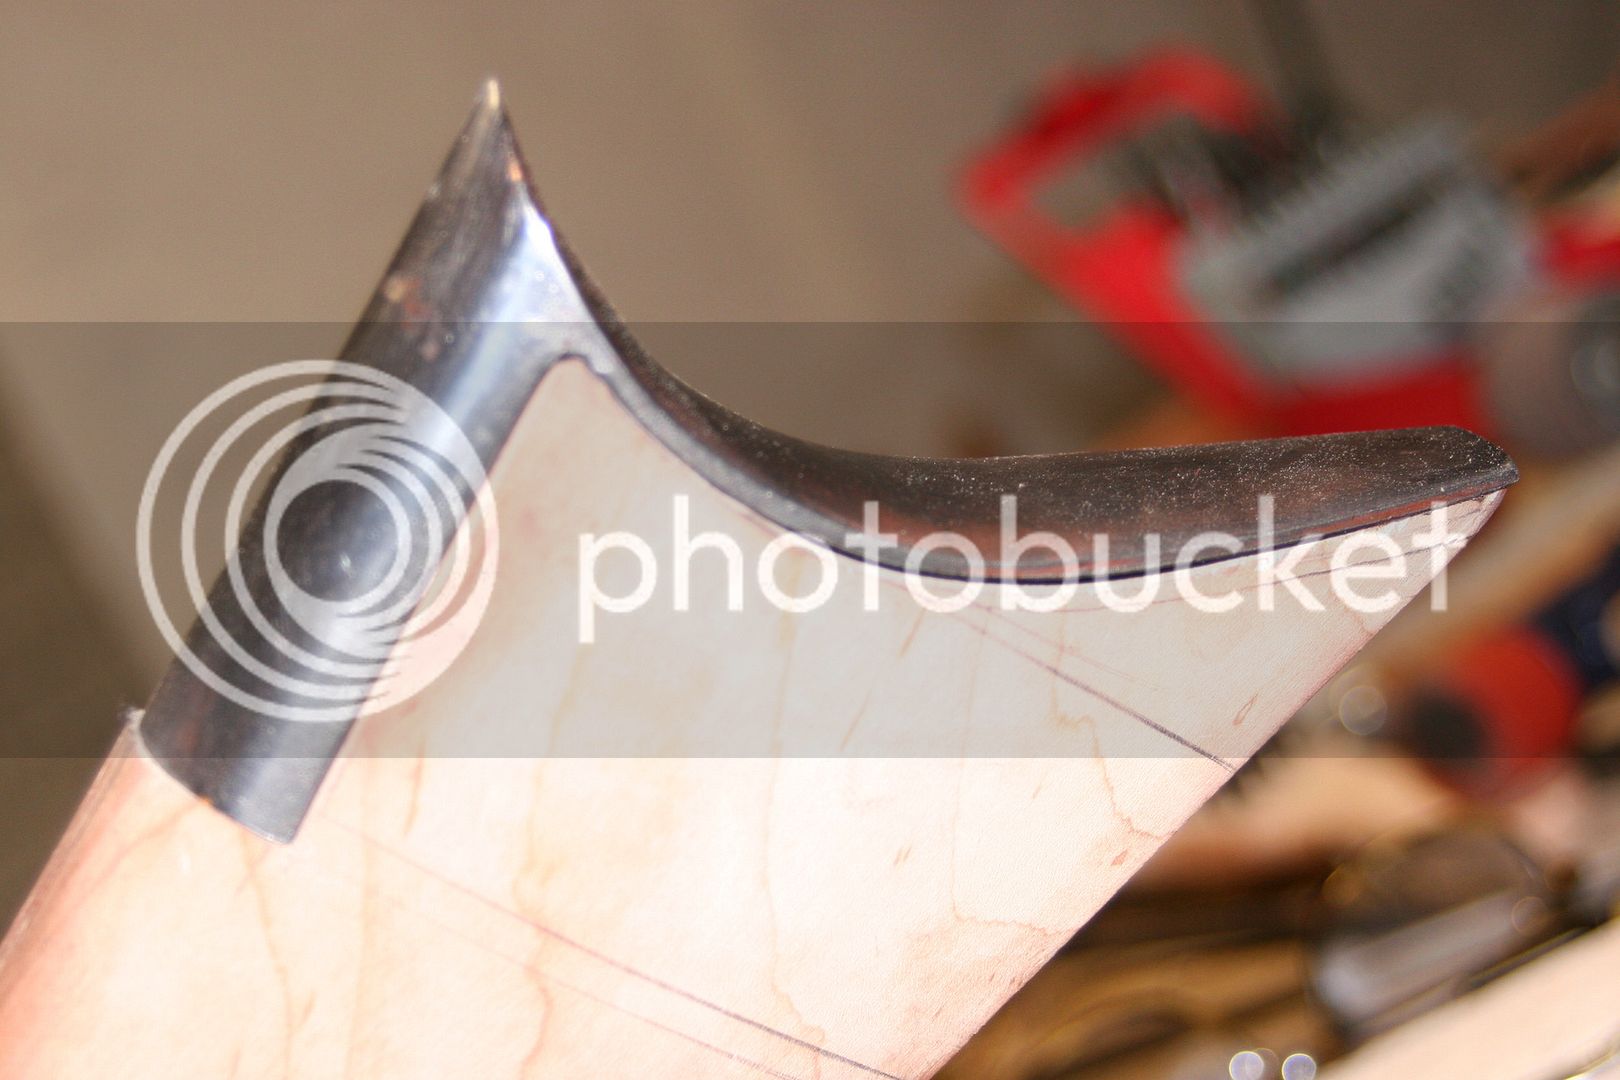
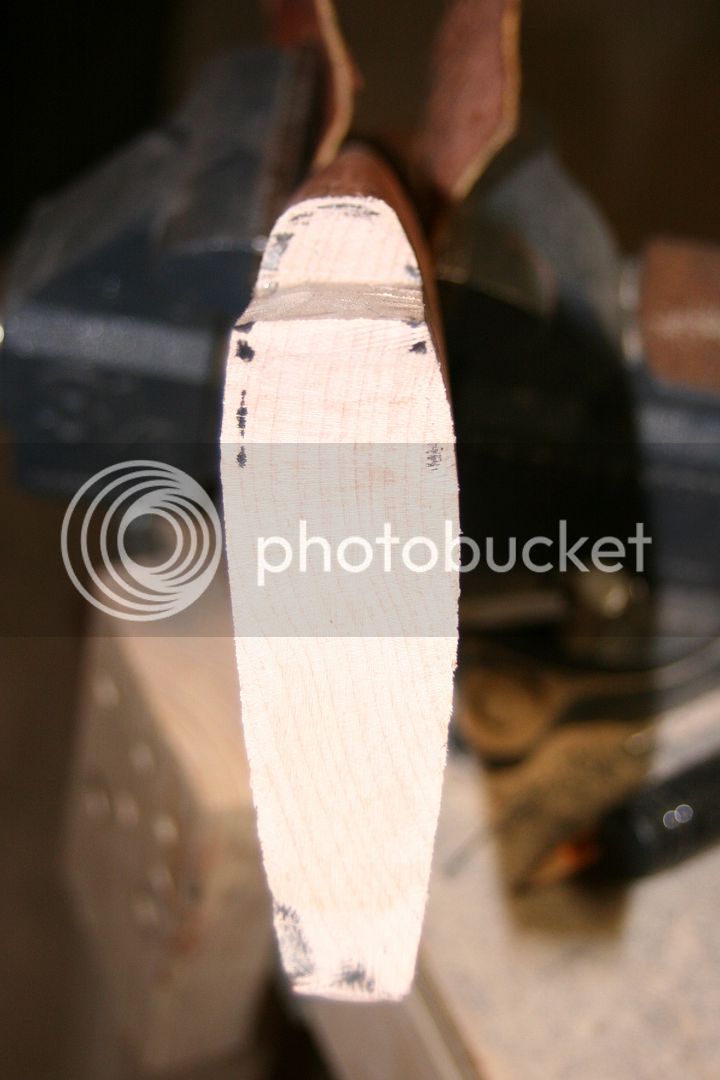
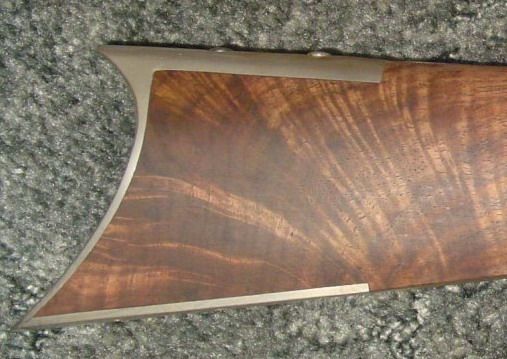
I don't know if this has been mentioned yet, but it's important to smooth up the contact surfaces of the buttplate before you start to fit it to the wood. For instance, on the upper return part, get those two "rails" parallel, flat, straight, and smooth. The front face should be perfectly flat as well. Make sure the curve of the vertical part is smooth and continuous, with no irregularities. Otherwise, any lumps, bumps, or divets are transfered to the wood, which makes it a real pain in the you-know-what to get a tight fit. Can't tell if you've already done all that, so just throwing it out there.

I do use a rattail file for the curve, and a flat file for the return, but only to get it in the "ballpark". For the final fit, it's chisels and gouges, mostly scraping in the end. Good luck. Bill
 

Latest posts

Back
Top