-
Friends, our 2nd Amendment rights are always under attack and the NRA has been a constant for decades in helping fight that fight.
We have partnered with the NRA to offer you a discount on membership and Muzzleloading Forum gets a small percentage too of each membership, so you are supporting both the NRA and us.
Use this link to sign up please; https://membership.nra.org/recruiters/join/XR045103
You are using an out of date browser. It may not display this or other websites correctly.
You should upgrade or use an alternative browser.
You should upgrade or use an alternative browser.
TOW Bucks County Rifle Kit Update
- Thread starter duelist1954
- Start date

Help Support Muzzleloading Forum:
This site may earn a commission from merchant affiliate
links, including eBay, Amazon, and others.
duelist1954
40 Cal.
- Joined
- Jun 27, 2011
- Messages
- 430
- Reaction score
- 70
The stock is stained and finished. The patch is certainly visible, but I guess it could have been worse.
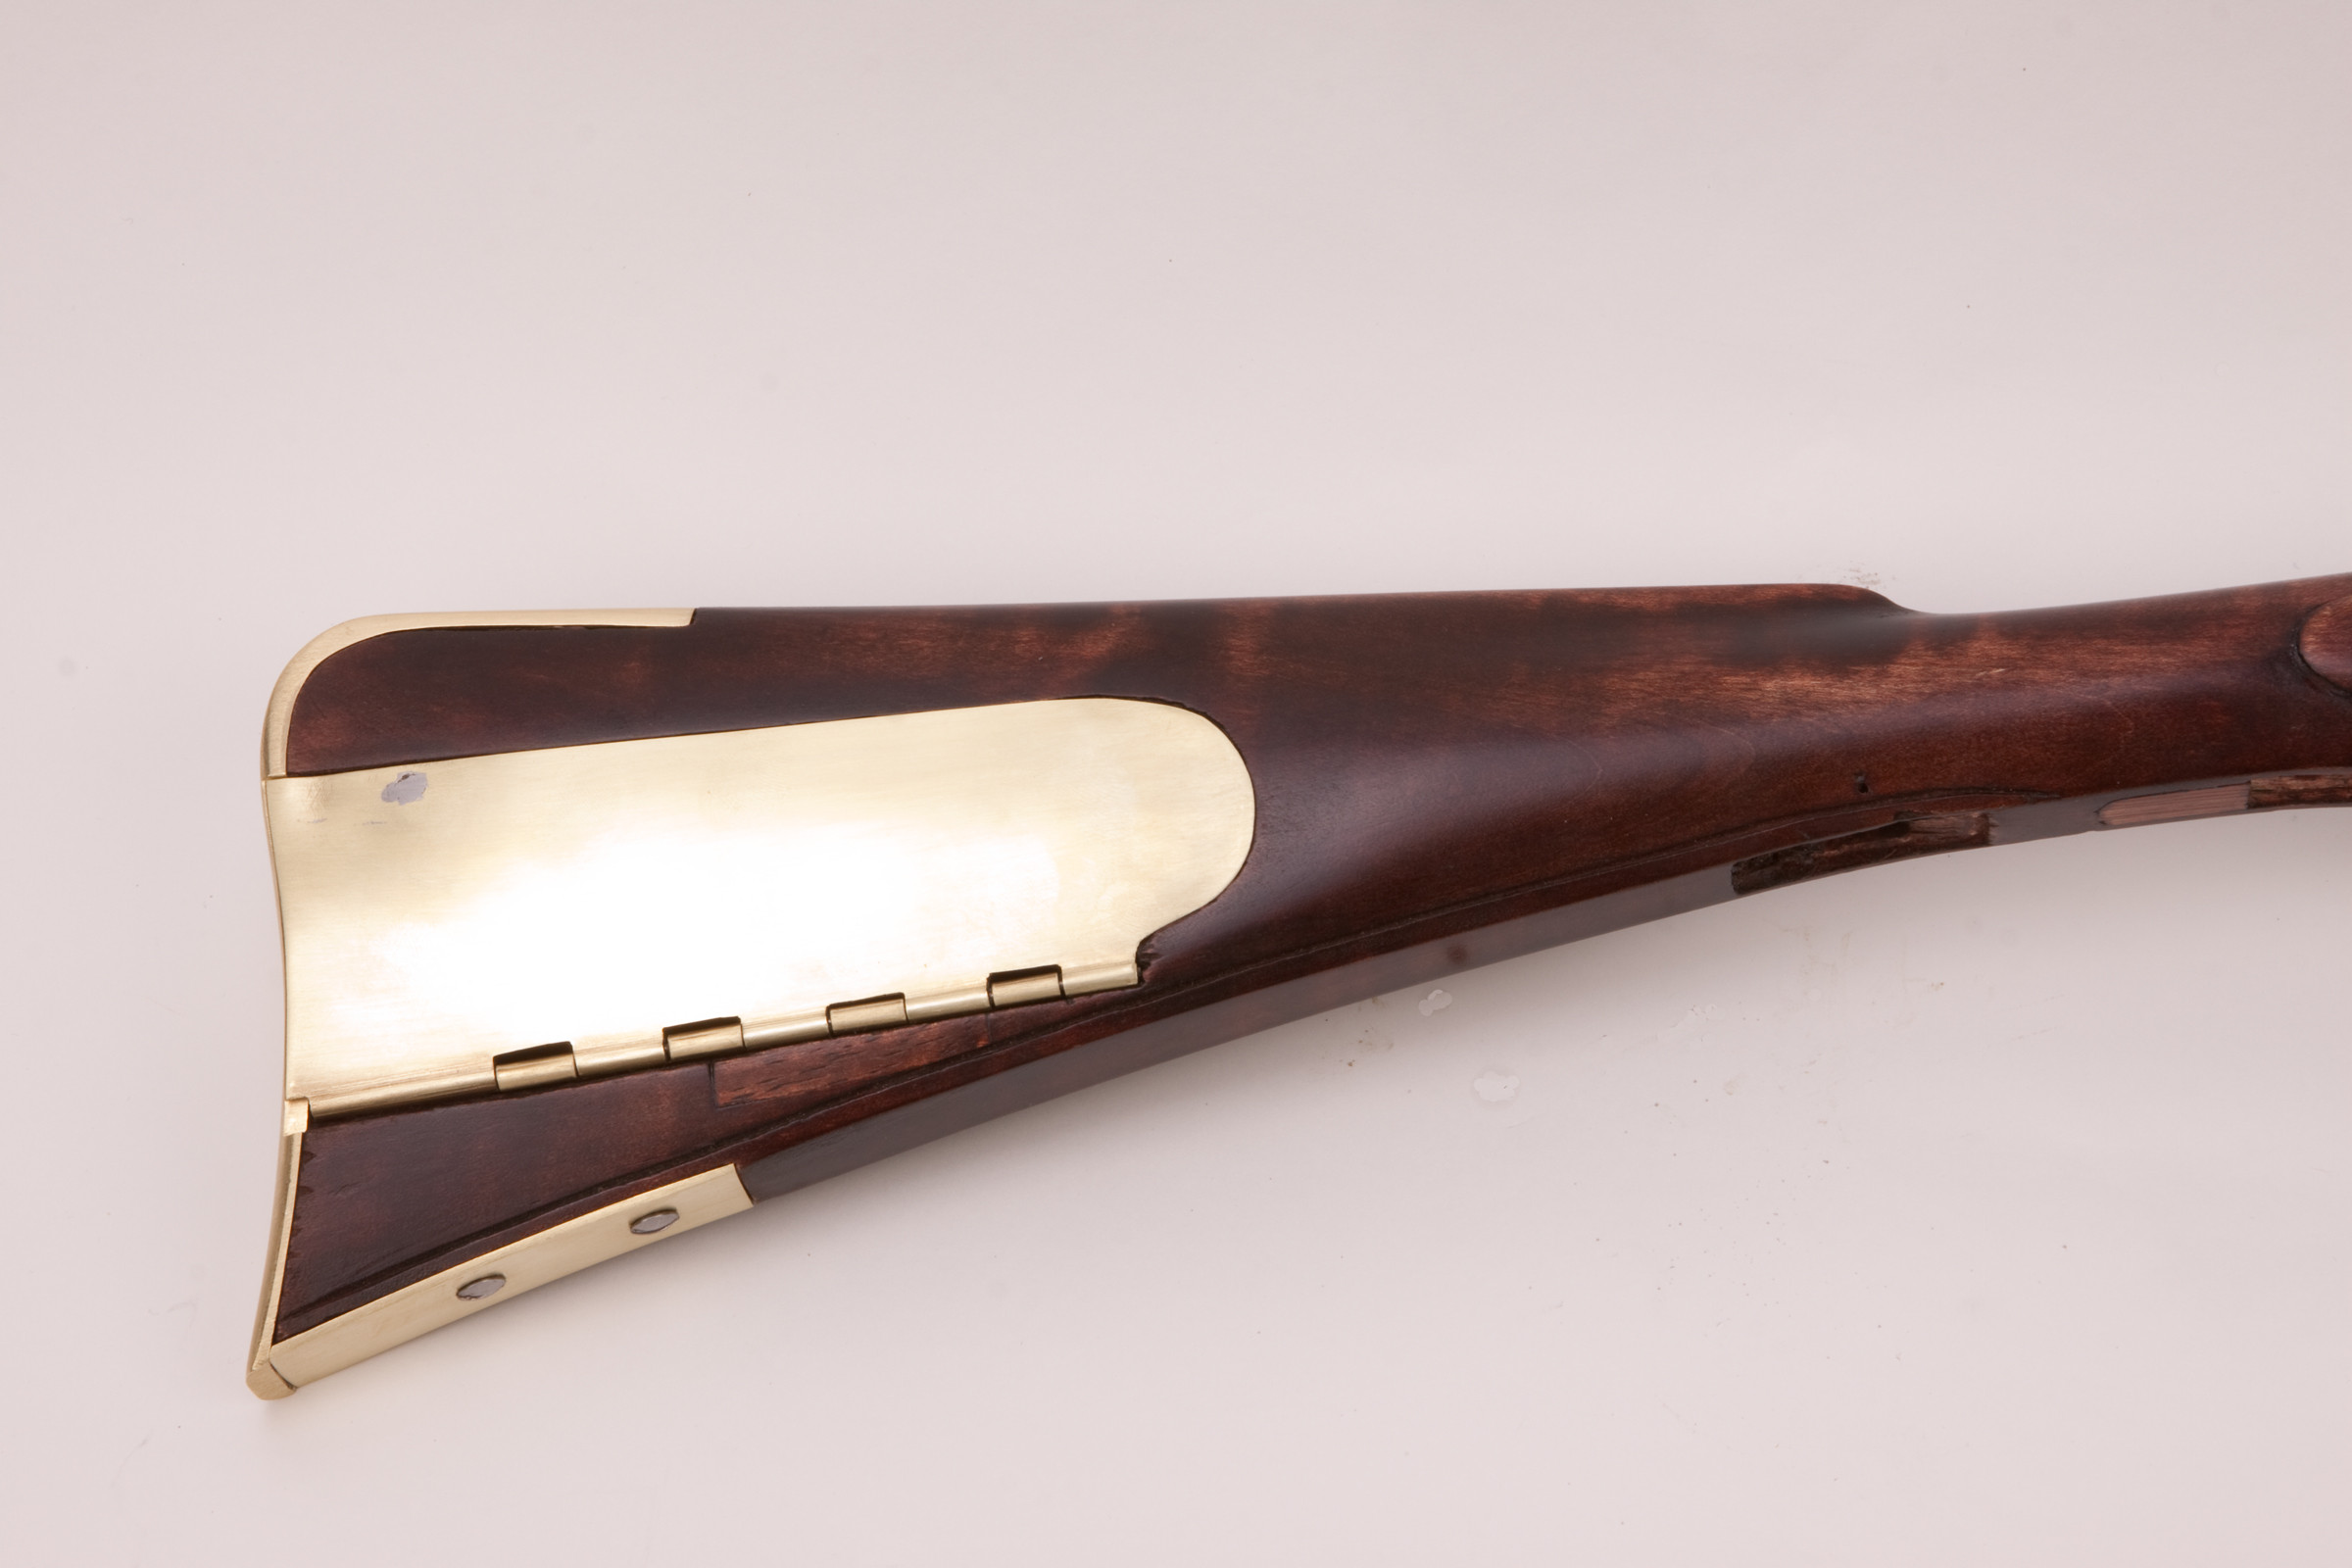
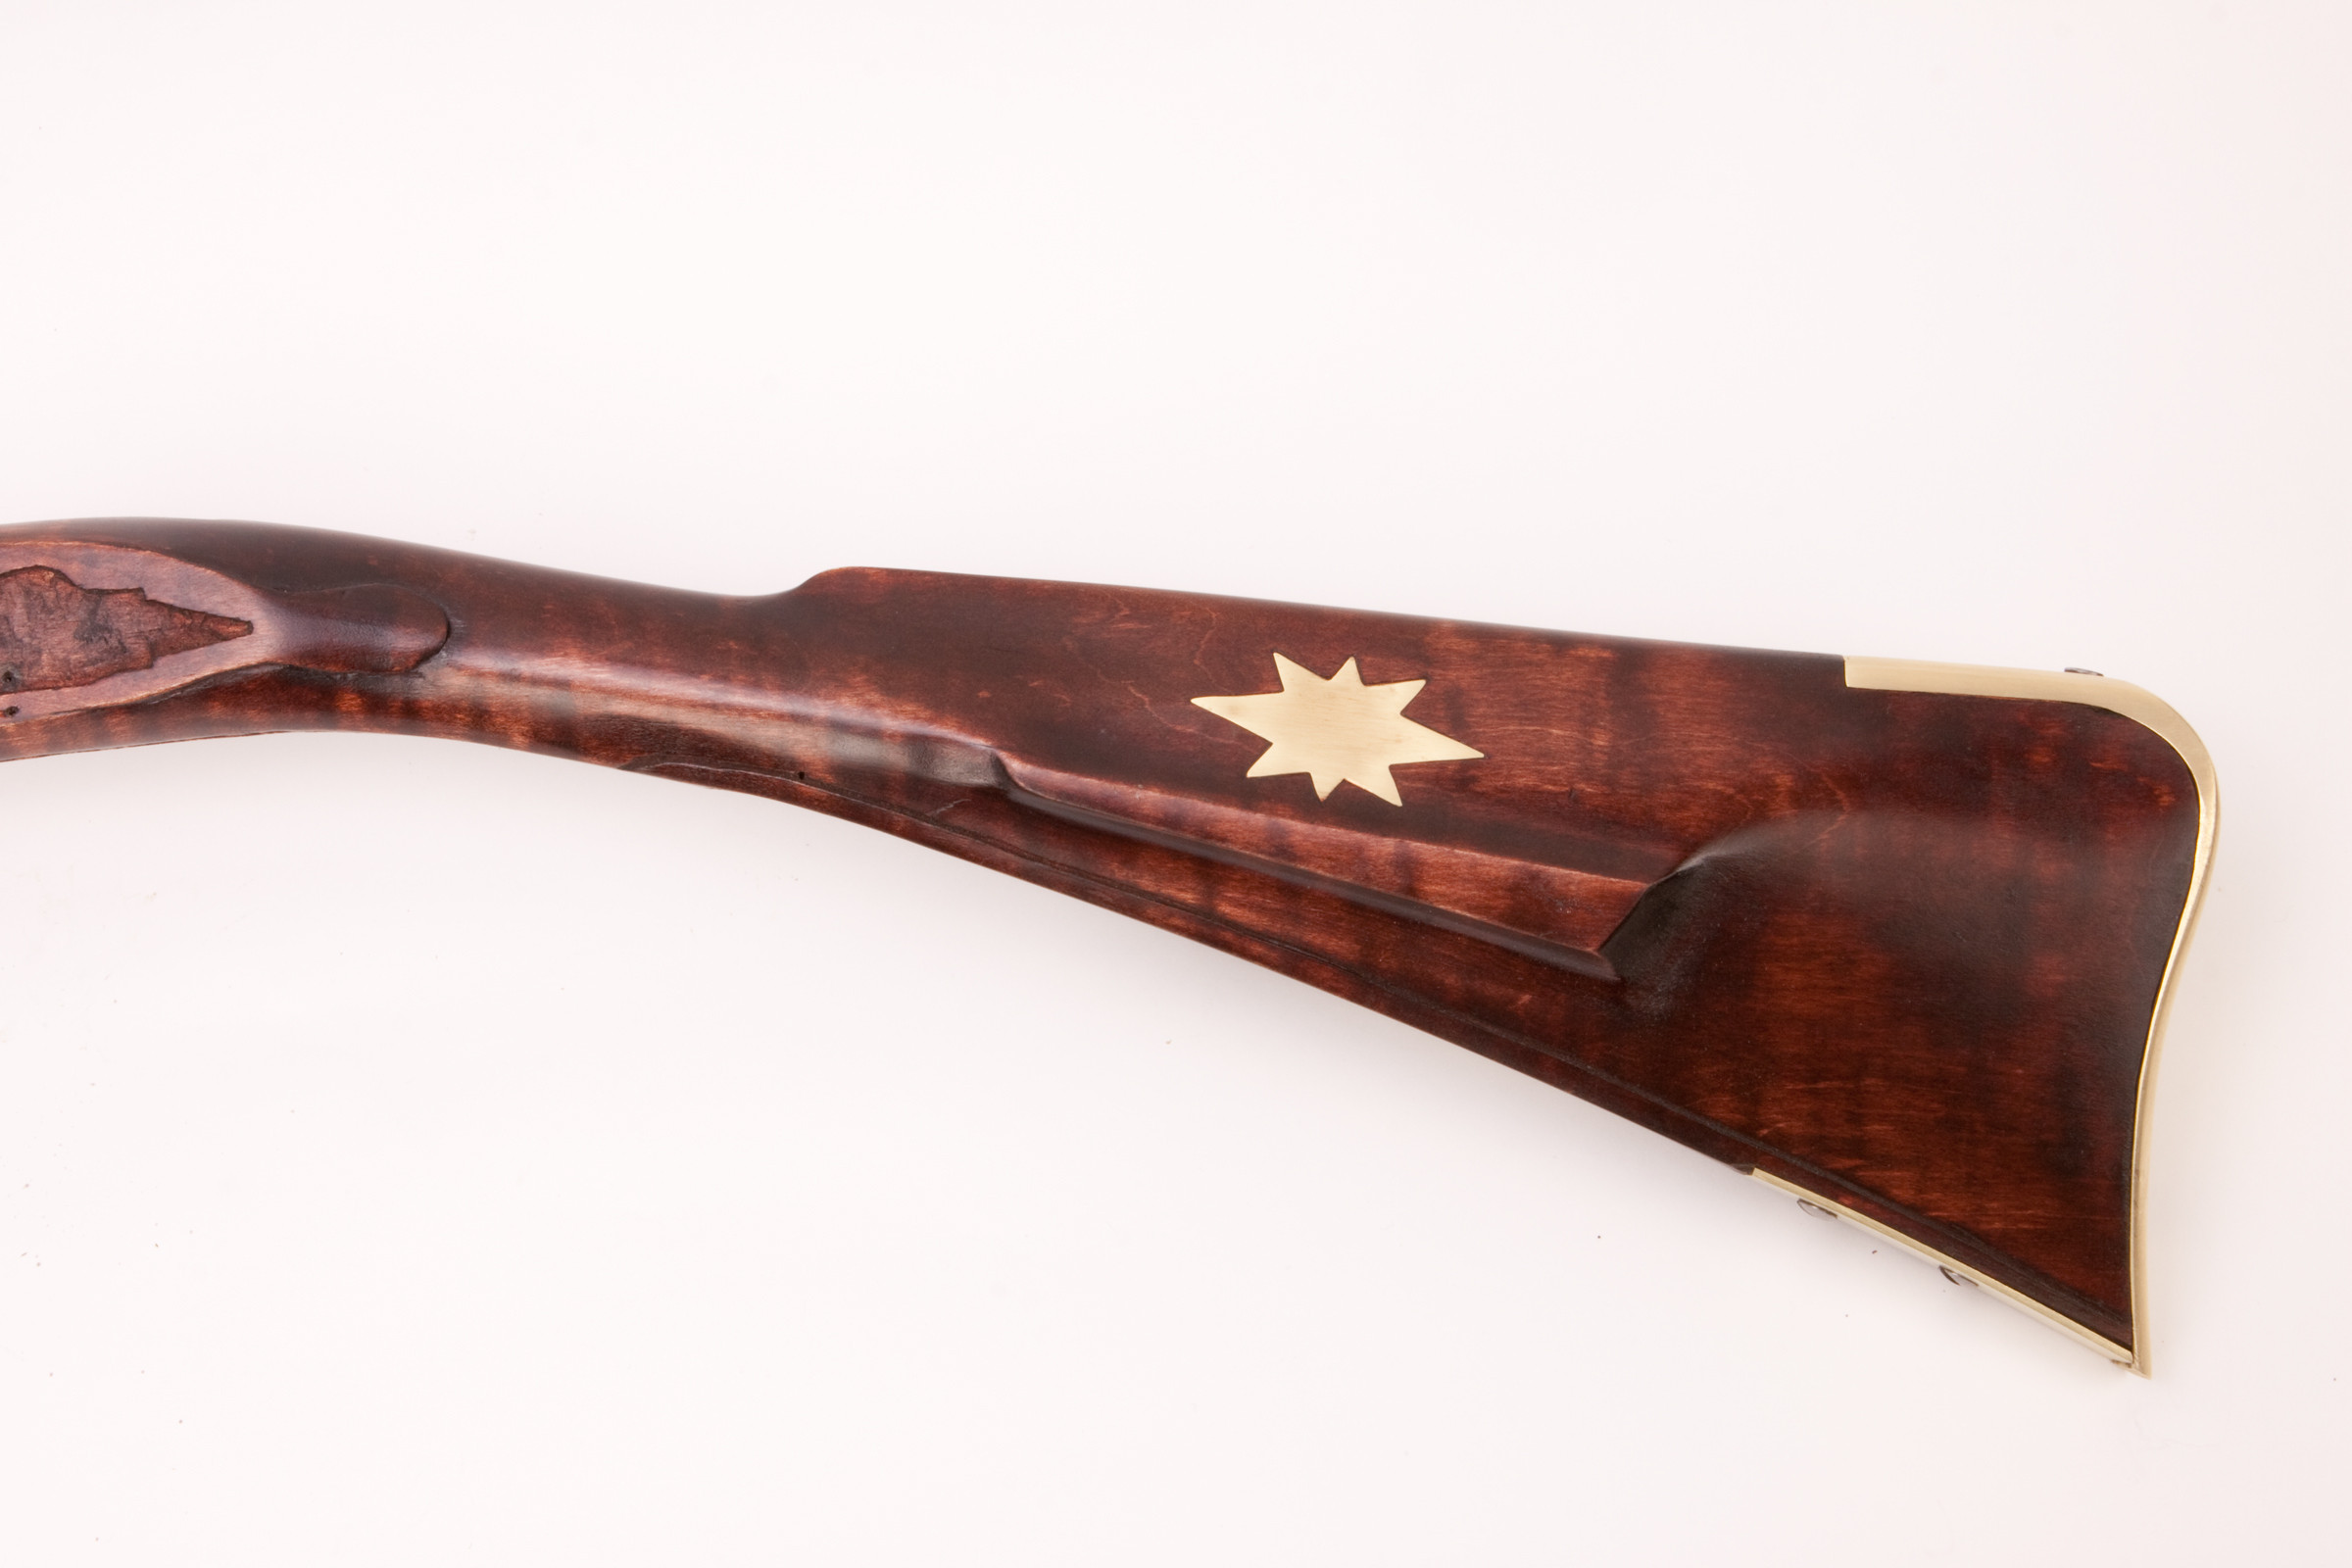


there still the vent pick idea. :wink:
I had my daughter look and she did not notice the patch. Mr. B I think the cutting board may have had some trace oil deep into it, that probably did not allow the stain to penetrate like the rest.
I think I've learned another thing from you, work on left side of gun first then the right side.
Lets see we got Staining video, sight installation video, Rust browning video, shooting video, then the article. Then Chambers Rifle kit build coming in the fall. :thumbsup:
duelist1954
40 Cal.
- Joined
- Jun 27, 2011
- Messages
- 430
- Reaction score
- 70
Swamp Rat, the sights went on today. I used a Brownell's dovetail file to do the front sight after the TOW sight chisel rolled a 7, but I tried the chisel again on the rear sight, which has a much shallower dovetail. It worked, but I still cleaned up the undercuts with the file.
The barrel is now browning in my make-shift humidity box, which is a lunchbox sized cooler with a beer stein of boiling water set into it and the whole shebang covered by a 55-gal contractor's plastic trash bag. (I might be a redneck... LOL)
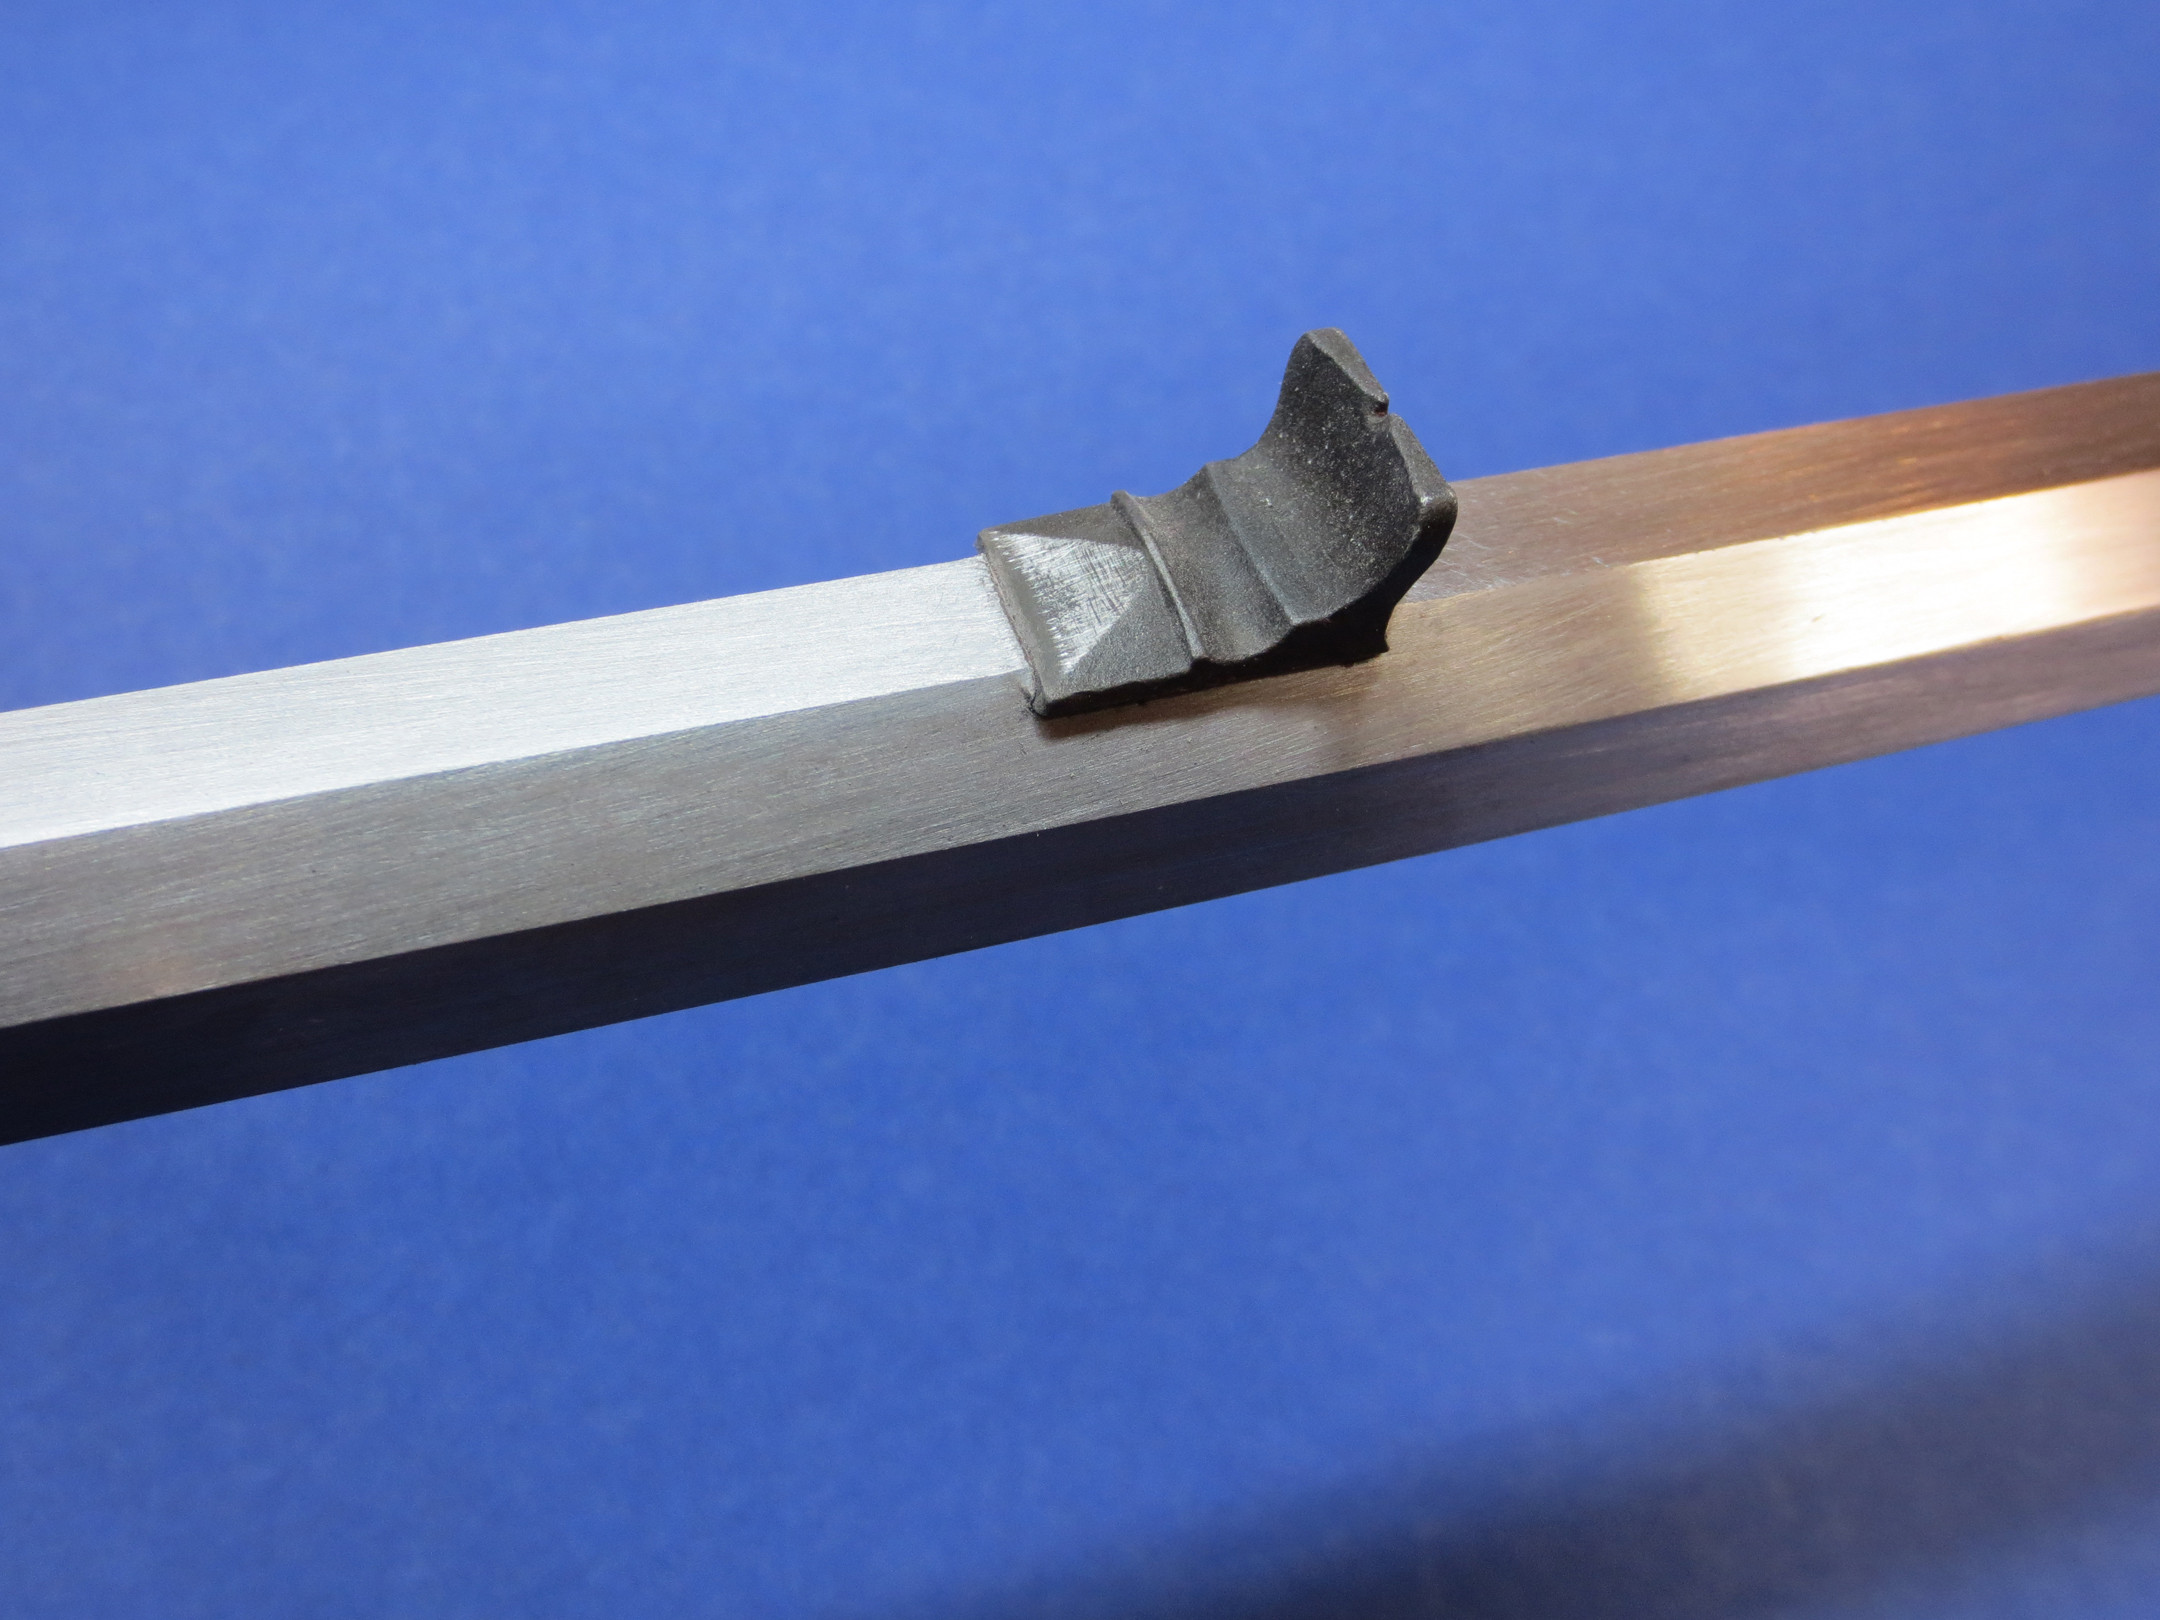
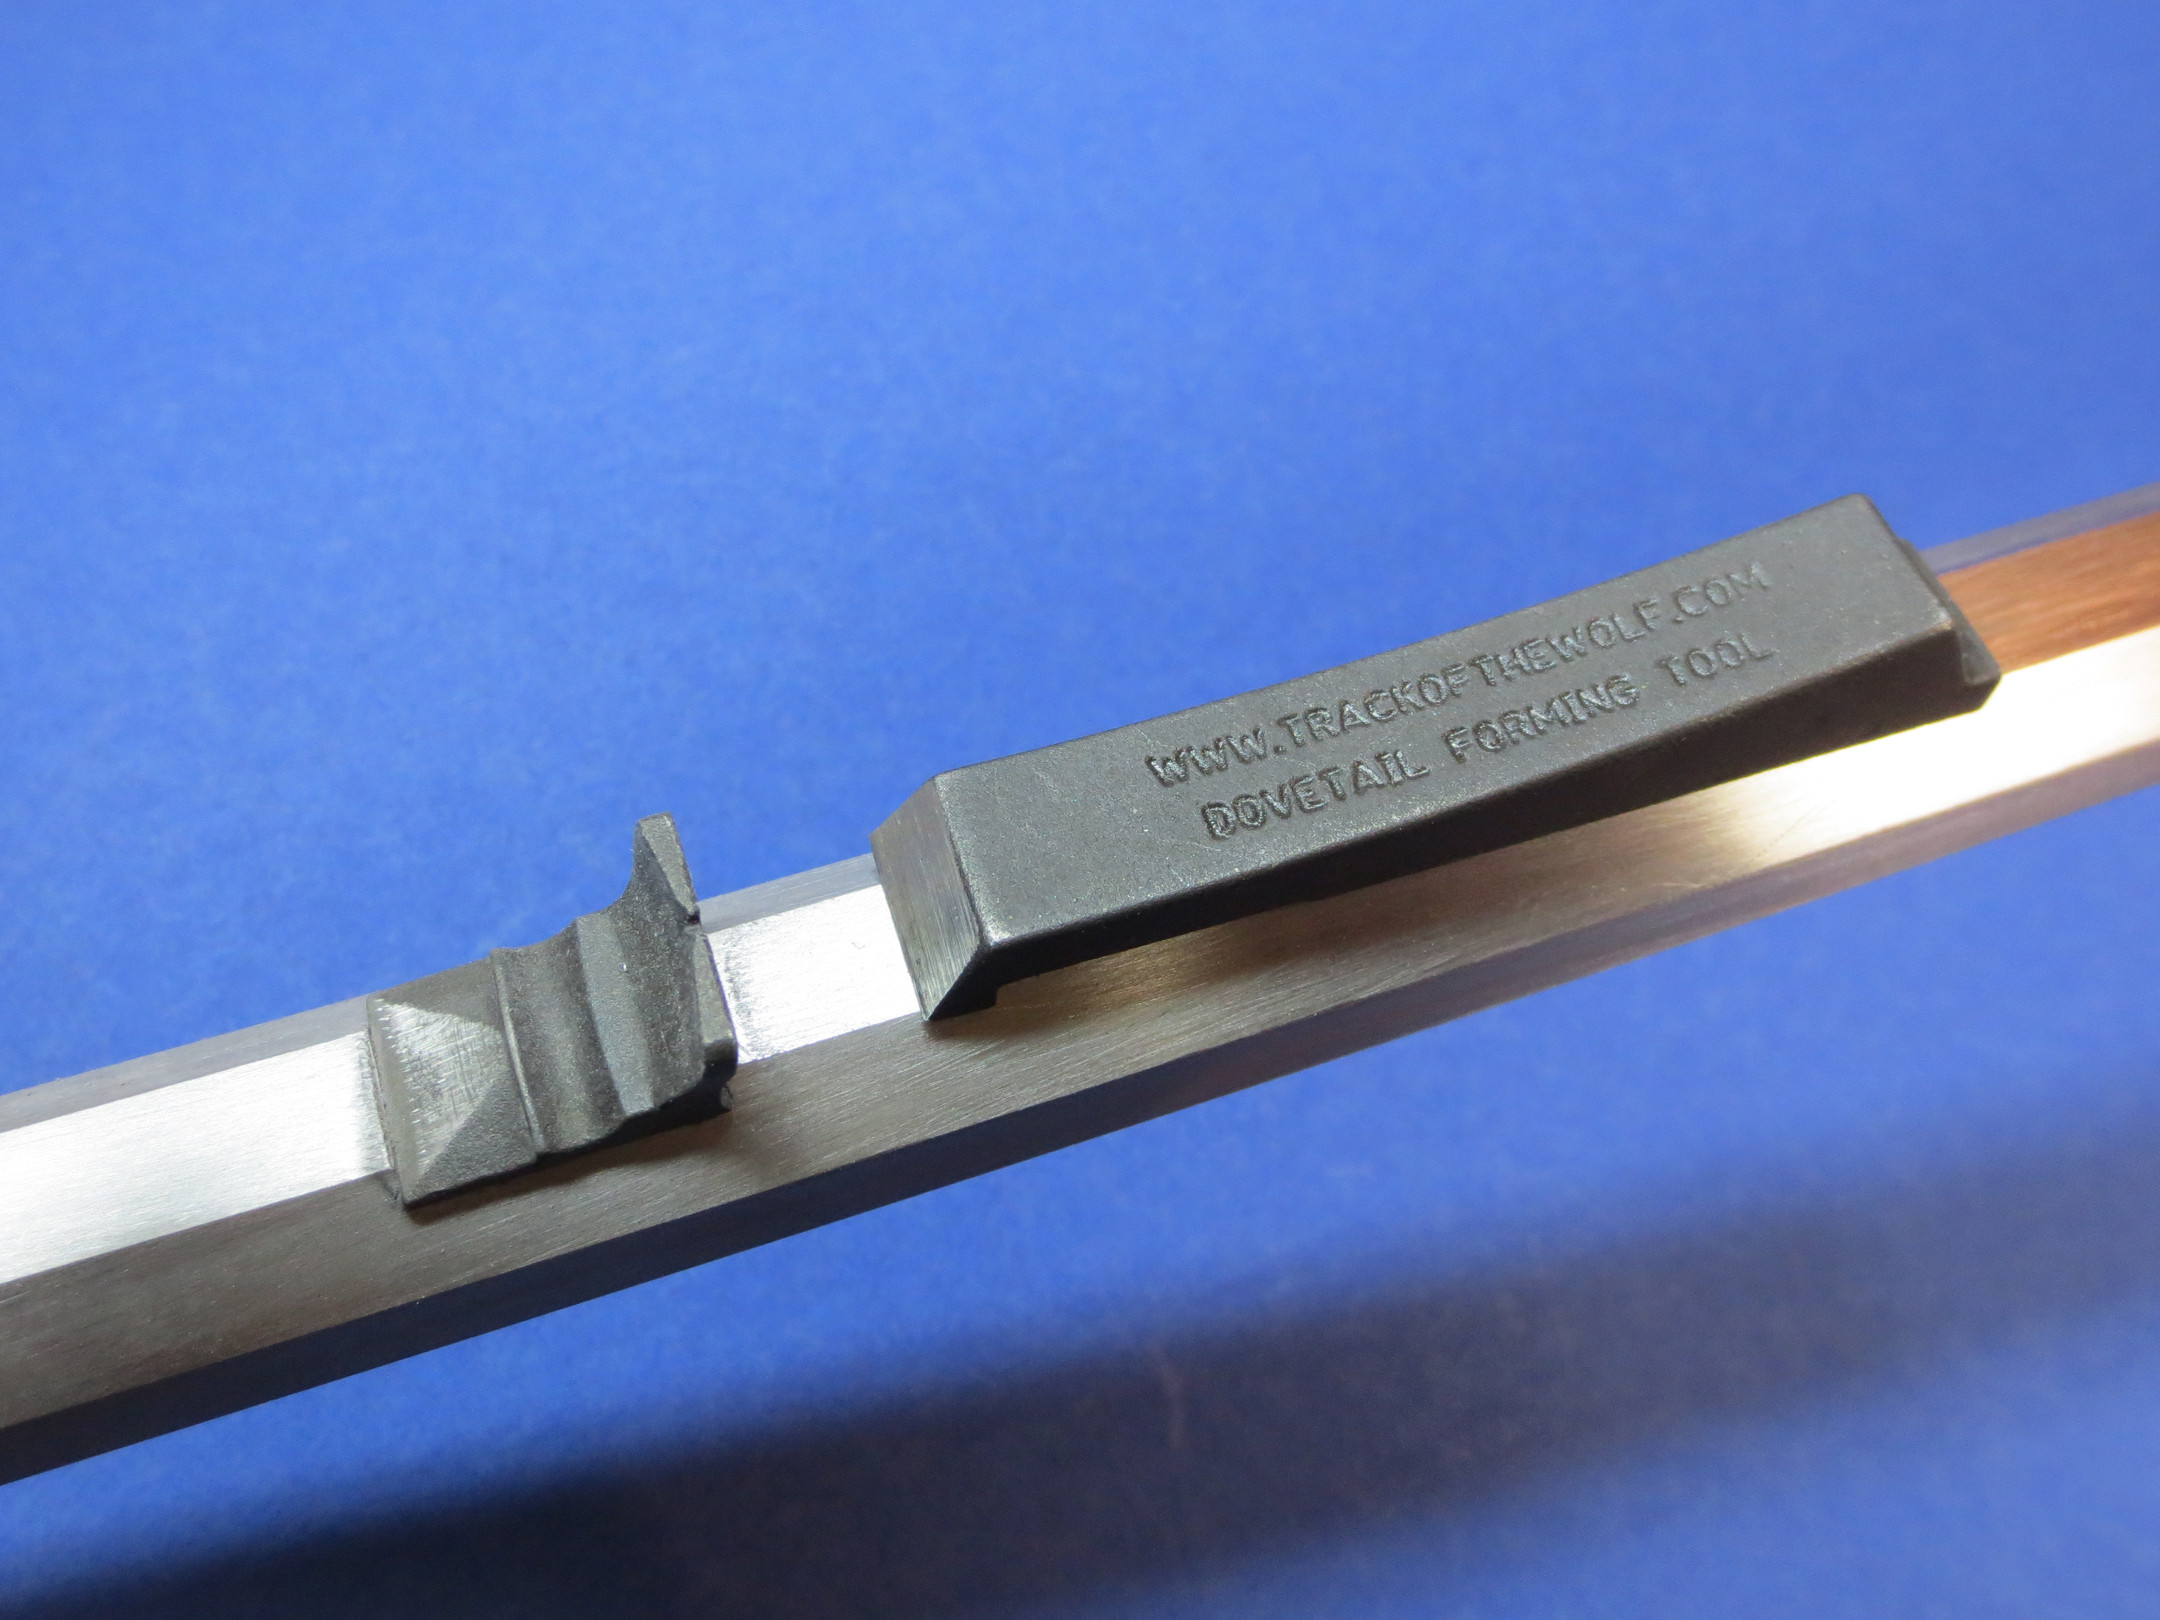
The barrel is now browning in my make-shift humidity box, which is a lunchbox sized cooler with a beer stein of boiling water set into it and the whole shebang covered by a 55-gal contractor's plastic trash bag. (I might be a redneck... LOL)


I looked at that tool and must say you have a better picture than the people selling it. Also I would be terrified to use it on something I cared about. Your not a red Neck by a long shot you have sentence structure. also never played craps so don't know if roll 7 is good or bad.
so which chambers kit you going to do? what I've seen is you get better with practice.
so which chambers kit you going to do? what I've seen is you get better with practice.
duelist1954
40 Cal.
- Joined
- Jun 27, 2011
- Messages
- 430
- Reaction score
- 70
My next build won't be a chambers kit. In fact, I doubt that I'll ever build another kit. I don't think the kit's partially inletted lock mortice does you any favors.
My next project will be a .40 caliber Lehigh County rifle. I picked up a stock with good tight curl from Tiger Hunt and a nice Siler late Ketland flint lock along with some brass from Dave Keck at Knob Mountain. iI've got a Green Mountain barrel, and I'm ready to get started when I wrap up the current build
My next project will be a .40 caliber Lehigh County rifle. I picked up a stock with good tight curl from Tiger Hunt and a nice Siler late Ketland flint lock along with some brass from Dave Keck at Knob Mountain. iI've got a Green Mountain barrel, and I'm ready to get started when I wrap up the current build
Hi....Nice going on the present build. Picking a Lehigh for your second build displays a lot of courage and perseverence or something....Lehighs are probably the most difficult LRs to "get right".
Is Keck profiling the buttstock....that's what I would have done. Getting the architecture correct from a blank, especially the wrist, is achieved by very few beginners.
TOW sells some Lehighs and most aren't "right" and a few are even built by fairly experienced builders. Anyways....good luck w/ the Lehigh.....Fred
duelist1954
40 Cal.
- Joined
- Jun 27, 2011
- Messages
- 430
- Reaction score
- 70
Hi Fred, Tiger Hunt profiled the stock. I picked it up at Dixon's fair last July.
Whooo HOOO Season Two! Good deal I'm glad to hear that. I followed your advise from, like video three when I ordered my wood and did not have the lock inlet, worked out good for me. I'm doing a 40cal 13/16" Green mountain straight barrel. Not following a school, more like a the John Cash song, where he built a car from parts he took home in the tool box, built a 63,64,65,67 Mustang. So Mine is a 1720,1820,1850,1950 Squog. Using Jaeger thimbles OH what a pain. LOL.
duelist1954
40 Cal.
- Joined
- Jun 27, 2011
- Messages
- 430
- Reaction score
- 70
The Bucks County build is 99.9% finished. I'm just waiting for the finish to dry on the ramrod. Then I'll pin the RR tip in place, and...DONE!!! 
Video in a week or two...
Bigger picture
http://i.imgur.com/4QNF4nv.jpg
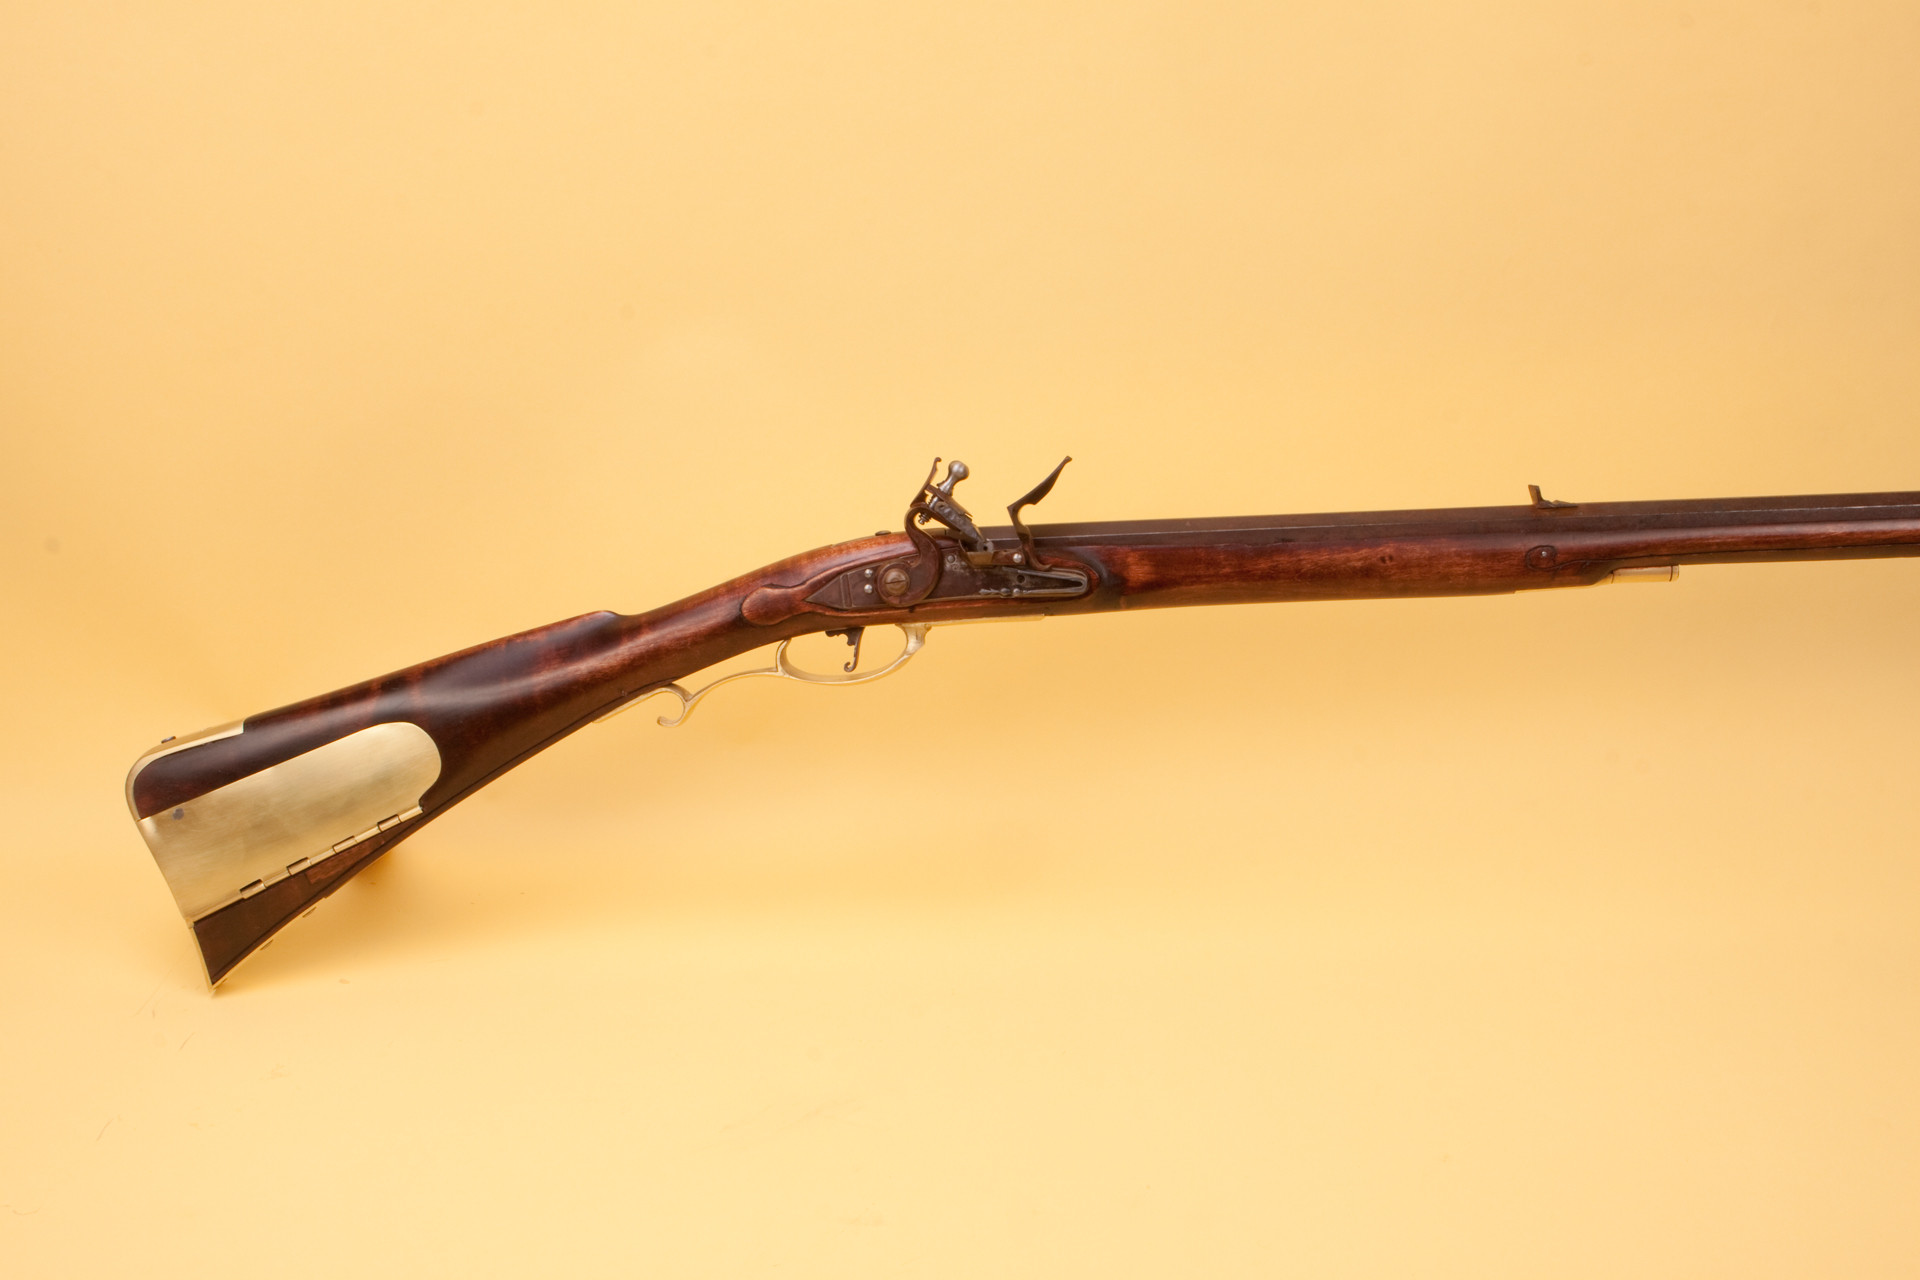
Video in a week or two...
Bigger picture
http://i.imgur.com/4QNF4nv.jpg

Last edited by a moderator:
duelist1954
40 Cal.
- Joined
- Jun 27, 2011
- Messages
- 430
- Reaction score
- 70
Swamp Rat, I have a studio down in the shop. I earn my daily bread as a gun writer, so photography just goes with the territory.
Of course, shot I took on the bench while building aren't as controlled as beauty shot like this one.
Of course, shot I took on the bench while building aren't as controlled as beauty shot like this one.
duelist1954
40 Cal.
- Joined
- Jun 27, 2011
- Messages
- 430
- Reaction score
- 70
Here is the second to the last video update on this build. This one covers stock finishing and installing sights.
https://www.youtube.com/watch?v=GYDucmmmOY8
https://www.youtube.com/watch?v=GYDucmmmOY8
Last edited by a moderator:
Just an observation, but I keep looking at the finished rifle & think the lock panels are not correct going into the wrist. I think the thumbnails are too large & just don't appear correct in shape for that rifle.
Also I think the patchbox is slightly oversize for the size of the buttstock, which got the bottom right side of it almost in the molding line. I know they are large for the Bucks like that, but that just appears a tad large or the angle is off slightly or both.
Also, since it is such a large patchbox, I think it needs some lines & engraving to enhance it.
Now these are just thoughts...... you said to toss them at you in the initial post, so I am tossing. :redface: And I am not cutting the rifle, as it is a nice rifle. :thumbsup:
Keith Lisle
duelist1954
40 Cal.
- Joined
- Jun 27, 2011
- Messages
- 430
- Reaction score
- 70
Keith, You won't get an argument from me on either of those points. This is only the second time that I've put beaver tails on lock molding, and I wasn't completely happy with them either.
I'll just say that it is still the best lock molding that I've done to date, but I have a long way to go before I'll be proud of it.
I agree about the size of the patchbox. This is "The" commercially sold Bucks County patchbox, and I figured the maker knew what he was doing, but as I was installing it, I thought it was awfully big. But, by then I was committed.
I may get a border engraved around it...been thinking on that...
Thanks for the feed back.
Similar threads
- Replies
- 49
- Views
- 4K
- Replies
- 21
- Views
- 2K
- Replies
- 4
- Views
- 298


