• This community needs YOUR help today. We rely 100% on Supporting Memberships to fund our efforts. With the ever increasing fees of everything, we need help. We need more Supporting Members, today. Please invest back into this community. I will ship a few decals too in addition to all the account perks you get.


    Sign up here: https://www.muzzleloadingforum.com/account/upgrades
  • Friends, our 2nd Amendment rights are always under attack and the NRA has been a constant for decades in helping fight that fight.

    We have partnered with the NRA to offer you a discount on membership and Muzzleloading Forum gets a small percentage too of each membership, so you are supporting both the NRA and us.

    Use this link to sign up please; https://membership.nra.org/recruiters/join/XR045103

Silver Mounted Horns

Muzzleloading Forum

Help Support Muzzleloading Forum:

This site may earn a commission from merchant affiliate links, including eBay, Amazon, and others.
Joined
Mar 7, 2007
Messages
648
Reaction score
2,003
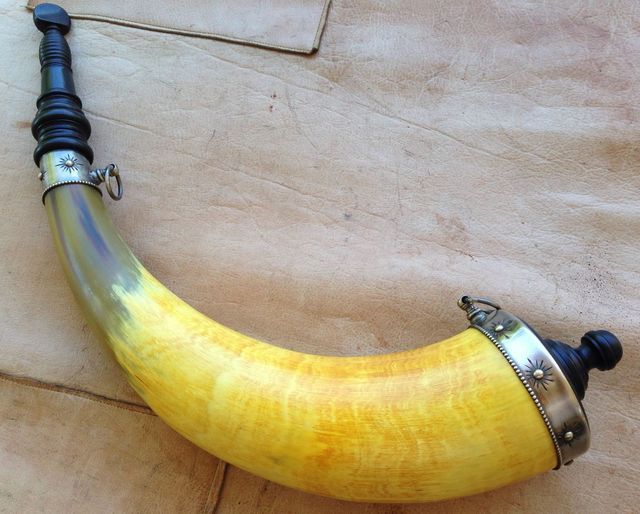
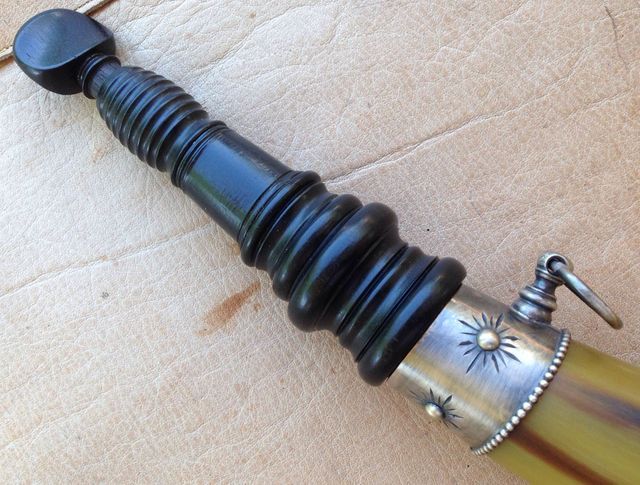
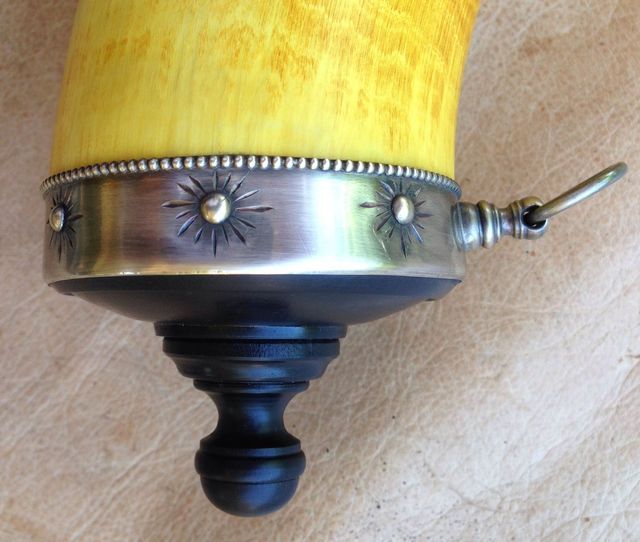
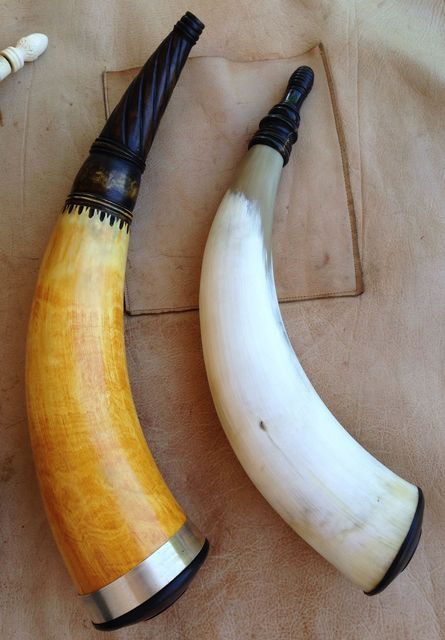
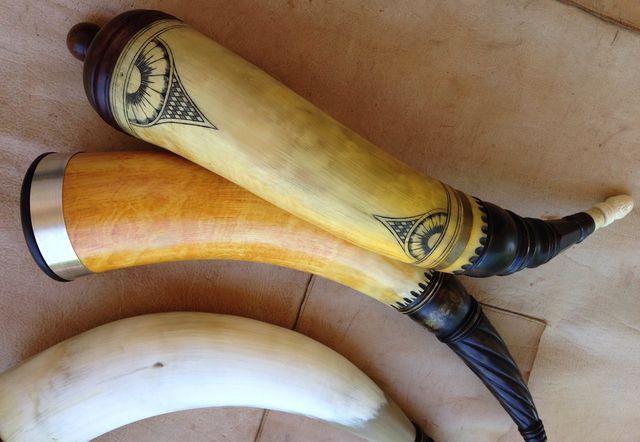
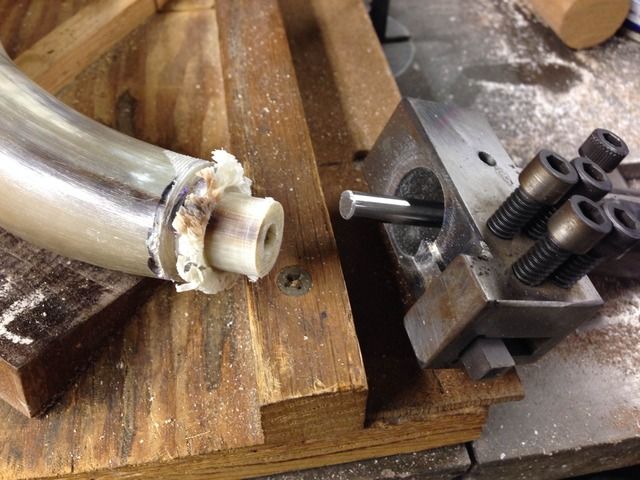
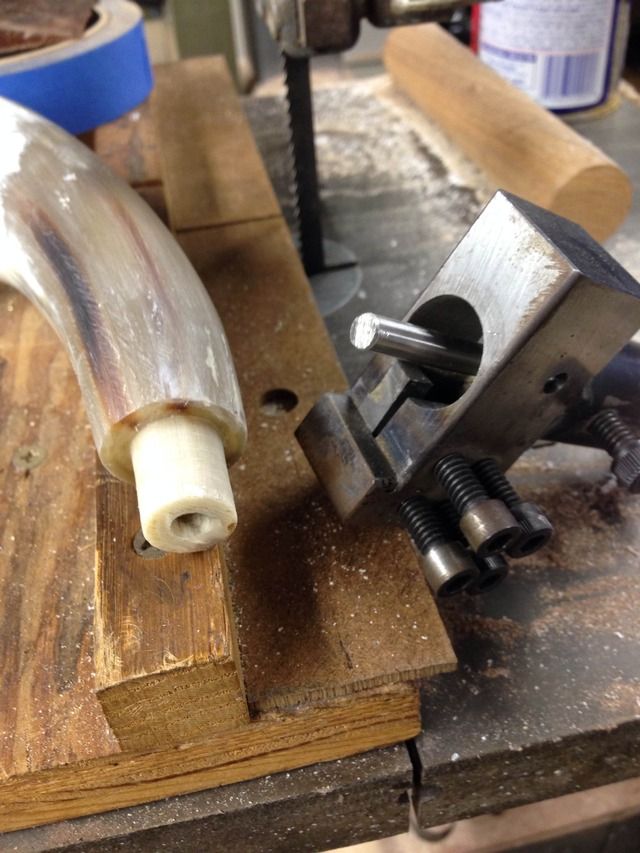
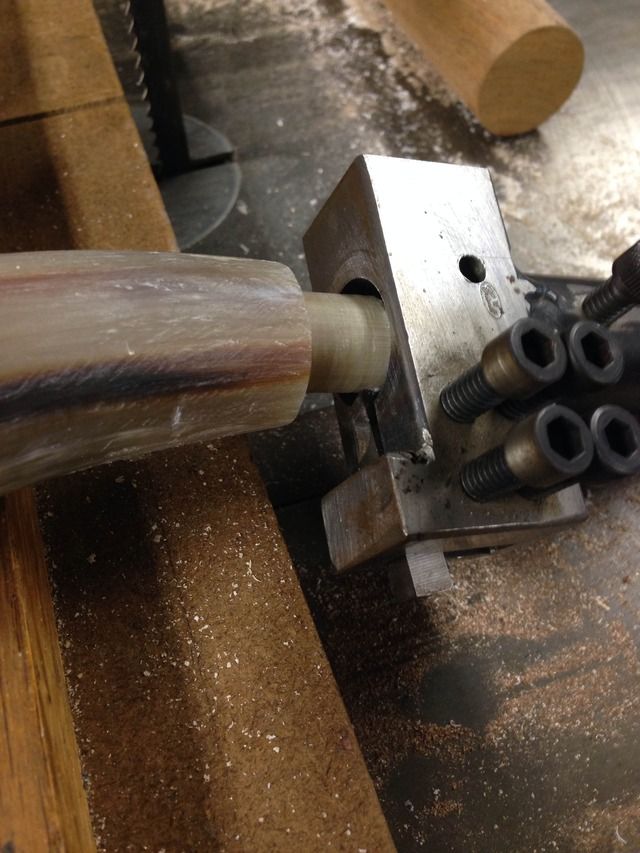
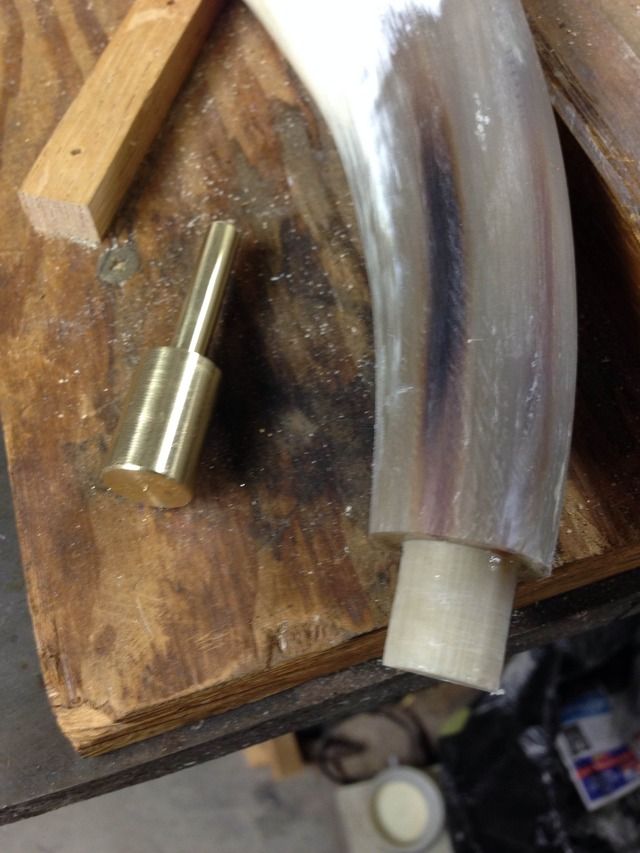
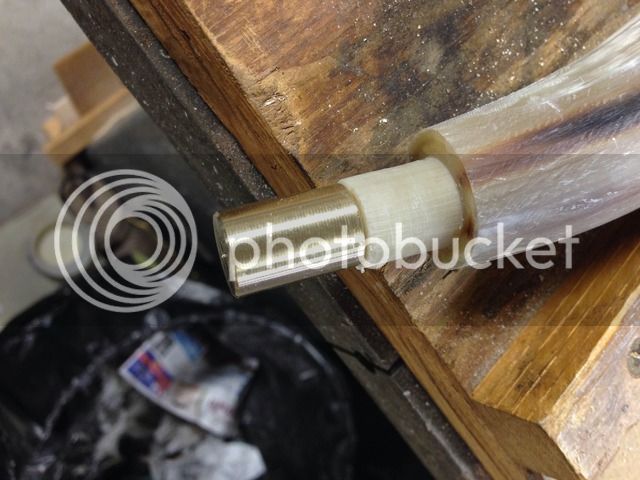
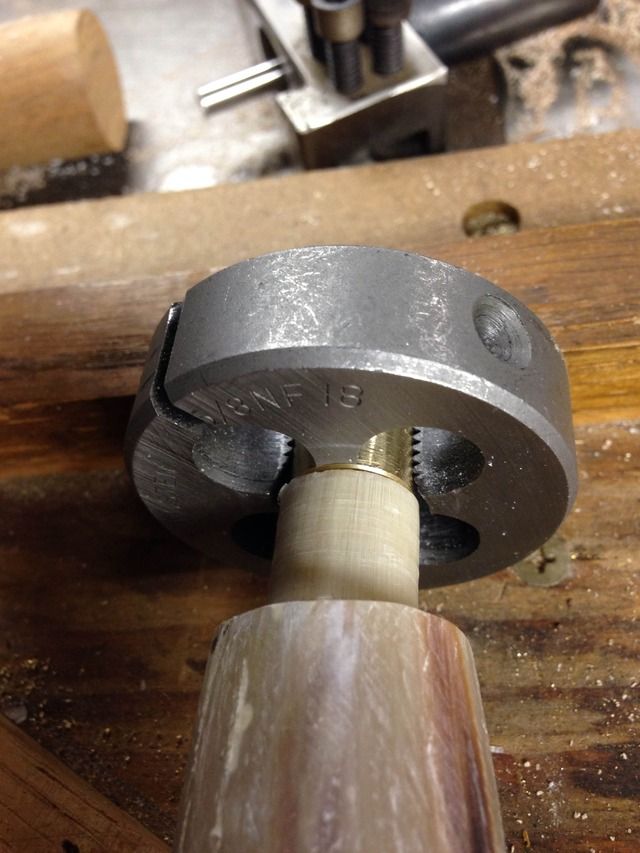
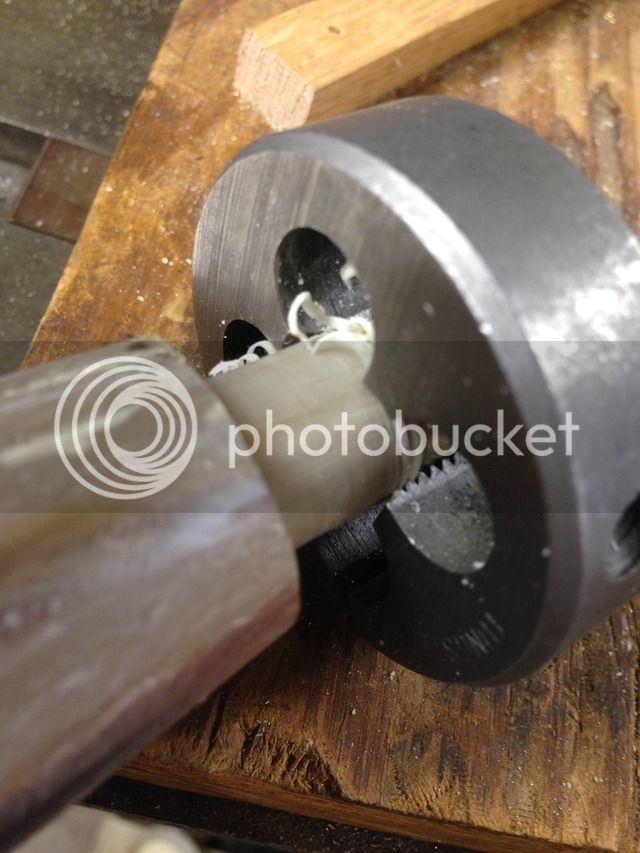
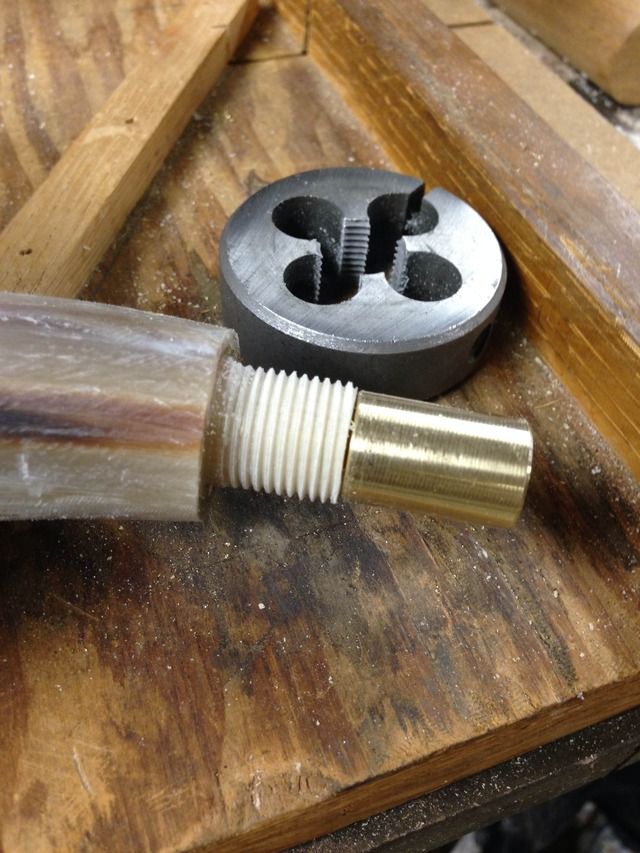
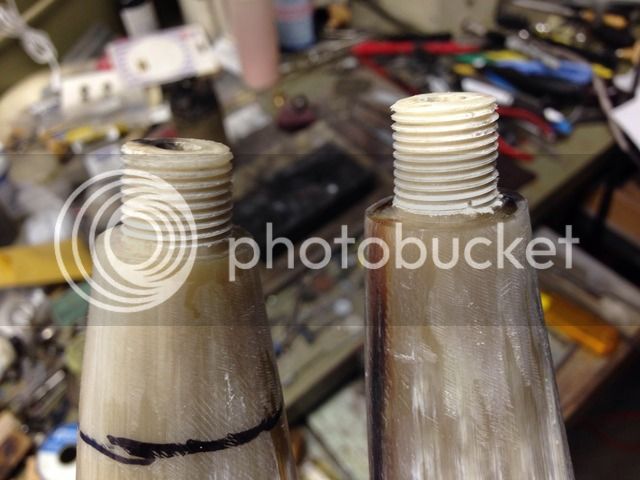
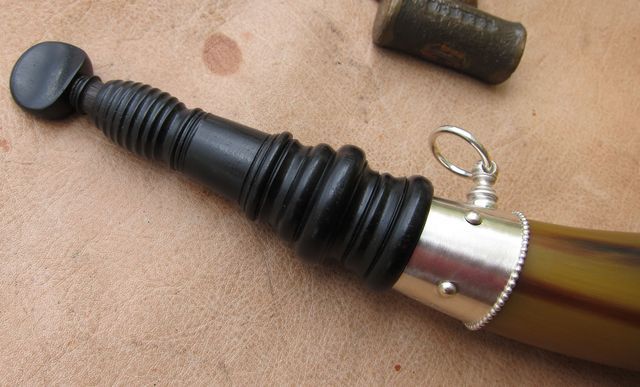
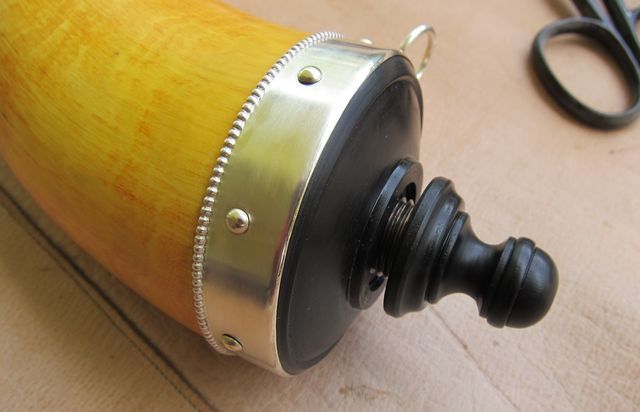
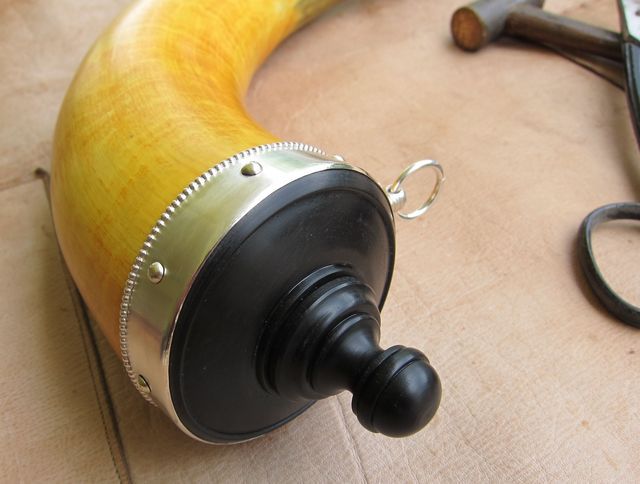
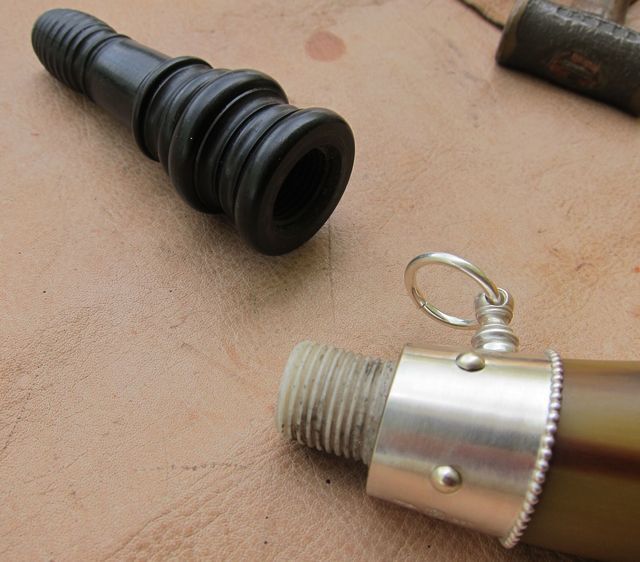
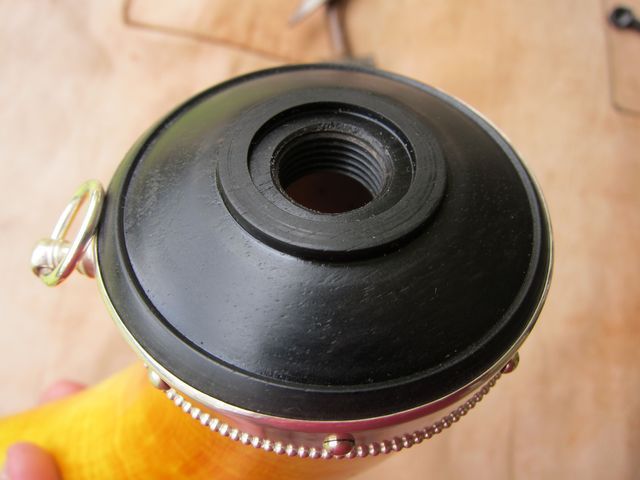
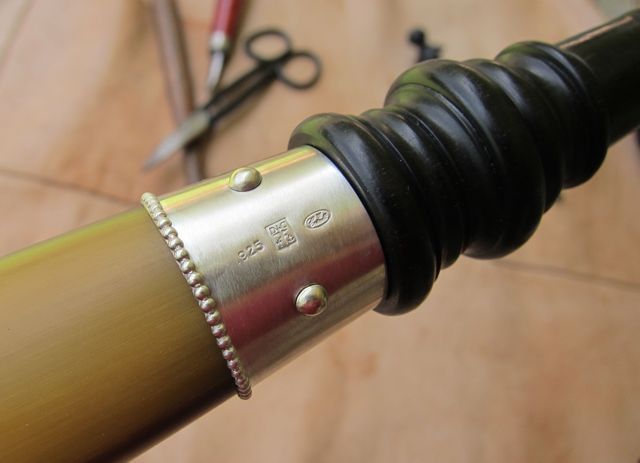
A year ago, in between work and rifles, I had a couple of horns that I was fooling around with.  At any rate, I have been up to my eyeballs with work and I don't like to work the difficult parts of gun projects when my mind is preoccupied.  So, to fill in the time blanks, I have been working on one of the horns mentioned in that previous post.  I tried staining the horn with aqua fortis / iron nitrate and heat.....came out a little yellow but not bad.  I turned the tip and butt out of ebony.  The cascabel unscrews for filling.  It looked a little plain, so I made sterling silver mounts for both the tip and the butt.  

I don't know if it is finished yet because I haven't decided if I will engrave the silver, scrimshaw the body, make a new tip plug (that is not a fiddle peg).....all of the above.....none of the above ??  But I will probably pair it with the nice beaded horn strap that I had Gary Bertelsen make for me.  The silver work looks like a chrome trailer hitch right now, but it will tarnish soon enough to the type of patina I prefer.......

Silver%20Mounted%20Horn%202016%20%20%201_zps9tzkbp4i.jpg


Silver%20Mounted%20Horn%202016%20%20%202_zpsbkvwvjca.jpg


Silver%20Mounted%20Horn%202016%20%20%204_zpsf460s08w.jpg


Silver%20Mounted%20Horn%202016%20%20%203_zpscag4mhmo.jpg


Silver%20Mounted%20Horn%202016%20%20%205_zps5hk2e48c.jpg


Silver%20Mounted%20Horn%202016%20%20%207_zpsowe9d6og.jpg


Silver%20Mounted%20Horn%202016%20%20%206_zpstjqe5ury.jpg


Silver%20Mounted%20Horn%202016%20%20%208_zpsstgsy6jq.jpg


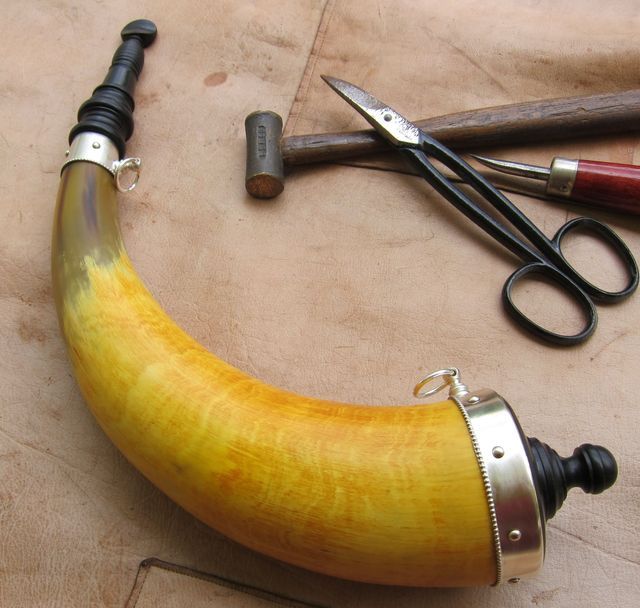
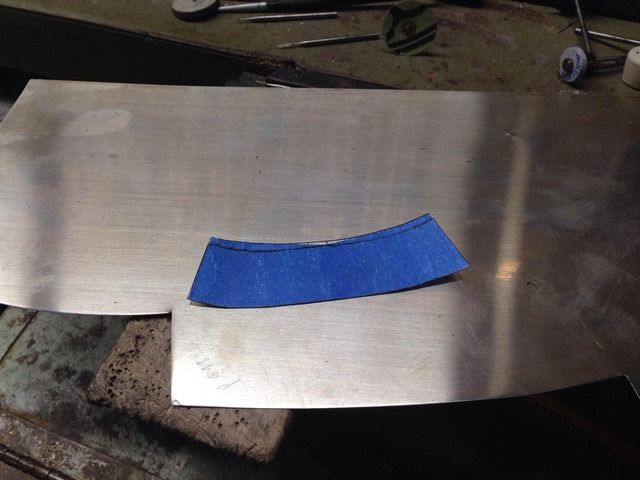
The bands themselves are cut out of silver sheet using a paper pattern:

IMG_1511_zpstegg92bh.jpg


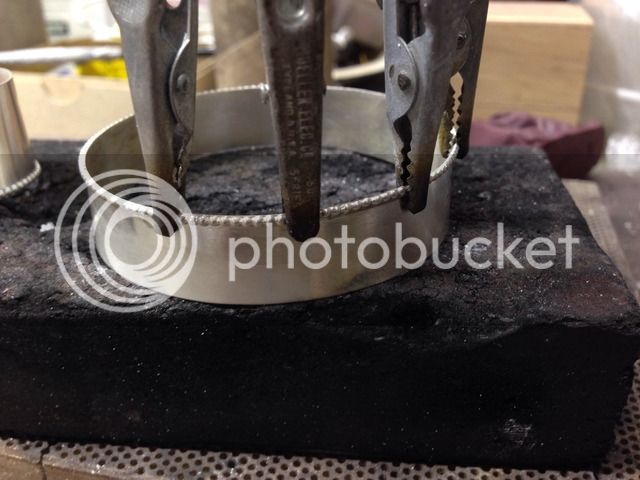
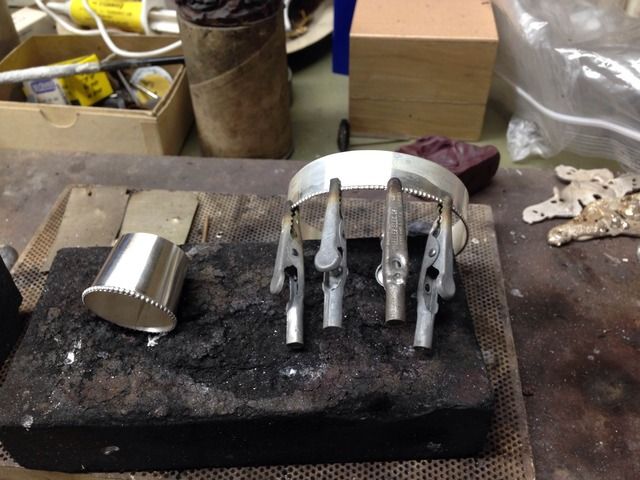
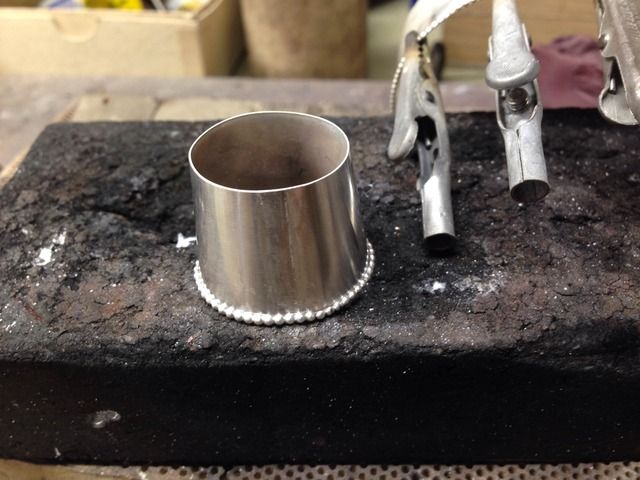
The ends are then silver soldered together and the beads are soldered on by using lengths of beaded silver wire.  Not too hard, but a little tricky to not get solder all over the beads or melt the thin sheet you are soldering the beaded wire to.

IMG_1510_zpsquaymo9t.jpg


IMG_1508_zpstdesw7wq.jpg


IMG_1509_zps2eaunzs0.jpg
 
So.....I decided to do a little slap dash engraving on the silver....not too much....just a touch.  And the silver is tarnishing nicely.  Not sure about the scrimshaw work yet......

Silver%20Mounted%20Horn%202016%20%209_zpsvifszvws.jpg


Silver%20Mounted%20Horn%202016%2010_zps21yadxf0.jpg


Silver%20Mounted%20Horn%202016%2011_zpssxovshrv.jpg


Part of my problem with finishing these darn things is that I keep starting others before I finish one at a time.  I guess I just have....SQUIRREL !!!!....a short attention span........

Silver%20Mounted%20Horn%202016%2012_zpsxmxl5zvv.jpg


Silver%20Mounted%20Horn%202016%2013_zps0a2zl7uk.jpg


Silver%20Mounted%20Horn%202016%2014_zpsp4ivxoij.jpg


Silver%20Mounted%20Horn%202016%2015_zpsps2yot9w.jpg
 
wow-

as usual, your work looks simply fantastic!

how do you get your threads to come out looking so neat and even? mine are always full of chip- out. even though I try and go slow. (I'm in maple .. is ebony more willing to be threaded?)

anyway, many :hatsoff: to you!
 
MSW,

Yes, ebony is hard enough to allow cleanly cut female threads with a good, sharp tap. Male threads, in either ebony or horn, are a different story but, as Horner 75 suggests, using an adjustable die will allow you to start cutting the threads a little at a time rather than all at once.

Here is how I threaded the tip of the horn......

 I wanted to get the tips nice and round quickly but without the trauma of trying to set up a lathe to turn just the tip of a horn as if flies around like the "fan blade of death".  I had what I will call a "box tool" that I had made some time ago for use on a lathe.  The tool had a couple of tool bits mounted in it and a drill in the center.  It was used in a tail stock and would drill a center hole and turn two different diameters on the work piece in just one plunge.  I thought, if I replace the 1/4 drill in the center with just a pilot and set up just one cutting bit at the appropriate diameter, I could probably hand turn the tool and cut a nice round nose on the horn to thread later.

I started by cutting the tip off the horn and drilling through to the inside with a 3/16 inch bit and then a 1/4 inch.  I adjusted the tool bit in the box tool to cut a 5/8 inch nose, inserted the pilot in the hole and turned the tool by hand.  It cut beautifully & here are some photos.......

IMG_0720_zpsiigjfizf.jpg


IMG_0723_zpszvkclh3o.jpg


IMG_0724_zpszyemym2m.jpg


After getting the nose nice and round, I made a brass pilot to help with getting the threads straight.  It is 1/4 inch diameter on one end and the thread root diameter (0.560) on the other.  Turing to the thread root diameter allows the die (5/8-18) to slide over the pilot but not engage it.  The die is then run onto the horn tip easily by hand. Took about 15 minutes to turn and thread two horn tips nice and straight.  More photos......

IMG_0725_zpsaqlnylsv.jpg


IMG_0726_zpspsycvjum.jpg


IMG_0727_zpsi8o7moir.jpg


IMG_0728_zpsetmjyix4.jpg


IMG_0732_zps2bijftpl.jpg


IMG_0733_zpsh9ojwqhd.jpg


IMG_0734_zpsvsiowdjr.jpg


I'm going to make up a better, brass body box tool that will be easier to adjust for cut diameter and easier to use... and then a set of pilots for various nose diameters and thread pitches.  
 
I really really really like that horn. All of them infact. The silver work is terrific and so is the scrimshaw on those that have it. Your workmanship is superb. Thanks for posting this.
 
A most enjoyable thread. Your horns are beautiful, very tastefully done. And I appreciate your explanations. Thank you for posting. :hatsoff:

Richard/Grumpa
 
Thank you all for the kind words. I intend to scrimshaw these much like one I posted some time ago

Post#1158579

I'm not sure if you can get back to that one from here.
 
Back
Top